If the time has not yet come for repairs, but you want to diversify your home unusually, you can easily do it yourself. Decorating an apartment or house with beautiful butterflies made of paper, cardboard and other materials is an interesting and stylish solution that does not require a lot of time and money.
The ceilings and walls in the apartment can be decorated with any material available at home, but the following can be considered the most popular:

In order for cute jewelry to hold securely, you must use the following types of fasteners, which you can find in the table:
| Way | Characteristic |
|---|---|
Wallpaper glue or PVA glue  | The easiest option, suitable for placing decorations on cabinets and other interior items |
Safety pins  | Suitable for mounting on wallpaper, fabric and plastic panels |
Chains, thread or wire  | With these tools, you can pin butterflies to the ceiling or lights |
Double sided tape  | Using scotch tape, you can attach the workpiece to any place |
Important! Use templates of different sizes for jewelry, then they will look more interesting and realistic.
Creating butterflies: universal master class
This master class can be used when creating a composition using any stencils. To create jewelry you will need:
- cardboard and colored paper;
- stencil sheets;
- Printer;
- pencil, glue and scissors.
Step 1. Draw yourself or print several different stencils on your printer. After that, you need to cut them out of plain paper.

Step 2. Attach the cut stencils to the cardboard, carefully circle them and cut them out. Sketch the silhouettes right away, or translate the template using carbon paper if desired.

Step 3. Outline the templates, but do so on the back of the paper. Make several copies, cut them.

Step 4. Bend the workpiece a little - this will create the effect of developing wings.

Step 5. Apply a little glue to the center of the fold and place the butterfly on the desired surface, pressing with your finger for a few seconds.

Step 6. Use your imagination - place butterflies in one or different directions, along the edges or in the middle of the wall. Try to arrange the butterflies next to or at a distance from each other - look for the option that you like the most.

Beautiful butterfly in origami technique
If you like making different paper figurines, you can make a butterfly in this way - such an unusual craft can cheer up guests and family. This is a simple scheme that you can easily do yourself.
Step 1. Take a square piece of colored paper or cardboard. Fold it twice in the middle, then unfold it again. Now the sheet is divided into four equal squares.

Step 2. Fold the piece of paper diagonally so that four more lines appear on it. It turned out that the square is divided into eight triangles. Pull the opposite triangles together.

Step 3. Fold the upper triangles in half, leave the lower ones as they are.

Step 4. Turn the workpiece upside down, the small part should be at the bottom. Wrap the corner, proceed carefully - the edges should not tear.

Step 5. Tuck the sharp edge. Turn the workpiece over so that the folded corner is right side up.

Step 6. In the middle, make a fold with your fingers and fold the butterfly - if you skip this step, the wings will not be able to unfold. The origami decoration is ready.


Important! To prevent butterflies from merging with the interior, make them visible. Feel free to use vibrant colors to make your craft stand out.
Stylish vinyl butterfly
If you have an unwanted vinyl record at home, you can create an unusual decoration for your interior. To do this, you will also need:
- sample;
- foil;
- baking sheet;
- colored markers and sharp scissors.
Step 1. Take the material and measure the middle of the stencil on it. Carefully trace the outline, draw on the plate with a white felt-tip pen, and use black on the sticker in the center.

Step 2. Lay out foil on a baking sheet, and place vinyl on it. Preheat the oven to 400 degrees and place the baking sheet with the piece in the upper area. After 50 seconds, remove the plate - it should become soft and pliable.

Step 3. Use a sharp pair of scissors to cut the jewelry out according to the template. This must be done before the vinyl is dry. If it does dry out, place the plate in the oven again and repeat the action.

Step 4. Peel back the wings after cutting the butterfly. The craft is ready.


Polymer clay butterflies
Polymer clay is a plastic material for modeling, which looks and feels like plasticine. You can make original blanks from it. You will need:
- baking dishes in the form of butterflies;
- polymer clay (at the rate of 120 grams for five butterflies);
- a skein of white thread for hanging crafts;
- push pins.
Step 1. Using a baking dish, cut out the pieces, make four small holes in the middle of the pieces.

Step 2. Peel back the wings and place the butterflies in a glass dish. Place in the oven and bake for 15-20 minutes at 110 degrees.

Step 3. Insert the thread into all holes with a cross and form a knot. Insert a button into it.

Step 4. Attach the resulting decorations to the surface. If the edges of the product are not formed, sand them. Color the butterflies with different colors if you want to add some color.

Butterflies on walls and objects: ideas
Choose a winged insect color that matches your decor. For example, you can place pink butterflies over a pink sofa.

Decorate the ceiling by placing butterflies around the chandelier. They will be beautifully illuminated, creating a good mood for all the inhabitants of the apartment.

The walls can be decorated with pink and black butterflies in the shape of a heart by gluing the blanks in the living room or bedroom.

For the room in which the baby lives, you can cut out several templates of different shapes, and then transfer them to multi-colored paper and place them on the wall in the form of a vortex.

To diversify the interior, before placing the blanks on the wall, use a brush to apply luminescent paint to the butterflies. After it dries completely, your butterflies will glow in the dark.

Another original idea: butterflies can be placed in a spiral shape.

With imagination and a few hours of free time, you can create a real work of art. Unusual and difficult to implement, but very beautiful version of the craft in the shape of a heart.

Stylish solution for the bedroom: butterflies can be placed in frames of different sizes and shapes.

Butterflies can also be attached to curtains. In this case, you can use corrugated paper - it will make the butterflies airy, light and voluminous.

A laconic option for placing do-it-yourself butterflies. It does not take a lot of time, but it looks very nice.
Important! Feng Shui philosophy says: butterflies are a symbol of joy, love and happiness. This symbol plays a very important role in the ancient teachings.
Butterfly patterns: cut out yourself
There are many different templates that you can use to make stencils and transfer them to paper. You need to choose the size and shape yourself, this is only a matter of your imagination.
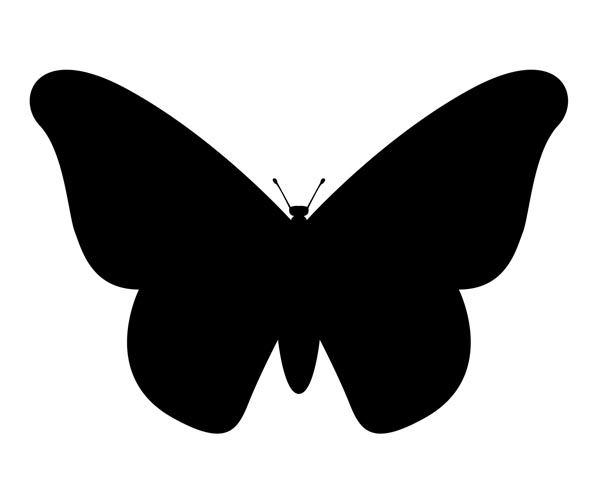
A classic butterfly for decorating walls and furniture.

Another variation of the classic butterfly.
A large butterfly with outstretched wings.

A cute curly butterfly with a round antennae.

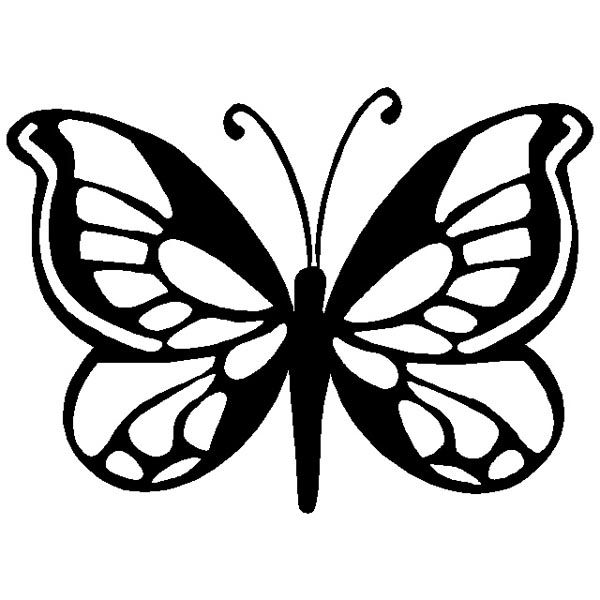
A beautiful butterfly with unusual wings.


A funny pink butterfly for the nursery.


A beautiful butterfly with antennae antennae.

Template for decorating walls and furniture: side view.


A chic butterfly with patterns and sharp antennae.

Self-made butterflies are a great decor method that will give the room a fresh and updated look. If you approach the issue creatively, put a little effort, imagination and effort, you can create a real masterpiece that will delight you and your family members for a long time.
Video - Paper butterfly patterns for interior decoration
What to do if the decoration of the room is tired, and there is no money or effort for repairs? The fastest and not very expensive way is to change textiles and decorative elements. Moreover, not all decor needs to be bought. For example, butterflies for decoration will help to bring an element of lightness. They make panels, wall compositions. Larger and brighter ones "live" on curtains or flowers.
What are they made of
Butterflies on the walls are made of different materials, sometimes even exotic ones. The appearance of the resulting decor depends on this choice. While there is no experience and you do not really imagine the end result, you can make several different decorative butterflies for testing. They can be attached to the location of the planned decor. This will make it easier to assess the effect and choose the most suitable option.
Paper
Butterflies for paper decor are the easiest and cheapest to make. There are several different techniques. If the product is flat and is glued to the wall / panel as a whole, only the front surface is important. If a volumetric composition is supposed, the paper should be two-sided - both sides should be painted, because white often “wrong side” spoils the impression.

Instead of ordinary colored paper, you can take corrugated paper. The effect will be different - it is lighter, airy, translucent, with its help it is easy to make the decor with butterflies volumetric.

Butterflies for decor from corrugated paper are airy and light
You can make butterflies from an old magazine, newspaper, postcards, colored napkins, wallpaper of suitable colors, any other printed matter.

As you can see, there are a lot of options only from paper. Considering that they can still be slightly tinted, combined, made multi-layered, it is clear that the scope for imagination is huge ...
Cardboard
Cardboard is used not very high density. It is rather very thick paper. It is also available in color and double-sided. With its help, they often make voluminous decor - it is easy to bend the wings relative to the body. This material holds its shape even better. Just remember that you can't make corrugated wings anymore - the material is too hard to make a small fold.

It is also easier to make openwork butterflies from cardboard. Having a sharp enough knife, they cut out the "excess" leaving only the partitions. Such decorations require perseverance, great patience and accuracy.

Also, cardboard is used to make templates for "mass" production of identical butterflies. With the help of such stencils, you can make insects of the same type and size and spend a minimum of time on this.
Textile
Having a pattern, you can make butterflies for wall decor or fabric chandelier lampshade. The fabric will need to be given additional rigidity, but the rest of the process is not much different: a contour is applied, cut out, decorated if necessary and attached to the wall.

It is more difficult to work with fabric, although very interesting decorative crafts are obtained. This is an option for more advanced decorators and needle or sewing machine skills. With their help, you can recreate the veins on the wings.
Exotic materials
Old vinyl records will also be excellent raw materials for making butterfly decor. Since vinyl is tough, you will need to heat it up in the oven to carve a butterfly out of it. And in order not to spoil the baking sheet, it must be covered with foil.

A contour is applied to the vinyl with the help of chalk, the plate is placed in a preheated oven, as soon as it begins to soften, it is removed, we quickly cut it along the contour with scissors. Often it is necessary to heat the "workpiece" several times. After cutting out, we warm up for the last time and give the desired shape.
Beer cans or any other relatively soft tin can also make excellent flying beauties. First you need to cut off the bottom and lid and align the piece of tin. Then, using an awl, transfer the contours from the template to the sheet metal, connect them with a marker and cut along the resulting contour.

Even beer cans can be used for butterfly wall decor.
You can decorate the back - the shiny part. This will require markers or felt-tip pens, you can try decorating with nail polish. Painted beauties are given the desired shape. One caveat: the edges are very sharp, you need to work carefully, otherwise cuts cannot be avoided.
How to make contour paper butterflies
We start with the simplest, but most effective - contour butterflies. You will need colored paper or magazine pages, outline maps, etc. You can use old postcards or colored cardboard. You will also need ordinary cardboard - for cutting out the template.

These are contour butterflies for decor - it's easy to make them, but they look great
Cooking a template
We take a piece of cardboard - any, you can even some kind of packaging (tea, cereals, cereals, etc.), the main thing is that the cardboard is dense and not cellular. Find the silhouette of a butterfly that you like, transfer it to cardboard and cut it out. There are several silhouettes in the photo gallery. They can be printed, then cut and transferred to cardboard.
Moth on the wall - the color will be good Swallowtail is attractive for its "tail", but the paper consumption is higher and the work requires more accuracy. Paper butterfly patterns for interior decoration are done in half. The second is obtained "automatically" after turning a piece of paper folded in half
A few tips for working with templates. Many contours of butterflies are given with two wings, but it is better to cut off one wing - it will definitely turn out symmetrically.
Decorations made of winged insects of different sizes look good. Therefore, one and the same contour can be enlarged, reduced using the simplest functions of graphic editors - the same Paint, which is in any computer. Since in this case only the outline is important, the quality of the drawing is not so important, therefore experiment with the dimensions boldly. Cut out the printed template, apply it to the cardboard and circle it. Cutting out we get a hard working template, with which you can make dozens of identical elements.
Cut and fasten

We take a sheet of paper, fold it in half, apply a template, circle it. Cut out along the drawn line. Then we bend the wings from the "body", we get a workpiece. After cutting out a number of butterflies, we attach it to the chosen place - on the wall, a piece of cardboard, etc.
You can fix it with ordinary glue (PVA is usually the best option), small strips of double-sided glue. You can use wallpaper glue, etc. If in doubt about the result, stock up on sewing pins. They can be mounted on the wall several times without much risk of damaging the surface. When you place all the butterflies and the result suits you, you can glue or use scotch tape.
Fishnet
The situation with openwork butterflies is a little more complicated. They are made from paper or cardboard. It is important to have a good sharp knife and a template with lines drawn on it, along which you will need to cut out excess paper. It should be said right away that this is painstaking work.
Patterns of butterflies with openwork wings - a variant of medium complexity The second half is symmetrical
The process is the same as described above: a template is prepared, then the required number of elements is cut out from it. The peculiarity is that first, small fragments are cut and removed, and then the outline is cut out of a piece of paper. With this sequence of actions, there is less chance of breaking thin bridges, and it is even easier to work this way.

How to make an openwork butterfly out of paper - process in pictures
You need to work with a knife with a thin and sharp blade. Better not on the table, but by placing something hard enough - you can have a piece, plastic, etc. But you need to understand that grooves and cuts will remain on the surface, so it will be problematic to use this piece for some other purpose.
Multilayer volumetric
When making multi-layer volumetric butterflies, several pieces of the same shape are cut out (size and color may differ). They are folded one on top of the other, "bodies" are glued together, and the wings are folded back at different angles. So these butterflies turn out to be more voluminous.

You can make a combination of openwork and contour butterflies. Take paper in contrasting colors or find the same color, but different shades. Make butterflies of the same shape out of them. Only some will be laced, others will not. Arrange them by placing a piece without a pattern underneath. It turns out to be an interesting effect.

There is a technique that allows you to immediately cut out volumetric butterflies from paper. You will need two rectangles of paper - a larger (for large wings) and a smaller one. We fold them diagonally once, then a second. The result is two triangles of different sizes. Now, from two opposite sides, we fold the paper inward so that we get such a triangle as in the third photo (with a newspaper).

Draw wings on the resulting triangles. In large openwork it can be located only along the edge, in smaller ones - over the entire area. We cut out the blanks and put them one into the other, glue them together. From above we glue the "little body" cut out separately with antennae. Due to the fact that the paper is folded and the wings are double, the products have a larger volume.
Corrugated paper
It is easier to work with corrugated paper and the butterflies for decoration are more airy and light, since the paper is translucent. We select the right colors, we take threads, scissors, glue. Nothing else is required. Cut out rectangles of about 7 * 10 cm from paper.

We sew the resulting rectangles in the middle with a needle and thread, tighten, make a couple of turns with a thread. It turns out something resembling a bow. We fold it in half, straighten the paper with our fingers, trying to leave as few folds as possible - we form wings.

When the result satisfies you, we take scissors, cut off a strip of several millimeters from this edge - on the antennae. On the rest of the part, we form a patterned edge that resembles a butterfly's wing.

We twist the antennae strips with our fingers into thin tubes. Now they exactly resemble antennae. We unfold the wings and finally straighten them. The result is light butterflies.
From folded paper
From double-sided colored paper or old magazines, you can make paper butterflies for decoration by folding them into a small accordion. Cut out two squares or rhombuses from paper (one a little more, the second a little less), fold them into a small "accordion", starting from one of the corners. The smaller the fold, the more interesting the product will be.

We fold two folded rhombuses one with the other, tie them in the middle with a thread or flexible wire in a sheath of a suitable color. We make antennae from the remnants of the wire, straighten the wings, adjust the shape if desired.
Photos for inspiration
To begin with, a little about how and on what you can attach already made butterflies for paper. The easiest way is to use glue on walls or panels. The second no less simple way is to use double-sided tape. But in order for the decoration to be more voluminous, it is best to glue it not directly to the wall, but on a small piece of foam rubber. The result will be a more airy composition, with clear shadows.

Paper butterflies are used to create volumetric decorative compositions on small hoops with fishing line tied to them. Cutted paper insects are attached to the line. You can't hang them on the wall, but they look very original, although it is more difficult to create such a composition than on the wall.

Hoops and fishing line are all you need to create this beauty
And several wall compositions that use butterflies for decoration, made of different types of paper.


Another option with a large butterfly ...

Colored tornado….


The main thing is to find a bright picture and even a simple silhouette will look great.
Butterflies are used to decorate postcards, notebooks, photo albums, furniture and even just walls. Ready-made products can be purchased in the store and simply stuck in the right place, or you can make it yourself, which is undoubtedly more fun. What can be used to make a butterfly?
Let's consider several ways to make a paper butterfly.
Quilling butterflies

The simplest, but no less beautiful decor option is a paper butterfly. With your own hands, you can make it in several ways.


And every time you get a unique option. More complex options are a paper butterfly made from double-sided strips. This technique is called quilling and requires certain skills, tools and a lot of time. But the products are amazing.


Having made these kinds of insects of different sizes, you can hang them from the ceiling or a chandelier using very thin fishing line, at different levels, which will create a wonderful effect of weightlessness.


They can be used to decorate curtains and walls, postcards and albums, and even as jewelry.
Openwork butterflies

Another option is a do-it-yourself paper butterfly using the vytynanka technique.


This technique is one of the types of folk decorative arts. Its essence consists in cutting out of paper using scissors or special knives.


Works in this style can be simpler, or they can reach the heights of grace.


Most often they are used to decorate windows or mirrors and other glass surfaces. They are attached with a soapy solution. They are also used in the creation of postcards.


To make such a decoration, paper butterfly patterns are used, according to which their products are cut. Curly butterflies can also be cut using a plotter.


This is such a special tool. Then, of course, you will spend much less effort and time on their creation, if you need a large number of decorating elements.
Simple paper butterfly garland
Making a garland, the main element of which is a butterfly made of paper, is completely easy with your own hands.


Moreover, you will surely find everything you need at home. And all you need to brighten up a dull room or set up a fun party is a few sheets of multi-colored double-sided paper and decorative or plain wire. A ribbon or rope will also come in handy to attach the garland to.


For one butterfly, you need 2 squares measuring 15 x 15 cm.Fold each of them diagonally. You should get a triangle. Now, fold both triangles towards each other, that is, from the edge to the center, in an accordion manner. The width of the fold should be no more than a centimeter.


Do the same with the second square. Then connect them together in the center and wrap with wire, the edges of which bend in the form of tendrils. That's all. Our paper butterfly is ready. Make as many as you need. Now all that remains is to attach them to the ribbon and hang them where, according to the idea, they should be.
Origami butterfly

Consider another way to make a paper butterfly. It cannot be called simple or complex. Rather, both options are present here.


Everything will depend on the paper butterfly pattern used. And, believe me, there are a huge number of them.


And all of a different level of difficulty. And, of course, the more complex and intricate the scheme, the more interesting the origami paper butterfly looks in the end.


When folding your product, make sure every time that all the folds are perfect and not warped. If you pick up material with interesting colors or unusual textures, that origami paper butterfly of yours will not disappoint you. Lay the square of paper with the white side up. Fold it twice diagonally and once vertically.


Having made a large number of such butterflies, you can miraculously decorate any room with their help.


You can make them in different sizes and use all the rainbow colors. After that, stick to the original lightweight snag, imitating the color scheme of the rainbow. And nail a snag with butterflies on the wall, for example, in the children's room.
Butterflies on a paper wall

There are many ways to "house" such wonderful insects as butterflies on your wall. One of them is a three-dimensional transparent picture, inside which there is a dried butterfly of a rare species. It looks amazing, but not for those who are for the preservation of wildlife.


This exposition is unlikely to please such people. Another, equally beautiful, option would be butterflies created from feathers and wire. They are often colorful and look great on plain walls.


If you have walls with a picture, then this option is unlikely to suit you, since such butterflies will be lost against this background. Or you can buy butterflies made from self-adhesive film and stick it wherever you want.
What can you do with your own hands?
With your own hand, you can create butterflies not only from paper, but also from cardboard.


Perhaps the easiest option for decorating walls will be paper butterflies. Variants of fixing the composition Ornamental insects made or purchased by you can be fixed in their permanent location in different ways.
There are four mounting options in total.
1. Fastening with glue. The choice of adhesive material will depend both on what you are going to attach your composition element to, and on the material from which the attached object is made. If we are dealing with paper insects, then most often PVA glue becomes the number one choice. And here the main thing is not to get carried away. If you apply more than necessary, you risk not only getting streaks, but also distorting the color.

2. You can use the pin method. It is, of course, much neater than glue, but it will only work if there is space between the wall and the wallpaper.
3. Another mounting option is fixation with tape. You can use both flat and volumetric options. The latter will add airiness and weightlessness to your composition.

4. And last, but not less, and perhaps even more original way - with the help of threads and transparent wire. This type of attachment is especially suitable for butterflies that have been folded using the origami technique. This type of fixation will affect your imagination to the maximum and will bring a lot of positive emotions in the process of work.
Preparing to create paper decor
Although paper insects are the cheapest option for decorating, it also gives you opportunities that no other can.

When creating paper butterflies, you can make them flat or voluminous, smooth or textured, as well as layered and even delicate. Or even combine everything in one. The main thing is to approach this issue not only creatively, but also wisely. After all, your composition should maximize the room. Breathe life and dynamics into it, and not become an indicator of bad taste.

It should also be noted that the paper color gamut is not only very wide, but can also be easily supplemented with all kinds of paints. Although in fairness it should be noted that the most win-win option is black monochromatic butterflies.

In general, before you get down to work, think through everything to the smallest detail. Starting from the form and color and ending with the methods of fixing the composition.
The process of creating a butterfly for a wall composition
In order for you to get a paper butterfly, which will become one of the elements of the future wall composition, you will need the following materials and tools.
First, there is paper and small decorative items for decoration, if you want to use them. For example, it can be rhinestones. Secondly, scissors, glue, a pencil, and whatever is needed for fastening. Also use ready-made templates for cutting insects for your composition.

So, let's look at how to make a paper butterfly. Cut the paper to be used into squares. The sizes of the shapes depend on your idea.


Fold each square in half and carefully circle half of the sketch of your future butterfly on one side, working through all the details. Without expanding the square, carefully cut out all the elements, and only then unfold.
You will end up with a completely symmetrical insect. After all the butterflies are cut out, decorate them as you intended and start attaching to the wall. On the surface that will be the basis of the composition, apply the markings in advance so that in the end there are no unpleasant surprises.
To create a unique interior, different options are used today. The butterflies on the wall, the photos of which you will see in this material, are an original way to revive an empty wall.
The renovation is complete, the furniture is arranged, new curtains are already hanging, but something is missing to complete the image of the room. Paper butterflies on the wall are a creative idea that cannot fail to attract attention.


The creation of such a decor will require a minimum of material and free time. Even if there is no suitable paper in the house, it is sold in any stationery department and is inexpensive. If you don't want to mess around with cutting out silhouettes, you can purchase ready-made stickers with a sticky base.
But fluttering beauties can be made not only from paper - there are other materials suitable for the embodiment of the idea. This is what the conversation will be about.

DIY butterflies on the wall
Butterflies as a design move are used not only to decorate walls. They are used to decorate frames of photographs and paintings, chandeliers and floor lamps, mirrors, ceilings. However, butterflies in the interior on the wall are the most popular option. And this is not just a beautiful element of decoration: according to the laws of feng shui, butterflies are considered a symbol of joy, rebirth and mutual love.

Their appearance in the bedroom will add new colors to the marital relationship, return slightly faded feelings, and kindle the fire of passion. Fluttering beauties should not be bored alone - they are glued to the walls in pairs or in large groups.

Different materials are used to make bright moths:
- Colored paper.
- Rough cardboard.
- Vinyl records.
- Starched fabric.
- Thin metal (beer cans, Coca-Cola cans).

The sizes of soaring beauties can also be different, different shapes and colors are also allowed. The embodiment of the idea depends on imagination and improvised material.

Advice! You can arrange butterflies on the wall randomly or depict a rapid whirlwind. Moths can be used as a frame for any composition, for example, from several photographs.

For what style are such decorations acceptable?
Decorating the wall with butterflies will be appropriate in any interior style:
- rustic provence;
- abounding in high-tech technology;
- ascetic modernist style;
- stingy minimalism;
- noble classics.

The main thing is that the miniature applications are in harmony in color with the overall interior. Otherwise, they will look ridiculous and tasteless. Just do not need to make butterflies out of paper of the same tone as the walls, they will simply merge with the background and will be practically invisible.

The following combinations are ideal:
- green or red moths on a beige wall;
- black or dark brown on a white or gray background;
- a combination of bright blue and bright red on a pink wall.


Preparation for work
First you need to think over the composition and make a stencil of butterflies on the wall. Photos of ideas can be spied on the Internet, this is in case your own imagination does not suggest anything. Then you should choose the material, and if there is nothing suitable in the house, you will have to go to the stationery or arts and crafts store.

Moths of the desired shape and size are drawn on paper or vinyl using a stencil. Ideally, there should be several stencils, then the figures will differ in variety. When choosing a mounting method, you need to take into account some points:
- if the moths will hang on the wall, at least until the next repair, then glue can be used to attach them;
- if the owner of the apartment is not sure that the butterflies are for a long time, it is better to fasten them with pins or small buttons.

Advice! Having clearly presented the future composition or having drawn up a sketch on paper, on the walls you need to mark the lines of the location of the butterflies with a pencil. This will make it possible not to deviate from what was conceived, which may well happen during the gluing of the elements.

Colored paper moths
This is the most common decoration option that requires colored paper. You can use a computer program to create a sketch. Buying paper will not hit the family budget, which is an important factor.

There will be no problems attaching the paper to the wall, since it is light, and the thin wings of butterflies will flutter at the slightest movement of air. If the presence of moths on the wall begins to bother you, they can be removed at any time without receiving material damage and without damaging the wallpaper.

By placing butterflies near a lighting fixture, you can create a beautiful three-dimensional effect.
Bright, shiny butterflies come from old, long-read magazines. Photos of butterflies can be taken from the Internet and printed on glossy paper. In order for the appliques to shimmer with multi-colored lights, they are covered with acrylic varnish with the addition of glitter. The effect is amazing! Compositions with fluorescent paint look no less tempting.

Advice! When fixing butterflies on the wall, only their middle should be fixed, and the wings should remain completely free and bent, create volume.

Wall arrangement of colored butterflies of different sizes and shapes
Composition from fabric and painted butterflies
If the room is decorated with liquid wallpaper, butterflies on the wall are the ideal solution, but it is better to choose fabric as the material. Any variegated or monochromatic rags that are likely to be found in any home will do. It is better to use PVA for fastening.

So that the edges of the fabric do not crumble or fray, and the fabric is more rigid, it is recommended to pre-wet it in water with the addition of PVA glue, dry it and only then cut out the figures.

Painted moths look no less luxurious. To create a unique composition you will need:
- stencil, which is made of plastic or thick cardboard;
- acrylic and fluorescent paint;
- thin brush;
- sponge for washing dishes.

Using a stencil, the main pattern is applied to the wall with acrylic paint, then the contours of the butterflies are outlined with fluorescent paint. In the dark, hovering moths will flicker mysteriously.

Advice! You need to prepare several identical stencils and fix them on the wall with masking tape. Remove the stencil only after the paint has dried, otherwise it may flow down the wall and ruin the finish. For the same reason, paint cannot be applied in thick layers.
Wall panel of bright butterflies on a beautiful turquoise background
The bright pages of the magazine will be used to make butterflies, the number of which is determined by the size of the frame - the figures should not be small, but they should not be sculpted too densely either.
First, a background is made, for which a sheet of colored paper is used or the base is simply painted with acrylic paint. You can fix the elements of the composition with PVA glue or double-sided tape. It is better if the butterflies do not adhere tightly to the base, but rise slightly above it. To achieve this effect, you need to put small pieces of foam rubber under the tape. The finished panel is framed and hung on the wall.
Beautiful painting of butterflies in pastel colors
To create a luxurious room design, it is recommended to use several techniques at once, which will be combined with each other and make the room harmonious:
- One wall is decorated with a composition of butterflies.
- A panel is hung on the opposite wall.
- They attach the moths to a fishing line or a colorless thread and hang such origami on a chandelier.
DIY multi-colored butterflies will replace a chandelier
Butterflies go well with flowers, small bird figures, bees and ladybirds. If pins are used, they must be decorative (beads, beads). For fixing on the wallpaper, the sharp end of the pin is bent 90 ° and pushed under the paper covering. Butterflies seem to float in the air.
For such creativity, any ideas are suitable, but patience is also required. The reward for perseverance and diligence will be the unique decoration of the room.


Instructions for making butterflies with your own hands. Decor options with butterflies.
The butterfly is a cute insect associated with grace and sophistication. Butterfly hairpins are often used to decorate hair, clothing and bags. Jewelry and bijouterie are also popular. Butterfly brooches will complement the most austere outfit.
How to make a beautiful volumetric butterfly out of origami paper: templates for printing and cutting, photos
Origami is the art of paper folding that dates back to the days of ancient China. More recently, the origami technique has spread to European countries, that is, it has gone beyond China.
There is a certain set of conventional symbols necessary to sketch the folding scheme of even the most complex product. Most of the conventional signs were introduced into practice in the middle of the 20th century by the famous Japanese master Akira Yoshizawa.
Classic origami prescribes the use of one square, evenly colored sheet of paper without glue or scissors. But now origami is closer to Ukrainian vytynanka, where beautiful figures are cut out of a piece of paper.
Below are the diagrams for making an origami butterfly. You will need small and very sharp scissors and patience to get the job done.

 templates for printing and cutting
  templates for printing and cutting
 templates for printing and cutting
Butterflies are often used in New Year's decor. They are tied to garlands, combined with cotton snowballs and artificial snow. In addition, such products are attached to the tree. Below you can find a butterfly stencil for decorating the New Year's premises and the Christmas tree.


How to make a flying paper butterfly?
The flying butterfly looks very interesting and harmonious. The main task is to make an elegant insect that will be as close as possible to the present. After hanging it vertically on a string, it should give the impression that the insect is flying.
You can watch how to make a flying butterfly in the video.
VIDEO: Flying paper butterfly
Basically, these applications are used to create paintings. Also, a paper butterfly will be an excellent option for the development of fine motor skills of the hands of preschool children. Depending on the age of the baby, the complexity of the application is selected. For toddlers, it's best to cut out the templates yourself. Toddlers should only glue the parts. Below are several options for applications for children of different ages. Volumetric appliques made using the lace technique usually look beautiful. Such techniques should be performed by children from 4 years old.


VIDEO: Paper butterfly applique
Butterflies are called winged flowers, they are able to give the room airiness and some windiness. It is very simple to make panels from paper butterflies. The simplest option is a picture with glued paper butterflies.
Materials:
- Scissors
- The basis for the panel
- Paper of the required color
Instructions:
- Decide on the size of the panel and the drawing itself. Also figure out what kind of drawing you will create.
- After choosing a stencil, cut out the butterflies from colored paper and glue to the base canvas
- It is advisable to mark in advance with a pencil the line along which it is worth sticking butterflies


Such decorative elements are made of paper and can either be glued or hang over the wall. Such butterflies can be attached to furniture, walls, or hung on strings.
Butterfly decor options:
- Fluttering butterflies under the ceiling
- Butterflies on the wall or furniture
- Decorating chandeliers and lamps with butterflies


Silhouettes on the wall can be both volumetric and flat. Initially, a base silhouette is chosen. Most often, butterflies resemble a flock, sometimes they make up a huge moth from small butterflies. It could be a cup with butterflies flying out or a watch. In this case, butterflies symbolize the transience of time. A whirlwind of butterflies also looks harmonious and interesting.


Colored paper butterflies will be a great addition to the interior. They are made using origami or quilling technique. These are insects made by folding and gluing pieces of paper. It turns out delicate butterflies. It looks very nice, especially if you combine colored paper. Below are templates and photos of butterflies made of colored paper.


Figures of this kind are used to decorate a children's room. They look very gentle and unusual. Such butterflies are hung on strings and decorate play areas with them. Such butterflies are very nicely combined with bright and colored lighting. It can be side lighting or direct beams.


Large butterflies are used for wedding or holiday decor. Despite its cheapness and simplicity, such decor can significantly improve the room and make it festive. Usually, thick paper is used, which holds its shape well. This prevents the wings from kinking. Such butterflies are hung on ropes, fishing lines or threads. Large paper butterflies for hall decoration: templates, photos 


If you do not have such experience, then such a decor is best done on painted walls or non-woven wallpaper. In this case, if you do not like the result very much, you can remove the butterflies. It is best to attach butterflies not to glue, but to double-sided tape. It looks great on wallpaper and painted walls. Do not use it with paper wallpapers.


Decorating a room with paper butterflies is easy enough. It is necessary to stock up on patience and materials.
VIDEO: Paper butterflies