Content:
Sooner or later everyone will spenddIY repair in an apartment or house... Therefore, the question: "How to start repairs correctly?" - is very relevant, and you need to approach its decision seriously.
We are starting repairs. We plan and think about the upcoming work
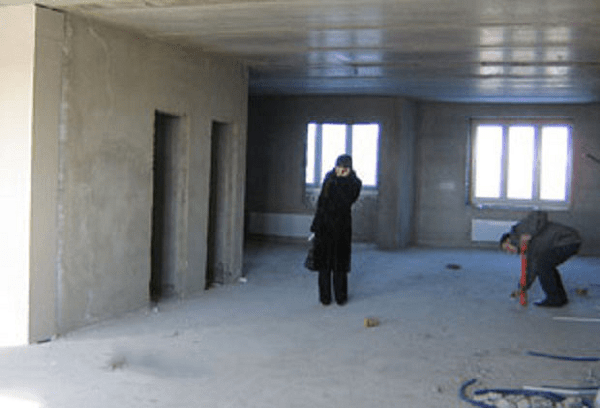
Photo 1 - Stages of repairing an apartment with your own hands
Before proceeding with the independent repair of an apartment, you must first draw up a plan of all the premises, indicating the location of furniture and equipment. Thus, it will be possible to determine where the sockets, ceiling lights, etc. will be located. This must be done in order to properly design the piping and wiring. The convenience of using the premises in the future will depend on how well it will be performed.
If you do not like the existing layout of the apartment, then the repair should be started precisely with the demolition of the walls or with their construction.
No less important is the style of the future room, which may be the same for all rooms or have cardinal differences. If it is difficult to decide on this issue, then you can resort to the services of a designer who will take into account your preferences and features of the apartment.
Having thought well and weighing all the points, you can start calculating the amount of necessary materials and their purchase. It is better to divide the repair work into stages, which will give the process a certain planning.
Important!
It is inappropriate to start repairs from a walk-through room or corridor, because work in other rooms can negatively affect their appearance.
Basic apartment renovation works
Repair starts with the so-called dirty work:
Stage one. Dismantling old coatings

Photo 2 - The first stage of repair - remove the old wallpaper from the walls
It is necessary to remove old wallpaper, whitewash, tiles and other finishing materials. If the floor has not become completely unusable, then it should not be touched yet. In the event that replacement is not provided, it should be carefully covered with plastic wrap, and its edges should be securely fixed with masking tape. To protect the floor from mechanical damage, it is better to use cardboard, it is much more reliable than paper.
To prevent dust from settling on doors and windows, it is better to leave the dismantling of old doors for later. You only need to withdraw the cashiers.
Second phase. Electrical and plumbing

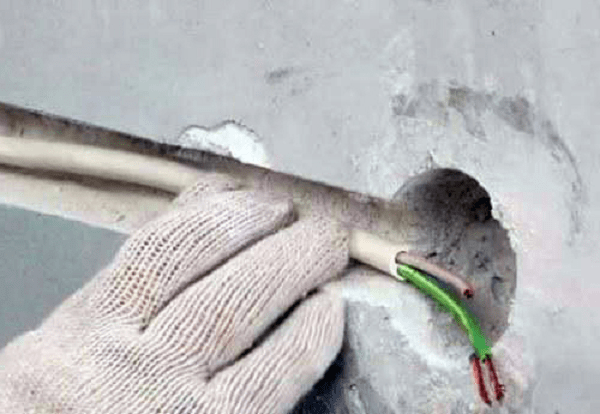
Photo 3 - The second stage of the repair - we cut the walls for wiring and pipes
This work is the dirtiest, but also responsible... It will be very difficult, and sometimes impossible, to redo such works later without a new major overhaul.
Important!
It is not wise to save on plumbing, as well as on electrics. Wires and pipes hidden in the wall cannot be repaired.
The walls should be channeled according to the scheme, which will need to be saved, so that you do not accidentally drive a nail in a dangerous place.
It remains to lay the wires of the required cross-section and pipes, it is better to use propylene and neatly close the grooves.
The third stage of the renovation. Preparatory installation

photo 4 - The third stage of apartment renovation - we dismantle old windows and doors
Differs in laboriousness, since right now it is necessary to dismantle old windows and install new ones.
Important!
To protect new windows from dust and accidental splashes, they can be protected by covering them with foil. There is another way - to use pleated paper curtains, which looks more aesthetically pleasing and is inexpensive.
 Next, you need to perform a rough finish, that is, prepare the floor and ceiling for finishing. Such jobs include:
- Grouting joints and cracks;
- Putting.
Important!
The material for roughing is selected depending on the type of finishing. Experts do not recommend saving on these materials.
The fourth stage of renovation in the apartment. Padding

Photo 5 - The fourth stage of apartment renovation - priming of all surfaces
Applying a primer allows you to make wall or ceiling is much stronger... The primer contains elements that have the ability to penetrate deep into the surface to be treated and to connect small particles. Now you need to wait until it is completely dry and you can start painting the ceiling.
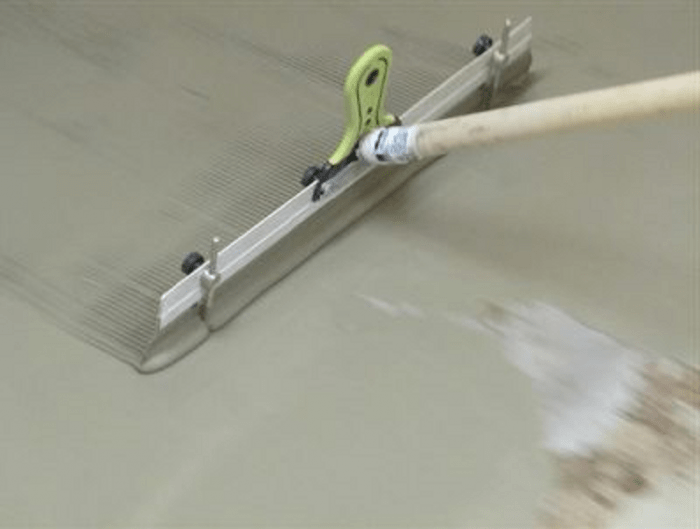
Stage five. Leveling the floor

Photo 6 - Do-it-yourself apartment renovation. Floor leveling stage
If the floor remains old, you can skip this step. Otherwise, you need to fill the base from a modern self-leveling solution, or carry out work on the screed. Only after complete drying can you move on to other work.
Stage six. Wall decoration

Photo 7 - The sixth stage of the renovation - finishing the walls in the apartment
Depending on your preferences and financial capabilities, material is purchased for wall decoration. You can glue wallpapers, the choice of which is extensive not only in color, but also in material, texture, size. For instance . There are many options for painting, as well as decorative plaster. There are more exotic finishes, it all depends on your desire and the overall style of the room.
Important!
Popular wisdom says: the leftovers are sweet. This means that you can buy leftover wallpaper, the price of which will be lower, and create an original combination.
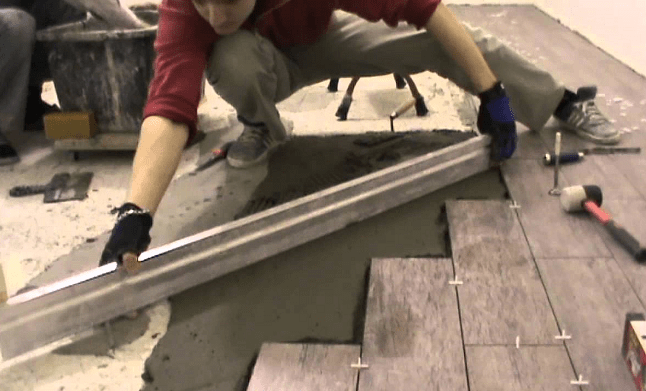
The seventh stage of apartment renovation. Flooring

It's time to start laying the floor covering. For this purpose, you can use: linoleum, carpet, block parquet or a more modern version - parquet board and other materials. If a decision is made to lay the floor tiles, then they begin to install it only after the completion of all work on the ceiling.
The final stage of DIY repair

Photo 7 - The last stage of the repair - the installation of interior doors
Thresholds, skirting boards, etc. At the same time, wardrobes are assembled, furniture is arranged, and decorative elements are added.
Now you need to thoroughly clean all the rooms and you can enjoy the result.
Almost always, new housing is purchased by a happy newcomer from the developer's company without interior decoration and repair, but with communications brought into the apartment. Firstly, such housing in a new building will be cheaper, and secondly, almost always the repair and arrangement of an apartment by the developer is performed extremely carelessly, using cheap materials. Thirdly, there is a desire to complete some stages of apartment renovation with your own hands or with the hands of good craftsmen.
How to start renovating an apartment in a new building
First you need to make an audit and inspection of the apartment, to establish problem areas of walls, ceilings and floors. Then we proceed in the following order. We determine what needs repair and finishing in the first place. If the time and money for a complete renovation of the apartment is not enough, it is necessary to put in order first of all:
- Front door and windows, apartment ventilation;
- Perform full and highest quality wiring and wiring of outlets around the apartment. This stage must be thought out in as much detail as possible, draw up a connection diagram and a circuit for laying wires into walls;
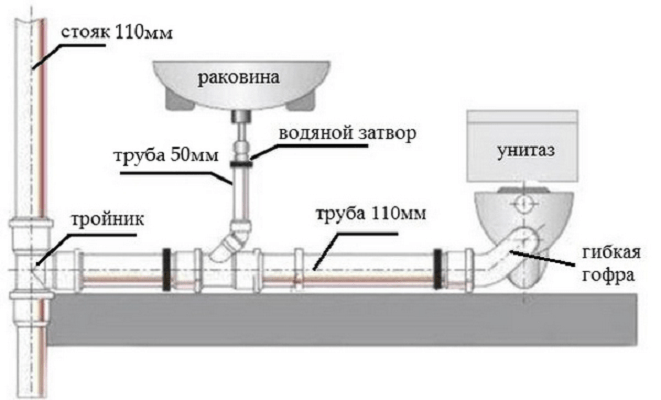
- Connect the water and collect the sewerage system in the bathroom and toilet, install a toilet, washbasin and shower;
- If the start time of the renovation of an apartment in a new building coincided with the heating season, be sure to check the degree of heating of the aluminum registers with a remote thermometer.
Advice! Before starting the repair, a list of claims for defects or defects must be presented to the representative of the seller. You may be able to get compensation for repairs in a new building. Do not agree to rework by the firm.
In the process of carrying out the listed preparatory work, you can calculate the sequence of repairs in a new building.
What affects the sequence of repairs in an apartment in a new building
Much in the renovation of housing in a new building depends on the availability of time and money resources. Having bought a "bare" apartment and having issued the necessary documents for the right of ownership, you automatically start paying rent and housekeeping, for using the adjacent territory, for the removal of household waste and construction waste. After connecting electricity and water, a new apartment in a new building began to bring you a loss in the form of costs for its maintenance and decoration. The longer the repair time for an apartment in a new building, the more it will cost you.
There are two main options for approaching the issue of finishing a new apartment in a new building:
- Planned renovation and finishing of the apartment. In this case, the owners draw up a detailed map and schedule for finishing work, in which all the main types of finishing and installation of devices are prescribed in stages. Such repairs, as a rule, are carried out from scratch to completion by one team of craftsmen. The term of delivery of the repaired object may take several weeks or months. The disadvantages of this approach include the constantly growing price and cost of work, sometimes exceeding the cost of the estimate by more than two times. As a result, if due to unforeseen circumstances there are not enough funds, the repair may be delayed for an indefinite period.
- Fast renovation from scratch. In this case, all the above stages of repair in a new building are performed by the hands of hired craftsmen with direct control of the quality of work on your part. An apartment in a new building within a week will be prepared for further decoration of the rooms. In addition to communications, the smallest room of the apartment is finished and equipped with temporary linoleum and wallpaper. In such a room there are still no amenities, but it can be used as housing - a temporary hut and a warehouse for building materials. All other work is performed as free funds and time become available.
The first option is well suited if the family has small children or elderly people who need to provide certain comfort and convenience. The second option is considered more economical and quicker, especially if, after finishing the kitchen, bathroom, toilet and one room, the housing is rented, with the sequential bringing the remaining rooms of the new building to condition.
We carry out apartment renovation with our own hands and head
Among the most popular horror stories for new buildings, it is customary to consider stories about the shrinkage of the walls of the house and its foundation. In reality, a similar process for a multi-storey building should finally be completed by the time the building is put into operation. This period is on average no more than 18 months. If, after 1.5 years, cracks form in the corners, the ceiling or at the joints and in the masonry of the walls, the tiles in the bathroom fall off, the loops with the skewed doors are deformed, this means that the new building has certain problems with the stability of the foundation. With the repair, you should wait until the main thing is clarified - what is happening with the new building.
How to start repairs in a new building
Before starting work, first of all, inspect the lock on the front door. The model and standard equipment of the door can be subject to separate agreement. Indicate in the supplement to the contract which model of door and lock you want to install. If it becomes necessary to take additional security measures, first of all, change the lock supplied when the new building was delivered.

At the next stage, it is necessary to resolve the issue of installing an electrical switchboard, connecting an electric meter. This will make it possible to start using a power tool when repairing an apartment. To get rid of the need to use a large number of carriers and extension cords, plan the layout of the electrical wiring in the apartment. When doing this, consider the following:
- For the kitchen and bathroom, the wiring must be laid in sealed hoses, sleeves;
- In a separate living room, lay the wire to the bathroom to connect the boiler or washing machine. The cable cross-section must be rated for a current of at least 25 A;
- An additional wire must be laid to the place where the air conditioner is installed;
- It is necessary to lead a wire to the bathroom, to the kitchen, to the hall, which will be connected and used in the future when organizing additional grounding.
Advice! When routing wiring, use only copper cable without twists or solders.
In addition to electricity, in order to create more or less normal conditions, it is necessary to connect hot and cold water meters and collect the sewage system in the bathroom and toilet. It is necessary to start work by installing a toilet and washbasin.

Considering that good plumbing is expensive, for the first time you can install an inexpensive toilet, assemble and connect plastic sewer pipes, a bellows and a washbasin sink. During the renovation of the apartment, the plumbing can be replaced at any time. Installing expensive plumbing increases the risk of damage to it during repairs; it must be installed at the final stage of renovation of a new building.
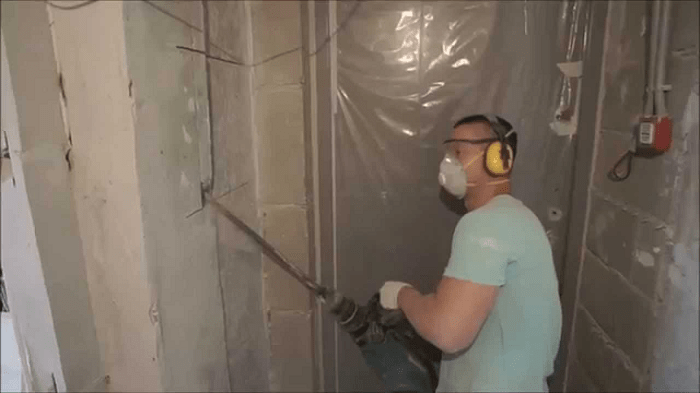
To lay a plastic water supply using a perforator, we pierce channels in the walls of the bathroom, toilet, kitchen with a depth of 2.5-3 cm. Next, you need to solder the water pipes and connect the leads to the cistern and washbasin. Finally, we will install and connect the cold and hot water meters to the domestic water supply system.

Rough operations
Before starting work, you will need to perform a large amount of cleaning the remnants of concrete, mortar. The main part will be for rough cleaning of walls, floors, ceilings, their chasing, alignment and trimming of seams. Such work gives a large amount of dirt and dust, so it will be necessary to organize good ventilation and wet cleaning inside the new building.

A separate point is to highlight the preparation of floors in each of the rooms for finishing. During the repairs in the apartment, it will be necessary to close up all the cracks, holes in the seams between the slabs, in the floor, in the interior walls of the new building. The most difficult will be to level the floor with a cement mortar screed and reinforcing mesh. This procedure will need to be performed upon completion of the preparation of the walls and ceiling for finishing.
We will perform similar work in the kitchen, bathroom and toilet.
Carrying out finishing works
After rough cleaning, it will be necessary to prepare the walls in the kitchen and toilet for laying tiles on the walls and floors. Facing tiles can be laid with your own hands, but it is troublesome and takes a lot of time. Therefore, it is better to entrust the laying of tiles to masters specializing in this kind of finish. While the tiles are being laid, you can do your own repairs in one of the rooms of the apartment. The best option would be to lay decorative plaster or liquid wallpaper on the walls. If at the time of the start of the repair in the apartment of the new building the double-glazed windows in the windows were in a satisfactory condition, then you can start applying plaster on the walls of the room immediately.
Upon completion of laying the tiles on the floor and walls in the kitchen, bathroom and toilet, you need to lay inexpensive linoleum in the corridor connecting these three rooms and the room in which the renovation was carried out using decorative plaster. This will reduce the amount of dust being raised and make it easier to clean the apartment.
The most important stages of renovation of a new building
Before finishing the walls in the apartment, it is necessary to align, and in case of a defect, repair the interior doors. If your future plans include wallpapering, normally closing doors are essential for high-quality wallpapering. After the walls are finished, we proceed to laying linoleum, laminate or carpet on the floor of the apartment. The most practical is considered to be a laminate for living rooms, for a corridor an office version of linoleum with increased resistance to abrasion. This type of work does not require special qualifications and is easily done with your own hands during the renovation of a new building apartment.

Conclusion
The final stage of the renovation is the connection of lamps and the installation of furniture in the apartment. Approximately 70% of the volume of work during repairs in a new building is quite available for doing it yourself. And only when performing special types of finishing - laying parquet, installing stretch ceilings, installing double-glazed windows or entrance doors in a new building, you will need the services of specialists.
If you are going to make major repairs in a separate room or apartment as a whole, you should draw up a complete work plan and cost estimate, including items such as dismantling old equipment (batteries, window sills, lamps, switches). If you have to replace windows and doors, include in the list of works cleaning and removal of construction waste. In most cases, this is a significant cost item, especially in an apartment building within the city.
It is very important to determine the real scope of work and relate them to your financial capabilities. It is highly undesirable to make adjustments after the start of repair and finishing work - for example, after painting the walls, you wish to lay parquet instead of laminate or stick wallpaper instead of decorative plaster. Therefore, all design and design decisions must be made before starting the actual repair work. Redoing is expensive, long and sometimes impossible.
Where to start renovating a room?
Having coped with the preparatory process and finding yourself in front of the bare ragged walls, you still do not fully imagine the entire volume of the forthcoming expenses and work. However, you can already navigate where and what will be located, what colors are optimal in a particular room and where a computer, TV and other electrical equipment will be installed. Be sure to pay attention to the location of the windows and the need for additional lighting in the rooms. What for? Because repairs should begin with equipment or re-equipment of the electrical network, including the location of the lamps - basic and additional.
This should be done both in old apartments that are being completely renovated and in new buildings. It's no secret that in new houses, wiring is mounted without taking into account the wishes of the owner. Each newcomer invariably has a desire to adapt housing to their needs as much as possible. The abundance of electrical technology requires an optimized, high-power grid with many branches. It is very inconvenient to unwind all kinds of extension cords in a new apartment and install additional sockets.
In parallel with the electrical network, an air conditioning system and fastening elements for heating network devices should be installed. It is also necessary to perform work requiring chiselling, drilling, grooving, grooving, recesses and other disfigurement of walls, floors and ceilings, accompanied by the formation of dust and fragments of brick, concrete and gypsum. Then we calmly remove the debris and start preparing the foundation of the future floor. There are several options:
- installation of a rough plank floor;
- pouring a concrete screed;
- preparation for the installation of a warm floor;
What's next?
The next stage of repair work concerns the windows. If replacement is required, we change. If the windows have already been installed and satisfy your request, then we skip this stage, not forgetting to inspect the condition of the slopes, the presence of thermal insulation, and the sealing of cracks. It is worth checking how the doors open and close, if there are any distortions, what are the vertical and horizontal levels. It is very difficult to eliminate these seemingly obvious imperfections after plastering and painting walls or pasting wallpaper. It is also advisable to install internal window sills. A plastic wrap will help protect them from splashes of paint and putty.
Of course, this work can be done later, when installing interior doors, but this option is more practical.
If the walls in the room require additional leveling and a significant amount of work before painting, then calculate the total amount of building mixtures required to process all the walls to be repaired. Building materials, despite their high cost, should always be taken with a small margin. It is very inconvenient to run after a bag or two of putty, which, as a rule, ends at the most inopportune and crucial moment.
The sequence of work on the repair and decoration of the room: frequently asked questions
What comes first: screed or plaster / putty on the walls?
The answer to this question is unambiguous - before starting the wall decoration, it is necessary to complete all preparatory work with the floor. It should be ready, after cleaning, to install decorative flooring.
The floor covering is installed last, whether it is laminate, parquet or 3 D effect self-leveling floor. The prepared base of the floor is covered with cardboard or foil - this will make it easy to remove traces of plastering work, which are inevitable.
Before the start of the putty and plastering work, you need to complete all the manipulations with the drywall, if any. All partitions, niches, decorative and functional details must be done before the start of the "wet" finishing phase. All work of this kind, including leveling the ceiling, must be performed in one technological cycle, so as not to return to them, remembering, for example, that “somewhere here” a niche for storing skis or installing a safe is conceived.
Which comes first: flooring or installing doors?
Any type of flooring should be installed prior to installing the interior doors. This will help to avoid mistakes during their installation and to achieve a minimum gap between the threshold or floor plane and the door leaves. Door installation is a clean and precise job that does not require the use of mortars, glue or other substances that can stain a clean floor. The tools used in this case cannot damage it, with careful work.
But this applies directly to the door. The door frame can be installed earlier - before leveling the walls. This will remove all cracks and irregularities near the opening. If the walls and openings are initially ideal, you can postpone the installation of the box until later. When installing the box ahead of schedule, it is important to take into account the height of the future floor covering!
What comes first: to glue the wallpaper or lay the laminate (parquet, carpet)?
Any type of wallpaper is glued to the prepared walls before the start of the decorative flooring. This is also true for painting walls.
True, there are different opinions on this issue. Supporters of the second option answer this question in the same way as the question of what first: paint the ceiling or glue the ceiling plinth. According to their position, the wallpaper is glued after installing the floor and ceiling plinth, because you can replace the wall decoration at any time, without touching the plinths either from the bottom or from the top. And the edges of the wallpaper can be simply cut evenly to the level of the plinth.
The ceiling is painted after the installation of the upper plinth. In this case, it is very convenient to eliminate all irregularities and leaks in the connection, and then the plinth and ceiling are painted in one step and look monolithic.
What comes first: stretch ceiling or wallpaper / painting?
The specificity of stretch ceilings makes it possible to install them at the final stage of renovation work, after painting the walls and pasting the wallpaper. This is a very clean job and it is difficult to damage walls or floors while doing it.
The top-down priority principle does not work in this case. It concerns mainly traditional renovation work. New technologists are making their own adjustments. The experts themselves who mount stretch ceilings recommend inviting them to the end of the repair.
If you make a short list of the sequence of repair work in the room, then it will look like this:
- wiring;
- heating and air conditioning system;
- preparation of the sub-floor;
- dismantling / installation of windows;
- preparation of walls for wallpaper or painting;
- ceiling (all works);
- wall painting or wallpapering;
- clean floor;
- installation of doors;
- thresholds and floor plinth;
- stretch ceiling.
This order is not an axiom. Each master chooses the sequence that is convenient for him. But in general, the sequence looks something like this.
How to paint a streak-free ceiling? What are the causes of stains and smudges and how to fix it?
How high should the sockets and switches be located?
How to close a hole in a wall?
How do I remove old wallpaper from the walls?
www.domfront.ru
Renovation of the room: where do we start?
The very first thing to do before starting renovation in any room is to understand what we want to achieve as a result.
Ask yourself a few questions:
- What should the room look like after renovation?
- What would you like to leave unchanged?
- What does not suit you in the first place and requires changes?
- What wishes do the people who will be using the room have (for example, other family members)?
- Do you need a major overhaul or is cosmetic enough?
You can think over the appearance of the room yourself. If this is difficult, you will have to contact a professional designer. This stage should not be postponed until later, they say, we will start repairs, and then we'll see what happens. Much depends on how we want to see the room - from the choice of materials to the performance of a very different type of work. It is better to think over everything in advance than to redo it later.
Preparation phase
So, the future look of the room has been thought out. Before starting any manipulations in the room, you need to take the following steps.
- Describe the sequence of repair work in as much detail as possible.
- Study the information about the materials that you plan to use and all types of work that you are going to do yourself.
- Select the start and end date of the repair, allocate a period for preparation. This is necessary so that the goal is clearly defined, and the renovation does not drag on for many months.
- Calculate the amount of required building and finishing materials.
- Select and buy all the building materials and tools that you will need throughout your renovation.
- Decide who will carry out the repair. Think about whether you will do everything yourself, find yourself assistants or still entrust certain types of work to hired specialists.
- Order windows and doors in advance so that you don't delay work due to the fact that you have to wait for their production.
- Think about how and where the garbage will be taken out. There will be a lot of it in any case.
- Draw a new location for switches and sockets.
Advice: building materials should always be bought with a small margin.
Preparing the room for renovation
Consider the option of a major overhaul in a living room, which involves not only changing the wallpaper, baseboards, renewing the paint on the ceiling and walls, but also replacing windows, doors, electrical wiring and other large-scale events.
Before starting the repair itself, you need:
- free the room from furniture and other things - the room must remain completely empty;
- remove from the walls and ceiling everything that can be bolted to them, leaving them empty;
- remove old wallpaper, remove tiles, old flooring (if the floor remains unchanged, you need to take care of its safety, for which you should cover it with a strong film);
- hang up the doorways with a damp sheet so that later construction debris does not scatter throughout the apartment.
- remove the doors;
- remove the old wiring, not forgetting to turn off the power supply;
- dismantle old heating radiators in case of a decision to replace them.
Sequence of repair work
A room repair plan is drawn up individually, depending on what work will be done. In order to compose it, you need to know where to start. Experts recommend an approximate sequence of actions, which does not have to be strictly adhered to, but must be borne in mind.
- It is advisable to start by replacing windows, including window blocks, window sills, slopes. After installation, in order to avoid contamination and scratching, the windows must be covered with plastic wrap, the window sills are covered with hardboard.
- The electrician is changing. The old wiring has already been removed, the channels for the new one are being grooved. After that, the cable is laid, and the channels are covered with plaster.
- Heating radiators are installed.
- The ceiling and walls are leveled, the floor is roughly prepared (screed, insulation).
- Full finishing of the ceiling is carried out, up to painting and gluing the baguette.
- If parquet or laminate is chosen as the flooring, it is laid after gluing the wallpaper. Block parquet is laid earlier, cycled and covered with the first layer of varnish. Then you need to glue the wallpaper, and only then the parquet is covered with subsequent layers of varnish.
- New doors are being installed. You can change windows and window sills not only at the very beginning, but also at this stage.
- Wallpaper is glued.
- Skirting boards and platbands are attached.
- Holes are drilled for wall shelves, curtain rods, paintings, etc.
To make repairs in a room from start to finish is a rather long, laborious business, requiring a variety of skills and abilities, and, moreover, patience. But by arranging furniture in the renovated room, you will be pleased to understand that it was worth it.
mr-build.ru
Where to start renovating an apartment and finish it as soon as possible
Where to start repairing an apartment so that the repair work does not stretch out for an indefinite period, and the end result will undoubtedly please you, this is what will be discussed in today's article. Renovation of the apartment requires serious preliminary preparation. The most important point is drawing up a detailed plan for future repairs, taking into account the smallest nuances. Consider, point by point, the advice of professionals on the correct organization of repair work in houses and apartments.

First of all, you need to decide on the complexity and volume of future repairs. To make an apartment bright and clean, sometimes it is enough to carry out cosmetic, superficial repairs: replacing the wallpaper, whitewashing the ceiling, changing the old linoleum, painting the walls, etc.
If you want to completely get rid of everything that is boring and old, decide on a major overhaul with the replacement of windows, leveling the walls, installing new floors, modern ceilings. Your home will be transformed and become new and beautiful.
You should not refuse the help of experienced specialists when carrying out major repairs. This is especially true for the creation of a modern design for your apartment, including redevelopment and the demolition of some walls and partitions.
Plan renovations based on your financial capabilities.

Decide on the interior design and renovation plan
First, decide on the interior and design of each individual room that you plan to change in your apartment. You can seek advice from a professional designer, which will slightly increase your total financial expenses for repairs. For rooms where renovation will be carried out, it is necessary to complete detailed drawings of the successive stages of repair work.
We recommend that you complete five detailed renovation sketches for each individual room. In the first drawing, display the top view of the room, and in the other four, each wall. Complete each drawing with a detailed description and a plan for the sequential implementation of repair work, which will avoid omissions and inaccuracies in the work.
- Think over the location of the furniture. Those walls that will be most conspicuous need to be given special attention and use the highest quality finishes.
- Think about where it is best to place lamps and chandeliers so that the light illuminates the room as much as possible.
- Given the location of the household appliances, indicate the locations for the outlets. To then correctly design the installation of electrical wiring in all rooms.
- Consider the location of the main decorative elements: paintings, mosaics, brick walls.
In the repair plan, you need to indicate the desired finishing option: wallpapering the walls, painting, etc. To divide the room into separate zones, designers recommend painting one of the walls in a different color in order to focus on it and visually divide the room. These moments also need to be reflected in the plan.

Determine the order of room renovation
According to the advice of experienced specialists, in order to avoid unnecessary dirt and dust when carrying out repair work, it is recommended to first of all carry out repairs in the rooms farthest from the front door. The final stage of the repair, it is advisable to choose passage rooms and a corridor through which building materials and tools are constantly sweeping. This is necessary in order not to stain or scratch the finish of the already repaired wall, not to damage the new floor.
An additional protection of the repaired room can be a cellophane film (fixed on the outside of the door), which will reliably protect the room from construction dirt, dust, plaster, paint, and accidental damage.

Repairs will be carried out independently or with the help of specialists.
Do not carry out all repairs yourself. At your request, the execution of all repair work or only the performance of particularly complex repair operations can be entrusted to qualified specialists. Firstly, experience and knowledge will allow them to carry out repair work quickly and efficiently. Secondly, you do not have to additionally buy expensive tools, with the help of which the screed is ideally poured onto the floor or the tiles are laid out.
Even if you find it easy to install an interior door, the slightest inaccuracy is unacceptable here. Of course, you can hang and arrange kitchen furniture, level the walls and paint a little yourself. But trust specialists for more complex repair work so that you do not have to redo it, which can significantly increase your financial costs for repairs.
Make a list of required materials and tools
#one. After the final choice of the design of the appearance of the rooms, furniture and interior, it is necessary to draw up a complete list of the necessary building materials. Their number and total cost depends on the amount of repair work and how they are carried out. If the budget allows you, you need to purchase building materials with a small stock.
# 2. Make a separate list of decor items: holders, shelves, mirrors, paintings, etc. Start your purchases with the selected decor elements. If the planned decor element is not available, you can quickly change or create a new design version of the apartment renovation.
# 3. Make a list of the building tools you need to complete the renovation. To do this, you can use the advice of a sales assistant in hardware stores or qualified repairmen.

Calculating costs
When the preparatory work has been carried out: plans and sketches of the repair have been drawn up, lists of the necessary materials and tools have been prepared, a decision has been made about the possibility of self-repair or with the help of repair specialists, you will be able to calculate the approximate total cost of the planned repair.
You should not rush to buy all the materials when you visit your first store. In the compiled lists of materials and tools, put down the prices of different stores, which will allow you to make purchases at a minimum cost. Carefully consider the choice of repair crew services. Pay special attention not only to the proposed cost of repair work, but also to the feedback from your friends about the quality of repair services.

Vacation of premises
To protect furniture from damage, construction dirt and dust, collect it in a central area of \u200b\u200bthe room. Then carefully cover with plastic wrap. This will free up access to the walls and ceiling. Move expensive equipment and clothes to other rooms.
Where to start repairing a separate room and what is the order of work
Repair work should start with the most dusty ones: replacing window blocks, window slopes and installing new window sills. This will avoid dirt and dust during painting work, when it is forbidden to open windows in order to avoid temperature extremes and increased humidity. When windows, slopes and sills are installed, cover them with plastic wrap or hardboard to avoid accidental mechanical damage and contamination.
Mark the installation locations of additional outlets, make the electrical wiring. Do not install sockets or plug them into the enclosure at this point.
In the case of welding work (for example, when replacing heating radiators), do them at the same time in different places of the apartment in order to quickly complete this dusty and difficult stage of work, sometimes involving breaking down walls.
Before repairing walls, floors, ceilings, you must check their condition with a laser or water level. Start by applying the thickest layers of mortar. While they dry, you can carry out other minor repairs without downtime.
After completing this preparatory stage, proceed with the repair work, performing them in the following sequence: repairing the ceiling, walls, floor. First, work is performed using putty, cement, gypsum mixtures. Then they begin work on the installation of the floor, doors, slopes.
Final repairs:
- Pasting or painting the ceiling.
- Wallpapering or painting the walls.
- Installation of flooring.
- Installation of skirting boards, sills, platbands.
Video: What you need to know before starting apartment renovation
srbu.ru
Where to start renovating a room?
Renovated room
"Do you have a plan, Mr. Fix?" This is a phrase from a previously very popular cartoon. But it contains the answer to many questions. So, if you don't know where to start renovating a room, then think about what you want to do in this room and make a plan of the work to be done.
The general order of work in the room is published on this website, but in addition to the order of all the work that we have planned, we need to know if we have enough money to carry out the renovation. And this requires at least a primitive estimate for finishing work in the room. How to make the entire estimate for finishing work, you can see on this site.
What materials will be needed for repairs in one room
Studio room
So, you already know how you want your room to look. Make a simple estimate for the cost of purchasing materials and paying specialists for those works that you cannot do yourself. How to make an estimate for the repair and construction work, you can see here on this site. For now, let's just see what materials you need for the renovation so that you can include them in your estimate.
You will most likely need gypsum plasterboards only for mounting the ceiling, since installing plasterboard sheets on the walls takes up free space, and we don't have a lot of it. So you need a drywall ceiling.
Since drywall needs to be hooked onto something, you will need to make a frame for which you will need CD profiles, UD profiles and fastening brackets for the profiles. To assemble the frame and hang the sheets, you will need dowels and screws. You will also need baguettes.
You might want a ceiling made of MDF panels. In this case, you will need the MDF panels themselves and a decorative strip to go to the wall. The frame for MDF panels is usually made of strips. To do this, you need rails and, again, mounting brackets for attaching the rails. To assemble the frame and the entire ceiling, you will need dowels and screws. And to attach the MDF panel to the rail, you will need clamps.
Laminate flooring in the room
To putty on walls and ceilings, you will need two types of putty - starting and finishing. Before applying the putty to the surface, apply a layer of primer on it. And at the end of the putty work you will need paint.
If you decide to install laminate floors, you need to prepare a sub-floor for them. And this, as a rule, is the filling of the screed, for which you need sand and cement, and in order for this screed to be even, you need lighthouse profiles. And for laying the laminate itself, you will need a backing, and to complete the floor, a baseboard.
If you want to glue the wallpaper, then you will have to level the wall with a starting putty, for which you will need lighthouse profiles and a primer. For direct wallpapering, you also need a primer and, of course, glue.
You may need to replace the window and interior door. The cost of the window includes all the components and work, but to install the door you will need a door frame, hinges and a lock. You will also need screws of different lengths, dowels and polyurethane foam.
You might want something different that isn't on this list. But the principle remains the same - in order to hammer a nail into a wall, you need not only a nail, but also a wall and a hammer.
Start and short sequence of repair
Wallpaper in the children's room
Based on experience, I can say that it is best to change the window at the beginning of the renovation. Then start cleaning the walls, ceiling (if you putty on the slab) and dismantle the old floor. Then fill in the screed. Wire up and install the door frame. Hang the door later.
Rough up the walls (starter putty) and slope the window, then tackle the ceiling. Do the ceiling to the end, right up to painting and glue the baguette, and only then proceed to the finishing of the walls and slopes. Lay the floor and then hang the door. Install sockets and switches after finishing the walls.
1. A good mine with a bad game.
Silk made from 100% polyester. Tiles "like a stone", linoleum "like parquet", laminate "like onyx", "Trekhgorka" like Ralph Lauren. Porcelain stoneware "python". There is something "artificially aged" ... It's embarrassing to even think about it. Alas, the number will not work. Flip through good interior magazines. There, everywhere a stone is a stone, and a tree is just that a tree. If you don't have the money for parquet and plain laminate is beneath your dignity, look for a good engineered plank. The result is a floor that looks much more expensive than the money spent on it. Cement tiles are a good alternative to porcelain stoneware for kitchens, bathrooms and hallways. The result will look a hundredfold more expensive.
2. Leave the ceiling alone.

Everyone has become obsessed with ceilings! If you think sensibly, riveting attention to the ceiling, you only remind everyone of its existence. And according to its height. Ceilings two and sixty high will not turn, even if they crack, into majestic vaults melting somewhere in the unthinkable height. This cannot be, no matter what "decorator's tricks" promise you. Just accept it. Tall doorways can do much more for your home than a ridiculous five-layer neon-lit ceiling. Let the interior doors be two, say, twenty high. And lower the door handles a little, by five to seven centimeters. By taking a non-standard approach, you will be pleasantly surprised by the result.
3. When choosing paint for walls, think about the movement of color around the house.

Neighboring. If you have a bright living room, have the hallway painted a deep, relatively dark color. The cost of the paint will be the same anyway, and the result can look really expensive.
4. Buy modular laminate cabinets from a store, and order the doors for them in a good carpentry workshop.

This will give you significant savings that no one will ever notice. The same is true for kitchen furnishings.
5. If you still purchase ready-made cabinet furniture, let the veneering of the facades be dark and the panels of the doors simple (rectangular).

Remember, light wood always looks cheaper. Avoid yellowish and reddish veneers. And, saving on the furniture itself, spend on good handles!
6. If you don't have the money for a good carpet, look for a viscose carpet or blended fibers, imitating a silk or wool pile carpet.

Choose the color and texture that suits you and order a piece of the size you need. For additional little money, its edges are swept with braid.
7. Place the curtains on a thick lining.

Even an inexpensive curtain fabric will greatly benefit from this. Look for fabrics that are 3 meters wide. This provides significant savings. If you are not ready to spend a lot, give up printed textiles (fabrics with patterns). When cutting fabrics with a pattern, due to the need to correctly dock the canvases, a lot of scraps remain. The more rapport, the more waste. Do not use curtain tapes for curtains. Have the seamstress fold in the "hand" folds. It's not that expensive, and the lace-up pleats look very cheap.
8. Set-headset-kit. Identical things in the interior are permissible only in one case: if they are paired things that form a symmetrical composition. and sconces from one set, leave those to whom God did not give imagination. For them - sets of upholstered furniture "sofa-two armchairs" and similar tender sadness. For details, see the next paragraph.
9. Ready-made solutions.

Bad news: none. At least for us. The shower room is erected in a building way because it is a room. If you don't run a student hostel or an underground striptease massage parlor, a shower cubicle (it's a sad construction of yellow acrylic and skewed doors) won't work for you. Don't spend money on designer plumbing. Let the appearance of the bathroom fittings (kitchen, bathroom) be dictated by function. Buy washbasins and faucets with simple shapes, without inappropriate decor. The toilet should be invisible and do its job. Nobody will admire him, right?
10. Paintings, prints, prints, photographs and posters frame in simple but deep frames with glass and always in mat.

Even a picture printed on a home inkjet printer (or a naive child's drawing) looks very significant in such a frame. Play with the dimensions of the mat. Small work in a very wide mat looks very "designer". And by the way, the cardboard for the mat can be of almost any color.
11. Comfort. Another collective fetish.

According to my observations, what is called "comfort" in our Palestinians is, in 99 percent of cases, poetic tightness. In many ways, this is a bodily memory of a bygone childhood, of a warm and affectionate meager Soviet life with carpets teeming with saprophytes, a kind grandmother, Czechoslovak crystal and an unreadable Dreiser in the polished Polish wall "Hanka". All the more comfort will not be added by the expensive devilry such as a round bed with music and a minibar, a bar counter with a built-in aquarium, etc. The same is true of such rich things as a lambrequin, garland and swag. Do not worry: in a good, thoughtful interior, comfort inevitably comes naturally. Therefore…
12.… Goodbye, Sara the gypsy!

Duvet covers made of coarse calico in fine Nefertiti, towels in scarlet roses, "torn-eyed" shades of pillow cases, nylon blankets with Shanghai leopards. All these are attributes of collective farm chic, forgive me for being straightforward. They will not add comfort. Coloring is often necessary for these items solely to hide their extremely lousy quality. Keep the bed linen and bath towels just white (options: ivory, ecru). But from the finest Egyptian cotton.
13. However, with ivory it is also important not to overdo it.

Peach, beige, sand… The average nuance is good for chain hotels. Because their stenciled interiors are bound to please everyone. You should like your interior. After all, he is a manifestation of your essence, right? Take in your hand the palette fan of any paint manufacturer. Feeling pleasantly heavy? These are your opportunities. Don't miss them!
If you have planned to repair a room with your own hands, but do not know where to start, after reading the materials of our website "Remontik" you will solve this problem. Adhering to our advice, the repair work will not take long, and the final result will please you.
First of all, you must understand that the renovation of the room needs serious preliminary preparation. The most important point is the preparation of a detailed repair plan, taking into account all the nuances. Consider tips for organizing repairs from professionals:
- What type of repair to choose: major or cosmetic.
- Preparation of interior design and detailed renovation plan.
- Determine the main stages of room renovation.
- Make a list of required tools and materials.
- Plan upcoming expenses.
- Free the room.
- Where to start repairing a room with your own hands.
Now let's dwell on each of the stages in more detail, attaching photos and videos to them.
What kind of room repair is needed: major or cosmetic
First of all, you need to decide on the volume and complexity of future repairs. For the apartment to be clean and bright, it is enough to carry out superficial, cosmetic repairs: replacing the wallpaper, changing the old linoleum, whitewashing the ceiling, painting the walls, etc.
If you plan to get rid of everything old and boring, decide on a major overhaul with replacement of windows, leveling walls, installing new floors, as well as modern ceilings. Your home will be transformed and become beautiful and new.We do not recommend to refuse the help of professionals when carrying out major repairs. First of all, this concerns the creation of a stylish design of the premises, including redevelopment, as well as the demolition of some partitions and walls.
Planning repairs based on your financial capabilities.
Choose an interior design and decide on a renovation plan
At the very beginning, decide on the design and interior of each individual room that you are going to change in your apartment. You can seek help from an experienced designer, which will slightly increase your financial costs for repairs.
For the room where you are going to carry out repairs, you need to complete detailed drawings of all stages of work, in their clear sequence.
We recommend that you complete five renovation sketches for all individual rooms. In the first drawing, we recommend displaying a top view of the premises, and in the other four, each wall. Complete all drawings with a detailed description, as well as a plan for the sequential execution of repairs, which will avoid inaccuracies and simplifications in the work.
- The location of the furniture. Those walls that are striking most of all need to be given maximum attention and use the highest quality finishes.
- Think carefully about where to place chandeliers and lamps so that the light can better illuminate the room.
- Considering the location of the household appliances, mark the locations for the outlet. Then to correctly design the installation of electrical wiring in different rooms.
- Consider the location of the main decorative elements: mosaic, paintings, brick wall.
In the repair plan, you must indicate the required finishing option: painting, wallpapering the walls, etc. To divide the room into separate zones, we advise you to paint one of the walls in a different color in order to emphasize and visually divide the room. Such moments also need to be reflected in the plan.
How to correctly determine the order of repairing rooms in apartments
According to the advice of experts, in order to avoid unnecessary dust and dirt when carrying out repairs, we advise you to first of all make repairs in rooms that are far from the front door. As the last stage of the repair, it is better to choose the passage rooms, as well as the corridor through which construction tools and materials will often rush. In order not to scratch or stain the finish of the already repaired wall, and also not to damage the new floor.
As an additional protection of the repaired room, cellophane film can act (it is fixed on the outside of the door). It provides reliable protection of the premises from construction dust, dirt, plaster, paint and accidental damage.Repair of a room in an apartment: with your own hands or by specialists
Do not carry out all the repair work yourself. If necessary, the execution of repairs or only particularly complex measures can be entrusted to experienced specialists. First, knowledge and experience will allow them to carry out repairs efficiently and quickly. Secondly, you do not have to buy expensive tools with which the screed is poured or the tiles are laid out.
Even if the process of installing an interior door seems simple to you, the slightest inaccuracy in this regard is unacceptable. Of course, you can hang and arrange furniture in the kitchen, level the walls and do a little painting yourself. However, entrust more complex repair work to specialists so that later you do not have to redo them, which will significantly increase financial costs.
Make a list of required tools and materials
- After choosing the design of the room, interior and furniture, you need to make a complete list of building materials. Their total cost and quantity directly depends on the repair work, as well as the methods of their implementation. If you have the necessary budget, it is worth purchasing building materials with a small margin.
- Prepare a list of decor items: shelves, holders, paintings, mirrors, etc. Start your purchases with the selected decor items. If the planned decor element is not available, you can quickly change it or develop a new design plan for renovating the room.
- Prepare a list of required tools to complete the repair. To do this, use the advice of a consultant in hardware stores in your city or professional repairmen.
Calculate costs
When the preparatory work was completed: sketches and plans for the repair were drawn up, lists of all tools and materials were prepared, a decision was made about the possibility of repairing the room on your own or with the help of repair specialists, you will calculate the average total cost of the planned repair.
Do not rush to buy all the materials when you first visit the store. In the lists of tools and materials that you have drawn up, put down the cost of various stores, which will save on purchases. Carefully consider the choice of the services of the construction team. Special attention should be paid not only to the cost of repair work, but also to the reviews of our friends about the quality of repair services.
Free the room
To ensure that your furniture is reliably protected from damage, construction dust and dirt, collect it in a central part of the room. Then cover with plastic wrap. Therefore, free up access to the ceiling and walls. We recommend moving expensive equipment and clothes to other rooms.
DIY room repair: where to start and what is the sequence of work
Repair work should start with the most dusty ones: replacing windows, window slopes and installing new window sills. This way, you can avoid dust and dirt when painting when it is prohibited to open windows, in order to avoid an increase in humidity and temperature changes. When slopes, windows and window sills are installed, cover them with hardboard or plastic wrap to exclude accidental dirt and mechanical damage.
Take care of the marking of places for installing additional sockets, make the wiring of electrical appliances. At this stage, do not install outlets or connect them to the shield.When using welding jobs (for example, when changing batteries), do them at the same time in different places in the apartment to quickly complete this difficult and dusty stage of work, which sometimes involves breaking down walls.
Before repairing floors, walls, ceilings, you need to carry out their condition with a water or laser level. Start by applying the thickest layers of the mortar. While they dry, you can carry out other small jobs without downtime.
Upon completion of this preparatory stage, proceed with the repair, performing it in the following sequence: repair of the ceiling, walls, floor. First, work is performed using putty, gypsum, cement mixtures. Then proceed to the installation of the floor, doors and slopes.
Last stages of renovation work:
- painting or pasting the ceiling;
- installation of sills, plinths and platbands.
By following the correct order during the repair and having a clear plan of action, you can avoid many mistakes, save time and money. This is one of the main components of a durable and beautiful repair, along with the observance of the technology and the quality of the materials used.