Before you start building a shelter for your car, it is worth deciding what material you will be building it from. There are many options and a brick garage is no exception. But in this article I would like to focus on one simple and cheap option, which is quite reliable and looks quite aesthetically acceptable - we will talk about a metal garage. Such a structure has its pros and cons, and everyone can decide which of the garages to build for themselves.
Advantages of a metal garage
The advantages of a metal garage with your own hands are in the ease of transportation to the site, and if it is being built, then in the ease of installation. The welded structure also allows the garage to be moved to another location, and transportation is carried out by a manipulator and a truck. Therefore, the convenience of such a garage is definable for people who often change their place of residence.
In addition to mobility, a do-it-yourself metal garage is quite inexpensive. The car will be located near the house in a protected area, and the metal is very durable. The metal garage does not need finishing and pouring a concrete floor. All parts of the garage are made of sheets of steel; the roof does not have to be covered with special methods either. It is quite simple to create a metal garage with your own hands. To do this, you should stock up on materials and tools, and then start work, however, it is worth considering that according to the preliminary plan, construction work is carried out much better and faster.
Required materials and tools
The first thing to do before starting work is to draw a drawing where you can familiarize yourself with all the necessary dimensions. The dimensions must be adjusted to the operating conditions of the future structure. If it is being built only for a car, the width should be the same as for a car with open doors. If you plan to equip the building with a rack for tools, store spare parts - you should definitely expand the dimensions.
Related article: Choosing a material for the roof of the gazebo: an overview of current solutions

Also, inside the garage, you can carry out repair work and vehicle maintenance. Toolboxes, a workbench, shelves with a rack and everything you need should fit inside. What tools and materials do you need to prepare to get started?
- concrete and reinforcement rods;
- ready-made concrete blocks;
- metal pipe 10-15 centimeters in diameter for runners;
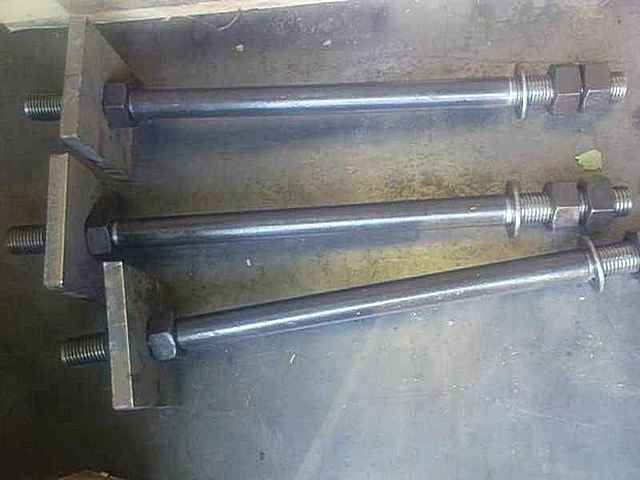
- a fifty-millimeter metal corner;
- metal in sheets, its thickness is from two to two and a half millimeters;
- electrodes and welding machine;
- grinding wheel, cutting off for the grinder and the grinder itself;
- lock, bolt and gate hinges;
- floor boards, if the foundation is strip or on runners;
- paint and primer.
Step by step technology
Each work includes certain stages. The process of building a metal garage with your own hands consists of the following stages of work:
- foundation construction;
- installation of a frame for the room;
- installation of cladding, or the creation of walls;
- insulation for the winter.
Each of the stages needs a specific action plan, and then each stage will be considered separately.

First, the site is marked. The land plot must be modified in accordance with the requirements of the foundation. For the foundation on runners, the fertile layer is removed. Having covered the site with sand, you will raise and protect the coating under the foundation from heaving during frosts. Sand is able to drain water.
Marking is done with a peg, twine, tape measure and square. The plank formwork, or rather, its ground part, should be 30-40 centimeters above ground level.
Foundation
The foundation is the basis of the entire structure. There are several types of such a foundation, including:
- tape;
- columnar;
- tiled.
The tape option is very common; to install it, you need to dig a trench around the perimeter of the future structure. The depth is determined by the soil freezing parameter, but more often than not one meter is enough. The width must be greater than the thickness of the future walls.
Related article: Entrance steel doors with patina

Any foundation must be reinforced. The frame for the reinforcement is created from steel rods 10-12 centimeters thick in diameter. The rods are tied with wire, but it is not advisable to weld them - overvoltage of the foundation can destroy the structure.
For concrete mix we need sand, cement M-500 or M-400, crushed stone, not very coarse. Using the materials described, the foundation can be quite inexpensive. Ready-made concrete can also be bought, although it is slightly more expensive than making it yourself, you will significantly save time. Half of the required strength can be achieved in six or eight days. After this time, you can safely prepare and lay the frame.
Frame
A frame for installing a metal garage with your own hands does not always require serious expenditure of money and effort. Ready assembled frames are sold today, and even shipping / installation can be free.

Garage frames can be wood or metal. Iron frames are fireproof, strong and durable. The metal can withstand even hurricane gusts, which will reliably protect your vehicle. For the frame you will need:
- metal profile 10x10 for rafters and floors;
- smaller profile for lathing;
- self-tapping screws.
The structure is assembled according to the drawing, the workpieces are interconnected with self-tapping screws and bolts.
Walls
The walls are made up of frame sheathing. Among the available types of cladding are steel and corrugated board. The material for the walls should be chosen for a long time so that you do not have to overpay for repairs.
Most experts offer prefabricated garages made of sheet steel or corrugated board as the best option, all these materials are attached to a previously prepared frame. Garage kits are inexpensive and quick and easy to install. The disadvantages of materials are as follows: poor thermal insulation, sometimes fire safety.
Warming
Warming becomes necessary with the onset of winter. How to do this if your garage is metal? The answer is simple - in the same way as all other types of buildings. In this case, both glass wool and foam can come to the rescue. Any available insulation can be mounted on the walls from the inside. And you can cover them with anything that will please the eye and create a beautiful and unique design.


 A ready-made collapsible factory-made garage - convenient, but, alas, expensive
 "Garage calculator" on the website of one of the manufacturers
  The acquisition of a metal garage that has already served a considerable time for its installation in a new place is a very risky business.
 A metal garage can be completely built independently - from "A" to "Z"


| Illustration | Description of the technological operation |
|---|---|
 | All cut to size were delivered to the frame assembly site. |
 | You can immediately check the completeness, we will lay out the pipes on the site in accordance with the assembly drawing. If there are no fears that they may be kidnapped, then it will be convenient to tai and leave them laid out in their places - less time will then go to the selection of the necessary parts. |
 | The assembly of the side walls begins. The crossbars, upper and lower, are attached to the racks (blue arrow). Assembly is carried out using 6x60 bolts. |
 | The bolt is tightened at the beginning, until the installation of the frame is complete, for now by one nut. Then, when the frame is assembled and carefully aligned at the corners, it will be possible to make the final tightening with the installation of locknuts. |
 | After fixing the upper and lower crossbars to the posts, a reinforcing jumper is placed in the center between them. There is a nuance - it is impossible to insert a washer and a nut into the pipe, so you have to use another method. You can go through both profiles, and take a longer bolt. Another option is to use a metal roofing screw. In this case, it is advisable to make a through hole only in the upper wall of the upper profile. In the bottom wall (shown by the arrow), as well as on the second profile, a hole is made either of a smaller diameter, or only outlined (the wall is weakened for a good and reliable passage of the self-tapping screw). In the same way, the central vertical support post is installed, in the center of the structure. |
 | When both sides are ready (blue arrow), they are connected with horizontal straps (red arrow). This is how a general, already three-dimensional structure is formed. |
 | In general terms, the shape of the garage frame is given. Stability is clearly not enough for him yet. It is imperative to align the right angles on each side. The building level is not an assistant to us in this matter - there is no guarantee that the bottom is strictly horizontal. The best option is to measure and compare the diagonals - they should be the same length. You can fix the rectangle by installing inclined fasteners (shown by arrows). |
 | Close-up puff. Their installation, of course, will increase the overall strength of the structure, but it will also require additional parts - they, for example, do not appear in the list of blanks posted above. |
 | It is also possible to give rigidity to the frame rectangles with the help of kerchiefs cut from metal with a thickness of 2 mm. They can be inserted into the joint by slightly loosening the screw. Then it is tightened, the diagonals are aligned, two holes are drilled in the kerchief on each side, and it is already finally attached to the structure, securely fixing the angle. |
 | We turn to the assembly of triangles-trusses, which will create rafter pairs and a kind of floor beams. Here, the installation of overlay parts is not very convenient, since there will be difficulties in further plating the gables with metal. It is better to make a cutout on one of the rafter legs in the ridge part, and then insert one into the other, finally fixing it with a bolt or a curly metal plate. |
 | Do the same at the junction of the rafter leg with the horizontal beam. A grinder makes the appropriate cuts (shown by an arrow), and then the parts are driven into another and fixed with a bolt or self-tapping screw. |
 | After these triangles are assembled, they are installed and bolted to the horizontal lintels of the front and rear walls. The picture clearly shows the mutual conjugation of the parts - the rafter leg and the beam, inserted into each other. |
 | The same connector in a different perspective - top view. Then the same structure is attached in the middle of the longitudinal side walls of the frame. The only difference is that it is possible to mount the triangle according to a simplified scheme, overlay - in this place it does not really matter. |
 | You can immediately start preparing for the gate. For this, hinges are mounted to the side posts of the frame itself on its front side. A vertical gate frame is attached to their reciprocal half. |
 | The very design of garage doors can be different. In this case, the simplest scheme is shown - with two symmetrical flaps, which are rectangular frames from the same profile pipe. Then, when cladding with metal sheet or wood and when insulating, they can be reinforced with puffs or jumpers. |
 | It remains to complete the construction of the roof. For this, four frames are being prepared, which will stand between the rafter legs on both slopes. So that all sides of the frames are in the same plane (this is necessary for a snug fit of the roof structure), the parts are not connected into an overlay, but "in a quarter", that is, grooves are outlined and cut out first ... |
 | ... and then the parts are connected and bolted. |
 | The assembled frames (shown by the arrow) are inserted between the already standing trusses and bolted to the rafter legs. In total, four such frames are to be assembled and installed. |
 | This is how the connecting unit in the ridge part of the garage pediment will look like. |
 | In fact, the assembly of the frame is complete. True, it is worth making one more clarification - the photo shows the assembled structure, which then still underwent minor changes. We are talking again about inclined puffs. The operation of such a frame has shown that too long (3 meters and even 4 - behind) horizontal spans are not a very good solution. Therefore, in the final version, additional vertical struts were used, two for each side and one for the back. It is this option that is shown in the drawing above. |
If the garage will be placed on a foundation, then the frame is knitted in a convenient way with embedded anchors or pins. At the same time, they do not forget that waterproofing must be laid between the concrete of the foundation and the metal structure - several layers of roofing material. Then it remains only to finally tighten and fix all connections with locknuts, process all the parts anti-corrosion soil - and you can go to the wall cladding.
Wall and roof cladding
Actually, the most difficult stage of construction is over. If a high-quality frame is ready, then it will not be difficult to carry out the outer wall cladding and put the roof.

Installation of walls can be carried out both on (but only when using rolled metal sheet) and on threaded connections. Bolts can be used by drilling through holes for them in vertical and horizontal parts, and then tightening the fasteners from the inside. When sheathing from corrugated board is installed, special self-tapping screws for it are quite acceptable. True, at the same time, one should not forget that it will not be difficult for an attacker to dismantle such a fastening without opening the garage door, so this option is called with a certain degree of caution. Often, rivets are used to fasten corrugated sheets.

The cut sheets are driven as tightly as possible to each other (if sheet metal with a thickness of 2 mm or more is used), or laid with an overlap, with mandatory fixation, including along the overlap line. When using corrugated board, the task is simplified - there the sheets simply overlap by one wave, thereby aligning vertically.
In the version of the frame, which was considered in the article, it is likely that it will also be necessary to install wooden slats (boards) on the outside of the vertical posts - so that all the parts come out on the same plane. The slats can be fixed to the profile pipes with self-tapping screws.
The frame structure of the roof allows you to make any type of wooden lathing (solid or with a certain pitch) on it for fastening the roofing material. You can get by and easier - attach the sheets of corrugated board directly to the metal parts. True, in our case they are spaced far enough away, and the crate still does not hurt. Moreover, it will be necessary if, for example, slate flooring or soft roofing is planned.
When installing the roofing, one should not forget about the eaves overhang, at least by 150 ÷ \u200b\u200b200 mm - this will to some extent protect the walls from direct rain. It is even better if gutters are installed on both sides. Since in the variant under consideration the roof is gable, a ridge profile will also be needed, covering the joint of the two halves of the roof.

Practice shows that the entire garage on a metal frame (which was described in the article), completely covered with inexpensive corrugated board, will cost about 25 thousand rubles. This cost, of course, does not include the “zero cycle” and insulation measures. But even when purchasing an expensive prefab garage, the buyer also only pays for the metal box.
Insulation of a metal garage
In fact, after the wall cladding and the installation of the roof, the hinge of the gate with the installation of locks, the work on assembling the metal garage can be considered almost complete. If the entrance is equipped, if necessary, and a reliable one is laid (there is a special publication about this on the portal), then you can safely drive a car into it
However, the caring owner will not be too lazy. take actionto maximally protect your four-wheeled pet from the winter cold or from the metal walls that heat up in the sun in the summer. In short, it is advisable to immediately address the issues of thermal insulation of the garage.
Before carrying out the insulation, it is imperative to revise the surface of the metal walls from the inside. If a it's bare metal, then it is necessary to treat it with anti-corrosion primer.
As a heater, ordinary polystyrene foam blocks, about 50 mm thick, are very often used. They are laid between the frame posts, and the foam can be fixed with glue directly to the surface of the walls. To insulate the flow, you can make a light "filing" from the beams to the existing cross beams, supplementing it with a rough surface (top) made of second-rate boards. Between the beams of such a ceiling frame, it will also be easy to lay blocks of insulation.
 Warming with expanded polystyrene in a garage is a rather risky decision
 - Expanded polystyrene, of course, has high thermal insulation qualities, is cheap and very easy to use. But he also has such qualities that call into very great doubt the advisability of using it in the garage. First, it is not a non-flammable material, and the proximity to flammable liquids in itself will pose a certain threat. In the event of a fire, such insulation will become one of the hotbeds. And the second is the chemical instability of the material to many technical fluids (for example, organic solvents), which are often used in garages, especially if a mini-workshop is also equipped here. And the probability of such chemical reagents getting on the walls, though small, is still there. And the last - with strong heating (for example, from red-hot in the sun of metal walls) polystyrene foam of low quality can emit a rather pungent odor. It will be very unpleasant if the interior of the car is also saturated with this smell.
 Mineral wool is the best option in the triad "safety - quality - price"
 - In terms of practicality and safety, the undisputed leader in these conditions will be mineral wool. ITS rolls (mats) are rolled out between the frame posts, or for insulation, a wooden crate is specially mounted on the walls inside. The step of the guides and their thickness should ideally correspond to the width and thickness of the mineral wool roll. It will be easy to temporarily fix the insulation by pulling a nylon cord between adjacent guides in a zigzag fashion.

- The most reliable solution would be to spray liquid on the inner surface of the garage walls. It quickly gains a volumetric shape and solidifies in a continuous layer, leaving no "cold bridges". There is only one drawback of this approach to insulation - it is impossible to carry out it independently, without special equipment and work skills, and services for such thermal insulation are very expensive.
Prices for thermal insulation materials
Thermal insulation materials
Video: insulation of a garage with sprayed polyurethane foam
The insulated surface of the walls and curtain is covered with a finishing finish. Most often, either plywood is used for this, or, much better, sheets. After such a cladding, you can proceed to the arrangement of garage furniture, the installation of lamps (if any), the canopy of shelves or cabinets, etc.

The issues of garage insulation are discussed in great detail in a separate publication of the portal. It is, however, more dedicated, but in the case of a frame metal garage, the technology is exactly the same.
That's all, it remains to put the final polish, if necessary - paint the garage outside with a durable atmospheric paint for metal - and you can "celebrate housewarming"!
Video: a simple option for a light metal garage or shed
A metal garage is a practical and convenient construction that is perfect for parking a car. The main feature of such a structure is its wide variability, depending only on your desire. Do you want to build a huge room for several cars with a viewing hole? Easy! Or do you need a small building that can fit into or a personal plot? It couldn't be easier! Making a metal garage with your own hands is not difficult if you have the skills, as well as all the necessary tools.
The most important advantage of a metal garage is its low price. If you take on the work yourself, then this will significantly save on the services of construction companies. Other advantages of these buildings include:
- speed of construction. The whole process will take no more than one month;
- durability and excellent performance properties of the metal. With proper care and processing, it perfectly resists weather conditions, does not rot and allows you to completely isolate the contents of the garage from the external environment;
- ease of construction. For such a structure, a too deep foundation is not required, which will save you money and time;
- ease of work with the material, a minimum of handy tools.
The structure is based on a metal frame (profiles and corners) to which sheet metal is attached. The garage is often supplemented with runners (if it is supposed to be moved), as well as a layer of insulation to maintain the optimal temperature regime in winter.
Tools and materials for construction
As mentioned earlier, this structure requires a minimum of tools and consumables. To build a metal garage with your own hands, you will need:
- ready-made concrete blocks for foundation or concrete mortar with reinforcement;
- metal corners 50 mm;
- iron sheets with a thickness of up to 3 mm (the optimal size is 2.25-2.5 mm);
- welding tool and electrodes;
- bulgarian;
- wheels for grinding and cutting;
- materials for the manufacture of the lock (hinges, the locking mechanism itself);
- floor boards (if a strip foundation is assumed);
- paint for metal and a primer solution.
How to make a metal garage with your own hands: step by step instructions
Construction of a metal garage consists of several step-by-step stages:
- Preparation and pouring of the foundation.
- Erection of the structure frame.
- Sheathing with sheet metal.
- Gate installation.
- Installation of a lock and other locking mechanisms.
- Finishing work.
Each of these sections is different and requires strict adherence to instructions for optimal results. Let's consider each of these points in more detail.
Foundation
Metal is a fairly light building material. In this regard, there is no need for a deepening more than 25 cm. There are two main options for filling the pit: with a ready-made concrete slab (pre-reinforced) or self-pouring the foundation with a concrete solution. The first method will not work if you plan to equip a viewing hole, since there simply will not be room for it. Often the foundation is also the floor of the room. This will save on building materials, while speeding up the process, but worsening the appearance of the garage.
Which of the ways to form the foundation to choose, naturally, is up to you. Adhere to the following rules when carrying out these works:
- the upper part of the foundation should rise above ground level by about 15-20 cm. This will exclude the flow of water into the room;
- the surface of the slab or hardened mortar must be perfectly flat. Use the level during the construction of the foundation;
- if the solid slab was initially uneven, then correct it with gravel;
- rods from reinforcement are concreted into the corners of the foundation, which will serve as the basis of the frame;
- the foundation should be poured in one day. So you get a monolithic and integral base for future construction.
The standard dimensions of a garage for one car are 3.5x6 m. If you want to additionally insulate the garage, then increase these values \u200b\u200bby 20 cm on each side.
When the foundation hardens, a layer of waterproofing material (roofing material) is laid on it. The joints of the sheets are covered with mastic. The next layer can be a concrete screed or a plank base, securely embedded in the foundation.
Frame
The material for the frame is a metal corner. Products with a large section should be selected. This gives the structure strength and reliability. The frame is assembled directly at the place of the laid foundation. This process takes place in several stages:
- Installation of the lower frame. This structure is attached to pre-prepared rods. At the same time, they remain indoors.
- Vertical supports are mounted in the corners.
- In front of the structure, two additional corners are installed on both sides. A gate will be installed on them.
- All corners are connected from above by frames.
The last stage is the formation of the base for the roof. If you are planning a structure with one slope, then simply bring two additional frames on top of the rest using props. The gable structure will require the preliminary preparation of two frame triangles (rafters), which are installed on top of the finished structure, attached with a welding machine or bolts.
To increase the strength of the walls, it is permissible to install additional supports in the horizontal and vertical planes. Be sure to observe a uniform pitch when installing them.
Metal cladding
You can make this material yourself from steel sheets of the required thickness or profiled sheet. You can also buy ready-made sheathing from a hardware store. Preference should be given to galvanized steel. This will prevent corrosion, which will lead to the loss of the original characteristics of the structure. The optimum sheet thickness is 2.25-2.5 mm.
Steel sheets can be fastened to an already finished frame using a welding machine or bolts and nuts. When installing the cladding on the roof, an overlap of 15-20 cm should be made in relation to the wall to ensure adequate drainage of water from the surface.
Gate installation
The most practical have long been recognized as double-leaf gates, swinging outward. You can make them yourself: first, the frame of each sash is made, and sheets of iron are attached to it. The technique is not very different from the wall and roof cladding of a garage. Gate sheets should be thicker (4.5 mm or more).
Installation is carried out on internal hinges, which prevents the gate from breaking.
You can also do it yourself, which we have already discussed in the previous topics.
Insulation of walls and gates
It will help to maintain a comfortable indoor temperature, while preventing its sudden changes. This is one way to deal with condensation that appears on the walls and ceiling of the garage. Styrofoam (a type of foam) is perfect as insulation. It has high thermal insulation properties, but is flammable. To insure yourself against fire, use mineral wool, which is placed between the metal sheathing and other sheet material inside the garage (chipboard, MDF, LDF).
Painting outside
To protect the garage from corrosion, while giving the structure a complete look, various paints for metal are used. It is recommended to use acrylic and alkyd. They set quickly and produce vibrant, saturated colors. It should be noted that alkyd paint is more flammable and toxic than acrylic paint. This is its main disadvantage.
Oil paint is not suitable for external treatment of the structure. It is unstable, but it will quickly lose its original appearance after rain or snow.
Castle selection
- a guarantee of the safety of the contents of your garage, so do not skimp on purchasing it. It must be metal with a width of more than 4 mm. Padlocks should be avoided. They are an easy target for burglars. The most optimal would be the installation of an overhead and mortise locks. They provide the required degree of protection, while being quite easy to operate. They are attached using a welding machine. Bolts and nuts will not help here, as they are easy to twist and then get into the room.
Another way to protect your garage is to install a camera. It is unlikely that someone will dare to covet the lock under the close supervision of a video surveillance system.
Before you start building a shelter for your car, it is worth deciding what material you will be building it from. There are many options and a brick garage is no exception. But in this article I would like to focus on one simple and cheap option, which is quite reliable and looks quite aesthetically acceptable - we will talk about a metal garage. Such a structure has its pros and cons, and everyone can decide which of the garages to build for themselves.
The advantages of a metal garage with your own hands are in the ease of transportation to the site, and if it is being built, then in the ease of installation. The welded structure also allows the garage to be moved to another location, and transportation is carried out by a manipulator and a truck. Therefore, the convenience of such a garage is definable for people who often change their place of residence.
In addition to mobility, a do-it-yourself metal garage is quite inexpensive. The car will be located near the house in a protected area, and the metal is very durable. The metal garage does not need finishing and pouring a concrete floor. All parts of the garage are made of sheets of steel; the roof does not have to be covered with special methods either. It is quite simple to create a metal garage with your own hands. To do this, you should stock up on materials and tools, and then start work, however, it is worth considering that according to the preliminary plan, construction work is carried out much better and faster.
Required materials and tools
The first thing to do before starting work is to draw a drawing where you can familiarize yourself with all the necessary dimensions. The dimensions must be adjusted to the operating conditions of the future structure. If it is being built only for a car, the width should be the same as for a car with open doors. If you plan to equip the building with a rack for tools, store spare parts - you should definitely expand the dimensions.

Also, inside the garage, you can carry out repair work and vehicle maintenance. Toolboxes, a workbench, shelves with a rack and everything you need should fit inside. What tools and materials do you need to prepare to get started?
- concrete and reinforcement rods;
- ready-made concrete blocks;
- metal pipe 10-15 centimeters in diameter for runners;
- a fifty-millimeter metal corner;
- metal in sheets, its thickness is from two to two and a half millimeters;
- electrodes and welding machine;
- grinding wheel, cutting off for the grinder and the grinder itself;
- lock, bolt and gate hinges;
- floor boards, if the foundation is strip or on runners;
- paint and primer.
Step by step technology
Each work includes certain stages. The process of building a metal garage with your own hands consists of the following stages of work:
- foundation construction;
- installation of a frame for the room;
- installation of cladding, or the creation of walls;
- insulation for the winter.
Each of the stages needs a specific action plan, and then each stage will be considered separately.

First, the site is marked. The land plot must be modified in accordance with the requirements of the foundation. For the foundation on runners, the fertile layer is removed. Having covered the site with sand, you will raise and protect the coating under the foundation from heaving during frosts. Sand is able to drain water.
Marking is done with a peg, twine, tape measure and square. The plank formwork, or rather, its ground part, should be 30-40 centimeters above ground level.
Foundation
The foundation is the basis of the entire structure. There are several types of such a foundation, including:
- tape;
- columnar;
- tiled.
The tape option is very common; to install it, you need to dig a trench around the perimeter of the future structure. The depth is determined by the soil freezing parameter, but more often than not one meter is enough. The width must be greater than the thickness of the future walls.

Any foundation must be reinforced. The frame for the reinforcement is created from steel rods 10-12 centimeters thick in diameter. The rods are tied with wire, but it is not advisable to weld them - overvoltage of the foundation can destroy the structure.
For concrete mix we need sand, cement M-500 or M-400, crushed stone, not very coarse. Using the materials described, the foundation can be quite inexpensive. Ready-made concrete can also be bought, although it is slightly more expensive than making it yourself, you will significantly save time. Half of the required strength can be achieved in six or eight days. After this time, you can safely prepare and lay the frame.
Frame
A frame for installing a metal garage with your own hands does not always require serious expenditure of money and effort. Ready assembled frames are sold today, and even shipping / installation can be free.

Garage frames can be wood or metal. Iron frames are fireproof, strong and durable. The metal can withstand even hurricane gusts, which will reliably protect your vehicle. For the frame you will need:
- metal profile 10x10 for rafters and floors;
- smaller profile for lathing;
- self-tapping screws.
The structure is assembled according to the drawing, the workpieces are interconnected with self-tapping screws and bolts.
Walls
The walls are made up of frame sheathing. Among the available types of cladding are steel and corrugated board. The material for the walls should be chosen for a long time so that you do not have to overpay for repairs.
Most experts offer prefabricated garages made of sheet steel or corrugated board as the best option, all these materials are attached to a previously prepared frame. Garage kits are inexpensive and quick and easy to install. The disadvantages of materials are as follows: poor thermal insulation, sometimes fire safety.
Warming
Warming becomes necessary with the onset of winter. How to do this if your garage is metal? The answer is simple - in the same way as all other types of buildings. In this case, both glass wool and foam can come to the rescue. Any available insulation can be mounted on the walls from the inside. And you can cover them with anything that will please the eye and create a beautiful and unique design.

How to install foam or glass wool? They can be fastened with wooden or transverse bars, which will be located between the posts.
Painting and locks
From the inside, the coating can be plastered, painted. It is mandatory to paint the garage from the outside. Before the procedure, rust is removed from the metal, covered with an anti-corrosion primer, dried and only then covered with paint. The paint must be special for metal.