The production and appearance of ceramic tiles are now improved, but the popularity of ceramics has remained unchanged for centuries.
Why is ceramic tile so good?
- versatility of application - from decorating a fireplace to a balcony, kitchen, building facades;
- choice of color, size and shape for every taste;
- resistance to various aggressive substances;
- moisture resistant, heat resistant;
- strength and durability;
- easy to care for;
- made from natural raw materials.
The relevance of tiles on the walls
Thanks to the listed positive properties of tiles, use in the kitchen will be the right decision. A variety of colors, textures and sizes fit this material into the interior of any style - from country to minimalism. The tile will protect against water, hot steam, oil splashes during cooking. Apron along the work surfaces, will be nice and clean, as the tiles are easy to keep clean.
What tiles can be put in the kitchen
 Any ceramic tile can be used in the kitchen for wall decoration, kitchen apron. To avoid mistakes when choosing, follow the recommendations of professionals:
- tiles are chosen after they have decided on the style and color scheme of the kitchen set and other elements of the kitchen interior;
- buy tiles with a margin of 10-15% in case of a fight when laying, trimming;
- the required number of tiles is calculated by the master who will lay them. The seller in the salon does not see the walls and features of the space, the calculation will be inaccurate;
- the size of the tiles is selected according to the size of the apron. A large format of ceramics in a small kitchen looks losing.
For an apron, tiles are more often used:
- Size 10x10. Requires less trimming, easier to lay if there are many corners and bends of the surface.
- Clinker tiles, or boar. Appropriate in any style - loft, classic, country, art deco, minimalism and other styles.
- A real mosaic from 1x1 cm to 5x5 cm, or an imitation with recesses that create the effect of seams between mosaic pieces.
- Medium format tiles - 15x15, 20x20, 20x30, 25x30 cm.
If the interior features or the size of the room require other options, feel free to choose what suits you.
A bold decision, for example, would be to decorate the walls with photo tiles. This is a ceramic tile, made individually, with a photographic image applied.
Do-it-yourself technique options
 Tiles are laid on the walls in various ways. Most often used:
- "seam to seam" - the tiles are laid in rows strictly above each other, this is a classic way of laying;
- “in a run” - the second row of tiles is shifted relative to the first so that the seams between the tiles of the second row are above the center of the tiles of the first row, this is repeated in each subsequent row;
- “Diagonally” is a time-consuming method that requires careful marking of diagonals and cutting tiles;
- "chess" - combine tiles of two contrasting colors;
- "modular grid" - use three or more tiles of different shapes and sizes, distributing them randomly horizontally and vertically.
Tiles are laid out in one of these ways, sometimes a combination of methods is used in the same room, highlighting different zones with this design.
Visually adjust the size of the room will help a certain way of laying tiles.
How to glue ceramic tiles on the wall in the kitchen
 Laying ceramic tiles for different rooms and surfaces has general principles:
- A laying plan is being drawn up. The required number of tiles is calculated, taking into account trimming, combat.
- Prepare walls for installation.
- Remove old coatings. If necessary, the walls are leveled. Then primed, for better adhesion (adhesion) of the tile to the wall.
- Next, proceed to laying the tiles.
How to put on an apron
First determine the height of the apron. This space is from the countertop of the kitchen set to the hanging cabinets, 60-70 cm. To avoid unnecessary trimming, the height of the apron is adjusted, and the whole tile looks better than the halves.
The first row of tiles is launched 2-3 cm below the level of the work surface. The last row is launched under wall cabinets at the same distance.
Laying technology:
- On the prepared wall, using a level, draw a horizontal line at the beginning of the first row. Under this line, a metal profile or a wooden block is attached to the wall. This support will not allow the tile to slide down under its own weight.
- Lay out the tiles start from the middle of the wall, from the most prominent central place, moving from the center to the edges.
- The adhesive solution is kneaded immediately before laying. Follow the instructions on the packaging. Pour the dry component into the water, stir until smooth. Defend 10-15 minutes. Mix again.
- With a spatula with teeth, apply the adhesive solution to the wall, or to the tile, whichever is more convenient for you. Apply to the wall, resting the lower edge on the profile, press evenly. Tap with a rubber mallet to let out excess air.
- Mounting crosses are placed at the upper and lower corners of the tiles, which regulate the thickness of the seam.
 Are tile joints required? Yes. When the tiles expand from elevated temperatures, they protect against cracking. They also compensate for inaccuracies in the size of the tiles.
- Apply glue to the next tile. Repeat the steps as with the first. Thus lay out the entire first row. Do not forget about the crosses between the fragments.
- After gluing ten tiles, remove excess adhesive with a damp cloth. If this is not done, the dried solution will be difficult to remove.
- The second row begins after the first has completely dried. This is in a day.
- Having finished with gluing all the rows, the masonry is allowed to dry. Then they tap with a mallet in search of a dull sound that speaks of emptiness. Such an element is removed and glued again, carefully applying the adhesive composition to the tile.
- The next step is to wipe the tile from the remnants of glue and proceed to grouting the joints with a fugue. Don't forget to remove the crosses.
- Fill vertical and horizontal seams with a silicone spatula. An hour later, after the fugue has dried, the seams are trimmed.
- After completing the filling of the joints, give two hours for the complete drying of the grout. The remains of the fugue are removed with sweeping movements using a kitchen sponge. Wipe with a dry cloth, then wash. So there will be less stains from the grout.
Don't forget to unscrew the support profile.
How to stick on a flat wall
If tiled work is to be done on even walls, then there are no special laying secrets. It is enough to prime the walls, and then follow the instructions for laying the tiles.
How to glue on concrete without leveling
 The concrete surface usually does not require leveling. But it has low adhesion. For a good setting, a metal plaster mesh is attached to the concrete surface.
The second way is when laying ceramics on concrete, the surface is carefully primed with Betonokontakt. The agent dries 12-18 hours. Then proceed to the tile work.
How to put on drywall
Drywall walls are primed before gluing the tiles.
The only difference between laying tiles on a GKL surface is that the adhesive layer should be as thin as possible. This is to reduce the load on drywall.
The second difference is that after gluing, the tile cannot be removed or corrected. When dismantled, the ceramics will move away along with a piece of drywall. Glue the tiles immediately carefully and carefully.
 A high-quality tool, the use of a special adhesive solution - will speed up the process of laying tiles.
If, when laying ceramics, the adhesive solution is applied to a wall with an area equal to 3-4 tiles, the process will accelerate. It remains to take fragments and press them against the wall one by one.
The Raimondi Leveling System special clamps system helps to fasten several tiles together, while aligning them in one plane. With these wedges and clamps, tiles do not need to be leveled flat.
When decorating the walls of the kitchen with ceramics, take care of the combination with other finishing materials, furniture, accessories. Buy material from trusted suppliers, follow the installation recommendations, and the result will be a cozy interior that pleases the eye and soul.
Useful video
Ceramic tiles are deservedly considered one of the best materials for decorating the kitchen. Such "clothes" are beautiful, durable, resistant to moisture and high temperatures. Manufacturers today offer many tempting options for decorating the kitchen space, however, the cost of laying often exceeds the cost of the material, so the question of how to lay tiles in the kitchen does not lose relevance.
The problem that anyone who decides to tile the kitchen will inevitably face is which tile to choose for the kitchen? The presented assortment is diverse: customers are offered matte and glossy, smooth and embossed tiles of various shades. What should you pay attention to when choosing first of all?
Kitchen tiles must be heat and moisture resistant, not be afraid of the aggression of chemical solutions and mechanical stress. Pay attention to the size and weight - the lighter the tile, the easier it will be to glue it to the wall, a large tile fits twice as fast as a small one.
It is important!
According to standards, when saturated with moisture, the increase in the weight of a tile should not exceed 1%.
As for the size, for small kitchens in small apartments, the best option is 10x10. However, do not forget that small tiles are more difficult to lay and level. Large spaces can be finished with larger specimens - 20x20 or even 30x30 cm.

Think in advance about the color of the tile and texture, consider the overall design of the room. You can calculate the amount of material as follows: determine the area of \u200b\u200bthe wall and add 10% to the resulting number (for pruning and a possible battle).
Video instruction
In order for the result to please for a long time, it is necessary to prepare the tools in advance and strictly adhere to the sequence of work.
Instruments
- grinder or tile cutter;
- hammer;
- crosses;
- glue;
- ruler, level;
- metal profile for drywall;
- bucket with water;
- spatulas (small rubber and wide notched);
- dowel-nails;
- pencil.

Surface preparation
Beautiful and reliable laying begins, first of all, with the preparation of the work surface. The walls must be cleaned and treated with a deep penetration primer, and then with a sand-cement mortar.
It is important!
Clay, lime and gypsum mixtures are not suitable for surface treatment.
You can prepare the walls in 2 ways: we level with plaster or drywall sheets. Consider the sequence of actions of the first and second methods.
Plaster leveling
- clean the walls from dust, remove the old coating;
- roughen the surface (stuff shingles on a wooden wall, apply notches on a concrete wall);
- treat the working area with a deep penetration primer or betokontakt, which will help to avoid peeling of the plaster;
- install beacons, attach corner profiles to external corners;
- prepare a sand-cement mortar and, 20 minutes after mixing, apply it to the walls with throwing or spreading movements;
- prime the surface.

Leveling with drywall
- with differences of more than 5 cm, standard sheets of drywall should be purchased for gluing onto mounting glue;
- make sure there are no crumbling areas;
- apply primer;
- cut drywall for sockets and ventilation;
- take care of hidden wiring (sockets and boxes for switches should protrude 20 mm above the base);
- apply gypsum or mounting glue to the cut sheets and glue the drywall to the wall;
- until the glue has hardened, level the sheets with a level and a rubber mallet;
- prime the walls, putty the seams.

Important Points
Please note that tiles are not laid behind wall cabinets and kitchen tables, because in this case, material overrun cannot be avoided. If you decide not to deviate from tradition and want to tile an apron, then draw a horizontal line in the place where the countertop will end. Attach along this line a metal profile for drywall sheets with a margin of 3 cm, on which the bottom row of tiles will be based.

Plastic crosses are used to adjust the position of the tiles and the thickness of the joints. Thus, if you need seams 3 mm thick, then you should choose the appropriate crosses.
The dimensions of the spatulas also depend on the dimensions of the selected material. For laying large tiles, you will need a spatula with a tooth width of at least 10 mm, for small tiles - 6 mm. In addition, there is one that will harmoniously fit into the interior.
Sequencing
The process of laying tiles is simple, even for a beginner who has faced this task for the first time, it is possible to lay tiles with high quality. However, it does not hurt to get acquainted with some of the nuances.
We knead the glue
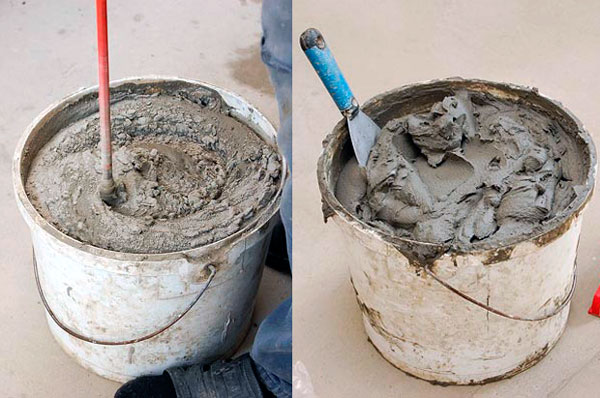
Glue after kneading is not used immediately - it must gain plasticity. This usually takes 15 minutes. The adhesive composition is applied with a conventional spatula, and the excess is removed with a notched one. To prevent glue from accumulating on the spatula, dip it into a bucket of water from time to time. If possible, try to keep the tool perpendicular, without tilting.
We glue the tiles
We fix the tile to the surface - if the preparatory work is done correctly, then the tile lays down as it should. Glue the second tile next to the first one and insert crosses between them from below. Do not forget to check the plane with the rule - there should be no intervals. By the way, after an hour after the completion of the work, the crosses should be removed - otherwise it will be problematic to do this later.

Some prefer to first apply the adhesive to the wall or floor, and then glue the tiles. Undoubtedly, this way the work will go twice as fast, but it will not be easy to achieve perfect masonry.
Check the verticality of the rows with a building level. If there is an obstacle, for example, a socket, draw the contours with a pencil and attach the tile to the socket from above and from the side - so you will accurately determine which of the contours should be cut. Please note that the cut line should be on the wrong side.
It is important!
Do not glue the tiles immediately after trimming - check if you did everything right.
It is easy to increase the adhesion of the material and the surface - just tap on the tile with a rubber mallet or mallet. It is most convenient to cut tiles with a tile cutter; curly cutouts can be obtained using a grinder.
For the neat design of window slopes or corners, plastic corners are used, which should be 2 mm thicker than the tiles.
Grouting
Grouting powder, chosen to match the color of the tile, is diluted with water and applied with a rubber spatula between the tiles. To simplify the work, you can use an extrusion gun or an empty pipe from under the sealant.

Excess grout is removed with a damp sponge. Act carefully so as not to remove the fruits of painstaking work cleanly. After a few hours, wipe the tile with a cloth and admire the result.
The work is completed, the tiles are laid and pleases with even masonry. As you can see, laying tiles in the kitchen with your own hands, if you wish, is quite simple. The main thing is to follow simple rules that will help transform the kitchen space and bring beauty to the house.
If you once spend a couple of days to lay out tiles on the floor in the kitchen, it will last you 10-15 years of use. Due to low cost, practicality and exceptional moisture resistance, this material is considered the best solution for rooms with high humidity and load. In the last article, we talked about, and now we will take a step-by-step look at how to lay tiles in the kitchen correctly.
The choice of floor tiles for the kitchen depends on whether you want to get a solid color or ornament, prefer the quality of foreign materials, or inexpensive Russian tiles are more suitable for you. In this article, the finishing will be carried out on the example of Ukrainian embossed stone-effect tiles from Inter Cerama 35*35 cm in size (BARI collection in light brown color).
Quick article navigation
Necessary tools and materials
For styling you will need:
- Two-meter level or rule for checking the plane;
- Bubble level 40-50 cm;
- Roulette, pencil, paint cord;
- Brush or roller for applying a primer;
- Spatula: regular and comb with 12 mm teeth;
- Rubber mallet;
- Bulgarian with a diamond disc;
- Deep penetration primer;
- tile adhesive;
- Plastic wedges and crosses for seams 3 mm;
- Grout and rubber spatula.
Preparatory work
If you have chosen a monochromatic design, as in our case, this is not difficult to do. Consider the floor area and add 10% for the margin.
Or you make it easier - knowing the size of the tile, consider how many pieces you need to lay out along the length and width of the room, taking into account trimming.
If you choose a floor finish with an ornament, please note that the amount of waste will increase.
Prime the screed liberally with any deep penetration primer and wait until it dries.

The presence of an even screed will not only greatly simplify your work and reduce the consumption of glue, but will also guarantee that after laying the tile will not crack due to the uneven setting of glue of different thicknesses (it shrinks at different speeds when it dries). Therefore, do not spare the money, and before laying the tiles in the kitchen, make at least a rough screed with waterproofing.
markup
From the wall where the entrance to the kitchen is located, measure a distance equal to the width of the tile, taking into account the gap of 5 mm, which will then be hidden under the plinth.
Pull the paint cord along the marks and beat off the line. The first row of tiles will go along it.

For laying tiles in one direction, there are auxiliary arrows on the wrong side. But when you smear it with glue, this arrow will not be visible. To fix this, immediately make marks on the ends with a pencil.

Make a mark in the center of the door and place a tile there without glue as a guide.

This object has an exit to another room through the loggia, so the laying of tiles in the kitchen goes from the door, so that it is easier to make markings and there are whole rows in the center of the entrance. In other cases, you can not lay several tile paths to leave your way back, or start from the opposite wall.
Glue preparation
According to the manufacturer's instructions, pour the required amount of water into a 10-liter bucket and gradually add glue there. In this case, the mixture must be constantly stirred with a mixer or perforator with a whisk nozzle.
Try to achieve the consistency of thick sour cream and leave the glue to mature for 5-10 minutes, and then mix it again before applying.
Laying floor tiles in the kitchen
- Apply the adhesive in an even layer on the tile itself using a regular spatula. Then run a comb along it at a right angle so that the same grooves of glue remain.
- Throw excess glue back into the bucket, and it is better to put the spatula in water so that the glue does not harden on it.
- We put the first tile to the right of the previously laid "beacon". We combine the edges along the line and press down to the floor. Then we check with a short level whether it lies flat.
- If one of the edges is uneven, tap it with a rubber mallet, and then check again with a level.
- We continue laying in the direction to the right. We insert plastic crosses between the tiles. Before inserting the cross, run it along the seam to remove excess glue, otherwise, when it dries, it will be very difficult to do. And in order not to accidentally move the tile towards the wall, put plastic wedges there.
- We finish laying the first row to the right side and check the overall level using a long level. If it is not there, a long rule or even a flat profile of 1.5-2 meters with a small bubble level attached will do.
- If unevenness is found, you have 15 minutes after laying to carefully remove the crooked tiles and add grout, or remove excess. If more time has passed, the adhesive will already begin to set, and it will be necessary to first remove the tile and clean its surface and the place under it with a scraper.
- Near the wall, you may need to trim. High-quality floor tiles are much harder than wall tiles, and it is better to cut them off with a grinder with a smooth diamond blade or an electric tile cutter.
- We lay the trim and finish the row on the left side of the kitchen doorway.
- We also start the second row from our beacon in the center of the door and go to both sides of it. We check each tile for level and combine the corners with neighboring ones. Finishing the floor is greatly simplified if you have high-quality tiles, but cheap domestic tiles can differ by several millimeters even within the same box.
- When we reach the pipes, with the help of a grinder we make cutouts for them. Sometimes you need to make round holes. For this, there are special attachments for the drill - crowns and ballerinas.

Glue application

To simplify the alignment of the tiles among themselves, there is one simple way: before pressing the next tile, put a level on it so that it hangs from the side above the previous element. So you will see how much more to lower it until the level touches the previous one.


Conclusion

At the end of the work, we check the floor surface again with a long level in different directions. If all is well, after a day we clean the seams from the remnants of glue and fill them with grout of a suitable tone. After 30 minutes, the excess grout is removed with a damp sponge, and after another day, the surface of the tile is finally washed from stains and is completely ready for use.
Laying tiles in an apron in the kitchen can not be trusted by all specialists. It is much more reliable to do everything yourself, even if you have no experience. The main thing is to know how to lay out the tiles correctly. And when your apron is ready, you will be surprised how easy it was.
We determine the size of the apron and calculate the material
To make an apron in the kitchen with your own hands, you need to determine the material consumption. And for this - to clarify the size of the area on which the work will be carried out. Here you can navigate to the default settings:
- The entire working area occupies about 55-75 cm in height from the level of the countertop, although it can reach the very floor - a lot depends on the location of the kitchen cabinets;
- Ceramic tiles must necessarily go under the countertop by at least 20 mm - so that dirt and water do not accumulate at the joints;
- From above, the installation of the apron is carried out before the hood - this technique is mounted at a height of 65 or 75 cm from the electric and gas stoves, respectively;
- The horizontal size of the work surface is the entire length of the corresponding wall, although you can limit yourself to only the “sink-work table-stove” section.
Be sure to do all the necessary calculations. And for this - decide how you lay out the apron. There are a lot of masonry methods, but among them we can distinguish the most popular:
- Standard (basic);
- Diagonal;
- Imitating brickwork.

The easiest way is to implement the basic method with your own hands, and the material overrun in this case will be minimal.
Advice! Do not forget that in the process of work, damage to the material, chips, and so on is possible. Therefore, tiles are always purchased with a 10% minimum margin.
What do we need
To lay out a kitchen apron with your own hands, you will need tools:
- Perforator for cleaning from the old coating;
- Screwdriver, supplemented with a special device for mixing the adhesive composition - a mixer;
- Buckets for water and glue with a capacity of at least 10 liters each;
- Spatula for working with the adhesive mixture: narrow for - a set of glue, notched - for distribution, rubber - for working with seams;
- Building levels - short - to check the location of each individual tile and long - to check the entire plane;
- Tile cutter and nippers, an abrasive bar for cutting tiles, correcting chipped areas;
- Rubber mallet to check the tightness of the apron;
- Crosses and pegs, allowing you to set the thickness of the seam;
- Hard pencil, ruler;
- Cord (beat).
Preparing the walls
After all the tools are ready, you need to start preparing the work surface.
- The wall is qualitatively cleaned from the previous coating. If tiles were laid on the wall, then a puncher will be required to clean them and the old mortar. In any case, the surface is cleaned to the plaster layer.
- The tightness of the plaster layer should also be checked - peeling elements are completely removed, after which all irregularities are repaired.
- It is important to make a perfectly even angle if the tile will move from wall to wall.
- It is advisable to make notches in the wall so that the adhesive solution better grips its surface.

Advice! If there are salts, fungus or mold spots on the cleaned surface, it must be treated with a high-quality fungicide with anti-corrosion properties.
Getting started step by step
Step 1. At the first stage, we do the markup with our own hands. , its upper and lower boundaries you must determine based on the dimensions of the headset. As a rule, the distance from the floor to the lower edge of the apron is 70-85 cm. And the height of the apron is 55-65 cm.
Advice! Where to start laying tiles from the center or from the edge, moving towards the corner? It's up to you: if you start the installation from the center, then the cut tiles will be installed at the edges and in this case they must be the same size on the right and left, otherwise the apron will not look neat. If you have a corner kitchen and the edges of the apron are in plain sight, then it is better to start laying from the edge so that the last tile is intact and the trimmings are in the corner.
An even wooden beam is installed on the horizontal level - it will support the tile from below, preventing it from moving out. Sometimes drywall sheets or metal profiles are used for these purposes. And in order to make a vertical mark, a plumb line is installed - a cord with a load is attached at the top of the wall and released. Under the influence of gravity, the plumb line itself creates an ideal vertical.

Step 2 After applying the markup, you need to make an adhesive solution with your own hands. If the mixture is prepared incorrectly, with violations of the manufacturer's recommendations, then it will collapse very quickly and the apron will fall off.

In the process of work, it is also impossible to use a dried solution and it will not be possible to dissolve it, it will lose its adhesive properties.
Step 3 Then we start laying the apron. For beginners, it is best to make an apron using a neat styling method. The size of the tile also matters - the larger it is, the easier it is to work, and it is also easier to maintain, since there are much fewer joints. Accordingly, the smaller the size of the tile, the more seams there will be and the more difficult and longer its installation will be.
We do the work with our own hands in the following sequence:
- The adhesive composition is applied to the wall (with a narrow trowel) and evenly distributed over its surface (with a 3 mm notched trowel). An even layer of glue with grooves should remain on the wall.

Advice! Glue can be applied not to the wall, but to the tile itself. The question of which method is more reliable does not have a clear answer, the opinions of the masters differ. You can experiment and try both ways. The main thing here is to properly press and seat the adhesive under the tile evenly.
- The tile is mounted on the wall with uniform pressure. Then we take a rubber mallet and seat the tile with it (or, by tapping, we press down with our own hands) - this will allow the glue to settle. If you started laying tiles from the edge, then at the same stage, install the corner. After that, with a short level, we check the horizontal and vertical of the laid fragment.

Advice! If the tile lays incorrectly, then you can remove it, correct the adhesive layer and lay it again. Of course, this can only be done until the solution sets.
- All tiles in a row are glued using the same technology. The smaller the size of the tiles, the more times you will have to repeat all these manipulations.
- The next row begins to mount only after the previous one dries. Keep in mind that the first row is the most responsible, and it is better to let it dry for 1 day.
Advice! Do not forget to install crosses between the tiles horizontally and vertically. This allows you to maintain the same inter-suture size.
Step 4 At the last stage, the tiles are trimmed and the resulting pieces are laid. The cut line is drawn with a ruler on the back side, after which a tile cutter (manual or electric), grinder or glass cutter is used.

So you can get any size of the fragment, as well as cut out the necessary recesses for sockets and pipes in the tile.

It is only important not to cut the tile along the front part - this way the material will crack in the wrong place. Holes in the tile are made with a carbide drill and also only from the “inside out”.
Step 5 After all the tile laid with your own hands has dried, you need to tap it with a mallet. A dull thud indicates a poor fit of the tile. Such elements are removed and laid again.
Step 6 After there is no doubt about the quality of the installation, you can start grouting the tile joints. In addition, before processing the joints, all tiles must be washed from repair dust. The grout is rubbed into the seams with a rubber spatula and left for 0.5-1 hour to dry, after which it is leveled and wiped with a damp cloth.
Advice! Do not forget that the shade of the grout should be in harmony with the color of the tile. Ideally, if it is 1 tone darker.
The use of ceramic tiles as a kitchen flooring is the most practical and functionally convenient option for finishing the kitchen floor. Laying tiles on a kitchen floor will require you to know a few things about using tiles as kitchen flooring. This article contains the basic tips you need to know before using tiles as kitchen flooring.
Laying tiles on the kitchen floor begins with its purchase
Determining the consumption of tiles that you need is not difficult. Simply, add 10% to the kitchen area in case of a possible fight, waste for trimming and a little for stock. You need to buy tiles at a time and always in one batch, because the differences in color tone in batches are very noticeable. You can check this by spreading a meter or two tiles on the same plane. Remember that tiles designed for wall covering are less durable and unsuitable for laying them on the floor.
The consumption of tile adhesive is: 10 kg of tile adhesive per 1 square meter of tiles with a mortar layer of 10 mm.
Conditions for work
Tiles are laid at positive temperatures from +5 to + 30˚C. In a heated room, if laying is carried out in winter, without direct sunlight on the floor surface. When using the SVP system (more on this below), the temperature in the kitchen should be more than 10 degrees.
Instruments
For tile work on the floor, you will need the following tool:
Tile laying tool
- Notched trowel. 6-8 mm depending on the size of the tile, the larger the tile, the wider the tooth;
- Spatulas for applying glue to the floor;
- A clean bucket made of soft plastic for mixing glue;
- Clean bucket for wiping tiles;
- Rubber spatula for grouting tiles;
- Drill with mixer nozzle;
- Rubber mallet for upsetting tiles;
- Building levels 500 and 1200 mm;
- Sponge or sponge with a holder for grouting;
- Scarpel and hammer for surface preparation;
- Roller for applying a primer on the floor.
- Means for cleaning up garbage (brushes, vacuum cleaner is better).
materials
To perform tile work, it is necessary to prepare the following material:
1. The ceramic floor tiles themselves. When buying a tile, you need to pay attention to the pictograms printed on the packaging of the tile. For the kitchen floor, you need to choose anti-slip tiles with increased abrasion resistance. 2. Tile adhesive. About him a little lower. 1. For the option of laying tiles with a seam (slotted tile laying), it is necessary to purchase plastic crosses for joints or a tile leveling system (SVP). If possible, foreign tile leveling systems Rubi Tile Level or Raimondi leveling system.  tile leveling systems (SVP)
Note: SVP systems are not used at temperatures below 10˚C.
3. Deep penetration acrylic primer (if you lay the tiles on a screed or floor slab). 4. Primer type betonokontakt, if the tiles are laid on monolithic concrete. Concrete contact can be excluded from work if monolithic concrete is ground with a special machine (remove the concrete film), but this is expensive and not always feasible. Betonokontakt
 Tile coating
The glossy coating of tiles, in places of greatest mechanical stress, may disappear over time and therefore it is more practical to choose tiles with a matte finish for flooring. Imported tiles often have an arrow on the wrong side. So when laying tiles, it should be placed with arrows in one direction.
Related article: Do-it-yourself mosaic laying on a wall apron
Choosing a tile adhesive
 Eunice glue recommended for laying tiles
 Laying ceramic tiles is carried out either on a cement mortar or on a special glue. It should be noted that the use of porcelain stoneware tiles as flooring does not allow the use of cement mortar. has a very low moisture absorption and without glue, flooring will be of very poor quality.
Also, one should not forget the fact that if the tiles are laid in a room with aggressive environments (kitchen or bath), among the adhesives, you need to choose a special elastic adhesive. When using ordinary ceramic tiles, before it lies on the cement mortar, it is necessary to soak it in water for several minutes.
When using tile adhesive, it is not necessary to wet the tile before laying.
Preparing the floor surface for laying tiles
Laying tiles on the floor begins with careful preparation of the surface. It should be perfectly smooth, clean, preferably without traces of paint, oil and other technical fluids. The presence of sagging is not desirable. The tile is very rigid and additional difficulties will arise during its installation.
To improve the adhesion of tiles to the floor surface, it must first be coated with a primer:
- Two layers of primer deeply penetrating the screed or floor slab;
- One coat of primer type , for monolithic concrete floor.
Distance from walls when laying tiles on the floor
It is rarely possible to lay tiles on the floor without trimming them. Be sure the last edge of the tile will not be from a whole tile.
- We start any laying of tiles with a measurement, that is, we consider how many whole tiles can be laid on the kitchen floor.
- Next, we decide where the row of cut tiles should be. It is better to place it under furniture or in the so-called "not red" (far) corners of the kitchen.
- Then there are two options, if there is furniture and the cropped row is laid under the furniture, we start laying the tiles from the corner that is visible (red corner);
- If the kitchen is unfurnished or the tiles on the floor are visible from all sides of the kitchen, then we start laying from the center of the kitchen to the sides. Thus, we get the same cropped rows around the perimeter of the kitchen (as in the figure).
 The scheme of laying tiles on the kitchen floor from the center
 In the case when the subsequent installation of skirting boards is provided, the distance from the walls must be left at 1 cm. This space can be used for laying a telephone or television cable.
Related article: DLS tile laying system: description, comparison, use
Seams between tiles
 the uniformity of the seams will provide crosses for tiles
 The adhesive solution (tile adhesive) is applied in an even layer on the floor without air bubbles using a trowel. Laying tiles on the kitchen floor joint to joint Not recommended in rooms where significant temperature fluctuations are possible, for example, in an unheated cottage. The seams are designed to prevent the tiles from moving from their original position.
The optimal temperature regime for laying tiles on an adhesive solution is considered to be from 5 to 30 degrees at normal air humidity.
SVP system instead of crosses
You can use the SVP system instead of classic crosses. It is more expensive, but more effective, especially with a lack of experience in tiling and laying tiles with your own hands.