 There are several ways to sculpt pies.
- Cooking time: 1.5 hours;
- Servings: 8;
- Kcal: 185;
- Proteins / Fats / Carbohydrates: 5 g. / 7 g. / 24 g.
Of course, there is no consensus, they say, sculpt pies can only be this way and not otherwise. You can wrap the pie so that it is oval, triangular, square. You can roll a pie into a snail, a tube, make a pigtail, etc.
Pie sculpting is not based on how skillfully you handle dough configuration changes. Initially, it will not be correct to train with curling / folding, but with the correct kneading of the dough. Precisely what will then allow to mold the perfect pies.
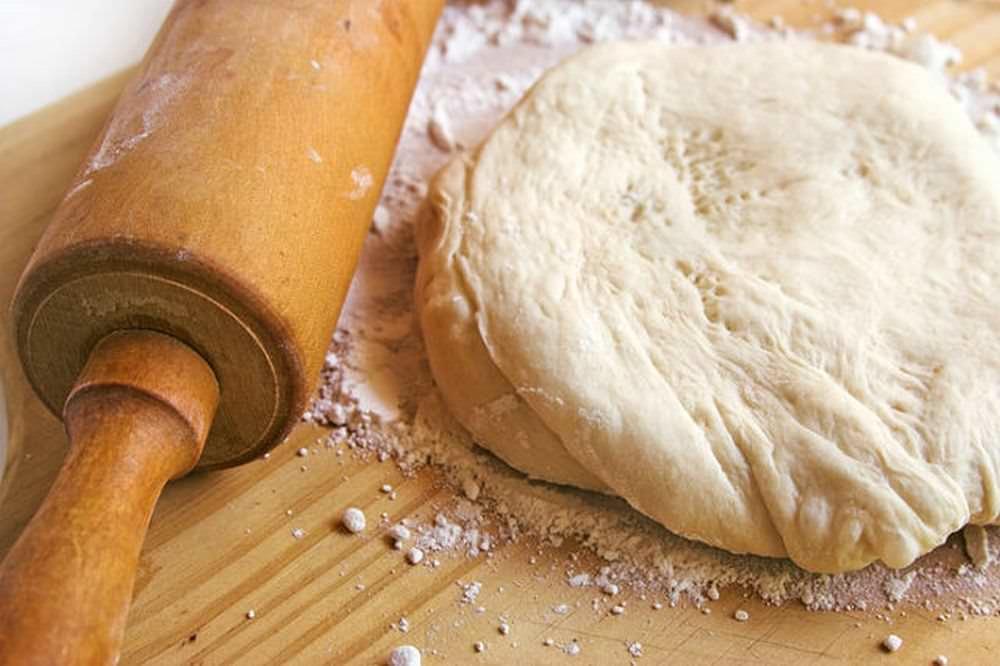
- The main thing is to make a moderately steep dough. It is necessary that it does not stick to your hands, nothing more. There is such a joke of the pastry chefs - if you get your hands dirty while kneading the dough, you did something wrong. First, you pour the required amount of flour in a slide, make a hole inside and pour the individual ingredients into it. And only then knead.
- To prevent the dough from sticking to your hands, brush your hands with vegetable oil.
- Even the strictest instructions often warn you not to cook the dough in a bad mood. Oddly enough, even culinary pros talk about the importance of this point. So - cook with pleasure and pleasure.
 The quality of the pies depends on the correct kneading of the dough.
Each hostess adapts the ways how to wrap pies, as they say, for herself. You can consider the sculpting of pies using the example of a specific recipe.
- Yeast - 30 g;
- Flour - ½ kg;
- Rast. butter - 3-4 tablespoons;
- Milk - 250 ml;
- Egg of chickens. - 1 PC.;
- Sugar - 1 tsp;
- A pinch of salt.
So, you start making yeast dough pies. Pies are also made from puff pastry, but nevertheless the yeast pie is the most beautiful and delicious.
- Heat the milk a little, add sugar to it. Add yeast there, stir well.
- Sift the flour onto a plank or bowl. Make a slide out of flour, in the center of which is a depression.
- Pour in milk with dissolved yeast, leave to ferment for 20 minutes. During this time, the mass will rise and be covered with bubbles.
- Then add the butter, beat the egg and salt. Start kneading flour from the center to the edges. This can be done with a wooden spatula.
- You will get a soft mass that you need to knead well with your hands, then beat it against the table, shape it in the form of a ball, and then sculpt the pies.
 Sculpting buns also requires some skill
Usually pies are made with filling - meat, cheese, sweet, vegetable, etc. You can also make triangular pies - you first make a round cake, in which you put the filling, and on three sides of the circle you need to twist the dough to the center.
Sculpting buns also requires some skill. Before frying or baking, you can make a sausage from the dough, on which there will be small cuts. Roll the sausage into a ring, you get such a beautiful wheel.
You can mold the dough and according to the principle of brushwood. Cut the dough into rectangles, make an incision in the middle, into which one of the edges of the rectangle is threaded by the tip.
Inspiration can come right in the cooking process. From the dough, you can form birds, leaves, roses, accordions, etc. Experiment, and buns and pies from an unusual look will be even tastier.
 First, prepare a moderately steep dough so that it does not stick to your hands.
 Each housewife has her own ways of how to wrap pies
 It is very easy to wrap the triangular pies, your pies are not only tasty, but will also become original in appearance
 You can make squares of dough that are wrapped in an envelope
 From what kind of fantasy you have, you can wrap a pie. You can make it any shape and type
Even the most experienced chefs do not know what shape the pies should have, and this is because there are no strict rules in this regard. Everyone can sculpt such cakes as they like.
If you prefer oval cakes, concentrate on the technique of sculpting them, but if triangular cakes are more to your taste, learn to fold the dough into an envelope. In fact, all existing sculpting options are easy to implement, but only if you are aware of a couple of subtleties in working with the test.

Secrets of the correct test
There are two main secrets for making pie dough:
Good mood
Any housewife has in her stock a couple of dough recipes for her favorite pies, despite their abundant number in cookbooks. 2-3 recipes, most likely, were left in the course of long-term experimentation. Many people confirm that the dough can feel and its quality depends on the mood of the hostess and the motor skills of her hands.

If you are not in the mood today, it is better not to start kneading the dough, it is unlikely to turn out the way it should be. Believe me, in such situations, even a recipe that has not failed before can break this trend.
Important!!!
Before kneading the dough for pies, charge yourself with positive, cheerful music, a humorous TV channel, etc. will contribute to this. When the effect is achieved, you can get down to business.
Lush yeast-free dough for pies. How to make dough for pies - recipe
Dough kneading
The dough for pies should be moderately thick, you need so much flour so that the mass does not stick to your hands. There is even a joke among professional chefs about this, that if your hands get dirty during the kneading process, it means that a mistake was made somewhere.
Grandma's pies on kefir
To guess the amount of flour for the dough, take all non-liquid ingredients, mix them and place them in a slide on a board, then make a depression in it and fill with liquid ingredients. Now start lightly, slowly stirring the flour into the liquid until the mass gets rid of the stickiness. At this, the batch can be stopped.
Important!!!
The dough will not stick to your hands during the sculpting process, if you grease them with vegetable oil before that.
Butter pies and 8 types of toppings. Video recipe
Modeling techniques
We present to your attention some of the most popular ways of sculpting pies among housewives. Before starting the process, you first need to form a tourniquet of about 5 cm from the dough. in diameter, and then divide it into even parts with a knife.

Take some dough and spread it evenly until it looks like a 5mm flatbread. in diameter. Squeeze the center a little and put the filling there. Connect two opposite edges and pinch with a crescent. When baking, place the pie on the seam, lightly crushing on top.

Round pies
Make the same cake from the dough as in the previous case, put the filling in the center, only then pin the edges in a circle in a different way into a "bag". Hide the resulting ledge inside.

Triangular patties
Get a tortilla from the dough, lay out the filling and smooth it over the surface, a little short of the edges. Lubricate the empty space formed in a circle with cold water. Now hook the two top edges and join them at a 45-degree angle to the middle. Connect the remaining edge to the center and pinch the seams. That's all, the pie is ready, you can put it on a baking sheet.

Embossed patties
Form an oval cake, fill the center with a sausage-shaped filling. Then wrap the two opposite edges a quarter of the length of the cake. Now take the ends of the top edge and stack them on top of each other without touching the filling. Now lay the dough crosswise on both sides. The impression that you are "swaddling" the cake may affect from the outside. To sculpt one embossed pie, you need 4-5 "swaddling".
Method for making pies and pies from Irina Moiseeva
Baking pies
After the sculpting of the pies is finished, do not rush to bake them right away. First, put the blanks on a baking sheet, anoint them on top with vegetable oil and cover with cling film, let them stand for about 15 minutes. While this is happening, preheat the oven. After the allotted time, grease the pies with the milk-egg mixture. Thanks to this coating, after baking, a shiny, ruddy crust forms on the pies.

Output:
Pies can be sculpted in different ways, everyone has the right to choose the most suitable technique for themselves. However, the taste of the finished product depends little on the shape of the pie; it is more important to properly prepare the dough and filling. Good luck! Delicious pies for you!
Imagine a large round table, a beautiful tablecloth, a samovar and a dish with pies baked with your caring hands! Not all housewives can pamper their household with delicious fluffy pies! With our short instruction, you will treat your loved ones with a delicious treat for tea tonight!
1) Yeast dough for pies in the oven
Yeast dough is considered a symbol of home comfort and warmth. Remember how grandmother got up at 4 in the morning to knead the dough and put it on the battery to rise. Then you, mom and grandmother made pies for the whole family. We offer a refined grandma's recipe that won't keep you waiting long to get up!
Ingredients for yeast dough:
- 1 glass of milk
- 50 g of compressed yeast,
- 3 eggs,
- 6 tablespoons of sugar
- 800 g of sifted flour,
- 50 grams of butter or margarine,
- 2 tablespoons of sunflower oil
- 0.5 teaspoon salt, vanillin.
Preparation of the dough - crumble 50 g of yeast, pour into a bowl and combine with milk, stir thoroughly. Add 1 tablespoon of sugar, 200 g of flour to the resulting mixture. Mix into a homogeneous mass, the consistency should be like thick sour cream. Cover with a towel and set aside for 20 minutes.
While the dough is suitable - prepare the baking - add the remaining 5 tablespoons of sugar, eggs, softened or melted butter, salt. Stir into a homogeneous mass, mix with half the flour in several approaches. Next, knead the dough with the matched dough, add the remaining flour and vanillin. Finally, add sunflower oil. Let the dough stand for 15-20 minutes, then do the first kneading and again let it stand for 40 minutes. Then you can start cooking!
Fast yeast-free pie dough
Allows you to significantly save time when kneading the dough, requires minimal preparation. Suitable even for a novice hostess!
Ingredients for the dough:
- 300 grams of sour cream;
- 1 egg;
- 700 gr flour;
- 1 teaspoon salt
- 2 teaspoons of sugar;
- half a teaspoon of baking soda;
- 1 tablespoon of sunflower oil;
Mix eggs, sugar and sour cream in a bowl until smooth, add baking soda. Gradually adding flour, knead a soft dough. Finally add the sunflower oil and let the dough stand for a while. Then you can immediately start making pies.


How to sculpt pies
Divide the dough into small pieces with a knife, shape into small cakes and let sit for 2-3 minutes for elasticity and tenderness of the dough when sculpting.
- The simplest form that our grandmothers sculpted - roll out the cake, move the dough a little and put the filling in the middle. The contents can be laid out both with a pastry bag and with a teaspoon. Lift the edges up, join and pinch the edges. Stick tightly together, excluding access to the filling. To transfer the pies to a baking sheet, brush each barrel with sunflower oil.
- Triangles - Place the filling in the middle of the round flatbread, pinching the dough on three sides, creating a triangle shape. Fold the pies on a baking sheet with the seam down, at a short distance.
- Pigtail - roll out the cake well, put the filling in the middle. Blind the edges like a dumpling, the top seam must be twisted inward. Stretch the dough with one hand and twist the seam down with the other. Place on a baking sheet on a barrel.
- Scallop - Roll out an oval, spread the filling from the center to the side. Place one side on the other and cut it in half with a knife into small compartments. Spread as far apart as possible.
Lubricate the cooked pies with whipped yolk, gently, without pressing down, otherwise the dough will sit down and change in taste. After greasing, let stand for about 20 minutes. Bake at 200-210 degrees for about 25 minutes.
The patties can be baked very quickly. The secret of how to sculpt pies is very simple - ready-made dough, ready-made filling, 5-8 minutes and you are the chef accepting congratulations. Jam, jam, boiled condensed milk, chopped ham, cheese, feta cheese, boiled potatoes, sausages or wieners - any products that have already undergone heat treatment are suitable as ready-made filling. Patties with fresh berries and fruits, vegetables or minced meat usually take longer to cook. With one single exception - deep-fried thin puff pastry pasties. Raw minced meat is put in pasties and they are cooked in hot oil in a matter of minutes. But this is the topic of a completely different article.
We will look at several methods that are equally simple to implement, but with different time costs. Not always a big time investment gives the most beautiful result. Spectacular triangles of puff pastry are prepared for 10 minutes, of which 3 are spent on cutting the dough, the rest of the time you watch the pies through the oven window.
Simple pies on kefir
The easiest option for hearty kefir pies with meat, potato or onion filling. If you don't even have a semi-finished dough product, but have a glass of kefir, flour, an egg, vegetable oil and a little soda, you can already make the simplest kefir pies without yeast. Boiled potatoes, fried onions, chopped greens, an egg, or a mixture of all of these ingredients are suitable as a filling.
Tip: Any meat filling recipe benefits from adding ham and cheese.
The cooking time for kefir pies is about 20-40 minutes, depending on the method of roasting and the number of pies.
How to make the simplest dough
Mix kefir, egg, a couple of three tablespoons of vegetable oil and add flour until you get a viscous light dough. Add about a quarter teaspoon of baking soda at the end and stir again. There is no need to make special delicacies and weaving from viscous kefir dough - everything will blur. For simple pies, the simplest elongated shape is optimal. Kefir in this case is a conventional name for a liquid lactic acid product. You can also cook with ayran, yogurt, fermented baked milk, yogurt. The presence of live lactic acid bacteria is important, which ensures the rise and fluffiness of the dough.
How to sculpt kefir pies
- Collect the finished dough in a ball directly in the container, into which you mixed, transfer to a board sprinkled with flour and mold a sausage uniform along the entire length.
- Cut equal pieces from the sausage and roll or knead with your hands into a round cake.
- Place the filling exactly in the middle. You can put fillings without regret. The norm of the filling for a hearty pie is a heaped tablespoon.
- Bring the opposite edges of the cake together and pinch. This will make the pie smooth. Finish the seam, you don't have to worry too much about neatness. It is important that the filling is inside and does not fall out.
- Turn the patty upside down and let it rest while you cook the rest of the patties.
- In the meantime, preheat the oven to 150 degrees. Grease a baking sheet with oil, place the pies on a baking sheet and bake at 180 degrees for 15 minutes.
Kefir pies do not even need to be cooked in the oven. They can be fried on both sides in a skillet in oil. Fried pies are especially delicious right after cooking.
Yeast or non-yeast dough for pies
There is a difference in temperature and baking time for yeast and non-yeast dough. The yeast-free dough can be safely placed in the preheated maximum oven without the slightest damage to the quality of the final product.
Yeast dough constantly takes time to "rest". The dough is rolled out - let it rest for half an hour. The pies are sculpted - let them rest. Transferred to a baking sheet - rest again. If the dough is not allowed to rest, it will be “capricious” and the pies will turn out to be completely “different”. Yeast dough is placed in an oven heated to a maximum of 120-150 degrees. Otherwise, it will not have time to rise. As you understand, yeast pies require a lot of attention.
Is the shape of the dough important?
The shape of the dough and the way the patties are sculpted are actually very important for the taste. The dough is baked in different ways, the filling is kept inside or creeps out onto a golden brown crust. Everyone in childhood wondered why a puff is tastier than an ordinary bun and why sausage in the dough tastes better if the dough is wound in a strip? Indeed, when winding a strip of dough, the contact between the meat filling and the bun increases, the strip is better impregnated with aroma.
Sausages in dough
If you are cooking sausages or sausages in dough, wrap the dough with a spiral strip, twisting it slightly. This applies to both puff pastry and yeast dough. Twisting will prevent the dough from rising too high. A huge bun with a sausage lost in the depths is not very attractive.
Cooking sausages in dough from ready-made puff pastry takes about 15-25 minutes.
Puff pastry triangles
The most economical way to sculpt pies from ready-made puff pastry is triangles. Pros - complete absence of scraps, maximum cooking speed, some elegance in appearance. Elegance and beauty can be easily enhanced with cuts and notches that allow the puff pastry to open up magnificently in the incised areas.
Tip: make cuts in a simple shape - you won't go wrong.
The procedure for making puff pastry pies:
- Defrost the puff pastry and roll out with a rolling pin. It is more convenient to immediately roll out a layer of dough than each square in turn. If you don't have a rolling pin, any smooth glass bottle will do.
- Cut the dough into squares or rectangles. Perfect accuracy is not required; it is not necessary to measure the sides of the square with a ruler.
- Place the filling in the middle of each square - cheese, ham, cottage cheese, or just a spoonful of jam.
- Fold the triangle in half and pinch the edges slightly. You do not need to pinch the edges of the puff pastry hard.
- Scribble the triangles to add originality to the baked goods. Place on a baking sheet and place in the oven. Cooking time in a preheated oven is about 7-10 minutes.
How to sculpt square pies
Square pies can be sculpted from yeast and yeast-free puff pastry, plain or shortcrust pastry. Any thick dough makes perfect square envelopes. The main requirement for the filling of square pies is that it should be dense enough, not spread or crumble.
- Roll out and cut the dough into squares as in the previous recipe.
- Place the filling in the middle, preferably rolled into a ball.
- Lift the edges of the square and staple at the top.
Brush the pies with butter or a beaten egg before baking for a delicious crust.
Plucking often diverges, and the pie opens up. It is important that the pie looks appetizing even when opened. The requirements for the filling are due precisely to this property.
The same method works well on large meat pies. Pinching upwards allows you to put a lot of toppings in the cake. This is the best way to make a chicken or fish pie.
Large cakes take a long time to bake, at least 20-30 minutes.

How to make croissant-style pies
A regular croissant is easy to mold. The puff pastry triangle is rolled around the hypotenuse, the longest side. Consider other, more intricate options that do not require much effort.
Notched bagel
A rectangular or round piece of puff pastry is cut in half with noodles. This can be done with scissors, a knife, or a pizza roller.
Wrap the filling in the uncut half and tighten it to the end. The resulting roll with a notch can be bent in an arc or in a circle.
Sun-Shaped Puff Croissant Option
Artek pies with butter can be dazzled with a minimum of time. Place a piece of butter on a round puff pastry. You can sprinkle with sugar, cinnamon, grated poppy seeds or put curd filling.
Fold the circle in half, preferably slightly unevenly so that one half protrudes more. Make several rays - cuts and slightly unfold the resulting patty. Such pies are baked almost instantly - in 7-10 minutes.
How to make a rose-shaped pie
For the base, you need a dense and elastic dough. You can puff. You can take a circle or a square as an initial shape. Make a notch, not reaching the middle, place the filling in the center and wrap it with dough petals, stretching and bending the shape. Form a rose, brush with oil and bake at 180 degrees until tender. You can check the readiness with a toothpick - if the toothpick with which you pierced the pie is dry, without traces of dough - everything is ready.
For a beautiful result, experience and skill are required. If you went to art school, you will definitely succeed.

Envelope
Not everyone can mold a rose. Now we will show you how to sculpt pies that will be perceived by households "with a bang" and surpass any options in ease of manufacture.
Slice the puff pastry into a triangle. Place some jam, jam, or other filling in the center of each triangle. A slice of cheese or a spoonful of cottage cheese is a great option. Fold the sharp corners of the triangle over. Ready! No need to pinch, sculpt. This is the easiest way to sculpt pies with no effort at all.
The result is quite presentable and original. If you put cheese, ham, a slice of tomato inside, and sprinkle with coarsely ground pepper on top, you get an amazing mini pizza.
Many people think that the secret knowledge of how to sculpt pies is transmitted exclusively from a caring mother or grandmother. The making of the pies was a sacred rite and took the whole evening. Pies, loaves, buns, puffs were baked for holidays and celebrations. Meanwhile, pies are great food on the road. Good patties usually stay fresh for 3 days. The filling inside the dough shell does not dry out or crumble. With the help of a stock of pies, you can provide tasty and nutritious food, for example, in the country or on a hike. If the pies are the same size, there is no problem with the distribution of portions.
A man who knows how to cook pies is valued by the ladies worth their weight in gold. A basket of croissants, the preparation of which will take half an hour on the strength, is capable of breaking any unapproachable beauty.
Making patties is easy, especially if you use store-bought dough pieces. The original folds of the patties look especially appetizing. Curiosity is one of the strengths of a person, and a pie is always a mystery.


Cut out figures from thinly rolled dough, roll up flagella, etc., lightly grease the contact surfaces of the dough with water, put the decorations on the cake. After proving, grease the pie with a loose egg and bake.
Garnish with apple slices before serving.

The pie can be closed with a net of dough strands or strips with decorations placed on it.
TIP: If you want to make the cake more ruddy, add a little sugar to the egg or yolk to grease the cake (about 1/2 full teaspoon for 1 egg or 2 yolks) and stir until the grains are completely dissolved.

Pie with potatoes and cheese.

A pie with cabbage.

Pie with mushrooms and potatoes.

Pie with meat.

Fish pie.

Pie with apples.

Cottage cheese pie.

Pie with dried apricots.
Danube Waves Pie

The dough is fantastic - fluffy, soft.
This cake can be made with a wide variety of fillings to suit your taste and the availability of products (see.
Fillings for pies, kulebyak, cheesecakes
). In addition, different fillings can be placed in different pies.
Ingredients
:
... 4 eggs
... 100 g butter
... 100-120 ml of milk
... 1 tbsp. l. + 1 tsp Sahara
... 1 tsp salt
... 25g yeast (fresh)
Cooking dough. Pour 100 g of pre-sifted flour into a bowl, add a spoonful of sugar and dry yeast. Pour 120 ml of milk, warmed to a slight heat, into the flour mixture, stir well. The result is a thick, smooth mass.
Cover the bowl with another bowl, preferably a glass one (to see how the dough rises) and leave it to come up in a warm place. Dough rises 35-40 minutes, increasing 3 times, becoming porous and bubbly.
Melt butter in a bowl. Pour in 3 tablespoons of sugar, salt, vanilla, drive in 3 eggs one by one. Pour the 4th egg into a cup and shake with a fork. Pour half of the loosened egg into the dough, and the other half will be used to grease the cake before baking. Let's add the matched dough.
Add flour little by little (about 500 g) and knead the dough. Another 50 g of flour is used for adding when kneading the dough.
The dough is very elastic, not sticky at all ("the consistency of an earlobe, does not stick to anything").
Place the dough in a large bowl, cover warmly and leave to come up. In about 1.5 hours, the dough grows to the rim of a large 3.5 liter bowl.
Bake in a round shape with a diameter of 26 cm. It is advisable to take a split form, but you can bake in a one-piece form with high sides. We cover the bottom of the form with a circle of parchment, and grease the walls with butter.
In this case, we use apples with sugar as a filling.
We tear off a piece the size of an egg from the dough that has come up, knead it on a sheet of parchment into a thick cake. Pour 0.5 tsp into the center of the cake. sugar and put in some apple, cut into strips.
When forming pies, do not add flour - the dough does not stick either to the hands or to the table. We form a round pie, pinch the seam and pull it up like an onion. Place it in the center of the form. Similarly, we form the rest of the pies and arrange them in a circle. Cover the filled form with a towel and leave it to proof for 25-30 minutes.
Lubricate the cake with half a loose egg (leave a little for the 2nd lubricant) and place it in a heated to 190 gr. From the oven. After 20-25 minutes, grease with an egg again. We bake until golden brown.
Leave the finished cake in the form for 10 minutes, covering with a double-folded towel.
If the form is detachable, just unfasten the side and take out the cake. First turn the one-piece form onto a soft pillow covered with a towel, and then place it on the wire rack.
The pie can be served hot or cold.
Trout Pie


Ingredients
... 500 g flour + about 50 g for bedding
For the test:
... 100 ml of milk (preheated to 30 ° C)
... 10 g fresh (live) yeast
... 1 egg
... 2 tbsp Sahara
... 1 tsp salt
... 70 g softened butter
... 370 g flour
For filling:
... 600 g fresh trout fillet
... 120 g mozzarella cheese
... 1 small red pepper
... 1 medium tomato
... parsley, salt, pepper - to taste

|
Dissolve yeast in milk, add sugar, salt, butter, egg, flour and knead the dough. |
|

|
After an hour, roll out the dough into a circle 0.6 cm thick. Stepping back from the edge of 3.5 cm, put the trout strips, cut into 2.5 cm thick, in a circle, cover with the dough from the edges and close the seam well. |
|

|
It turns out such a roller. |
|

|
Cut the roller into 4 cm wide pieces and rotate each piece 90 degrees with the fish facing up. |
|

|
Cut the remaining fish into slices and place in the middle of the pie. |
|

|
Bake preheated to 180 gr. From the oven, 30 minutes until golden brown. |

"Ship" from yeast dough

Bake the "hull" and "sail" of the ship laid on top on heat-resistant objects of suitable shape, lightly oiled.
After baking, assemble all the parts into a finished product.
Fill the assembled "ship" with gingerbread, dryers, crackers, bagels, sweets and serve to the tea table with a samovar.
Serve separately in vases jam, cookies, raisins, dried apricots, prunes, candied fruits, etc.


And simpler:

Unusual, graceful, lacy buns ... Few can resist such beauty !!! Whoever liked the buns, come in to see how easy it is to make these laces ... even a child can handle it)))
Ingredients
350 g flour
- 80 g soft butter
- 2 egg yolks
- 140 grams of warm milk
- 3 tablespoons of sugar
- 1 bag of vanilla sugar
- 10 grams of yeast
- A little sweet milk for greasing the buns
- Powdered sugar

PREPARATION
Pour milk into a bowl. Add 1 tsp. Sahara. Add yeast, stir, cover with a napkin and leave for 10 minutes.
In a separate bowl, combine flour, sugar and salt.
Add prepared dough + milk + sugar and eggs. Mix with a spoon.
When the dough becomes difficult to stir, add the butter, chopped into small pieces.

Knead the dough for 10 minutes. Transfer the dough to a clean bowl, cover with a napkin and leave in a warm place for about 1 hour 30 minutes, until the dough rises (doubles in size).
Divide the dough in two. Roll out not too thin. Cut out circles (here 5 cm in diameter)
Fold three circles of dough as shown.
Fold them together and then cut them in half to make 2 pieces of lace
Do this with the entire test.
Line the muffin tin with baking paper, not too tightly to fit the laces as shown in the picture.
Grease the buns with sweet milk and let them expand in volume, bake for about 15-20 minutes in a preheated oven at 180 degrees. Decorate with powdered sugar)


++++++++++++++++++++++++++++++++++++++

Ingredients:
For the test:
250 ml warm milk, 1 egg
1/4 cup sugar, 1/2 tsp. salt
100 g butter, melt
vanilla, 2 + 1/4 tsp dry yeast
3 cups flour
Separately:
sugar, poppy
vegetable oil
melted butter
powdered sugar
Knead a soft dough from the food, cover with cling film and let rise in a warm place until it increases for about 2 hours.
Divide the matched dough into balls. Take a piece of dough, roll it out in an oval shape.
Brush with vegetable oil, sprinkle with sugar and poppy seeds. Form the bun as shown in the photo.
Place the buns on a baking sheet and let rise in a warm place for about 30 minutes. Bake the matching buns in a preheated oven at 190C for 15-20 minutes.
Grease the finished hot buns with melted butter. When the buns are cool, sprinkle with powdered sugar.