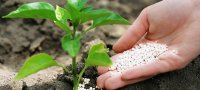
Vacation is ahead, you are planning a vacation on the sultry sea coast. Tickets have already been purchased, things have been collected. And looking around the apartment for the last time, you remember the indoor flowers. If there is no one to come water them, then you risk seeing dried bushes instead of lush greenery after your arrival. But everything can be corrected if you build drip irrigation using medical droppers. This simple remedy will allow the flowers to last quite a long time, especially if you take additional measures. Today we are talking about how to automate the watering system for house plants while you are away.
What is drip irrigation?
This is a system that provides constant soil moisture in small portions. This is much more beneficial for the plant than a one-time flow of water. The soil does not dry out and is also not overly moist, which can also harm the roots. Drip irrigation from medical droppers is an excellent assistant for the gardener, especially in the summer and during the In fact, there are a lot of options for implementing an automated irrigation system; we will try to touch on all the simplest and most reliable ones. Don't forget that we set out to find a way not only to preserve our plants, but also to provide them with optimal conditions for growth and development.

How to make drip irrigation from medical droppers with your own hands
In fact, it takes much longer to describe than to do. You will need regular droppers, which can be bought at the pharmacy, a reliable high stand and a large one. How big depends on the duration of your departure. For one large ficus, a bucket of water will be enough to last for two to three weeks. If you have a large garden, then you will need to properly prepare it for your departure, but more on that a little later.
Technical side of the issue
In fact, even a child can collect drip irrigation from medical droppers. Think in advance where your plant will stand. It is advisable that this is not the sunniest and hottest place in the house. Next, transfer it to the floor. There should be a stand nearby, such as a windowsill or table, on which you can place a container of water. Now open the package with the medical system. It looks like a syringe from which comes a tube with a needle at the end. There is a wheel in the middle of the tube that allows you to adjust the speed of the liquid literally in seconds. The next step will be to put our system into action. To do this, pour water into a large bucket and place it on a stand. All that remains is to insert one end of the tube into the bucket and extend the other to the plant.

Main difficulties
Drip irrigation from medical droppers is not difficult to do with your own hands, but there are some nuances here too. First of all, you need to take into account the elementary laws of physics. The tube should not bend, otherwise water will not move through it. You can use a holder for the drain pipe from a washing machine. Its shape allows the tube to descend smoothly, without kinks, to the plant. The second point is the location of the tube inside the bucket, which will serve as a source of water. The ideal option would be a container with a hole at the bottom through which you can thread a straw. Then it will ensure its movement until the container is almost completely empty.

Another point is the need to adjust the water supply. To do this, you need to have a few days left. Set the slowest mode and observe the condition of the soil, as well as
If your home garden is large enough
Indeed, if one or two plants grow at home, then this method is a real godsend, but what if there are several dozen of them? In fact, you can do the same drip irrigation from medical droppers with your own hands, just take a larger water container and place all the pots around it. Each of them will have their own “tube of life” drawn to them. The system turns out to be cumbersome and unaesthetic, but it is suitable for saving flowers from death.
Additional measures during holidays
Homemade drip irrigation from medical droppers is quite simple and reliable, but if you have truly valuable plants at home, then it’s worth insuring yourself in case something goes wrong. To do this, it is recommended to place all indoor flowers on the floor in the coolest room. Windows should be shaded. You need to place bottles of water between the plants so that it evaporates and gives moisture, and cover each plant with a plastic cape. Drip irrigation using medical drippers, along with these precautions, can keep your garden intact for a very long time. After arriving, having placed the flowers in their places, you can continue to use this simple technique by replacing the bucket with a plastic bottle, which can be easily hung next to the pot. By adding water to it daily, you will free yourself from tedious watering and will delight your plants with a constant soft rain of sun-warmed water instead of a cold flood every few days.

Methods for automatically watering house plants
Drip irrigation using a dripper is not the only way to protect plants from drought. The method of “thread” irrigation is very often practiced. To do this, even when planting, thread a thick synthetic thread through the drainage holes (it is better not to use wool, as it will rot quickly). The top of the thread is cut flush with the soil surface, and a tail 5-10 cm long protrudes from the drainage hole. It is necessary to purchase a wide and shallow tray, which is filled with expanded clay and filled with water. Pots are placed on top, and the threads serve as a transport tape that transfers moisture.

A modification of this method is to place flower pots in a bathtub, with a thick towel soaked in water placed at the bottom. In such conditions, a previously well-watered pot can wait quite a long time for the owners to arrive.
Automated system for home greenhouse
To do this you will need a little more materials, time and effort. Do-it-yourself drip irrigation from drippers is a real thing that will give life to indoor plants every day. First of all, you need to imagine a diagram of how all elements of the system will be placed, namely:
- A stand for a storage tank, its height is at least 2 meters above the soil level.
- Pipes that carry water from the water supply to the container and from it to the plants.
- Connecting and shut-off fittings for all pipes and hoses, tees, plugs and taps.
- Disposable droppers.
In essence, this is a modernized drip irrigation from medical droppers. The photo shows us a system, the installation of which begins with the distribution of hoses throughout the greenhouse. This option is also suitable for a room, but in this case you need to think about how to beautifully decorate the entire system. One end of the hose is attached to the pressure line, and plugs are installed on the second. The supply line itself is connected to a container of water.
Now you need to mark where exactly the pots with plants will be located, and therefore individual droppers. In the marked places, punctures are made with an awl, and the end of the dropper is inserted into them, which in the hospital is attached to a container with medicine. The second end, with a needle, goes to the roots of the plant.

Despite its simplicity, such a system combines strength, reliability and durability. And most importantly, you can control the flow of water to different plants using the liquid regulator, which is located on the medical dripper itself.
Caring for system elements
The container itself, pipes and hoses can last for years, but fragile droppers need regular cleaning. If they are not removed and washed regularly, they will become clogged with impurities contained in the water. In order to extend their life and increase the periods between cleanings, you can install a filter in front of the supply line. This measure also has a good effect on delicate indoor plants, the roots of which also suffer from impurities contained in the water. This is how automatic drip irrigation from drippers works. There can be as many house flowers as you like; such a system will cope with watering completely independently. All you have to do is enjoy your luxurious home garden.
Alternative option
If you often leave home, but want your plants to always feel good, you can try implementing a watering system using plastic bottles. It works equally well both in the garden and at home. The essence of the method is as follows: a plastic bottle, in which several punctures are made, is buried in the soil (a bed or a large pot). Only a neck with a stopper remains on the surface, through which it is filled with water. For about 4 days, such a bottle can feed 3-4 tomato bushes. When applied to house plants, this method is only suitable for large flowerpots.
Let's sum it up
The drip irrigation system is one of the most effective. When using it, a crust does not form on the surface, the roots are not injured or eroded. The plant constantly receives moisture in small portions, which is ideal watering. That is why such a system gives the best results, promoting the ideal growth and development of a green pet. There are automated systems that are expensive, but medical droppers allow you to create an exact copy of them with your own hands almost free of charge.
Drip irrigation evenly and promptly moistens the soil, supplies plants with nutrients, and does not erode the fertile layer. The method is popular for growing vegetables, fruit trees and shrubs. Its use even on poor soils and in arid climates allows you to get a rich harvest. Using the advice of experienced craftsmen and available tools, it is not difficult to create drip irrigation with your own hands for your personal farm.
- Forced. The water is under pressure from a circulation pump or water supply. The system is equipped with a reducer - a pressure meter and regulator, the upper value of which in a drip system is no more than 2 atmospheres.
- Using gravity. From a tank filled with water, under the influence of gravity, water flows to the plants. The tank or container is located approximately 2 meters above ground level.
- Moisture goes directly to the root and does not touch the stem, protecting the plant from fungal diseases.
- With careful, uniform moisture, the soil near the crop remains loose and saturated with oxygen. The water does not stagnate and does not compress the soil, as happens with the conventional irrigation method.
- The result of drip irrigation is similar to natural humidification.
- Water is supplied in such a way that the soil is moistened as needed, not too dry, or flooded.
- Drip humidification is used to safely feed plants.
- Water for irrigation is used sparingly.
- Moistening a limited area of soil does not stimulate the root system to strengthen, grow wider and deeper, which reduces the effectiveness of fertilizers. When applying increased amounts of them, only part of them is effective in a moist area of soil, that is, near the drip. The remaining amount of useful elements is useless or harmful to the soil. The solution to the problem is to install 3-4 droppers around the plant. But this increases the cost of the system.
- Insufficient hydration. A healthy plant requires approximately 10 cm of moist soil. It is created in 2-3 hours of operation of a drip irrigation system. If the water has not penetrated to the required depth, the root of the plant does not receive the necessary nutrition and required moisture. The solution to the problem is to determine in a practical way the relationship between the depth of moistening and the time of watering before using the system.
- 1. A diagram of the greenhouse with dimensions (length, width) contains an image of the beds and the location of the plants. Required to calculate the length and select the type of garden hoses.
- 2. Water is supplied to the site through plastic pipes; they are conveniently located around the perimeter of the greenhouse.
- 3. The pipes are equipped with fasteners and fittings for further installation. To create a portable, mobile system, flexible garden hoses are used; to install a stationary system, hoses with a rigid structure or plastic pipes are used.
- 4. The water tank is placed in a place convenient for collecting and distributing water, at a sufficient height for the correct operation of the gravitational system. Gardeners agree that a water supply of at least 100 liters is required.
- 5. Calculation of the length of hoses, the number of accessories and spare parts is made according to the planting scheme. These include pipes and flexible hoses, fittings, shut-off valves, plugs, and adapters. When planning an automatic irrigation system, regulators and a water supply controller are purchased.
- 1. Using a watering tape with holes is convenient. It will last up to 10 years in a greenhouse or indoors, but is susceptible to the destructive effects of ultraviolet radiation.
- 2. The second way is to make holes in the flexible hose yourself using a heated nail, an awl, or a thin drill.
- 3. The third option is to use additional thin hose outlets with holes up to 30 cm long and up to 4 mm in diameter. The advantages of this method are mobility and the ability to move the device as the plant grows. There is no need to plant crops in even rows.
- Plantings in open ground exceed the area in greenhouses, which increases the amount of water required for irrigation. Requires connection to water supply or well.
- Water supply lines and hoses that are constantly outdoors must be resistant to temperature changes and still be able to maintain working condition.
- To water large areas, it is advisable to use a pump and a hydraulic accumulator, which maintain the required pressure in the system and regulate the water supply.
- The number of drippers is equal to the number of plants that require watering.
- Inlet holes are created in the main hose according to the diameter of the drip tubes.
- Connections and branching of hoses using fittings of the required size.
- Sections of hoses with plugs at the ends are laid out along the plants along the length of the furrows.
- Rubber tips of medical systems are inserted into prepared holes in the main hoses.
- The other ends, where the plastic needles are placed, are located near the root of the plant.
- 1. Select a bottle that corresponds to the distance between plants and dig it into the ground with the neck up. To irrigate one bush, you can use a small container with holes made in the direction of the plant's root. Bury it in the ground next to the bush and fill it with water. Nylon is used as a filter. After this, water begins to flow into the soil and moisturize the root system.
- 2. The bottle is hung upside down on a crossbar or convenient holder up to half a meter high. A uniform supply of water occurs through the holes in the bottle cap.
- 3. The container is placed in the ground, neck down, with holes made. This technique helps deliver water directly to the depth of the root. The peculiarity of the method is that the lid should not be lower than the root in order for the moisturizing to act strictly as intended.
- 4. Special nozzle with ready-made holes. It easily screws onto the bottle. The method is simple and convenient. The nozzle is convenient to place in the ground and remove for cleaning and filling the bottle with water. The disadvantage of this method is the single size of the nozzle, suitable for use in bottles with a capacity of no more than two liters.
- a layer of polyethylene film;
- perforated pipes or hoses;
- drainage (crushed stone, gravel, expanded clay);
- priming.
- 1. The systems are placed inside a storage tank with water through the top. The complexity of this option is starting the dropper, getting water inside the hose and adjusting the water supply.
- 2. Drilling holes in the bottom of the storage tank and fixing the distribution hoses in them. Since the diameter of the outlets should be smaller than the diameter of the hoses, it is easier to insert the latter into the holes heated in hot water. After cooling, a tight connection is created, the outlets are additionally sealed.
Show all
Operating principle
The main advantage of the drip irrigation system is the targeted, economical supply of water to the plant in uniform volumes. In this case, the roots of the crop are directly moistened through the holes in the hoses. Supply is carried out in two ways: into the soil, to the rhizome using droppers, or to the surface through hoses - a special watering tape.
Drip irrigation is distinguished by the method of water supply:
To supply water to crops requiring irrigation, pipelines with specially mounted splitters are used. The pipes are placed and secured along the perimeter of the site, along the walls of the greenhouse, in prepared furrows. The filter at the outlet of the water supply or tank prevents blockages in watering ribbons and holes. The valve controls the water supply.
Advantages and disadvantages
The advantages of the drip irrigation system were appreciated by gardeners and gardeners who tested it in action.
Advantages of drip irrigation:
The use of drip irrigation makes the farmer's work easier, and so significantly that it leaves no room for analyzing the shortcomings of the system. And they are:

Calculation of consumables
Correctly installed perforated hoses are spaced at intervals of no more than 30 cm. High-quality moistening of the soil and root system occurs in about 2 hours. Approximate water consumption per 1 sq. meter - 20-30 liters. A longer time for watering means excessive consumption of water, as well as waterlogging of the soil, leading to diseases and rotting of the roots.
DIY drip irrigation system
To correctly calculate the irrigation structure, the area requiring irrigation is taken into account. The length and location of the pipes and the volume of the gravity system storage depend on it. If drip irrigation is forced, using a well pump or water supply, it can be controlled manually or automatically, provided that a water supply controller is installed.
The capacity of the irrigation tank is calculated using the formula: volume of required liquid for 1 sq. meters (about 20–30 l) multiplied by the irrigation area.

Design
Creating a home watering system begins with developing a plan. You can choose a stationary one - for perennial crops, or a portable model - for annual crops. Irrigation in greenhouses is suitable for growing cucumbers, tomatoes, peppers, and strawberries.
Irrigation system plan for the site
Planning the irrigation system on the site:
After calculations and preparation of materials, installation of the irrigation system begins. A home tool kit will do.
Installation of simple drip irrigation
An example of creating a drip irrigation system for one plant:

The system is installed in three ways to choose from:
For open ground
Installation is carried out according to a similar scheme, but taking into account the following features:
From infusion medical systems
Medical drippers do an excellent job of garden watering. They have rubber adapters that are conveniently inserted into the main hose, as well as ready-made water supply intensity regulators.
Drip irrigation using medical systems
Irrigation installation diagram:
The first start of water will allow you to evaluate the intensity of the pressure, which can be adjusted later. If a tank is used for irrigation, its top should be protected from direct sunlight to prevent contamination of the filter and hoses.
From plastic bottles
The simplest option for drip supplying water to the root is to use plastic bottles. This is an elementary, profitable and reliable device that serves well in greenhouses and open ground. The summer sun heats the water, and at night the earth continues to be moistened with warm water.
Bottle irrigation system
A peculiarity of using the method when moistening dense clay soils is the need to monitor the cleanliness of the device’s holes. In dry times, plants require periodic heavy watering in addition to drip irrigation. The disadvantages include the difficulty of servicing large areas.
The device is cheaper than a ready-made kit, but is not inferior to it in terms of efficiency. The choice of bottle size is based on the size of the plant and its need for moisture. Containers from 1 to 5 liters are used. The amount of watering time that will last depends on the size and number of holes. To create them, nails, an awl, and a needle are used. Use a nylon stocking or fabric as a filter.
Relationship between bottle volume and watering time^
Installation options:
Liquid nutrients and fertilizers are poured into a bottle in a diluted state. The proportions for the correct solution are indicated in the instructions for each fertilizer. Feeding the plant will be uniform and distributed along the entire length of the root.
Underground drip irrigation
The root system of garden crops is shallow, located closer to the soil surface. The distribution pipes of the irrigation system are placed taking this factor into account - no deeper than 2 shovels. If the pipeline is located at a shallower depth, there is a possibility of damage during cultivation and digging.
Subsoil moistening device
Arrangement of underground irrigation involves planning the placement of plantings for several seasons, so that the plants are located close to a source of moisture. The watering device is not intended for free movement within the area.
A preliminary design of the system will help to correctly calculate the amount of materials required, the location of the trenches and the drainage layer. The following are placed in the recesses prepared according to the diagram:
It is recommended to make perforated pipes yourself, since production ones have too large holes. The perforation diameter should be up to 20 mm, the step between them should be no more than 40 cm. Clogging of nozzles during underground irrigation is inevitable. A cheaper filtration option is nylon tights, while a professional approach uses geo-fabric.
The water storage tank is raised to a height sufficient to create high-quality water circulation. Depending on the length of the system, the approximate height of the tank placement is at least 2 meters.
Underground irrigation system for garden and vineyards
Orchards and vineyards that require constant watering are distinguished by a deep and powerful root system, going 1 meter or more deep. To moisten garden trees, pits are created near them by drilling. The recess is filled one-third with drainage (crushed stone, expanded clay).

A vertical pipe up to 5 cm in diameter is installed, with holes, a filter and a plug at the bottom. The size of the hole depends on the age of the plant and the size of the roots. For young trees it is possible to use a depth of up to 72 cm, for mature plants with a powerful root system - up to 1 meter.
Vertically installed pipes or hoses are combined into a single network by main pipelines coming out of the water storage tank or connected to the water supply. If it is not possible to install a general system, the vertical pipes at the roots are filled with water manually. To avoid blockages, the upper part of the pipes is closed with a lid or plug.
Automation of subsurface irrigation
Connecting the system to a well pump or water supply, as well as installing a timer and controller, makes automation possible. The device allows you to set a program to independently turn on and off watering.
A plastic canister, bucket, and bottles with a volume of more than 50 liters serve as water storage. Medical infusion systems are used as watering hoses - cheap, durable and reliable devices. There are two options for arranging home drip irrigation:
Making a home automatic watering system using the second option will take more time, but the result will be a reliable device that can be used not only to moisten the soil, but also to feed plants.
In order for plants to thrive in the garden or greenhouse, they need to be provided with good lighting and proper, even watering. Therefore, every gardener tries to create the most comfortable conditions for all representatives of the flora that grow on the site. And if everything is more or less clear, then what about watering? You've probably heard more than once that simply pouring water from a hose is harmful to plants. That is why many people are thinking about a more gentle type of moisture supply to crops. A do-it-yourself drip irrigation system is quite simple to make, but there are a huge number of advantages from using it.
What is drip irrigation, how to turn it into a “system” and what advantages can it have? Before we answer these questions, let’s figure out why heavy watering with a hose is so harmful to plants. Most people are even willing to water the plantings manually from jars rather than use a hose.

And all because:
- the pressure of the jet from the hose erodes the soil around the stem and roots of plants, which crops really don’t like;
- the soil around the plants receives too much water, which negatively affects the process of natural aeration - the air that the roots need is simply pushed out of the soil by water;
- If you water the garden with a hose, the water consumption will be very high; this indicator is extremely important for those garden plots where water is brought by water tankers, but for some reason there is no water supply system and wells;
- Because of excess moisture in the soil, plants begin to grow poorly, become sick, their roots rot, and eventually the plantings die.

These are the main reasons why many gardeners are increasingly thinking about installing a drip irrigation system in their summer cottage. Drip irrigation is truly a win-win option for both greenhouses and open ground. It is a system of water hoses, which are connected at one end to a reservoir of water, and with many other ends of the branches dug into the ground right next to the root system of each plant individually. That is, many thin hoses are necessarily diverted from the main, main one, and each goes to a separate plant.

On a note! Such a system can be equipped for absolutely any crop. But most often, summer residents provide drip irrigation for peppers and other, more capricious plants.

As a rule, such a system cannot be universal for every garden. Typically, a separate drip irrigation plan is drawn up for each site. It will indicate all the plantings that need a gentle supply of water, and all hoses will be laid in accordance with this plan. This is probably the main drawback of the drip irrigation system - you can’t just go to the store and buy the first kit you come across for installing this device. By the way, that’s why many people do everything with their own hands.

Benefits of drip irrigation
- Water is supplied directly to the root of the plant without affecting the stem, which means it does not expose the crop to the risk of plant diseases associated with excessive moisture.


On a note! It was with the help of the drip irrigation system that it was once possible to turn dried-up Israel into a blooming oasis, in which gardening is now widely developed. So drip irrigation is time-tested.
Most likely, after reading the beginning of the article, you are inspired and are already thinking about going to the store for a drip irrigation system. But don’t rush: first, first you need to draw up an irrigation plan and use it to calculate how many meters of hoses you will need. And secondly, drip irrigation is faster and easier to do with your own hands.

Prices for drip irrigation systems
drip irrigation system
What can drip irrigation be made from?
Knowing the basic principle of operation of a drip irrigation system, it will not be difficult for an imaginative gardener to come up with what this device can be made of. The system typically consists of a large water tank mounted on an elevated surface. A long main hose is connected to it in the lower part using taps, to which, in accordance with the irrigation scheme, hoses with a smaller cross-section are connected through fittings. And the ends of small water conduits are dug directly under the root of each plant or fixed so that the moisture from them drips directly along the stem onto the ground.

On a note! It’s good if you take care of the presence of a filter in the irrigation system. The fact is that various debris can get into the water (if the tank is open), which will quickly render the hoses unusable by clogging them. Everything will have to be redone to make the system work again.

This is what a drip irrigation system looks like. It can be complicated and equipped with a controller, or, conversely, simplified.
Table. Ideas for a DIY Drip Irrigation System.
| Material | Description |
|---|---|
| The most familiar and understandable way. You will need a thick watering hose and thin water conduits with a diameter approximately the same as the air supply hose of a conventional pump for wheels and balls. The entire system is connected, as in the case of industrial installation, using fittings. |
| There can be two scenarios here - the bottles can be hung near the plants or dug into the ground. In the first case, they are equipped with droppers, in the second, a lot of holes are made in them, and the upper part is cut off. The system is inconvenient because you have to add water to the bottles. |
| It is very easy to make drip irrigation from this material. Droppers are an affordable material; they can be purchased at a pharmacy or asked from a medical professional you know. |


The device looks like this: a plastic bottle with small diameter holes is dug in near each individual plant in the greenhouse. The bottle is filled with water, which seeps through small holes and nourishes the roots of the plants.
There are also many modifications of the listed ideas that can be improved or, conversely, simplified. Let's consider creating a drip irrigation system from conventional medical droppers.

Materials for a dripper irrigation system
Where does the installation of an irrigation system begin? And it begins with developing an irrigation scheme and acquiring the necessary materials. The plan should reflect the complete layout of your site, and not just show the location of the house and greenhouse, but also show all the garden plantings. But this is the case if you decide to equip your entire garden with a drip irrigation system. To equip an irrigation system for a small plot - for example, three strawberry beds - it will be enough to draw up a detailed diagram of these same beds. The diagram also indicates the location where the water tank will be installed.

On a note! Try to transfer the most accurate dimensions to the drawing - this will simplify the calculation of the amount of materials needed. Measure everything with a tape measure.

Materials needed to make a drip irrigation system:
- water tank- as a rule, this is a large plastic tank; It is better not to use metal, as it will begin to rust over time, and rust particles will clog thin hoses, which will lead to damage to the entire system; in this case, the tank must be opaque, otherwise the water will quickly bloom;
- main pipe- it is best to use plastic, as it will last longer; the tube will be connected to a water tank, you can also use a hose;
- medical droppers in an amount equal to the number of bushes that need watering;
- ball valve, opening the flow of water;
- filter, ensuring the purity of the water entering the droppers;
- fitting for branching hoses;
- stub for main hose.
On a note! The water tank must be located at a certain height, so you should immediately take care of the presence of a stand for it. The optimal height for raising the tank is 2-2.5 meters.

Installation of a dripper irrigation system
So, the materials have been purchased, plans have been drawn up - it’s time to start making a drip irrigation system from drippers.
Step 1. It is necessary to make a hole for water outlet in the tank. To do this, cut a hole for the ball valve a few centimeters from the bottom of the tank and install the latter using seals and a coupling so that water does not leak out.

On a note! If you plan to install a filter in your system, it is best to install it at the water outlet from the tank so that all debris that gets into the water does not clog the tap and hoses. Instead of a filter, you can use a piece of foam rubber, but it will need to be changed regularly.
Step 2. In the hoses that will be located between the bushes, we make holes of such a diameter that the ends of the droppers will be held inside. The number of holes will be equal to the number of plants being watered.

Step 3. We connect the main main hose to the tap, to which, according to the diagram, we also connect those that will be located between the rows of bushes. The connection is made using splitter fittings.

Step 4. We stretch the hose system and lay it between the rows.

Step 5. We close the ends of the main hoses with plugs to prevent water from spilling out.

Step 6. We remove the needles from medical droppers, leaving the rubber tips in place.
Step 9 Open the tap and allow water to enter the system.
Step 10 Using a regulator with a wheel on the droppers, we control the flow of water, adjusting the intensity.


On a note! Be sure to cover the water tank with something from the sun's rays to prevent the water from blooming. Otherwise, microalgae will grow in the tank, which will quickly contaminate the filter.
Video - Installation of drip irrigation from drippers
You are convinced that making a drip irrigation system yourself is not difficult. How much cheaper it is than buying a ready-made one remains an open question. This will be easy for those who have medical workers in the family or people who can buy IVs at a discounted or wholesale price. Otherwise, the system may turn out to be quite expensive.

And finally, I would like to give some tips on using drip irrigation that will extend its service life and make it easier for you to use.
- The reservoir should only be filled with clean water to keep the filter clean for as long as possible.
- By the way, you need to clean the filter weekly even if you fill it with clean water.
- Before you first start using your drip irrigation system for its intended purpose, flush it and see if everything is working correctly. It is better to eliminate shortcomings immediately, if any.

Now you fully understand what drip irrigation is, why it is needed, and how to assemble it from ordinary droppers. The system is not complicated, but very functional. That is why do not waste your time now, so as not to run around with buckets later.
Video - How drip irrigation from drippers works
The main direction in growing any type of plant is watering (saturating the soil with moisture). The most important fact is to provide the right amount of water to young seedlings and seeds at the earliest stages of their development. A large number of garden and indoor plants are irrigated abundantly when planted in open soil or in a greenhouse. But there is another main factor in the rapid growth of many different garden and vegetable crops - this is the provision of living moisture during their active growth and vegetation. In this case, not all plants require the same amount of water. Some of them like to grow in conditions of high soil moisture, while others prefer to develop in dry soil. In this case, do it yourself with your own drip irrigation for your dacha at no cost. And how to do this correctly is worth telling in this article.
In order to distribute water more proportionally and efficiently among all plants, there are special systems developed by both gardeners themselves and specialists. This system is called drip irrigation. It is used in the garden with great success. There is no need to walk around the garden with various soda equipment (buckets, watering cans, sprinklers, sprayers, etc.). And even more so to stretch the irrigation hose throughout the garden, spending a lot of time and effort on this. You can set up drip irrigation in your garden plot yourself. To do this, it is not necessary to have special knowledge and skills. You just need to study the assembly diagram and buy the necessary materials for this (piping system and barrel). There are less complex methods for creating drip irrigation for your garden beds. Their implementation will require minimal expenses and skills from you (using plastic containers in a variety of interpretations).

How can you make a drip irrigation system at your dacha yourself? What possible options exist. How can you implement them?
If you read this article carefully, you will learn how to make drip irrigation from plastic bottles. It is worth saying that there are several options for drip irrigation systems. As a rule, they are widely used by many summer residents to water their beds. One of the most complex, but quite effective, is drip irrigation, consisting of a tank (plastic or metal container for storing water), a pump, a pipeline system with special holes for spraying and connecting fittings. For a summer cottage, this option is preferable, but only if you have large beds that reach more than 10 m in length. This system is also suitable for small gardens. This will take less time for maintenance and installation.
The main principle of operation of these systems is the operation of the law of physics, namely in communicating vessels. According to this law, water is distributed evenly in communicating vessels, regardless of their main parameters (shape, width and height). Based on this, all the water in this drip irrigation system for the garden (dacha) will be supplied equally through all pipelines, while maintaining the required pressure.
The barrel is installed at the required height from the surface on supports. (you can equip a wooden or metal frame).
It is necessary to connect communications to the barrel: on the one hand, water drainage from your well (well) or water supply system, and on the other, irrigation pipelines separated by horizontal lines throughout the area. It is necessary to take into account the fact that if there is a well or well and there is no central water supply system, you need to install a pump. It will ensure an uninterrupted supply of water to the barrel.

Watering the beds or vegetable garden is carried out in small portions and into the root system of the plant itself. Based on this, the maximum effect from water entering the soil occurs. After you understand all the drawings and the basic principle of operation, you can start planning the site and drawing a schematic representation of all the irrigation pipes. In addition, the diagram must indicate the length of the pipes, the placement of the barrel, the method of filling it with water (manual filling with buckets, pump, rainwater).
A typical work plan for the installation and arrangement of drip irrigation for a summer cottage:
- Taking in hand a blank sheet of paper (you can also use special programs on a computer), we will draw on it a diagram of a summer cottage plotting the existing plantings that need to be provided with moisture, as well as communications (water pipe, well, main hose, and other options for filling a container with water) . In addition, you need to measure the length of the rows and the distance between them. This diagram will help you make a more accurate calculation of the amount of material needed.
- You need to start planning the placement of the barrel. Special attention should be paid to this work. Depending on the filling method, the container for drip irrigation in the garden should be placed rationally and ergonomically. If you use a pump to supply water to a barrel, it can be placed anywhere on your site, but close to the supply source and beds. In addition, it is necessary to install the barrel closer to the garden. The height of its installation varies depending on the topography of the summer cottage (1.5-2.5 m).
- After you install the container, you need to start planning the installation of the drip irrigation hose. As a rule, one branched hose is required per bed. Branching with drip lines is made using special connectors. The central hose is installed in relation to the container strictly perpendicular to the bed. It is secured to the barrel using starter fittings. To be able to install the fitting, a hole is made in the barrel, slightly above its bottom, with a drill with the required drill diameter (usually ½ inch). After you have inserted the main pipe with branches, you need to start planning the insertion of a filter to purify the water that will flow from the container to water the beds. If you don't do this, debris may clog the IVs. This, in turn, will negatively affect the functionality of the drip irrigation.
- Drip tapes in rows should be installed close to the plants. Drip must be sent to the base of the planted crop.
- The main central water supply pipe to the barrel is secured using a cut-in fitting equipped with an adapter. In the well it will be connected to the pump. In addition, for drip irrigation, you can use external pumping stations rather than deep ones on the site. But there is one drawback to this - it is necessary to dig a pit for this station.
- After completing this work, you can safely begin filling the container with water and ventilate the system in action.
- The use of drip irrigation in the garden allows you to completely solve the issue of moisture deficiency during dry periods during the growing season of plants. The very first start of the watering system should be done by flushing all drippers and pipes. To do this, you need to remove all the plugs and run the water several times. In addition to everything listed, there are also innovative systems - automatic drip irrigation. In your garden, their use will be necessary if there are several plots and it is impossible to keep track of them all. In this case, special sensors are installed that activate the water at the required time, in accordance with the settings.

You probably now understand how to make a drip irrigation system with your own hands. In this section it is worth listing the advantages and disadvantages of this system.
- Since watering is carried out under the plant stem itself, it is possible to add liquid fertilizers to the soil without causing any harm to the plants.
- Saving personal energy and time.
- There is no possibility of soil drying out and excessive waterlogging.
- This irrigation system is used for almost all types of garden plants, and also for trees and shrubs.
- Constant feeding of plants.

The main disadvantages of this irrigation system:
- Costs for purchasing the necessary materials, components and pump.
- Constantly requires care. The filter and droppers need to be cleaned regularly.
- Electricity costs for pumping water into the container.
- Despite all the disadvantages listed above, many reviews of drip irrigation in the garden indicate that there are many more advantages. And the most important thing is a good and high-quality harvest.
Drip irrigation from plastic bottles for the garden
If you do not know how to properly make drip irrigation, then in this section we will talk about how to make this system from plastic bottles. To be able to save personal money on the purchase and installation of an automatic irrigation system using a container and a pipeline system, many resourceful gardeners began to use other methods of organizing drip irrigation on their site - plastic bottles. According to practice, the use of this irrigation system will be effective only if it is necessary to provide plants with a certain amount of moisture in a small area for 4-5 days. It also happens that a summer resident comes to his garden very rarely (usually on weekends). Based on this, plastic bottles come in handy.
How can you make your own drip irrigation at your summer cottage from plastic bottles?
To be able to organize watering of country crops, you need to use plastic bottles with a volume of 1.5 to 3 liters. You can use larger containers. But it would be advisable to use it only when growing garden crops that do not require a lot of moisture.
Drip irrigation with bottles at a summer cottage is done in two ways:
Hanging systems. This method involves installing a wooden or metal frame along the rows of plants. Near each plant you need to hang a bottle filled with water. You need to make two small holes at the neck of the bottle (if the soil is sandy or black soil), and four if the soil is very hard.

Near each or every two plants, to a depth of approximately 8-16 cm, it is necessary to dig plastic bottles with holes made on their sides. The bottom of the bottle needs to be cut off. This way, you will have the opportunity to organize automatic water filling in rainy weather.

Using the described drip irrigation methods, it is also possible to fertilize plants with liquid fertilizers. These methods are the cheapest and least time-consuming. But there is one drawback - a waste of personal time organizing this irrigation system (cutting holes in bottles, creating a frame, etc.). Despite these disadvantages, most summer residents actively use plastic containers to provide water for their beds.
Video on the topic: How to make drip irrigation. DIY drip irrigation