Laying the tiles is completed by grouting the joints, which have an attractive appearance and complete the entire surface. But, alas, after a while, dirt begins to accumulate between the joints of the tiles, and with constant exposure to moisture, mold also multiplies. To avoid this problem, you should periodically clean the joints of the tiles, we will discuss how to wash the joints between the tiles later.
Seams between tiles - grout options
Before moving on to the direct issue of cleaning the joints between tiles, first of all, you should study the materials that are used in the process of grouting.

All compounds that are used during grouting are divided into two main types:
1. Mixtures with a cement base.
They appear in the form of a powdered filler, which is diluted with water or latex. Inexperienced specialists work with mixtures that contain Portland cement substances. This grout is quite flexible and easy to work with. In addition, it fills the narrowest seams with ease.
A respirator and safety glasses are used to dilute this kind of mixture. Since there is a risk of contact with the mixture in the eyes or the appearance of allergies.
There are cement-based mixtures in a ready-to-use form. This material is also convenient for work, only its cost is much higher. Therefore, it is practically not common in the construction industry.
When mixing the mixture yourself, it is recommended that all instructions specified by the manufacturer be followed exactly. If this is not done, then the solution is too liquid, after drying it will spread and form cracks. The use of too thick a solution is fraught with the fact that the mass is not able to fill all the joint areas, therefore, the tightness between the tiles is broken.
2. Grout based on the use of epoxy resin.
This mixture has the highest strength and adhesive properties, in addition, the percentage of its moisture absorption is practically zero. It is used in the process of grouting the joints between tiles installed on the surface of the pool, in the bathroom, baths, on the front sections of the building, in rooms with high performance characteristics.

The use of such a grout requires special care and scrupulousness from the person performing the work. Since it will take special efforts to remove excess material, there is a risk of damage to the tile itself.
The grout contains epoxy resin and a special hardener, which fixes it to the surface. It is sold in different packaging and mixed with the main formulations before starting work. The finished mass is not intended for long-term storage.
Seams between tiles in the bathroom - cleaning with chemicals
Before proceeding to the consideration of the means by which the tiles are cleaned, a few words should be said about the rules for caring for it. If you do not adhere to them, then the tile will serve its owners for a short period of time and will lose its appearance.
Despite the fact that ceramic tiles are highly durable and resistant to various kinds of influences, there are a number of rules for its operation:
- abrasive cleaners or a metal brush are not suitable for cleaning tiles with a glossy surface, even with minor scratches, the original gloss is lost;
- chemical compounds based on the use of acid can easily damage the seams between the tiles on the floor;
- to improve the strength of the joints, it is recommended to use an epoxy-based paint, it allows you to improve their resistance in front of a humid environment;

- in the process of cleaning tiles, you should rely solely on specialized products that are designed for cleaning ceramic tiles, the use of other types of products is unacceptable;
- do not use cleaning agents that contain pumice, sand, grease solvents in the form of soap;
- if there is a need to remove various kinds of dirt, then for these purposes use a brush with soft bristles that are not able to remove the coating on the tiles;
- for cleaning matte tiles, use specially designed emulsions, after washing, it is covered with wax mastic, which makes its color more expressive.

To buy a tool with which it will be possible to clean the seams between the tiles, it is enough to contact any household store. There are a wide variety of cleaning products available for cleaning tiles and the joints between tiles.
Chemicals are characterized by the following advantages:
- the ability to remove deposits of a mineral nature;
- effective fight against unpleasant odor;
- protection against harmful microorganisms, bacteria and microbes;
- the use of aromatic additives fills the room with a pleasant smell.
Please note that each type of tile has its own characteristics, which determine the type of cleaning agent used in the process of washing it. Before using this or that composition, you should carefully read the instructions from the manufacturer.
For example, if you use a solution in which chalk is present to wash ceramic tiles, stains will appear on the surface, which is very difficult to get rid of.
Do not use chemicals right away. First try to get rid of the dirt with a soft brush and water. If the desired effect is not achieved, then resort to more radical methods.
An excellent tool in this matter is the Pemolux powder mixture. To apply it, use the same brush, which is moistened first in water and then in powder. In this case, it is better to wear rubber gloves. After applying the composition, it is recommended to wait about ten minutes, and then all seams are cleaned with a brush.
The use of this method is relevant if the tile has slight contamination.

How to clean the seams between tiles with folk remedies
- moisten tile surfaces;
- apply baking soda with a sponge;
- wipe the tile surface to get rid of dirt;
- do not press too hard on the surface, as there is a risk of damage to the tiles.
Bleach helps to make tiles and the joints between them snow white and shiny:
- dilute lime with water to obtain a liquid mass;
- using a spray bottle, apply the solution to the surface;
- after seven minutes, wipe the tile with a damp cloth.
Tip: use a mask when performing this cleaning method, as there is a risk of unpleasant odors. Although the positive aspect of such cleaning is the fact that all mold and pathogenic bacteria are destroyed between the seams.
The use of acetic acid will help to deal with stubborn dirt between the tile joints. To clean the joint between the tiles, follow the instructions:
- apply vinegar essence using a spray bottle;
- using a brush, spread the vinegar over the joint surface;
- after 7 minutes, wash off the vinegar with a damp cloth.

Note that acetic acid is not used in its pure form. It is diluted in a ratio of 1.5 tablespoons to 500 ml of water. It is recommended to use this method first before applying the bleach, as cleaning with vinegar is more gentle and harmless to both the tile and the skin of the person doing the cleaning.
Another popular method for cleaning the joints between tiles is citric acid. To do this, follow these steps:
- take a sponge and wet it with water;
- squeeze a sponge lightly and dip it in citric acid;
- after 3 minutes, rinse the solution from the surface.
The width of the joints between the tiles does not affect the use of one or another processing method. In addition, you should take into account the fact that after applying any of the above cleaning methods, it is imperative to rinse off the solution and wipe the tiles dry.
Another popular way to clean tiles involves a combination of the above methods. To prepare the solution, you will need to mix in a metal container:
- 3 glasses of water;
- 0.25 cups of soda;
- 0.15 vinegar essence;
- 0.15 citric acid.
Always wear gloves when handling the cleaner. This substance is quite aggressive, so you need to work with it quickly. Use a toothbrush or sponge to cleanse.
Apply the compound to all seams and wait ten minutes. Rinse off the surface with clean water. It is preferable to do the procedure at least twice. Even the most difficult dirt can be easily removed with this solution.

How to clean the joints between tiles in a bathroom mechanical method
To use this cleaning method, you do not need to go to the store for chemicals or prepare mixtures based on folk recipes.
It is enough to have sandpaper at home. It is with its help that the seams are cleaned. Only special attention should be paid to the tile, it is unacceptable to scratch it with paper, as there is a risk of damage to the appearance of the coating. This option is fast and easy to implement.
After cleaning all the joints, they are treated with water, and then the tiles are wiped dry.
In addition to sandpaper, use a toothbrush, sponge, dish scraper. This option is suitable for small types of dirt. In addition, as an addition to this method, it is recommended to apply detergent to the tiles.
In response to the question of how to clean the seams between tiles without the use of chemicals and folk remedies, the best option would be to use a sponge based on melamine foam. This material is durable, but at the same time soft. It easily penetrates into any pores, removes all stains and dirt without the use of chemicals.
To apply a melamine sponge, only water is required, and the less effort is applied to wash, the higher the effectiveness of the process. This sponge not only helps to wash the joints between tiles, but also does an excellent job of cleaning plumbing fixtures, sinks, bathtubs, mirrors, etc.

We suggest that you familiarize yourself with practical tips to help make the cleaning process easier and safer:
- when washing the joints between tiles, be sure to use gloves;
- an excellent cleaning agent for the joint between tiles and for cleaning the tiles themselves is the chemical used to wash glasses or mirrors;
- the washing process always starts from the bottom, and the procedure for cleaning and wiping the tiles from the top;
- to whiten the joints between tiles, the use of hydrogen peroxide is perfect, which is applied directly to their surface without further rinsing;
- when the polished tile is cleaned, it is required to apply a special mastic to its surface, and a vinegar solution is used to improve the gloss of the glossy tile.
Removing grout from tile joints
If all of the above methods of cleaning the surface between the seams of the tile did not help, then you should resort to more radical methods. If after a while after cleaning the grout still darkens, then mushroom-like bacteria have settled on its surface. Their main feature is the presence of characteristic dark spots on the surface of the seams.
To paint over these places, a special opaque felt-tip pen is used. It is with his help that problem areas are hidden.
In addition, there are a number of funds available for renovating seams. To buy them, you should contact a specialized store. In the presence of a more serious kind of contamination that leads to crumbling of the grout during washing, you should resort to opening this material.
Advice: Before starting work, furniture and other objects should be removed from the room, since a large amount of dust will be released during the opening process.
The procedure is carried out with great care to avoid damaging the tiles themselves. After the first pass, all joints are wiped with a damp cloth, and then the procedure is repeated again. If the emery wheel failed to remove certain areas, then you should use sandpaper. Next, the seams are treated with a solvent and primer. A new grout is applied to the surface.

In specialized stores, there are products that are designed to protect the joints between tiles. To carry out the procedure for their application, it takes a lot of time and effort. Therefore, these funds are used very rarely. After all the seams have dried, they are treated with a protective compound. A small brush is used for these purposes. It is not recommended to apply the solution to the tiles, as it destroys its integrity. If the mixture gets in, immediately wipe it off with a rag.
In order not to completely remove the grout, proper maintenance of the tiles should be ensured. Once a month, wipe the seams with a stiff brush and warm water. Thus, it will be possible to preserve their pristine appearance for many years.
How to clean the joints between the tiles in the bathroom if the appearance of the tiles has deteriorated over time and you decide to update the grout. If cleaning the glossy surface of the tiles themselves is not a particular problem, then cleaning the joints requires a more thoughtful and scrupulous approach.
How to properly wash tiles
"It is not clean what is washed, but what does not get dirty" - says the popular wisdom. So it is with tiles: its seams are the most vulnerable part of the entire visual appearance, so it is advisable to keep them clean at all times and, at least, avoid actions that could lead to pollution. One of the main reasons for darkening and loss of brightness of tile joints is improper cleaning of the entire coating as a whole.
Tiles should be cleaned and cleaned at intervals of 7-10 days, depending on the intensity of use, as well as whenever critical contamination forms on the tiles: from coloring liquids, dirty hands or, for example, the results of the work of young artists, or red bloom from the high content of iron in the water. Thus, it is possible to distinguish regular preventive and local special cleaning of tile coatings.

Regular tile cleaning consists in removing plaque formed by dust, small drops of grease and dirt, and soap stains. This type of cleaning can be carried out both dry and using cleaning agents: grease solvents, antistatic agents, polishing compounds. In this case, dirt is removed only from the central part of each individual tile, the seams are not affected. In rooms where tiles are constantly in contact with water, the cladding is cleaned under a stream of liquid and, as a rule, without the use of special cleaning agents. The main requirement for this method of cleaning is to maintain a low relative humidity in the room, so that the tile is in a dry state most of the time.

Local cleaning is carried out in local areas or in full, if the regularity of preventive cleaning is not high enough. The difference between this type of cleaning is the targeted removal of a certain type of contamination. At the same time, the observed severe contamination of the seams, as a rule, is the result of non-compliance with the rules for cleaning the tiles and is carried out according to a more complex scheme, up to prompt repair.
Choice of cleaning agents
The range of household cleaning chemicals is very extensive, most of the products can be successfully used to clean the tile fugue from contamination. In total, three categories of suitable formulations can be distinguished:
- Combined universal kitchen and bathroom products from manufacturers such as Mister Muscle, Domestos or Cillit. The type of detergent should be selected based on the nature of the dirt: grease, dust, dirt, limescale. These products are good because they are supplied ready-made and in a sufficiently strong concentration, however, some may be confused by the high cost of such household chemicals. It is important that the cleaner has a neutral or high PH: acidic environment destroys the joint filler and leads to increased porosity.
- Self-prepared compounds or household chemicals that do not have such a direct purpose as tile cleaning. Starting with chlorine and oxygen bleach, ending with glass detergent, washing gels and hand washing paste for car refiners. Often, when cleaning seams, there are areas with particularly heavily ingrained dirt, where you have to select a cleaning agent by a test method. Self-prepared formulations based on baking soda, ammonia and whiteness are also quite effective, they are less expensive and therefore more popular.

- Specialized fugue solvents are used in two cases. The first is if the bevels of the tiles have not been properly cleaned of aggregate residues and constantly spoil the overall picture of the joints. Also, cleaners of this kind can be used when stubborn dirt does not lend itself to any of the available cleaning methods: in these situations, it is better to remove a thin top layer of material to renew a fresh, unstained surface.
How to properly clean a joint or grout
The very process of cleaning tile joints is extremely simple. Initially, you need to remove dirt from the main surfaces so that the washes do not subsequently drain onto the cleaned seams. Better to do it this way: apply the cleaner to the seams and leave for 20-30 minutes. During this time, the tile in the selected area is slightly moistened from the spray bottle with water lathered with dishwashing detergent. In this case, each tile must be wiped separately, often rinsing the rags in a bucket of clean warm water.

During the cleaning of the common plane, the dirt in the seams will already be corroded. For further work, you should arm yourself with a small brush, you can use a toothbrush. It is convenient to carry out cleaning in this order: starting from the uppermost row, the crosshairs of the seams are first sequentially cleaned, then the vertical joints between the tiles of the same row, and after that - the common horizontal vein. In this case, the dirty wash and the remains of the cleaning agent do not need to be removed, they will drain onto uncleaned areas.
When removing stains from tile joints, you must constantly ensure that the applied cleaning agent continues to work in the area intended for cleaning. It is advisable to periodically update the presence of liquid solvents on the seams, and when using pasty compositions, sprinkle them with warm water when dry. After all the seams have passed the initial cleaning, if necessary, another portion of the cleaner is applied to them, or a milder detergent composition.

The final task is to remove the remaining detergent with dissolved dirt as thoroughly as possible. This is necessary to avoid the formation of a sticky coating on which dust will accumulate abundantly. The best way is to go over all seams with a clean brush, periodically washing the areas to be cleaned with a spray bottle with water. In conclusion, it will not be superfluous to rinse the entire surface of the tile several times and use a polish to polish it.
Mechanical cleaning
Often, when cleaning tile joints, one can conclude that the work is not being done on removing dirt from micropores, just as a result of long work and efforts, the top layer of filler is removed. There is nothing to be done: sometimes the joints are so badly neglected or affected by mold that partial removal of material from the surface is the only way to return the cleanliness and visual clarity to the joining.

It is important not to overdo it when cleaning mechanically. In the most contaminated area, you need to check to what depth the dirt has eaten and visually adhere to a certain depth of material removal throughout the entire cladding area. It often happens that in the pursuit of removing particularly deep dirt, the grout surface becomes wavy, which will finally ruin its appearance. Do not forget that after removing even a very thin top layer, it makes sense to try washing the tiles again: often on a slightly peeled surface, household chemicals begin to successfully cope with the removal of dirt.
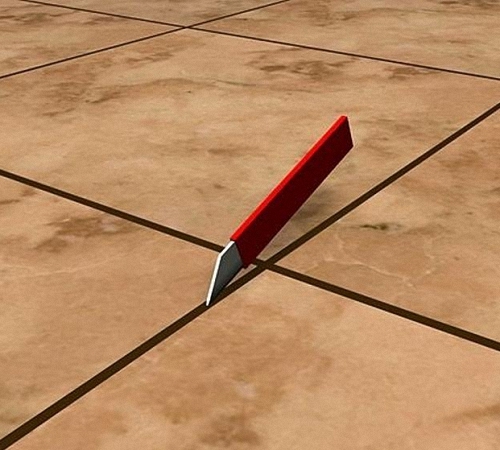
To remove a thin layer of seam, you can use the simplest mechanical method: sharpen the handle of any cutlery to form a spike of the same width as the tile seam. Hard stainless steel will not blunt when scraping the seams, it is only important not to exert excessive pressure on the tool so as not to inadvertently crumble large lumpy fragments. The depth of filler removal is controlled by the number of scraper movements: it should be the same in each area.

The second way to remove the grout surface is with the help of special fugue solvents. In this case, the removal depth is controlled by the time during which the applied solvent reacted with the filler. With this cleaning, it is very important to establish the correct sequence of actions: work in small areas, for example, 5x10 tiles, ensuring uniform removal. Residual solvent must be removed quickly and completely after the specified holding time.
Replacing the joint filler
Complete renovation of tile joining is rarely required, but there are situations when this method is the only one possible. In particular, such a procedure is indispensable when the grout is damaged by fungus and mold, as well as when the joints are contaminated with potent dyes, such as brilliant green or a solution of potassium permanganate.

It makes no sense to partially replace the joint: the filler is firmly held in the grooves of the tile due to the T-shape of the profile, that is, it is in a kind of lock. In order for new seams to last a long time, you first need to completely remove the old ones and process the joints between the tiles. For these purposes, it is convenient to use special scrapers to clean the seams from glue. It is better to choose a tool with a serrated working edge instead of a diamond one, so it is guaranteed that no scratches and chips are formed on the tile bevels.
From available tools, you can offer a blade for a hand-held bow saw for metal. Many people are familiar with canvases with a double-sided tooth of different sizes. It is enough to break off the tails to leave the middle part with a length of 170-200 mm. Next, you need to wipe off the bulk of the filler with a large tooth, and then pick up the remains in the corners by slightly tilting the blade with a small tooth. We do not recommend doing such work with a grinder or a brush-brush, such tools are guaranteed to spoil the edges of the tile.
Contamination prevention
It is quite possible to avoid the hassle of cleaning tile grout in the future. To begin with, it is imperative to carry out a bio-protective treatment of the seams before they are filled with grout. The introduction of an antiseptic into the root of the seam and subsequent impregnation of the filler will eliminate the formation of mold and mildew during operation. It remains only to prevent damage to the seams by settling dust and dirt dissolved in the liquid flowing down the tile.

If the joints are rubbed with cement, plaster or sand grout, open pores will inevitably form on the surface. You can protect them from dirt using any universal water repellent. The simplest method at hand is to rub the sanitary silicone with effort into the seams, and then remove the remnants with the coarse fiber side of the kitchen sponge.
Furan or epoxy based grout is virtually immune to any kind of contamination. You can fill the seam with them completely, but there is also a more economical option. An ordinary gray cement grout is applied to the root of the joint between the tiles. While the composition is still raw, using an improvised scraper, it is necessary to deepen the seam by 2-2.5 mm. After that, the surface is degreased with a toothbrush soaked in acetone, then the seam is covered with a grout based on synthetic resins. This method is somewhat more time consuming in comparison with conventional filling of joints, but at the same time it is less costly and rather durable.
The tiles on the floor, and especially the joints between them, get dirty very quickly. This happens both in connection with its daily use, and after the repair work carried out. In any case, it looks unaesthetic, which means that such a problem needs to be solved.
Practical tips and little tricks for tile maintenance will be discussed in this article.


The causes of contamination
Before proceeding to the description of the means to combat contamination between the seams, it is necessary to understand the reasons for their appearance.
Dirt between the tiles on the floor appears for the following reasons:
- Particles of building and finishing materials get into the cracks during repairs, both in the bathroom and in other rooms.
- The cause of contamination can be the remains of detergents, as well as particles of dirt from the water with which the tiles were washed. After the moisture dries, all the debris remains in the seams and is pressed.
- Compressed dust can also cause heavy dirt and darkening of the seams.
- The fungus in the tile joints creates not only the appearance of a dirty floor, but also causes an unpleasant odor in the room.


The choice of a specific method of cleaning the seams should be based on the cause of their contamination. It is also worth noting that often the seams darken simply from time to time, for example, when the tile has not been changed for more than 10 years. But in all these cases, the floors can be reanimated using the same methods.


Necessary tools and tools
It goes without saying that you should not clean dirty floors with your bare hands.
Therefore, you need to stock up on the following items in advance:
- doormat;
- tough old brush for cleaning teeth;
- broom for sweeping the floor:
- a few rags:


- clean warm water;
- hydrogen peroxide;
- vinegar or citrus juice;
- soda;
- salt;


- solvent;
- mustard powder;
- ammonia;


- bleaching cleaner with abrasive particles;
- small metal hard sponge;
- old small knife.


Not all of these items may be needed to clean the seams, but only a part of them. The choice of a specific cleaning method should be selected based on what led to the appearance of dirt in the seams.

It all depends on the choice of a specific method of cleansing, but it is better to keep all items at hand.
After renovation
Usually, after repair work, particles of cement mixture, paint, lime or varnish may remain between the tiles.
The sequence of actions in these cases will be as follows:
- Wash the tiles with warm clean water and wipe them dry.
- Determine the number of stains and their origin.
- If the spots are cementitious, they must be carefully cleaned with a knife or blade.


- In all other cases, the solvent or kerosene is diluted with water in a 2: 1 ratio and the solution is liberally applied to the stain. Leave in this form for a couple of minutes, and then scrub vigorously.
- If the dirt is not easily erased, then you can use a metal float.
- After that, the contaminated area is thoroughly wiped off again with a damp cloth and clean water, and then dried.
- If the joints are heavily soiled, steps 4 to 6 can be repeated again.

Using this cleaning method, it is worth remembering that not all tiles can be cleaned with aggressive products. Therefore, first you should read the manufacturer's recommendations. It is also worth scrubbing off the dirt very carefully, so as not only not to damage the tile itself, but also the seams between it.


Joint cleaning work involves the use of rather aggressive products. Therefore, it will not be superfluous to use gloves and a mask on the face.
Traditional ways
If the seams between the tiles need to be cleaned of ordinary dirt, then you can resort to the traditional methods that our grandmothers also used.
Such cleaning options, despite their simplicity, turn out to be very effective:
- Using baking soda and lemon juice will not only remove dirt, but also whiten the seams. In this case, the space between the tiles on the floor is slightly moistened with water and covered with soda quite abundantly. In this state, the seams are left for 10 minutes. Then, using an ordinary sponge or rag, they are thoroughly wiped, excess soda is removed, and lemon juice is poured in its place, which is washed off with water after a couple of minutes. Usually, two to three repetitions of this procedure are enough to completely cleanse the seams.

- Ammonia diluted in warm water also removes almost any kind of dirt. To do this, 100 ml of alcohol is diluted in 1.5 liters of water and applied to the places of contamination for 20 minutes. After that, thoroughly wipe with a sponge and rinse with warm water.

- The whitening toothpaste is also great for cleaning the joints between the floor tiles. A small amount of it is applied to an old toothbrush and rubbed in with vigorous movements, then washed off with water. The paste can be exchanged for a kitchen cleaning powder if desired.

- If you mix equal amounts of mustard powder and baking soda, you can make an excellent cleaning agent. Adding a little water to it, we get a paste, which we apply to the seams with a sponge. Then carefully three places of contamination and wash off with clean water.

These methods of cleaning floor tile joints are the most sustainable, cost effective and efficient. It should be understood that it will not always be possible to remove all the dirt at once in one cleaning session.

In some cases, three cleaning procedures in a row may be required.
Modern methods
If there is no possibility and desire to use the old methods of cleaning, you can resort to modern methods of cleansing:
- Steamer.You shouldn't be surprised, but judging by the reviews, the intense exposure to hot steam on the seams can remove many dirt. This method is best suited in cases where the dirt is small and fresh.

- Cleaning marker pen is one of the most modern cleaning methods. Using such a pencil is simple - all that is needed is to paint over the seams with it. This not only removes dirt, but the seams themselves look new. This invention allows both to clean and renew the joints between tiles at once.


- Whitening gels, such as "Whiteness", are often used not only to remove dirt between the seams, but also to disinfect and whiten the tiles themselves. The gel is diluted with water, applied to the dirt and left for a couple of minutes, then washed off with water.

All of these methods for cleaning floor tile joints are certainly good and effective only if the cause of the pollution is not fungus.
How to remove fungus?
But if the cause of the dirty seams lies not in dust and residues of detergents, but in mold, you should use slightly different methods:
- If it has just begun to appear, then you can prepare your own disinfectant from bleaching gel and ammonia with water. To do this, mix 100 g of "Whiteness" and 50 g of ammonia. This solution is poured into a liter with hot water, and then sprayed onto the fungus with a spray gun and left for half an hour. After this time, the seams are wiped with a damp sponge and rinsed with warm water. Then they are washed again with water, but with the addition of vinegar per liter of water, 100 g of 9% vinegar.

- If the mold has appeared for a long time or appears regularly and progresses, then it can be cleaned only by a radical method. To do this, the seams between the tiles are cleaned with a scraper and treated with a special antiseptic, which can be purchased at a plumbing store or pharmacy. After it has completely dried, the seams are re-sealed and once again treated with an antiseptic solution.
It is necessary to clean the seams between the floor tiles from the fungus in a timely manner. Otherwise, mold will start to grow and can not only disfigure the entire room, but also cause serious harm to health.


