


The arrangement of a wooden floor is recognized as the most time-consuming, expensive and complex, since any structure made of wood should be protected from direct contact with concrete. Otherwise, the floors will become unusable in a short time, and they will need to be replaced. Using some impregnation, you can protect the tree from decay. Chemical protection methods are very effective and prevent the process of material deterioration. However, a wooden structure impregnated with chemicals cannot be considered environmentally friendly. Considering that it is because of this indicator that a tree is chosen, few people use chemistry. When laying on concrete, waterproofing is required over the entire area between the layers. Fasten the wooden flooring using metal squares to create a gap between the bases and the joists.

The subfloor denotes certain bases, which by themselves form an ideal surface for laying the final floor. It is created to ensure the distribution of loads directed to the floor covering.
In wooden structures, draft floors are made by three methods:
- wooden on logs;
- pouring concrete;
- use of plywood flooring.

Wooden floors on logs
In a wooden house, the subfloor device does not differ from the installation of similar structures in a monolithic or brick structure. The only feature is how the lags are attached:
- There is no need to fasten the logs to various wooden boards. The best option is to strengthen them to the basement or grillage of the foundation, retreating a couple of centimeters from all the walls. The distance from the support must be at least 11 cm on all sides of the lag.
- Before laying the base, lay the strapping from below, which is made of a long and thin board. Logs are attached to it using metal anchors. They do not need to be rigidly strengthened with strapping. It should only be fixed so that they do not stagger while working on another layer of the floor. This design will have a few centimeters indent from the walls.
If the distance is less than 11 cm, then it is better to crash into the walls. But before that, it is necessary to make the initial laying on the base, then you should attach a choice of timber or logs. It is necessary to first measure the contour of the cutting site, then cut out in the tree the dimensions necessary for the groove, which will be required for the support function.
Important: it is recommended to add about 2cm to further widen the lag. It must be remembered that the laying of the log and beams is done on the grillage or plinth when the laying of the waterproofing layer is completed.

The standard steps between two lags are 40-60 cm. However, when choosing, great emphasis is placed on the width of the insulation and the required load. Based on this, the choice of the lag section and the acting load is made. With small sizes, the sections should be approximately 15x10, with heavy loads - 15x20, with medium ones - 15x15 centimeters. In case of excessive load action, if the beams have a small section, it is desirable to provide section parameters of 30x40 cm.
Installation of subfloors on logs
When the installation is done, you will need to do the standard installation. It is carried out in several stages:
- It is necessary to fix the cranial bars. They have small sections (approximately 4 by 4), they are fixed in the lower parts of the log from the side. Professionals recommend replacing the cranial bar with boards that will have more lags in width. They will need to be nailed either along or below the lags.
- Boards should be laid. They need to be laid on the cranial bar, but not fastened. Considering that their main task is to fix the insulation, they are left to lie freely.
- Waterproofing. Lay it on the subfloor. This is done to avoid additional load. The waterproofing is laid so that it goes onto the wall at the level where the floor will be in the future. It is recommended to use film insulation, and use a stapler for fastening.
- Thermal insulation - laid on waterproofing.
- Vapor barrier. Lay in the same way as waterproofing.
- Ventilation. To create a ventilation gap, you only need to break through the counter rails along the lag on top of the vapor barrier.
- Coating. At the final stage, it is proposed to use chipboard sheets, as well as boards. From the wall, the logs must be separated by a gap of 2 cm. They will then be placed heaters.

On our site you can find contacts of construction companies that offer house design services. You can directly communicate with representatives by visiting the exhibition of houses "Low-Rise Country".
Video description
Read more about floor insulation in a wooden house - in this video:
Rough plywood floors
The floor in a wooden house is one of the most reliable options, because it has a high hardness. Plywood is also used for flooring. If it is well sanded and varnished, it looks expensive. But in most cases, it is then covered with linoleum or parquet flooring.
Plywood can be laid in one of two options:
- On a cement base. It will be necessary to provide a horizontal and even base or use leveling stands.
- Attach to the legs. The main thing is to correctly set the lags to ensure that the joint of the sheet hits them. The joists must be set in such a way that the top surface provides a straight line. They then remove the insulation and sound insulation.
Need to know! When laying plywood in 1 layer, it is necessary that it be at least 15mm thick, if there are 2 layers, the minimum thickness should be at least 9mm.

All debris and dust must be removed from the base prior to final laying. If possible, priming should also be done - primer treatment. Plywood must be fixed with glue, and the head of the self-tapping screw must be drowned.
Concrete floor
Like the draft and finishing floor in a wooden house, the concrete version is less common than the others. The concrete floor has one significant drawback - it is very cold. This problem can be solved with the help of thermal insulation material.
The advantages include durability and reliability. Compared to analogues, it is more even and durable. The concrete floor in a wooden house is also chosen because it is better preserved from destruction.

In a wooden house, a concrete floor is made in 11 stages:
- Lay on the lags.
- Lay on the ground.
- A concrete screed is made on top of the wooden floor.
- The floor horizon is set with marks (it is recommended to pull the cord for accuracy).
- Stakes less than 11 cm should be hammered into the ground, so that later gravel can be poured over them. After that, it should be tamped and the pegs removed.
- Next, the sand is poured.
- Then a large polyethylene film is laid, creating an overlap on the walls. It will act as waterproofing.
- Using slats, it is necessary to divide the room into equal strips. The width of each should be about 1 meter. The height of the installed rail must be equated with the height of the cord. The concrete is then poured onto the prepared surface.
- Concrete is leveled along the rails.
- Next, the concrete should be covered with a film and left to harden for several weeks. To avoid cracking, it is sometimes necessary to spray the mass with water.
- After the expiration of the term, it is covered with a screed of cement and sand.
Materials for processing lags
Some environmental factors, such as dampness, should not affect the lags. Therefore, when providing a floor in a wooden house, it is necessary to protect them from certain factors.
Bioprotective compounds
The drug with a bioprotective composition protects the tree from mold, decay, blue discoloration, beetles and fungi. One application of such funds will provide protection for 27-32 years. You can buy them in the form of a concentrate. Sometimes a pigmenting substance is added to the composition, which makes it possible to control the quality of application.

Bioprotective compounds are praised for:
- environmental friendliness;
- slight odor;
- absence of allergens.
It is necessary to apply preparations before the installation of the floor in a wooden house has begun.
Indelible antiseptic
A great option if the city has high humidity. It is also indicated for use in places with high rainfall, temperature fluctuations, in baths and saunas. Working with antiseptics is simple and not too time consuming. Approximate consumption per 1 meter is about 400 grams. Surface application can be achieved after 4 coats. After completion of work, the color of the tree will become pistachio.
Folk methods
Folk remedies for processing lags:
- Transformer oil. Due to deep penetration into the structure of the tree and embalming, this agent perfectly protects the material.
- Resin. From bugs, fungi and decay, birch resin will perfectly help. Its only disadvantage is the vulnerability to fire.
- Motor oil. Pros - low price, good protection. Cons - too strong smell, sometimes interfering for several months.

Before starting work, you should understand the layout of wooden floors, which consist of 4 “layers”:
- Draft coating.
- Heat and waterproofing layers.
- Clean floor.
- Finishing.
Therefore, when wondering what to make a finishing floor in a wooden house, you must first complete the first 2 stages, which were mentioned above, and start working on the finishing floor.

To make a finishing floor yourself, you need to buy milled boards.
Need to know! The finished floor in a wooden house is laid 5 centimeters above the subfloor.
The floor structure of the first floor in a wooden house is being built in 3 stages:
- Logs are laid - so that the boards can be laid perpendicular to them. The smallest thickness is 25mm.
- The board must be fixed closer to the wall.
- Next, you should use a hammer and a bar so that the boards are as close to each other as possible. With the help of a self-tapping screw, fasteners of each log are carried out through the comb.
Important! If there are plans to change the floor in the future, it is necessary to use a simple mounting option - all floorboards should be fixed from above to the logs using self-tapping screws.

Conclusion
Every morning, waking up in his dwelling, a person puts his feet on the surface with which he will be in contact all day. Regardless of what kind of dwelling it is, whether it is a high-rise apartment or private property, the floors in it are a three-layer structure, including a rough base, a leveling layer and a top coat.


Peculiarities
The floor in a private house is somewhat different from the one that is mounted in the apartment. In order for it to last long enough, it must be protected from interaction with water, that is, it must be waterproofed. Waterproofing is an independent procedure aimed at protecting the surface from the adverse effects of moisture contained in the environment, which can harm any substance.


Kinds
Depending on the materials used, the floors in a private house are concrete or wooden. The choice of material for the floor device depends mainly on what the walls are made of. If the walls are wooden, then the floor is made of wood. If the walls are brick or concrete, then the floors will be made of concrete. Often the concrete base acts as a substrate for the wood flooring. Whatever type of device is used, it is important to strictly align all its layers, otherwise, an uneven surface will result.


Wooden
The wooden floor is an environmentally friendly flooring with good thermal insulation characteristics. With good waterproofing, such a floor will last for many years. Depending on the technologies used, a wooden floor is built:
- on logs on the ground;
- on supporting pillars;
- on a cement screed.


Concrete
The concrete floor is considered, perhaps, the most impact-resistant and hardy. The cement monolith, which is the concrete surface, will become an insurmountable barrier to fungus, mold and other microorganisms. Its drawback is that using concrete, it is necessary to provide additional floor insulation, since the concrete cools quickly, it does not hold heat at all.


Which ones to choose?
The preference given to one or another design depends on the purpose of the building. In the summer kitchen or in the country, which are operated in the summer, there is no need to create complex structures. In this case, the boards are laid on the logs. Of course, such a floor will not keep warm.
In a capital house used for living all year round, it is better to use more massive structures.


If the house does not have a basement, then the most budgetary and less difficult to implement is the floor of the first floor on the ground. In this case, two options are possible: either they use a concrete base (the so-called screed), or they mount multilayer wooden floors on logs.

The way the floor will be on the second floor is directly dependent on the method of laying floors between floors. With wooden bases, beams and logs are used. If the floors are reinforced concrete, then only logs are used. The floor on the second floor, as well as on the first floor, can be on beams, on logs, on concrete slabs.


If the building has a basement or cellar, then the floor in it must also comply with certain standards. Due to the proximity of the earth, it should be as insulated and stable as possible. The material is chosen depending on the further purpose of operating the premises: if a living room is planned in the basement, then wood is preferred, if a workshop is created, then a concrete screed will be appropriate, and if a cellar is equipped in which stocks will be stored for the winter, then there is nothing better than clay.


In order to avoid unpleasant surprises, when constructing a cellar, it will not be superfluous to find out the depth of groundwater.
Walkthrough
When building a country house, wooden surfaces are often preferred. This is explained by the fact that wood is an environmentally friendly material. In addition, laying such a floor is easy to do with your own hands from scratch. Installation does not take much time, there are no difficulties with repairs in the future. The poor thermal conductivity of wood will help the wood flooring keep the house warm. A big plus will also be a long service life and an attractive, “natural” appearance.

New floor
The new floor in the house begins with the choice of materials. The final result depends on the correct choice. So, you will need:
- Wooden beam or round timber for the manufacture of lags. Logs are transverse beams on which the floor is located. In this case, the height of the beam section should be one and a half or even two times its width.
- Unedged board for rough coating.
- Grooved floor board on a fine flooring.
- Material for thermal insulation: sawdust, expanded clay or mineral wool.
- Materials for waterproofing.


To determine how many boards are needed, the following example will help. Let's say it is planned to lay floors in a room measuring 5x6 m. The rail has a length of 2 m, a width of 0.13 m and a thickness of 0.05 m. For such a board, the logs are laid in increments of 1 m. Calculations are carried out according to the following algorithm:
- Multiply the length and width of the room to get its area. In this case, 6 * 5 = 30 m2.
- Find the volume of lumber needed in cubic meters by multiplying the thickness of the board in meters by the area of the future floor: 30 m2 * 0.05 m = 1.5 m3.
- The volume of one board is calculated by multiplying its length, width and thickness: 2 m * 0.05 m * 0.13 m = 0.013 m3.
- The number of boards is determined by dividing the total volume of lumber required by the volume of one board: 1.5 m3 / 0.013 m3 \u003d 115 boards.


In the same way, the amount of building material for the rough coating is determined. Since the floor surfaces in the house are subject to mechanical pressure, for their construction it is necessary to choose high-quality wood without cracks and chips with a moisture content of up to 12%. Pine, cedar, larch are considered more suitable. Before starting work, all building materials are treated with an antiseptic and impregnated with flame retardants. Mount the wooden floor in the following sequence:
- Remove a layer of soil around the perimeter of the room.
- Install support poles.
- Pour gravel at least 10 cm thick.
- Pour in a layer of sand.
- Tamp.


- Lay roofing material or other waterproofing material on the support pillars
- Prepare lags. If round timber is used as lags, then one side must be cut off.
- Fix the lags on the support pillars.
- Make double insulation. For this purpose, sheets of plywood are laid out on the sides of each lag, on which a heat-insulating base is placed.
- Place the rough coating, tightly fitting the boards to each other and fastening them with self-tapping screws to the logs.

- Leave a gap up to 2 cm wide between the walls and the flooring around the perimeter. It will provide ventilation and protect the walls of the house when the floor expands while it dries.
- Lay a waterproofing layer on the subfloor. To do this, you can use a thick (from 200 microns) plastic film. The joints of the polyethylene strips are glued with a wide adhesive tape, the edges are wrapped on the walls to the height of the finishing coating.
- Apply a clean finish. If the floor surface in the house remains wooden, then the final coating is made immediately from a tongue-and-groove board, which is enough to varnish. Lacquer will emphasize the beauty of natural wood.
If you plan to lay a laminate, linoleum or other decorative material, then the expensive grooved board is replaced with cheaper plywood.

If it is required to make a concrete floor in the room, then it is poured according to the following algorithm:
- preparatory work.
- Clean the soil from the top layer, tamp.
- Pour a layer of gravel, compact.
- Pour a layer of sand, compact.
- Cover the entire area with a thick polyethylene film for waterproofing

- Cement strainer.
- Set levels.
- If the screed is more than 5 cm high, or it is planned to install a warm floor, then a reinforcing mesh must be laid on the waterproofing.
- Prepare a solution consisting of cement grade not lower than M-300, screening of sand and water. For additional strength, add a plasticizer to the solution.
- Pour in the solution.
- Level the surfaces with a rule in the direction from the wall to the door.
- After the concrete has set, remove the beacons, fill their traces with the same concrete. Fill and level all gaps.
- Cover the floor with polyethylene and leave to dry for at least a month, periodically wetting it with water.
- Until the concrete is completely dry, you can not turn on the warm floor, as this will lead to cracking of the surface.
- Lay the top decorative coating.


With full observance of the technology, the floor will delight the owners both in the heat and in cold times, without requiring costly repairs.
Warm Coat
The floor in the house should be not only beautiful, but also warm. Modern technologies make it possible to install a heating system in the floor at the stage of construction or repair. Most often, preference is given to the following systems:
- cable floor using a special heating cable. The cable generates heat when an electric current passes through it. The laying method depends on which cable (solid, twin or self-regulating) is used in the system. Such a floor is usually installed under the tile.


- heating mat, unlike a cable floor, it does not require a cement screed. It is a thin cable attached to a synthetic mesh. A heat insulator with a reflective surface, such as foil, is laid out under the finishing coat. An unfolded roll is fixed on top with adhesive tape or glue. To change the direction of the layout, it is necessary to cut the base without damaging the cable. A clean finish is applied on top. You can use tiles, laminate and other materials.


- Film or infrared floor is a special film capable of emitting infrared radiation when an electric current is passed through it. The film is ultra-thin, and the infrared radiation emitted by it is harmless to humans. All the advantages lie in simplicity: it is enough to spread the film and cover it with any floor covering. If several canvases are used, then they are connected by wires. The heating temperature is controlled by a thermostat.

The arrangement of floor heating using modern technologies will not only give comfort in use, but will not cause any particular difficulties in case of repair. All repair work is reduced to the replacement of a failed element or section.
How to properly care?
Caring for the floor should be based on the rules for caring for the material of its finish. The floor is one of the main elements of the interior, so it is important to adhere to the established requirements when choosing materials for the floor. Coverage is selected depending on the purpose of the room. For example, linoleum does not withstand heavy loads, and parquet does not like moisture.


The materials used for finishing coating can be classified in many ways: hard and soft, stone and wood, synthetic and natural. Each type of material has its own characteristics of laying and methods of care.


Rigid materials include tile and stone. They are durable, not afraid of moisture. Modern technologies allow laying tiled floors not only in the bathroom and kitchen, as before, but also in other rooms. If desired, the tile can be easily replaced with another one. Tiles can be made from natural stone: marble, granite, and if financial opportunities allow, then from malachite, jasper, rhodonite.


Synthetic materials, such as, for example, vinyl, concrete, are practical, but are afraid of moisture, temperature fluctuations, as well as chemical and mechanical influences. Floor rubber is a mixture of cement, cork, rubber, marble chips and chalk. It is flexible, durable, resistant to mechanical stress and temperature changes.


Natural, oddly enough, is linoleum. It is made by applying a hot mixture containing resin, beeswax and linseed oil to a fabric base. Natural linoleum is an expensive, but very effective material.


The most common surface is wood. Wood flooring is made from various types of wood. The most durable and very expensive is oak flooring. Maple, beech, elm, ash, linden, birch, cherry, pine are also used. A modern wooden material is a laminate, which is represented by a multilayer structure. It has a top layer made of wood. Laminate flooring is easy to install, inexpensive, and outwardly looks like natural wood.
Today, natural materials are at the peak of popularity. A special place is occupied by wood, which is an environmentally friendly building element and is perfect for arranging floors. Very often you can find a wooden floor in the country. Despite the fact that laying the floor is the most important moment in construction and repair, you can refuse the services of specialists and do the floor in a private house with your own hands. But this requires maximum effort and attention. The floor should turn out to be reliable, strong and durable, so you should take the study of flooring technology seriously.
 Wooden floor cake on logs. Highlights: vapor and waterproofing, insulation and ventilation gap
Usually it is to the floor that special requirements are put forward, since this part of the room in a private house is subjected to the greatest tests. Mechanical stress, chemical attack and a high degree of abrasion are the reasons that make it necessary to comply with a number of rules:
- certain level of humidity. It should be about 12%. The durability of the wooden floor will depend on this indicator. Due to the observance of humidity standards, deformation of the wood can be avoided.
- No external defects. Before buying material for a wooden floor, you should carefully inspect it. There should be no cracks, chips or other defects. Otherwise, sooner or later you will have to repair or completely change defective boards.
- Mandatory treatment of wood with antiseptics and fire retardants. This will extend the life of wooden materials and increase their fire resistance.
- High quality wood. You should not save on wooden floors in a private house and it is best to choose hard conifers such as pine, fir, cedar, larch, etc., although ash and oak are considered the most durable.
If we talk about the most suitable time for installing a wooden floor, then this is the end of the heating season. During this period, you can observe the optimal humidity of the air, and the likelihood of the tree absorbing a large amount of moisture is minimal. But if the wooden floor still has to be installed in the summer, then it is worth guessing the moment when the weather will be dry and sunny outside for at least two weeks.
 Arrangement of a wooden floor
 For the arrangement of floors in the house, you can use the following materials:
- Unedged board;
- Sheet device (plywood, chipboard, etc.);
- Glue board;
- Folded board.
The first two options are ideal for a rough wood floor. In this case, further finishing of the floor with a finishing coating is provided. But the glue beam and the folded board can be used as a finishing structure. The finished floor is usually varnished or painted in the future. Ideally, if the board is solid across the entire width of the room.
Preparatory work before laying
Before carrying out installation and choosing a laying method, it is recommended to assess the condition of the soil. For example, in some areas, logs can be laid directly on the ground, but first lay waterproofing under them. It is this device that allows the wooden floor to last for more than a dozen years. In some cases, it is better to additionally use crushed stone and sand, but sometimes even this is not enough. So, video on the topic:
Since there are no specific instructions for matching room features and installation methods, it is best to use the best option that is suitable for any conditions, even for places with high humidity.
To this day, the most win-win option is a wooden floor in a private house on or. Such a floor can act as a hard base or waterproofing. But the main point will still be ground planning. To be able to regulate the consumption of building materials, the soil is well tamped. And already on the compacted soil, you can fill up the sand with a thickness of 20 mm or more. On top of the sand, waterproofing is laid, which can be cellophane or roofing material.
 Scheme of the device of a wooden floor on the ground on logs (with heaving soil)
 Methods for laying a wooden floor
The installation of a wooden floor can only be started after the frame device of the posts and beams is finally ready. A layer of roofing material is laid on the posts, which serves as a good waterproofing. Beams are installed on the waterproofing layer, and logs are fixed on the beams for additional strength. It’s good when the width of the room corresponds to the length of the lag, but if you have to connect the lags, then it’s better that the joints are right on the support pillars, and they are fastened with self-tapping screws.
The very device of the wooden floor is both single and double. Single floors are not very durable, and they are usually placed in summer country houses. Such a floor does not tolerate weather fluctuations and is not intended for year-round use. In order to feel comfortable in winter, it is recommended to build double. It will take a lot of time and the right material. But the extra effort is worth it, as it increases the degree of strength and reliability. To do this, a list of works is performed in a certain sequence:
- Install lags;
- Lay moisture-resistant plywood between them, and lay insulation on top;
- Lay the rough base of the floor on the logs.
 Double plank floor pie
 To create a subfloor, boards of low grades are suitable, the thickness of which is 15-50 mm. Such boards, carefully processed, are adjusted to each other. Then the finished boards are attached to the logs with self-tapping screws.
Boards are laid 15-20 mm from the wall. This promotes ventilation and prevents the floor from swelling during the seasonal deformation of the tree. Waterproofing is carried out using a 200 micron polyethylene film, and additional thermal insulation is made of polyethylene foam. The film is overlapped, the edges are glued together with adhesive tape. On the walls you need to make an overlap of 20 cm and stick it on adhesive tape. After that, the finishing floor and topcoat are laid.
For flooring of the final floor, either an array is used. Plywood is placed on top of the heat-insulating layer and fixed with self-tapping screws.
It has an attractive appearance, it is convenient to lay, and besides, it is easy to operate. The advantage of solid wood flooring is that you can apply varnish or paint to the floor and thus do without additional costs for finishing materials. The massive board is produced in two versions: regular and tongue-and-groove. The difference between them is in the installation method. The tongue-and-groove board is much easier to install. However, before installation, it must lie down in the room for three days.
How to lay an array with your own hands?
 The massive board keeps within on plywood sheets. The base can be either a concrete floor or a wooden one on the logs.
 - It is necessary to measure 15 mm from the walls to create a ventilation gap and in case of seasonal deformations.
- The boards of the finishing floor must be laid so that they are located across the boards of the subfloor. The first row is placed with a spike against the wall and screwed with self-tapping screws. It is necessary to tighten the screws so that they are covered with a plinth near the wall. From the second side, the screws are screwed into the groove at an angle of 45 °.
- A wooden spacer is placed in the gap between the board and the wall. If the dimensions of the room are greater than the length of the floorboards, then the boards are spread "in a row". This will make the floor more durable.
- The second and subsequent rows of boards are placed with a spike in the groove of the previous row, sealed with a mallet and fastened to the groove on the other side with self-tapping screws. If you want the wooden floor to last as long as possible, you need to lay the boards in such a way that the growth rings are opposite to each other.
It is laid "out of the blue". A solid parquet board can also be used as a finishing floor. In fact, this is the same grooved massive board, only shorter. Its installation is somewhat different:
- It can be fixed on self-tapping screws only from the side of the spike.
- Installation is carried out only "out of the box".
- If the base is made of plywood, then it is better to glue the parquet board first, and then additionally fix it with self-tapping screws.
- If you lay the board diagonally, the room will visually look larger.
Wood is a natural, environmentally friendly material that requires constant care. In order for the wooden floors in the house to serve as long as possible, take care of protecting the material in advance. Laying wood floors is a painstaking, difficult job, however, following the instructions and advice of professionals, any beginner with his own hands can make a private house or cottage beautiful, warm and cozy. Leave your opinion about the article or share your experience in the comments!
The simplicity of the construction of the boardwalk is apparent. And it's not just that the ultimate load must be taken into account; for example, for the floors of the basement floor of a private house and the attic, it is different. Wood is a material, although malleable in processing, but “capricious” in its own way, as it easily undergoes deformation when humidity and temperature change. In addition, there is a specificity of its laying, depending on the type of base (floor). It is realistic to mount a high-quality wooden floor with your own hands, only having dealt with all the nuances of this work.

A wooden floor is a somewhat vague concept. Basically, when it comes to such a design of the lower part of the room, it means laying boards on the supporting structure. But if further, “finishing” finishing with other material (laminate, parquet board or something else) is supposed, then mainly products (slabs, sheets) based on wood are used - multilayer plywood, chipboard, OSV, MDF.
The main purpose of such flooring is maximum leveling and ensuring sufficient surface strength. But there is no need to talk about a wooden field in a private house as such in such cases; this is his intermediate version, "finishing".
How to choose the right boards? When arranging a wooden floor in a private house, it is definitely not worth saving on them. Otherwise, such problems will arise (cracks, grooves in the flooring, deformation of individual floorboards) that subsequent repairs (taking into account the complexity of the work associated, among other things, with the need to free the room from everything) will be much more expensive.
Board type. Only grooved. Do-it-yourself processing at home is a very complex process, requiring practical skills, appropriate tools (which are not available in every home), time and a separate room.

There is another option - from the glue beam. But this lumber is used, as a rule, in the rooms of a private house with an increased load on the floor, since it is not cheap.

- Linear parameters (mm). Here it must be taken into account that the tree must provide not only high strength of the flooring, but also good thermal insulation of the lower part of the room. The optimal dimensions are: total thickness - 45 ± 5 (depending on the specifics of the room), width - around 150.
- moisture content of wood. 12% is the acceptable upper limit of its value. Therefore, you should purchase an industrial drying board. Naturally, it will be expensive. But all recommendations on how to remove excess moisture from a tree on your own are nothing more than profanity. It is necessary to choose an appropriate place on the site, to make a competent stacking of lumber, to organize its protection from moisture, good ventilation, acceptable temperature conditions. And most importantly, wait. And this is time. Moreover, a high result is not yet guaranteed.

- The grade of the tree. And in this regard, it is irrational to buy cheap boards. Not only that, even paint, especially varnish, will not hide large flaws in the form of knots, chips, and so on. Defects in the floorboards during the operation of the wooden floor will become more and more pronounced. The cracks will only get bigger; knots fly out of the boards, and “pits” or through holes will appear in their place.
- Type of wood. Here it is desirable to maintain the optimal ratio between such properties of lumber as strength, beautiful texture and resistance to geometry changes under the influence of external factors. Experienced craftsmen recommend paying attention to oak and ash. Such boards are expensive, but for a wooden floor they are considered the best, as they are able to carry an increased load.

If this factor is not decisive, larch, fir, cedar or pine are perfect for floors.
- The degree of protection of the tree. In production, more expensive products are impregnated with special / preparations from decay, ignition. This can be implemented (even recommended) with your own hands, but only in terms of secondary (additional) processing. It will not be possible to recreate industrial technology at home, therefore, the quality of work will be low.
What lags are used? Here you need to understand that during operation, any materials (even if visually imperceptible) change their geometry. Consequently, the integrity of the structure also depends on how much the coefficients of deformation of its elements coincide. For the installation of a wooden floor, metal profiles (although it is more convenient to work with them) are not suitable, only lumber. The recommended timber parameters are 100 x 100. This is a universal choice for floors in any room. Smaller samples (for example, 50 x 50) will have to be tightly “fastened” to the screed (otherwise the flooring will “play”), and this is not always possible or rational.
When should you do wood flooring? Experts consider the best period to be the end of March - the beginning of April, that is, before the end of the heating period. There are several justifications.
- At this time, it is easy to achieve the most comfortable conditions for such work. If necessary, effective ventilation can be arranged so that wood dust does not overcrowd the room. Then technical devices will not be needed.
- The air humidity in the room is optimized. This ensures that the lumber does not absorb water, except perhaps in a minimal amount.
- The nuances of arranging the screed are such that you will have to wait for it to completely harden. And the worse the external conditions, the longer.
As an option - in the summer. But the arrangement of the wooden floor should be started if weather forecasters guarantee stable dry weather for at least the next 10 days.

Preparatory work
Further - all stages, regardless of the specifics of the premises in a private building. What needs to be done in relation to the features of a particular room (location in the house, size, degree of arrangement, etc.) is easy to understand.
The basis
This can be both a floor and a ground, if the floors are arranged on the basement floor. In any case, there are a number of activities.
Surface condition assessment and elimination of deficiencies
In relation to the ground, it is carefully leveled, compacted (the simplest rammer is easy to make with your own hands), and a sand cushion is arranged (the recommended layer thickness is about 20 cm). It performs two main functions - more accurate planning (levelling) and mitigation of the possible deformation of the upper levels when the load changes.

- If we are talking about a concrete floor (interfloor), then the slabs are thoroughly washed, after which, during the inspection, existing defects are revealed. Any cracks, loose joints are sealed. Otherwise, in the future, possible leaks into the lower room and heat loss cannot be avoided.
Foundation waterproofing
If the base is soil, then it is advisable to immediately cover it with a film. Depending on the size of the room, you can either buy a membrane that will completely cover the floor (it will be more expensive), or make its original analogue by fastening several canvases by welding (you will need a special tool) or with adhesive tape, laying them with an overlap. The nuance is that the edges of the film should be bent up, approximately to the level of the intended installation of skirting boards. They will also close the excess waterproofing.

Arrangement of the screed
This is a separate and rather large topic (composition of the mixture, ratio of components, kneading rules - there are enough nuances). Therefore, only the main points.
Materials are selected based on the financial capabilities of the owner of a private house and the type of surface. If we are talking about overlapping, then the screed is made thin, with leveling compounds. For a soil base, it is advisable to pour expanded clay on the waterproofing.

The advantages of this solution:
- round (comparatively) granules will not damage the polyethylene film under any circumstances. If you use crushed stone, then its breakthroughs in several places will appear unambiguously;
- expanded clay is a good heat insulator. Therefore, it is possible to save some money on the material of the insulation (if it is to be mounted).
The recommended layer thickness (in mm) is from 40 to 100. You should focus on the size of the "pebbles"; the larger they are, the more layer is required, since gaps are formed between them, increasing heat loss. Small granules are stacked quite tightly, therefore the layer can be made smaller.
Advice. Costs can be optimized if you purchase expanded clay of different fractions. Then its thickness will be no more than 50 - 70. But only well-dried granules should be laid; they will begin to draw excess moisture "on themselves" (that is, absorb), additionally protecting the tree from dampness.
It is advisable to install the beacons and level them immediately, before pouring the solution. After leveling it, you will have to wait for the screed to dry completely (at least 4 weeks, and then, under favorable conditions in the house). This largely explains why experts recommend certain periods for organizing wooden floors in a private house.

It is impossible to accelerate this process artificially (with the help of technical devices in the form of heaters, heat guns, and so on). Such rationalization will result in the fact that the screed will dry out unevenly over the entire depth. The top layer will grab quickly and literally clog the surface. This will drastically reduce the rate of evaporation of moisture from the lower levels. As a result, a decrease in the strength of such a base and the appearance of cracks.
Installation lag
In a private house, they can be laid directly on the base, without arranging a screed (for example, in the basement). In this case, it is advisable to prepare small brick racks. Here the main attention is on the upper sections of such supports. They must be in the same (horizontal) plane. To prevent the beam from moving, a metal pin or wooden insert is placed in the center of each post. It is not difficult to guess how to fix the lag in this or that case.

If the logs are laid directly on the ground or screed, then it is desirable to treat the lower planes of the timber with tar. The work is easy, and it does not require money. The advantage of this solution is the additional protection of wood from absorbing moisture from a damp surface.
Sometimes, a supporting frame (crate) is preliminarily mounted on the supports, to which the logs are “fastened” with self-tapping screws. As a rule, this is done when laying them directly on the ground or slab, since the pillow may not provide perfect alignment.

The recommended interval between lags is about half a meter. If more, the strength of the flooring decreases; less - increases the consumption of materials and the load on the floor. In addition, there will be problems with the installation of a heat-insulating layer.
Wooden floor insulation
Do it or not worth it - it's up to the owner. This largely depends on the specifics of the room. But if it is unheated, or residential, located on the lower floor, then additional thermal insulation in the form of expanded clay and the boards themselves are clearly not enough. The best choice for warming a wooden floor is mineral wool. It is sold in various modifications, but products with the prefix "eco" are considered the best for a private home.

The material is elastic, therefore, even if the lag axial lines do not coincide (the "cells" are curved), it is quite easy to lay the mats; they compress slightly and are easy to fit into place. And after straightening, they are securely held between the lags, while there are no gaps along the beam-insulation line. Therefore, gap sealing is not required.
When choosing mineral wool in thickness, you need to focus on the fact that after installing the mats (plates) between the lags, they are slightly lower than their upper cut. This is necessary to form a small space under the wooden floor, through which air can circulate freely. Natural ventilation helps to remove excess moisture from under the flooring, thereby protecting the boards and insulation from moisture.
Finished floor installation
It is carried out in 1 or 2 rows. A single-row floor is arranged, as a rule, in utility rooms, country houses, sheds and the like. For most of the rooms in a residential building - only if a thick board is chosen or a "finish" lining with parquet or laminate is supposed.

With a double plank field, the boards are taken thinner (the main thing here is the total thickness of the flooring). The advantage is that cheap lumber is suitable for the first level; and this gives some savings. Sometimes the owners of private houses lay a film between the rows, which also partially reduces heat loss and increases the degree of waterproofing.

Features of laying a wooden floor
- A small gap is left between the walls and the floorboards (about 1.5 - 2 cm) so that the flooring does not begin to warp when the wood expands or gets wet. In addition, this installation scheme guarantees effective natural ventilation of the space under the floor. Therefore, the risk of mold and mildew on the boards is minimized.
- The first board (from any edge) is rigidly attached to the joists; and self-tapping screws. If you use nails, then problems will arise in the future - individual floorboards will begin to “play”, and the creak of the boards will constantly be heard in the house.
- Their adjustment is done with a hammer and a piece of board, carefully so that the tenon fits snugly into the groove along the entire length of the sample. But this is the case with the profile board. If an ordinary edged one is bought, the technology changes.

First, the extreme boards are fixed on the logs. All the rest, in turn, fit between them simultaneously from both directions. Naturally, in the center of the room there will be difficulties; the last floorboards will not lie exactly in place. They are put in a “house”, and then they are pressed down, standing on his “horse”.
The last stage is screwing all the boards to the joists at pre-designated points. Beforehand, a chamfer is made in each of them so that the head of the fastener is completely “drowned” in the tree.

- It has already been noted that self-tapping screws should be used as fasteners. The nuance is that you need to choose not ordinary products, but with a coating against corrosion. Otherwise, rust spots will appear quite quickly in the places where the boards are fixed to the joists.
- It is advisable to “walk” along the lines of the joints of the floorboards with a grinder. If wooden floors are equipped in a private house, then it is worth buying it; it will be needed again, and more than once. Processing the seams will smooth out the existing irregularities between the boards. This is especially true for decks that are supposed to be varnished, which is most often done to preserve the grain of the wood.
It turns out that when installing a wooden floor in a private house, it is quite possible to do without the services of professionals. Following the above recommendations, all stages of work are easy to do with your own hands.
Normal living conditions in a private house are unthinkable without underfloor heating. From how correctly the supporting structure of the floor was chosen, the elements of insulation and protection were made, it depends on how healthy the atmosphere in the room will be. It is not difficult to lay the floors in a private house with your own hands, any person who has a clear idea of \u200b\u200bthe device of the home floor will be able to assemble and lay the floor, even without the qualifications of a carpenter or carpenter.
Wooden floor options
Concrete or stone varieties of the floor in a private house today are a rarity. Even with powerful thermal insulation, it is almost impossible to turn them into truly warm floors in a private house, so most owners prefer to build a wooden floor in a private house with their own hands. With proper care, wooden plank floors can stand for several decades, but they still need to be periodically repaired, updated and restored.
Traditionally, a warm version of the floor in a private household can be done in three ways:
- Laying a classic floor from boards, with mineral wool insulation or expanded clay backfill;
- Flooring from boards on log beams laid on a concrete pie, with thermal insulation from expanded polystyrene;
- Make laying of log beams on columnar supports.
In the first two cases, fertile soil is replaced by a compacted layer of gravel and sand, sealed with roofing material sheets. If the floor insulation in a private room is made with expanded clay backfill, then, in addition to the main floor, it is necessary to lay a rough base of boards. On top of the backfill, you need to make a film vapor barrier, and then lay the new floor from a sanded board.

In the second case, the underfloor heating is laid on the logs, based on a double concrete screed, insulated with EPPS and reinforced with a reinforcing mesh. Lag beams can be supported on the basement of the walls or on threaded studs.
Both options are quite effective, but today they are considered too expensive, since a system of studs with a concrete pad and massive hanging logs will obviously cost a decent amount. Today, flooring is done in this way in a relatively small private room, with an area of 10-15m 2. How to make a warm floor in a private house in an affordable way?
The most modern and easiest to assemble is the installation of a floor from boards on columnar supports. When choosing a method for how to properly make a floor in a private house, one has to take into account the laboriousness, cost of installation and the possibility of repairing a wooden floor in a private house in the future. Installing load-bearing beams on columnar supports allows you to cheaply and safely assemble the floor in a private house of almost any size. It is possible to repair floors on poles within one day, but it is not so easy to repair studs or a long massive beam of suspended logs.
A concrete pad under the joists allows you to dramatically reduce humidity and heat loss in a private house. Initially, it will be necessary to backfill with crushed stone and sand, lay a waterproofing film, a layer of insulation, and close it with a layer of concrete, 40-50 mm thick. Experts recommend making a screed if the ground is soft and there is a danger of rodents entering the underground.
Assembling a wooden floor according to the optimal scheme
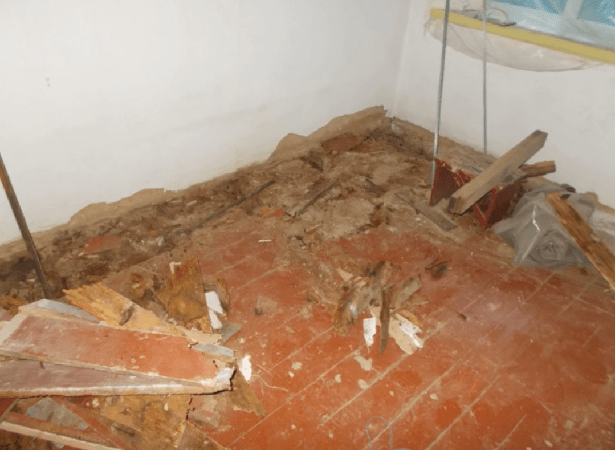
The most difficult option for arranging the floor is associated with the replacement and alteration of the entire supporting structure in old private houses, which are several decades old, and most of the log beams and boards have rotted and turned into dust. The situation becomes more complicated if the soil in the subfield of a private house is too wet. In this case, you have to look for a way to make wooden floors in a private house so that they are preserved and stand for at least a couple of decades.
The sequence of arranging a new floor in private housing construction can be divided into several stages:
- Make cleaning and preparation of the soil in the subfield;
- Assemble columnar supports and waterproofing;
- Install log beams;
- Make preparation of the grooved board for laying;
- Perform installation of insulation and vapor barrier;
- To make a flooring of a board and decorative finishing of a covering.
Advice! If you plan to remake and replace the wooden floor in a private house, fold the pre-purchased grooved board in the room where the repair is supposed to be. In this case, in a couple of weeks, a dry board will take on the background humidity of the room, which will save you from squeaking and warping of the floorboards in the future.
We prepare supports and soil base
How to make a floor in a private house? Initially, it is necessary to free the room in a private house from all structural elements of the old floor. To sanitize, any boards are mercilessly cut and removed, even those that do not look damaged or rotten in appearance. Often, there are a large number of spores of pathogenic microorganisms in the boards of an old rotten floor, so it is necessary to repair the floor in a private house in a mask and protective clothing.

The soil cushion will need to be removed by 25-30 cm, and a thorough ramming should be done. Over the area of the room in several rows with a step of 100-120 cm, we drill holes with a diameter of 30 cm with a drill. The row spacing is 0.6 m.
There are two ways to make support pillars - they can be folded out of brick or made by casting a concrete mass into a polystyrene mold. The second method is more accurate and faster. Each support is reinforced with four vertical rods, 12 mm thick, welded to horizontal steel plates, 15x10 cm in size. We lay the support frames in the drilled holes, align the upper plates of all supports in the same plane with a hydraulic level. It took 18 supports for a room measuring 3x4 m.

Quadrangular polystyrene forms are installed on the aligned frames, they are filled with M300 concrete, with the addition of 10% slaked lime. After 4-5 hours, the molds are removed so that the welding proceeds normally, the metal plates of the frames must be made clean to a shine.

Waterproofing the floor in a private home is made of a 0.8 mm thick polyethylene film that is laid on the ground. In the places where columnar supports are raised, the film is taped to each support with adhesive tape, a section of the film on the head of the support is cut to release the metal plate on the column.
A five-centimeter layer of fine gravel and a ten-centimeter layer of a mixture of dry sand and quicklime are poured onto the laid waterproofing film, in a ratio of 1:5. Such a mixture will make it impossible for the remnants of putrefactive microorganisms to penetrate from the soil to the floor boards in a private house.
How to make a support lag system, laying vapor barrier and insulation
To fasten the log beams on columnar supports, it will be necessary to weld a vertical shelf to each horizontal plate. The support beams are attached to the welded plates with a threaded stud, a pair of nuts and Belleville washers.


Due to the diameter of the hole in the beam increased by 1 mm, during installation, the bearing surface of the log can be adjusted and aligned in a horizontal plane, as in the video:

Beams with a section of 100x60 mm are treated with oil varnish and drying oil before installation.
At the next stage, you will need to lay a 15 cm layer of mineral wool and vapor barrier. We lay mineral wool in the space between the lags, after which we stretch the vapor barrier material along the lag beams in the transverse direction. We attach the film to the lags using a stapler. Individual canvases can be glued together using double-sided construction tape along the red line of the separator.
Advice! Do not use polystyrene, especially Chinese or domestic production, to insulate the floor, ceilings and the inner surface of walls in a private building.
Laying boards and finishing a wooden floor in a private house
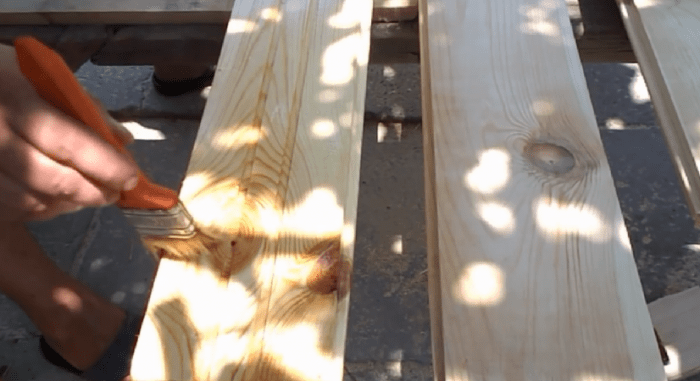
For flooring in a private house, a tongue-and-groove pine board, 40 mm thick, is used. The presence of a groove and a ledge allows you to get a very strong connection of all boards in one plane. Before laying the floor in a private house, the boards must be treated with an antiseptic, dried thoroughly, and then varnished.
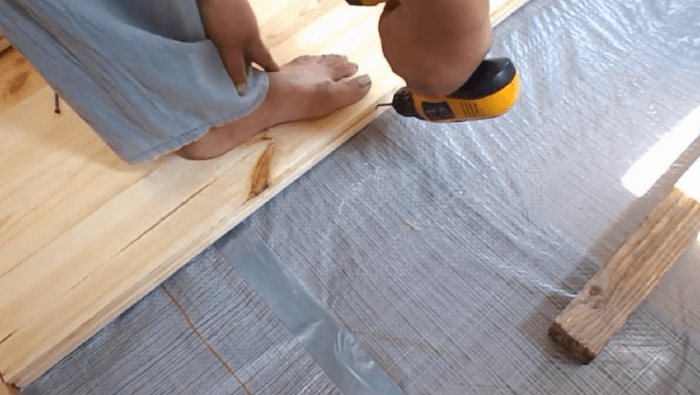
Before laying the boards on the logs, it is necessary to make a gap with an indent from the wall of a private house of 10-15 mm. The air gap allows you to equalize the humidity in the subfield of a private house, and at the same time plays the role of a compensator when expanding the boards. Laying the first board must be done with a spike to the wall. We fasten each board to the log using black carpentry screws, 50 mm long, with threads along the entire length. The halves are self-tapping screws with knurled threads ½ the length of the fasteners; they are not suitable for installing the floor in private housing construction.

We screw the self-tapping screw into the groove of the board at an angle of 45 ° using a screwdriver. Before fastening, the board is knocked out with a hammer through a wooden block.
After screwing the self-tapping screw into the groove of the board, micro-chips are formed from deformation and lifting of individual wood fibers, they must be carefully cut with a knife, otherwise the spike of the next floorboard will not fully enter the groove, which will lead to the formation of a gap.
After laying the boards, additional surface treatment will be required. One layer of lacquer coating is not enough for reliable protection against moisture penetration into the thickness of the wood. Therefore, before re-lacquering, the surface of the floor is treated with sandpaper to bring down the gloss and make the floor covering smoother. After completion of work, the surface is cleaned with dry, clean rags or a vacuum cleaner.

10% solvent is added to the pentaphthalic lacquer, making sure that the lacquer mixture is easily flowable. It is better to varnish the floor with a wide soft brush, intensively rubbing the varnish into the surface of the wood. Gradually, the air bubbles will go away, and the second layer will acquire a smooth surface. After twelve hours, the varnished surface of the floor is moistened, and after a day, dry polishing is done.
Conclusion
The tongue-and-groove boards purchased for repairing the floor in private housing construction, before proceeding with the flooring, must be sorted out and measured for compliance with the dimensions of the groove and tenon, the presence of defects in the form of knots and saw cuts. If there are ring defects in the board array, they can fall out like corks during laying and padding. On average, there are a couple of defective boards per hundred calibrated boards, even when buying building materials for repairs in a private house in a company store.