In the modern world, kitchen spaces often combine kitchen and dining functions. It is in these rooms that the whole family gathers for breakfast and dinner. In addition, the kitchens are often equipped with recreation areas where you can have a cup of coffee and chat with a friend or girlfriend.
In this regard, the question of where to start renovating the kitchen is very relevant. Indeed, in this multifunctional room, you need to rationally place a lot of useful things and at the same time maintain a cozy atmosphere.
To make all your dreams come true and imagine what the future kitchen will look like, you need to make a volumetric drawing. It should display all furniture, kitchen accessories and necessary household appliances with an indication of the dimensions. Since the kitchen is a multifunctional room, a large number of electrical appliances are always installed in it.
Almost any room has:
- Cooking stove;
- Hood;
- Microwave;
- Fridge;
- TV set.
In addition, in the working area, it is necessary to provide for the lighting and connection of various household appliances, for example, a mixer, blender, meat grinder. To increase the comfort, it is recommended to zone the kitchen area, and this, as a rule, is done with the help of various lighting devices. In this regard, the repair of a kitchen should always begin with the organization of electrical communications, while the location of all outlets must be thought out very carefully. In parallel with the arrangement of electrical communications, it is possible to install double-glazed windows. It is also important to consider the location of the hood and how to connect it.
Can be used:
- Convector, when the air purified by the device will return back to the room;
- Connecting the device directly to ventilation.

Features of kitchen renovation
Having decided on the design of the kitchen and providing the furnishings to the smallest detail, you can make a list of the necessary materials. Of course, it is important that the planned expenses match your financial capabilities. It is advisable to purchase all materials at once, and, if necessary, make adjustments to the design before starting the repair.
If you are planning to carry out a major overhaul of the kitchen, then it is necessary to completely empty the room before carrying out any repair measures. In addition, all old finishing layers must be removed. For example, the whitewash needs to be washed, and the old paint on the walls must be removed mechanically or using a special remover. Do not forget that, most likely, you will need to replace the door or arrange an arched opening instead. Therefore, it is also necessary to dismantle the old door.
You should prepare for the fact that with this approach to repair, there will be a lot of debris. But you can't do without this, and it is the process of preparing the kitchen room for repair measures that can be considered the answer to the question of where to start repairing the kitchen.
Finishing work
Upon completion of the arrangement of the electrical part and the organization of ventilation, you can proceed to finishing work. They always need to start with repairing the ceiling.
To do this, you can:
- Align the ceiling surface with special solutions and subsequently paint it;
- Install a special structure on the ceiling, on which to fix plasterboard sheets, which can then be finished using any of the modern methods.
Both methods are quite laborious and require certain building skills. Therefore, if you are not confident in your abilities, then it is better to attract specialists. After finishing the ceiling is completed, you need to start decorating the walls. This event does not require high qualifications and all work can be done independently.
The most common finishing methods are:
- Pasting with wallpaper;
- Laying ceramic tiles;
- Painting the plastered surface.

You can combine various types of finishes and thus zone the space of the room. Moreover, for finishing the working kitchen area, it is better to use tiling or paint wall surfaces. But it is better to accent the dining area with wallpaper. The best option is paintable, which can be coated with durable alkyd and acrylic paints. These materials are environmentally friendly and guarantee easy maintenance of wall surfaces during operation.
The floor is laid at the final stage of the kitchen design. The floor in the kitchen should be practical and, besides, fully correspond to the created interior.
The most common kitchen flooring materials are:
- Laminate;
- Linoleum;
- Parquet board;
- Ceramic.
The choice of building materials depends entirely on taste preferences and financial capabilities. The arrangement of the floor is a complex process, therefore, if possible, work should be entrusted to specialists who will perform them efficiently and in a short time. Upon completion of the finishing work, the repairs in the kitchen area can be considered complete. After that, you can start arranging furniture, filling the kitchen with household appliances and various useful accessories.
Of course, it is optimal to order built-in kitchen furniture, in the development of which the designers will take into account all your requirements and wishes. But since this is an expensive pleasure, much more often, ready-made kitchen sets are purchased that are easy to install on their own. One should not forget about competent lighting, several separate lamps, lighting of the working area and overhead light should be provided in the kitchen room. It is equally important to provide for the presence of beautiful curtains and other decorative elements.
If you know where to start a kitchen renovation and how to finish it, then you will be able to create an amazingly comfortable room that fully meets your taste preferences.
It was possible to start repairs, sending the whole family to their historical homeland. In order not to be so boring to be engaged in repairs, I decided to take pictures along the way. What if my experience is useful?
So, it WAS: an ordinary smoky gray room with an area of \u200b\u200b6.5 sq. m (I forgot to take a picture, excuse me).
I wanted something cool and loft, but money was running out.
The first two days I studied the assortment of Ikea, Leroamarlene and Obi and tried to compare my desires and possibilities. The results were not very pleasing, so first I decided to dismantle everything old.
To start repairing, you need to disassemble everything old, unscrew and drag the necessary one into the next room.


I took 5 heavy sacks into the trash heap. As luck would have it, the elevator was not working.
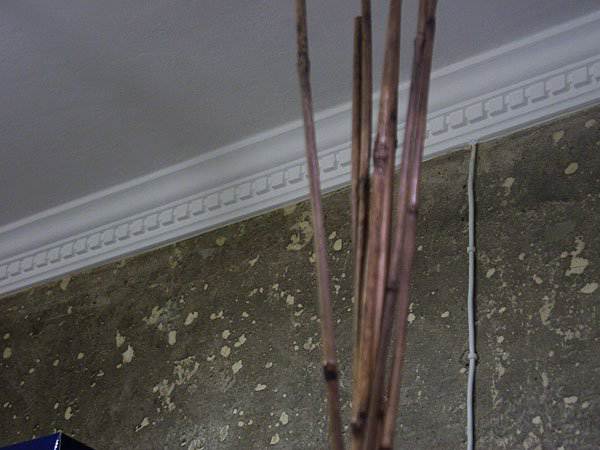
Tried to get close to the wiring to do it the way I need it.

Finally we managed to clear the last wall of wallpaper. The war was fought for every centimeter: a hellish mixture of glue, which becomes terribly slippery from water, left me practically without hands.
This wealth of textures of the peeled wall, on which time has worked well, inspires me terribly. I would live alone - I would ask the designer to arrange such walls.


I started to make holes for 4 - all the neighbors came running. As I remember, I will shudder.

The ceiling has already been made, the walls and furniture remain. I decided to leave the working area above the stove as it is.

And our ceilings are crooked. The door frame is level.

Having cleared the paint from the windowsill, I saw such a stunning color that my hand did not go up to paint it back. And I will choose the color of the laminate to match the color of the window sill.

I could not find a lamp that was suitable in size and price in stores. Converted an old chandelier. Here is the result.

Fit new doors on the mezzanine

I'm starting to laminate the floor.

The most interesting thing is that the last stage of the repair was the most protracted and costly. Hanging furniture, connecting a washing machine, shelves, hooks and other little things took more time and money than the repair itself.
To be honest, the impetus for the beginning of the repair was the dream of such a faucet (switching modes, retractable spray) and a sink.

This is how our kitchen began to look after renovation:


The concrete was thoroughly washed and covered with wax from Ikea
I decided not to glue the wallpaper, I painted the walls with water-based paint. Top covered with pearl enamel from Leroy. And it feels nice and washes perfectly.

It takes ~ 3 minutes to read
Sooner or later, anyone comes to the conclusion that the kitchen needs repair. To remain satisfied with the quality of the work done, you need to think carefully about everything before taking action. For example, you can see a photo of a do-it-yourself kitchen repair on the net, ask experienced relatives, ask for help from specialists, or read this article.
The most important points in the repair are the choice of material, costs, the possibility of independent work. And, of course, the main plus of self-repair is its budget.

Save
Where to begin?
Arranging a kitchen space is not an easy task. Probably, when the thought of reorganizing the premises arises, many questions are poured in. For example, how to properly make repairs in the kitchen, how to make beautiful repairs in the kitchen, etc. No need to buy building materials and demolish walls at breakneck speed. You need to start with a detailed plan. We will talk about this in more detail in the next paragraph.
The procedure for performing work during overhaul
Let's make a consistent plan. It can be taken as the basis for a budget kitchen repair with your own hands. To achieve the main goal, you will have to complete several small ones. Here's a possible course of action:
- We release the premises to the maximum. The more furniture you take out, the easier it is to measure.
- We assess the condition of walls, communications, windows, doors, floor and ceiling.
- We make accurate measurements.
- The next step is to plan where the large household appliances will be located.
- The primary choice of kitchen furniture: size, functionality, installation location.
- Thorough cleaning indoors, cleaning all surfaces from dirt, dust, mold treatment (if necessary).
- Renovate the base floor surface (renew).
- Similar to the previous point, only now the ceiling needs to be repaired.
- Repair of old or installation of new communications.
- Ventilation check.
- Replacement or restoration of windows, doors.
- Decoration of the premises "from top to bottom": from the ceiling to the floor and installation of the plinth.
- Installation of equipment, installation of headsets, lighting devices.
- Connecting all systems and checking their performance.
We considered where to start DIY kitchen renovation and its sequence. Now let's take a closer look at each point.
Floor replacement
The old flooring must be replaced. They dismantle the floor, take out debris and carefully examine the surface. It is often necessary to beat off an ancient screed to get to good floor slabs. The dismantled floor does not differ in a flat surface, so you need to immediately tackle its screed. After this manipulation, further work on the floor can be carried out in about a week if ordinary concrete was used, or earlier if special mixtures were used.
Water pipes are laid to the installation site of the sink. Now they are usually built into the walls, leaving only water sockets and pipes outside. Mounted lines are installed in the cavities (grooves) made in the wall. There is also a sewer pipe leading to the kitchen sink. It is important to observe a special slope so that the water flows into the riser.
Gas pipes must never be hidden in the wall. The maximum that can be done is to cover it with some kind of decorative element (for example, a retractable apron). The main thing is that the controllers can have access to any section of the pipe.
Much attention should be paid to the laying of electrical communications. The aluminum wiring of old Khrushchev houses is unlikely to cope with a large number of household appliances that are equipped with a modern kitchen. Therefore, we change it to good quality copper wires. In addition, several lines will be required, since each device must have its own connection point, depending on its power.

Save
Aligning walls and ceilings
First of all, we align the ceiling. Its repair is started immediately after the floor has been repaired. It is cleaned by removing all irregularities on the surface. Very often during work you have to deal with cracks, joints between floor slabs, cracks in the corner of the ceiling and wall. All these flaws must be repaired with a spatula. Material for this: cement, primer, latex elastic filler, compacted polyethylene foam rollers, plaster.
Replacement of doors and finishing of doorways
Before starting finishing work, you should either finish the doorway or install the door. Let's consider the first option. First, it is inexpensive. Secondly, it is convenient. Slopes can be decorated with various means: plastic, MDF or natural wood panels, plaster. Remember to level the surface first before decorating with drywall.
Now let's talk about the door. Oddly enough, the choice here is quite large: swing doors, coupes, accordions, double-leaf, folding, swinging. Choosing the type of door follows the layout and personal preferences. If you are unsure of the ability to install a door, contact the manufacturer.
Redecorating
The stages of redecoration are similar to the last steps of a classic overhaul. In the same way, all work is done "from top to bottom", that is, first of all, the ceiling is finished, then the walls are plastered and then the flooring is installed. At the end, the walls are decorated with wallpaper and furniture and decor items are installed.
If, after removing the old finish, large surface defects are found, then they are corrected with a cement-sand mixture. Further leveling is carried out with gypsum plaster.
After leveling the walls, cover them with a special primer before finishing. It will play the role of adhesion to the material and eliminate the mycotic component, thereby preventing the development of mold.
The choice of materials for finishing
The kitchen is characterized by high humidity and temperature changes. For this reason, materials should be selected to be moisture and heat resistant. The hygiene of the room is no less important - it is desirable that all work surfaces are easy to clean. It is best to decorate them with tiles or plastic panels. Then the kitchen apron can be pasted over with wallpaper, provided it is protected by glass.
Wallpaper for the kitchen should wash well. Suitable:
- acrylic;
- vinyl;
- glass wallpaper;
- silk-screen printing.
For flooring, a good option would be wear-resistant laminate, linoleum, rough tiles. In no case should the color of the floor blend in with the furniture. 3D coverage can be selected. The main thing is that the drawing is not too bright, otherwise over time it will get bored.
Lighting
We draw up an approximate lighting plan even before the start of the repair, so as not to be mistaken in the number of outlets.
Alternatively, 2-3 ceiling lights and spotlights in each functional area (for cooking, dining). You should not choose one lamp, because performing some action in different parts of the kitchen, you can stand with your back to it. You can hang the following lamps on the ceiling:
- halogen;
- suspended;
- waybills;
- lED (have low power consumption, deliver light in only one direction, therefore they are used as point ones).
It is even better to put lamps with a rheostat so that you can adjust the degree of illumination. For the main light on the ceiling, make some switches. For family meals, the light can be kept to a minimum for a more intimate setting.
Selection of furniture and equipment
Come up with several variations of the furniture arrangement. It doesn't have to be furniture in one line. At the moment, kitchen sets of P- (along 2 walls) or L-shaped (along 3 walls) are more in demand.
To make the kitchen design as harmonious as possible, use built-in appliances. In addition, it looks more aesthetically pleasing, neater, because dirt does not accumulate between the furniture.
The size of the countertop should be at least 50 cm. Even if you are not very fond of cooking, this is a necessary minimum. The tabletop material is strong, durable (special plastic, stone). If you have small children, the absence of sharp corners will make life much easier.
Hanging cabinets are hung at a height depending on a person's height:
- ~ 175cm - for people of average height;
- ~ 190cm - for tall people.
Facades with a glossy surface look very impressive. If you are not confused by fingerprints that quickly appear during use, then feel free to choose this type of facades. If you are not happy with the prospect of daily wiping of cabinets, it is better to choose materials such as stone, tiles or plastic panel.
Drawers in the kitchen are more convenient, because you can find the necessary dishes much faster in them. It is worth noting that they are very attractive when they are empty in the store. But having filled them with things, it becomes not very handy to nominate.
Arrangement of kitchen appliances
It is necessary to think over the arrangement of all household kitchen appliances (even small ones) to the smallest detail. Microwave, kettle, toaster, bread machine, coffee maker and other commonly used household appliances should not be placed too high. The technique for regular use needs to find a place at eye level or slightly below. You can store rarely used electrical appliances on the lower shelves. Do-it-yourself budget kitchen renovation involves purchasing the most necessary devices and refraining from additional ones.
The placement of the refrigerator is especially important. It should not be near heating objects: batteries for heating, stoves, ovens, because it can fail in a very short time. The optimal distance is from 15 cm. From the same convictions, the refrigerator is not installed in direct sunlight.
The subtleties of repairing a small kitchen
How to make repairs in the kitchen with your own hands without spending almost the entire family budget? Probably, you can save on materials or household appliances. But this is not necessary if you are a small kitchen owner. This will not affect the stages of repair in any way, everything is done using the same technology. There are design restrictions here. To be more precise, it is not allowed to use decorative elements and color schemes that will physically or visually narrow the room. These include laying walls and ceilings with plasterboard. In this case, there is a real decrease in the room by several centimeters.
Stretch ceilings will visually expand the space due to the mirror reflection of the surrounding objects. Spotlights are a good addition to stretch ceilings.
To save on materials, use the interior zoning method. Folding furniture, an abundance of vertical cabinets on the walls will help save space. For visual expansion, light the room as intensely as possible, and decorate the interior in light pastel colors.
Now you know how to make inexpensive repairs in the kitchen, photos and videos on this topic can be found on our website. Self-confidence and careful planning of the process will be the basis for creating your dream kitchen.
Video: repair options for a small kitchen
In the kitchen, every woman tries to show imagination and ingenuity in preparing food for her family. The kitchen plays a vital role as the heart of the home. The home comfort that the kitchen creates encourages every household to look there more often. Kitchen renovation options photo - 70 design ideas:


It is in the kitchen that friends who accidentally drop in for tea with cookies get to. Therefore, every housewife wants the kitchen to feel a pleasant atmosphere of warmth and comfort. Renovating this part of the house is becoming an important and serious step. Especially, this applies to those cases when the owners themselves take responsibility for the inexpensive repair of a small kitchen.


In order not to delay the repair in the kitchen for many months and to get pleasure and emotional relief from this process, it is necessary to adhere to certain tactics in actions.


Kitchen design project
Create a design project for the future kitchen. Making repairs without a previously calculated plan can lead to excessive worries and costs. If you make an estimate, it is possible to fit the repairs into the established financial boundaries and understand what you can ultimately come to.

To create a design project, you can contact a professional designer. Taking into account your wishes, the designer will provide you with several types of project, and you can choose what you would like to see for you. Your task is to think over the colors, furniture placement, style and lighting of your kitchen. Kitchen renovation real photo examples:


You can get by with minor repairs to maintain the cleanliness of the room, or make major repairs, or you can perform a complete redevelopment of the room and change your favorite corner of the house to an amazing state.

How to make a kitchen renovation quickly and inexpensively
Clear the area and disassemble the previous finish. When the design is selected, you need to remove household appliances and furniture from the kitchen. You can easily part with unnecessary items and old lockers. Then proceed to disassemble the trim on the ceiling, walls and floor.

Plumbing work is one of the most important stages in the renovation of any kitchen. Especially if the plumbing equipment needs to be completely replaced with a new one. Pipes must be placed close to the walls, or mounted inside the walls. Replacing the cast iron battery with the latest aluminum system or convectors would be ideal.

For the pipeline, polypropylene, metal-plastic, copper are used. These materials have a number of advantages:
- - polypropylene pipelines have low thermal conductivity and corrosion protection. No need for cuffs and linings. Differs in a democratic price. You can install it using a welding machine.

- - metal-plastic pipes do not lend themselves to corrosion, are characterized by low heat transfer and a rigid structure. Installation of metal-plastic pipes is quite complicated and requires a large number of components.

- - the highest indicators of durability, tolerance of very high and low temperatures, resistance to deformation and other external reasons for a copper pipeline. Copper has antibacterial properties. The disadvantage of copper pipes is their high price. Kitchen repair options photo:


Electrical work
When replacing electrical wiring, it is important to take into account the workload of the kitchen with various electrical appliances - a refrigerator, an electric kettle, a microwave oven, a washing machine and others.

It is better to lay a separate electrical line with a sufficient number of outlets.

In addition to the main lighting, additional lighting is also needed. These can be spotlights that will illuminate all the required areas of the kitchen. If you want to make a general replacement of wiring or install gas equipment, then the best option would be to use the services of professionals.

Window for kitchen
Modern kitchen renovation means window replacement, and it is important to decide which window you want - wood or plastic. The quality of a wooden window is ecological, natural and breathable, but the price of such a window is high.

Plastic is more solid, is resistant to temperature changes and other hostile circumstances, does not need additional care. Also, the PVC profile in combination with a glass unit creates excellent sound and thermal insulation.

Consider all types of room ventilation when replacing a kitchen window. Install such a sash so that it is as practical as possible in operation. Kitchen renovation photo ideas:


Installing doors in the kitchen
Kitchen doors can be ordinary, or you can make an arch. There are plastic and wooden doors. Plastic doors do not crack, are not prone to deformation, are sealed, moisture resistant, have high sound and thermal insulation.

Repair of a kitchen in a one-room apartment, the prices of plastic doors are quite reasonable. But plastic wooden doors are still inferior in naturalness and environmental friendliness.

With the help of the latest technologies, it is possible to process the wood so that the highest possible performance properties are achieved.

The arch can be made of drywall, or it can be made of wood. The main thing is that this element is in good harmony with the overall interior.

Inexpensive repair of a small kitchen, starting to level the walls yourself, you need to pay attention to two methods. You can level the walls using drywall or plastering.

The methods have both pros and cons:
- - it is not difficult to install drywall and this process does not take a lot of time. You can form even, even walls and hide the differences in surfaces using drywall. The disadvantage of drywall is a significant reduction in the size of the room, and the drywall wall comes out empty and sonorous.

- - if you use plaster to level the walls, you can eliminate unnecessary gaps between the finish and the wall. And in the end, get a smooth, integral surface. But in rooms with large differences in surface levels, wall decoration with plaster is impractical, this is due to the painstaking process and rather high material costs.

Designer kitchen renovation - choosing an apron
No kitchen is complete without the design of the "apron". "Apron" is intended to be a protection and decorative element of the gaps between surfaces and wall cabinets. The usual methods for finishing the apron are:


- - plastic panels. An affordable and suitable option for self-repairing a kitchen. If you make a good choice of the color scheme of the panels, you can get a fairly practical coating, the care of which will be quite simple;

- - tile is a hygienic and long-term finishing option for the "apron";
- True, the tile is painstaking in laying and will require significant financial costs;

- - mosaic or artificial stone - a specific option in the design of the kitchen. Exclusivity and high price are guaranteed. It is better to entrust the work with these materials to professionals.
- - a non-standard solution would be the choice of a mirror or glass "apron".

Having an idea of \u200b\u200bwhere to start renovating a kitchen, you can step by step get closer to your dream. Kitchen renovation options photo - 70 design ideas:


If you have some free time and some money, and life has become too monotonous, you can do your own kitchen renovation. This will not only save money, but also acquire useful skills and even improve health, because physical activity has not harmed anyone yet.
The chances of getting a result in which you are not afraid to invite people to your kitchen after your own repair will increase significantly if you use the advice of a specialist.
When deciding how to make repairs in the kitchen, it is necessary first of all to consider the finishing materials, taking into account the costs of their acquisition and the possibility of self-assembly.
Style selection
So that the kitchen does not stand out much from the rest of the rooms, it is advisable to do everything in the same style.
When determining where to start renovating the kitchen, first of all, they choose the style. There are more than a dozen of them for kitchen decoration, the most famous: classic, high-tech, modern, minimalism, baroque - the implementation of many requires a lot of money.
In the classics, expensive natural materials are used - a wooden kitchen set, parquet on the floor. High-tech and modern require the presence of expensive plastic and glass materials and are more suitable for modern young people, baroque with carved furniture looks better in living rooms and bedrooms.
For established people, one of the options that are simple and financially affordable is to decorate the kitchen in the Provence style on their own, which allows you to create a beautiful, cozy interior, characterized by comfort and grace.
Recently, Provence has been quite popular, it assumes the presence of light pastel colors in the decoration of the room and the furniture itself (finishing under natural light wood), the presence of plants and decorative elements. Provence excludes the presence of bulky interior items (heavy curtains, massive chandeliers), the kitchen should be light and a little romantic.

Provence will add coziness and warmth to your kitchen, as it looks organic
It is not difficult to make repairs in the kitchen with your own hands with a small budget in the Provence style, it does not require a lot of construction experience and special expensive tools.
Ceiling
The most commonly used ceilings in the kitchen are plasterboard ceilings, stretch, painted or pasted over with wallpaper. You can also use a ceiling finish made of expanded polystyrene or foam ceiling tiles or PVC panels - do-it-yourself repairs are easy, although in the latter case, you will need to arrange a wooden or metal frame to fix the PVC panels.
Coloration

It is not difficult to paint the ceiling, it is enough to have a roller with a long handle
Usually, the ceilings in the kitchen are painted with waterproof paints - acrylic latex, water-based. If the ceiling is flat enough and has been painted with waterproof paint, it will not be difficult to repaint it with a roller.
This must be done at least twice, the first time the staining occurs perpendicular to the direction of light from the window, the second time along.
In some cases, it may be necessary to level the ceiling - for this it is necessary to rinse it very well and clean it up to the floor slab, prime and apply a putty, and after it dries, wipe it with sandpaper.
Wallpaper

Wallpaper on the ceiling looks unusual, but it is advisable to buy a waterproof version
Gluing thick waterproof wallpapers to the ceiling will eliminate the need to level it and give it a more interesting aesthetic appearance than in the case of staining.
The choice of wallpaper for the ceiling is a budget option, besides, pasting the ceiling is a fairly simple job that even housewives can handle. It is advisable to prime the ceiling before wallpapering, the stripes should be glued in the direction of the light.
Floor
Do-it-yourself Provence-style decoration requires a light wooden floor. Naturally, in a damp kitchen, natural wood is expensive and impractical and can be replaced with common flooring materials such as ceramic tiles, laminate or linoleum - all of which come in natural light wood finishes.
Ceramic tile

Ceramic tiles are durable materials with water resistance properties, but require careful handling of heavy objects
Not the most suitable option for decorating the kitchen with your own hands, for laying tiles on the kitchen floor you will need a special tool (tile cutter, grinder) and the skills of a qualified tiler.
In almost all kitchens, due to the fact that the tile floor is rather cold, it is laid on an electric heating mat in the form of a wire about 5 mm thick. on the grid. This further complicates the task of laying tiles and requires the connection of the heater control unit with a knockout to install it, a hole in the wall and a strobe for the electric wire.
Considering that finishing a Provence style kitchen on your own will require the involvement of specialists for laying tiles, and the work will be quite expensive, this option can be abandoned.
Laminate

It is advisable to choose a waterproof laminate, since the kitchen is quite humid, and there is a high probability of frequent water ingress on the floor
Ordinary laminate is not a very suitable material for the kitchen due to its low water resistance, therefore, more expensive moisture-resistant types with special surface treatment and locking joints should be used. It is quite easy to repair the kitchen with your own hands, laying the laminate on a substrate, while observing a simple work technology.
Moisture-resistant types of laminate withstand exposure to water without consequences for about 6 hours, while waterproof ones are not afraid of its effects. Waterproof laminate is also made in the form of panels of various thicknesses or glued to the floor, its only drawback is the very high price.
Linoleum

If linoleum breaks in one place, you will have to replace it throughout the room
A budget option for laying on the kitchen floor, modern types have a wide range of colors and patterns, commercial brands are highly durable and durable.
The disadvantages of linoleum when laying in the kitchen can be attributed to its small thickness, which leads to different levels of the floor if laminate is laid in the corridor. That is why many people prefer to lay out the floor in the kitchen from impractical ceramic tiles.
This problem has a simple solution - the floor in the kitchen is filled with a leveling self-leveling mixture to the required thickness (3 - 10 mm) - this allows not only raising the level, but also leveling the floor.
You can do the filling work yourself if you have a special gear roller and a mixer for mixing the solution (self-leveling is sold in bags as a dry mixture).

Before laying linoleum, it is necessary to make a perfectly flat floor so that there are no differences in height.
A construction mixer can be replaced with a household drill by purchasing an inexpensive whisk for mixing the mortar, a roller with a metal comb with teeth (this option is very risky to use, liquid self-leveling may not spread well on the floor and it will be damaged).
You can repair the floor by laying linoleum on KS or PVA construction glue yourself, this is not too difficult construction work.
Walls

Kitchen walls should also be practical and easy to clean.
Provence style kitchen renovation implies light colors, MDF or PVC panels, ceramic tiles, painting, wallpapering are most often used for wall decoration, often the types of finishes are combined.
Nowadays, rarely anyone decorates the entire kitchen with ceramic tiles, even to the middle of the walls, it is too expensive and out of fashion, mainly the work area is laid out with tiles.
There are 2 types of MDF, fiberboard or PVC panels: from a solid sheet (average size 1.2 m by 3 m) or type-setting, which are mounted on a wooden or metal frame.
In the latter case, the use of type-setting panels is impractical, since this significantly reduces the free space of the kitchen by the thickness of the frame and panel. In kitchens, it is better to use MDF panels covered with moisture-resistant PVC film or one of the types of fiberboard - laminated hardboard. The sheet panels are about 3 mm thick and are fixed to the walls with glue.
Painting

Choose only waterproof paint that won't lose its appearance after washing
To paint the walls, preparation is necessary by leveling with puttying and rubbing, otherwise the light falling from the windows will highlight all the irregularities. The work is quite difficult for a layman and will require additional financial costs, and a monochromatic painting of the walls looks rather boring and is unlikely to become an interior decoration.
It is common knowledge that waterproof acrylic paints can be washed, but this statement is not entirely true. In the area of \u200b\u200bthe working area, drops of food with fat often fall on the wall, which are absorbed into the porous surface of the paint and is practically not washed off.
Wallpaper

3D wallpaper has an unusual texture that will help hide unevenness
The most budgetary option is wallpapering the walls, the most practical thing is to do it with glass wallpaper for painting or vinyl. The latter, due to their thickness, hide irregularities on the walls, and all types of dirt, including grease, are perfectly removed from their smooth water-repellent surface.