Installation of plastic windows in an old wooden house can be done according to the standard instructions for such work. However, old houses have one feature that can be considered a great advantage over newly built houses - the old house no longer shrinks. In this case, large gaps are not needed, which are left for shrinkage of new houses.
Sequence of work:
- The preparatory stage is the dismantling of the old window, fitting the size of the opening to the new window;
- Casing manufacturing
- Window installation
Preparatory work
If the house is old, then, most likely, the old windows were made of wood. Such windows are dismantled with a crowbar. If necessary, the old window is sawn. The doorway is completely cleared and inspected to determine the condition of the logs.
Important! If the house is old, then during the first installation of windows, most likely, the window opening was not treated with antiseptic impregnations that protect the wood from rot and bugs.
The old casing in the doorway is usually not suitable for a new window - it is either damaged or does not fit the new window of the desired size - about 2 cm is left between the window frame and the casing on each side. If you use old casing, then the window may turn out to be too small. Therefore, the old opening is expanded taking into account the size of the new plastic window.
New opening dimensions:
- Width - 220 mm is added to the width of the plastic window, which takes into account the thickness of the bars of the new casing (2 * 100 mm), the gaps between the frame and the casing are 20 mm on each side, 15 mm on each side for jute insulation. The allowance is reduced by 50 mm due to the entry of the spikes of the side openings of the window into the casing bars;
- Height - 245 mm is added to the height of the window for mounting clearances under the frame and above the window frame, the thickness of the casing bars is taken into account. For an old house, they do not make a gap for shrinkage above the upper casing beam.
Attention! If there is even a slight doubt about the possibility of shrinkage at home, then it is better to leave a small gap of about 45 mm above the upper casing beam to compensate for possible shrinkage.
Casing manufacturing
The casing must be installed even if the house no longer shrinks at all. Casing is needed to fix the linear dimensions of the opening.
Attention! For casing, use only well-dried wood that will not shrink.
Spikes are cut out at the end of the logs on the side parts of the window opening, and recesses are cut out in the side beams of the casing, the size of which exactly matches the size of the spike.

After trying on the beams, the opening is treated with an antiseptic impregnation, and before laying the beams, the casing is fixed with a stapler with a jute sealant.

A casing beam is laid on the lower part of the opening with a sealant, then on the upper part of the opening. The side rails of the casing are installed last.

Before installing the side rails, a sealant is applied to the joint. All gaps that were left above and below the casing are sealed with tow.

In my house, I decided to replace the windows from wooden to plastic windows. Much has already been said about the advantages and disadvantages of these windows, so we will not dwell on this issue.
Introduction
This article will discuss in detail the installation of windows in a wooden house with my own hands, where personal experience will be taken as a basis - I installed plastic windows in a wooden house myself. Why? There are two reasons for this:
- If you order the installation of plastic windows from the manufacturer, then on average you will be charged for the dismantling of old windows and the installation of a new window in the amount of 40-50% of the cost of the window. Why pay more when installing windows in a wooden house is not at all difficult?
- In most cases (up to 95%), the manufacturer of plastic windows does not guarantee windows that are installed in wooden houses. So if you install windows in a wooden house yourself, you will not lose anything (I mean the warranty period), but only gain - this is money (save on paying for installing windows).
Example: A plastic window costs 5,500 rubles ($184), respectively, the fee for dismantling old windows and installing new ones will be (50%) 2,750 rubles ($92). The total cost of the window is 8250 rubles ($275). I needed to install five windows, taking into account that I did the installation myself, it turned out that I saved 13,750 rubles ($ 459) on this.
Note: I did the installation of windows myself without assistants, on average, it took me no more than 2.5 hours to dismantle and install the window.
Removing old windows
Dismantling the old window
Do-it-yourself installation of plastic windows in a wooden house requires a solid foundation - a frame. Since my window frames were installed only five years ago and had no damage: a wormhole, putrefactive formations, cracks and chips, I decided to use them as a frame for new windows.
Note: measurements for the windows were made taking into account the fact that the window frames remain in place.
If the window frames still have sufficient strength, they have not rotted, then they can be used, for example, for building a greenhouse. So the work of dismantling them should be carried out carefully and it is advisable to first remove the glass from the bindings of wooden window frames.
I did not take out the glass, since the bindings of the frames had sufficient strength and were easily removed (there were no distortions).
Preparing a place for installing a plastic window

Preparing the opening for window installation
With a clean, dry cloth (you can use a brush), I wiped the surface of the window frame, removed the debris remaining after dismantling.
Installation of a plastic window sill

Installation of a plastic window sill
The window sill (PVC) is the base of the window when it is installed, so it is worth paying special attention to ensure that the installed window sill has the most accurate horizontal surface of the longitudinal and transverse arrangement.
For the strength of the installation of the window sill, I made cuts from the sides of the window box, about 8 mm deep.

Installation of adjusting plates under the window sill
To level the window sill, I used adjusting plastic plates, you can also use fiberboard lining plates or thin wooden planks pre-treated with an antiseptic.

Checking the levelness of the window sill
The horizontal position of the window sill during its final installation and fastening was carried out using a building level.
The window sill was attached to the lower trim of the window frame with the help of self-tapping screws, stepping back from the outer end of the window sill 2 cm, I put washers under the screw head so that when tightening the screw head does not break through the surface of the window sill (the PVC window sill has cavities). After installing the window, the attachment points of the window sill will be hidden under it.
Preparing the window for installation

Preparing the window for installation
The first thing to do before installing the window is to install the handle. It is not necessary to remove the entire protective film of the window surface in order to exclude the possibility of mechanical damage to the window.
The protective film must be removed only at the place where the handle is installed. When installing the handle, the handle must be in a horizontal position (as seen in the photo) - this position of the handle means that the window sash opens to the side, if the handle is lowered down - the window sash will be closed if the handle is turned up - the window sash opens in the ventilation mode .
I fixed the handle to the window with two bolts and moved the handle down (to the “closed” position).

Preparing to mount the window frame
At the ends of the side pillars of the window, I made markings for drilling holes through which the window will be attached to the window block. Two holes - upper and lower in the left window pillar and the same holes in the right window pillar. The distance from the holes to the bottom and top of the window is 25-35 cm.

Holes in the side rails of the frame
After marking, I drilled through holes in the side pillars of the window with an electric drill. Drill diameter 6mm (screw diameter 5mm).

Mounting holes
In order for the screw head to have a hard stop in the metal frame of the window, on the inside of the side pillars, I drilled the mounting holes with a drill of a larger diameter - 10 mm, to the metal frame. The diameter of the hole should allow the head of the self-tapping screw to pass freely into the cavity of the window post.
Installation of a plastic window

Installation of a plastic window
After preparation, we put windows in a wooden house. To do this, install it in the window opening. The center of the window installation was controlled by measuring with a tape measure from the edge of the window to the surface of the window frame on each side, the distance turned out to be the same - 1 cm. it took.

Setting the level between siding and window
In order to install the window parallel to the wall of the house, between the siding and the wall of the house, I installed a building level as a stop. If your house is sheathed with clapboard or other finishing material that fits snugly against the wall of the house, and there is no way to exercise control in the same way as I did, then you will need to use a plumb line.

Installing the spacer bar
Between the window and the window frame, I installed a spacer bar 1 cm wide (it is necessary that the bar fits snugly between the window and the window frame). This bar is necessary as an emphasis at the moment of fastening the window into the window opening using self-tapping screws. Otherwise, the window pillar, when it is fastened, can simply be taken away and the opening-closing mechanism of the window will work poorly or the sash will not open at all.

Fixing the window with self-tapping screws
When the stop bars are installed and the window is aligned parallel to the wall of the house, I fixed it with self-tapping screws. The window was fixed to the window frame only from above and below the side posts so that the self-tapping screw was free in the space between the window and the frame.
Such fastening of the window provides not only reliable fastening, but such fastening turns out to be “floating”. In the case of seasonal shifts at home and possible skew of window openings, the window, not having a rigid binding to the window frame, practically does not warp, since most of the self-tapping screw is in free space and the self-tapping screw moves arbitrarily from the window towards the window frame skew.
Installation of double-glazed windows
Before installing double-glazed windows, it is necessary to install adjusting plastic plates between the drain holes. This is necessary so that the double-glazed window does not block the holes and does not interfere with the removal of condensate through these holes.

Installation of double-glazed windows in the frame
Carefully installed the double-glazed window in the window opening. A double-glazed window should not fit tightly between the window pillars, since in the event of a possible skew of the window frame, the glass may crack, not having free space to move inside the window frame.
So if your double-glazed window fits tightly, and there is no necessary gap between it and window racks (at least 5 mm), contact the company in which you ordered the production of windows and demand to eliminate this shortcoming.
Note: checking the gaps between the double-glazed window and the frame must be performed immediately before dismantling the old windows.

Fixing the double-glazed window with plastic glazing beads
After installation, the double-glazed window was fixed with plastic glazing beads. The glazing bead has a profile spike, which is inserted into the groove of the window frame, with a light tap on the bead, the spike deepens into the groove, if a click is heard, this means that the bead is securely installed.

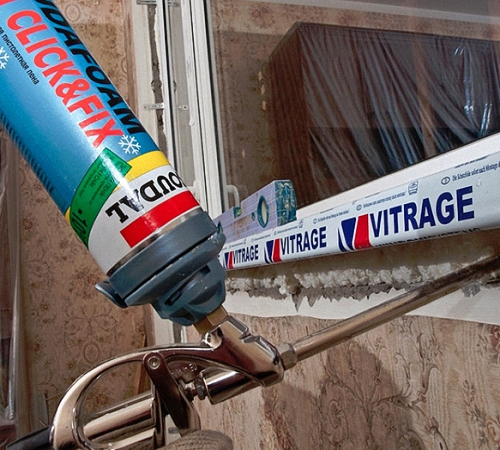
Filling with mounting foam the space between the window and the opening
After installing the window, I filled the space between the window and the window frame with mounting foam - from the inside and outside of the house.

Removing excess foam with a knife
When the mounting foam hardened, I cut off the excess with a knife.
Everything, the window is installed and you can start finishing with fittings, platbands and drainage.
Attention: Prices are given at the time of 2011.
Plastic windows can be installed in any kind of construction: stone, concrete, wood. But installation in a wooden structure requires more attention, since the tree is prone to shrinkage due to drying out. The wood that dries out turns into a strong press that can deform the window unit. As a result, the window construction ceases to function correctly, it may squint. Consider how to avoid the occurrence of such a situation and install windows without errors. Let us dwell on the specifics of PVC window construction, its strengths and weaknesses.
Advantages of PVC windows
PVC windows are window structures made of polyvinyl chloride. This material is chemical synthetics, which is based on petroleum ethylene, chlorine. This polymer is resistant to various influences and serves for a long time. Window structures made of this material are resistant to:
- sun rays;
- high humidity;
- the influence of insects;
- exposure to invisible organisms.

PVC for window structures is a tough and durable material. The strength of the polymer is several times greater than the strength of wooden structures and can withstand drops of one hundred degrees - from fifty degrees below zero to fifty degrees above zero.
Polyvinyl chloride consists of the following components:
- stabilizers;
- modifiers;
- dyes;
- fillers;
- lubricants.

The material lasts a very long time, manufacturers give a twenty-year warranty, but it is still impossible to make sure that this is the case. The service life of the first installed windows has not yet passed. Statements that even in fifty years windows will not lose their properties are perhaps real. But window seals fail much faster. As practice shows, they need to be changed every eight to ten years. In general, the service life of the seal depends on the temperature of each particular area.
Among the advantages of plastic structures are the following:
- high quality material and resistance to various kinds of influences;
- tightness of the structure - staying indoors, a person is reliably protected from noise, dust, gases and harmful substances;
- high soundproofing ability - windows are able to significantly dampen extraneous sounds;
- reliable thermal protection - complete protection against drafts and reliable heat preservation;
- profitability - saving heat resources;
- attractive designs - you can apply not only standard windows, but also bring design ideas to life.
The main properties of PVC window structures
Supporters and opponents of plastic windows argue about the safety of these structures for health. Those who argue that structures are unsafe for human health argue this by the presence of lead in the basis of raw materials. But lead in windows is completely safe, and most manufacturers have replaced this material with other ones. The fact that PVC window structures are quite economical and environmentally friendly is confirmed by certificates:
- thanks to PVC windows, heat is retained in the room and this saves resources and money;
- plastic structures save wood resources and thus prevent deforestation.
In some countries, the government pays money to residents who install plastic structures for their personal contribution and concern for saving natural resources.
Opponents of plastic structures claim that over time, plastic becomes unaesthetic, as it turns yellow and fades. But at present, the technology for the production of plastic windows has improved and the color is not lost under the influence of natural forces.
In the event of a fire indoors, window structures of this type will “hold” the fire, since the plastic structure has high thermal insulation capabilities.

Types of plastic windows
In the construction segment, a huge variety of plastic windows is presented. They are different in many ways: shape, size, number of doors, the way they open, types of double-glazed windows, profile types. Currently, manufacturers present windows with various kinds of decoration, varying degrees of transparency.
By the number of sashes, windows are divided into one, two and three-leaf windows. The chosen option depends on the location, the size of the structures and the individual characteristics of the dwelling. For a small window, it will be convenient to have one sash. For typical apartments, it is recommended to install windows in a pair of shutters.
Regarding the opening of windows, the following options are distinguished:
- a blind design is the most ill-conceived window regarding its functional tasks;
- rotary elements;
- folding elements;
- combined elements.

Its operational capabilities depend on the characteristics of the profile. PVC itself has a low thermal conductivity, but chambers with air inside the structure help to retain heat several times better. The thermal conductivity of the window and the air temperature in the dwelling depend on the number of chambers. There are three to seven chambers.
Three-chamber windows are installed in rooms that do not require heating: outbuildings, sheds.
As for six and seven-chamber windows, they do not perform their functions better than four or five-chamber ones, so there is no point in overpaying for the design.
As for marking profiles with letters, there are types: A, B and C. Type "A" is used in dwellings. "B" and "C" are recommended for use in factory or warehouse premises.
The glazing of the structure itself can be made using two, three or four sheets of glass. They are fixed at the required distance from one another and form chambers.
Double-glazed windows can be one, two and three-chamber. This point can be confusing when buying a window. It should be clarified which cameras are meant, in the frames themselves or in double-glazed windows.
Plastic structures for a wooden house
With the installation of plastic windows in wooden walls, you will have to study the theory of the issue in order to do everything right. Some people think that it is impossible to install plastic windows in old wooden-type buildings. But in fact, no, it can be done in any type of premises. You can install windows yourself, provided that there is minimal knowledge of building basics. The main thing is to take into account the features of wood as a material and take into account the fact that the wooden frame of the house can also give a drawdown.
After the windows for a wooden house are selected, it is necessary to familiarize yourself with the “pigtail” technology. This technique is aimed at preventing the deformation of window structures, regardless of the material chosen.
As statistics show, a wooden house shrinks up to thirty-five centimeters. Depending on the basis of the structure, twelve months after the construction of the house, it sags in any case, this is a natural process. The maximum error will be provided that the house is built from rounded timber, the minimum - from glued. An ordinary beam can sag by thirty to forty centimeters. This is taken into account as a factor that can deform window structures. Deformation can manifest itself in the impossibility or difficulty in opening and closing the window.
Builders are advised not to install plastic structures in new homes until it has shrunk. But as experience shows, old structures can also deform windows. But what to do, is it impossible to install plastic metal structures in wooden houses? In fact, experienced builders have developed an installation technology that will allow PVC windows to be used to their full potential.

Installation instructions for plastic windows
For successful installation work, it is important to plan and carry out competent preparatory work, they consist of the following actions:
- it is necessary to dismantle the old window structure;
- clean the recesses from construction waste and dust;
- correctly measure the window opening, write down the calculations;
- if the window opening does not match the dimensions of the new window frame, it should be adjusted to the dimensions using special solutions for working with wooden surfaces.
At the preparatory stage, a decision is made on the shape of the window, the number of sashes, in what color scheme it will be and in how many packages.
When all decisions are made, the order of double-glazed windows is carried out according to the requirements.
An okosyachka is the next stage in the installation of a metal-plastic structure.

You can finally install the window structure in a wooden structure after preparing the pigtail. This is a structure made of wooden beams, aimed at holding the weight of the load-bearing walls and not allowing the window to deform. The required size of the beam is ten by fifteen centimeters. Using a chisel, connecting grooves are made on these bars, about five centimeters wide. Cuts are made longitudinally using a chainsaw. All manipulations are controlled by the building level.
Plastic structures are inserted into the prepared pigtail system and fixed with fasteners. The order of installation work is as follows:
- with the help of fasteners, the pigtail system is fastened into a single frame;
- at the bottom, with the help of a wooden wedge, leave a small distance;
- a window frame is inserted into the system of the manufactured pigtail and fixed with fasteners;
- previously removed window sashes are installed;
- all gaps must be filled with mounting foam;
- the wooden wedge laid previously is removed.
The pigtail, installed specially in a wall made of wooden material, performs several important tasks:
- does not allow the wooden structure to move vertically;
- does not prevent shrinkage of the log house vertically;
- reinforces the wall at the window opening.
Experienced builders insist on installing pigtails even when installing plastic windows in an old wooden house. They argue that this measure is simply necessary. A structure made of wood all the time to one degree or another changes its size - during rain it swells, during heat it dries up.

Tool for mounting plastic structures
The most important process is the process of installing plastic structures in their intended place. To do this, it is advisable to prepare in advance all the tools that will be needed in the process of mounting the structure:
- drill for woodworking;
- screwdriver;
- fastenings: anchor bolts and plates;
- mounting foam;
- sprayer with water.
Naturally, other tools will be needed during operation. Ideally, this work should be done with a partner who can feed the tool, hold the structure when needed.
The installation of plastic elements is not an easy type of construction activity. If you yourself are engaged in the installation of plastic windows, consider all the recommendations of experts.

Calculation of plastic windows
Correctly calculating the dimensions is not easy, it is a very difficult process that is best entrusted to a professional from a window workshop. Recently, an online calculator of plastic structures has appeared, allowing you to find out the exact cost. It is very comfortable. There are various filters on the sites:
- you can choose the layout of the future window design;
- decide on the configuration;
- in the configuration, a choice is made by type, profiles, types of double-glazed windows;
- after that, just press the button and the calculation of plastic structures will be performed.
The cost of window structures is affected by the number of sashes, the choice of additional fittings, additional functions of a double-glazed window, and the color of the profile.
To imagine how in practice the installation of plastic metal structures in wooden houses takes place, watch the video. In fact, you can install windows on your own, for this you need to take into account the specifics and features of this method and follow the recommendations of specialists.
Being engaged in self-repair, many are interested in:
“Is it possible to install PVC windows with your own hands?”
"How difficult is it?"
This event can be classified as medium-difficult work.
In terms of time, it may take about five hours for a person without experience to work on replacing the middle window, including its dismantling.
Constantly practicing employees of specialized firms spend much less time on this.
The upper and side parts from the inside of the room and from the outside are closed with slopes. They may be made from the same material or using a different technology.
Do-it-yourself installation of plastic windows
Measurement
To order plastic windows, you need to make important ones. These are six mandatory indicators: the width and length of the window sill and slope, the width and height of the window.
In order for the measurements to be performed correctly, you need to determine the type of your window opening - with or without a quarter.
The opening is inspected: it is a quarter if the inside of the window is wider and the outside is narrower. Measurements in this case are carried out at the narrowest point, and at several different points. It is necessary to determine the smallest indicator, and add three centimeters to it. This is a measure of the width. The height is set as it is.
In the case of an even opening, without a quarter, the calculation is carried out differently. Height and width are measured, and five cm are subtracted from the first value, and three are the second. This is the height and width of the future window. The side three cm are removed because gaps of one and a half cm are needed for mounting foam on both sides. Five cm of height are distributed as follows: the same one and a half cm from above, and 3.5 cm below will be required for mounting the window sill.
The length of the window sill is considered to be five to ten centimeters greater than the width of the opening inside the room. The length of the ebb is also calculated, but outside. For some distance they go deep into the wall. The window sill is measured on the basis that it should deviate somewhat from.
Its width can be different - at the discretion of the owners. More often it ends a little further than the battery. Before ordering, you need to decide what components will be in your window, and how many there will be: is there a capercaillie, if so, where is it located, the number of sashes, how they open, in what positions. The type of fittings used is also considered in advance.
Preparing for installation
Removing old windows
When replacing windows with new ones, the old ones must be dismantled. This is easy to do, but it will take some effort. Then an audit of the opening is carried out, during which everything that can fall off later is removed. All protruding parts are removed with a chisel, hammer or even power tools.
All debris generated during the dismantling process must be carefully removed, including construction dust. In the presence of large cavities or potholes, it is advisable to cover them with a solution. The fact is that the installation is easier to carry out, the smoother the window opening. If the walls are made of too loose material, they should be treated with special ones.
The choice of installation method for metal-plastic windows
There are various installation methods: with window disassembly (unpacking) and without.
 When unpacking, holes are drilled through the frame through which anchors are driven into the wall. This method is more difficult, but more reliable.
With another method, metal plates are attached to the outside of the frame, then they are fixed to the wall with them. This is much faster, but such a mount is not the most reliable. The frame may sag or warp under significant loads, such as strong winds.
If you do not want to disassemble the window, then for installation it is better to use wide and thick plates used when installing the system. If you install small windows on just such, then they will stand normally in the absence of strong wind loads.
If your region is characterized by frequent and strong winds that blow mainly through the windows, and the apartment is located on a high floor, then installation with disassembly will be required.
Window installation technology
Let's take a closer look at both methods. Indeed, it is often the method of mounting on plates that is required.
It is preferred in buildings erected from low bearing capacity, when it is necessary to distribute the load from windows over a large surface.
 Also, this method is necessary in the case of building a building using a special “layered” technology: for example, behind and in front of concrete layers, between which a layer of insulation is placed.
If it is intended to install a window in a soft layer, then it should be fixed with plates. Installation of PVC windows in a house, panel or cinder block is best done on an anchor.
After installation, only a plastic profile will remain in three planes and in two axes of rotation.
Installation with unpacking
With this method, only the frame is installed in the opening.
First, the window opening and the frame itself are measured to make sure they are compatible. Only after that they start working.
The process begins with unpacking the window. Actions are carried out according to the following algorithm:
Removing window sash
- the window is placed in the closed position, its handle is directed down;
- pry off with a screwdriver and remove the plastic lining from the hinges;
- the pin on the top hinge serves as a movable connection, it is located in the center and protrudes slightly. By pressing, you need to slightly drown it so that it slides out below. Then it is grabbed with pliers (or side cutters) and pulled down;
- hold the sash at the top, turn the handle, opening the lock. The upper part deviates slightly towards itself, the sash rises and is removed from the pin at the bottom.
The double-glazed window is also removed on the capercaillie. It is held by glazing beads, which are removed, after which it can be easily removed.
Beads are removed
- something strong and narrow is inserted between the frame and the glazing bead, for which it is convenient to use a spatula. Disassembly usually starts on the long side;
- the angle of the spatula is inserted into the slot and the glazing bead is gently moved away from the frame, moving along the entire length. The separated glazing bead is taken out;
- with a short side is even simpler: the freed edge is hooked and removed from the groove by turning the spatula. By pulling it up, the glazing bead is removed.
After all of the above activities, you can try to pull out the double-glazed window. You should be careful that it does not fall out: it is quite heavy.
The double-glazed window is pulled out
- along the outer perimeter, the released frame is glued with self-adhesive tape, as recommended by GOST, so that the future window does not dry out;
- remove the protective tape;
- a prepared frame is inserted into the opening. To set it up, you will need mounting wedges, which are placed under the impost and in the corners, as well as in places where it is necessary. They are gradually laid down, while the window is aligned in three planes, strictly according to the level. The position of the window is fixed using mounting plates;
- with a drill with a drill of the right size, fixing holes are made, retreating 15-18 cm from the top edge for the first of them. At approximately the same distance from the bottom corner there will be a place for the lower fastener. In a standard window, another anchor is placed between them: the distance between adjacent fasteners should not exceed 70 cm;
- having made holes for fastening, in all three planes they check the position of the frame - whether it has moved. After that, the anchor is carefully hammered in, tightened, but not overtightened. It is impossible for the profile to sag;
Arrangement of low tides from the street side
- self-adhesive vapor-permeable insulation is glued outside the frame. Neat strobes are made on the sides of the opening: later, the edges of the tides will be brought into them;
- on the outer part of the opening, in the place where the tide is supported on the wall, a mounting foam is applied. In some cases (with large elevation differences), a lining profile is first mounted, to which the ebb is attached. The ebb of the desired size is fixed with screws to the frame under its ledge;
- the tide foams along the bottom edge;
- the opening is also foamed. In summer, for a better setting of the foam, the space between the opening and the frame is sprayed with water;
- a heat-insulating vapor-permeable strip is glued along the contour of the window frame;
- all gaps for two-thirds of the volume are filled with foam. With a large gap, it is necessary to do this in several stages, with an interval of at least ten minutes between applications. After the first layer dries, it is sprayed with water, then the next one is applied;
- until complete polymerization has occurred, the edge of the tape is glued to the window opening. It is important to remember that when using heat-insulating tape, the slopes must be made of plastic. Mortar and plaster do not stick to it;
- all parts of the window are assembled;
- vapor barrier tape is also installed under the window sill, at the bottom. In the same place, support pads made of solid
Quite often, owners of private houses or country cottages choose to make corrective changes to their housing, for example, install plastic bags or choose a more secure door to protect their own property. It is these elements that perform a protective function, so they must be of high quality and reliable in all respects.
PVC windows in a wooden house
Owners of private housing often ask themselves the question: is it allowed to install plastic windows in a wooden house, especially if this event concerns old buildings? This question can be answered unequivocally: of course, it is allowed. Moreover, professional builders recommend such structures for any property, including wood. You can carry out the installation yourself, if you have even a little knowledge of building skills, and, of course, during installation, you must take into account the features of wooden buildings.
The technology for installing PVC windows in wooden buildings provides for some differences, so this process will require a scheme of all manipulations that will be correctly and correctly calculated. The most important thing here is to take into account that the wooden base of the house tends to sag, which can affect new window coverings. If the order of work is carried out according to the correct scheme, then all manipulations with the windows will not lead to a disastrous result, subsequently the shrinkage of the tree will not disturb the installation of the plastic material.
The procedure for installing PVC windows in a wooden building
 Having chosen for your home, it doesn’t matter - old or new - PVC window coverings, it is recommended to install using the "casing" or "pigtail" technology. This technique will prevent the process of window deformation, regardless of the base that was chosen for the manufacture of the building material.
According to statistical studies, a house made of natural wood can shrink by about 35 centimeters. The amount of shrinkage depends on the base that was used in the construction of the wooden structure. A year after the construction of the building, the house can sink on:
- 45-65 centimeters if the walls were built from logs.
- 35-45 centimeters, if an ordinary beam was chosen as the basis.
- 15-35 centimeters, if the walls of the building were built from glued beams.
These parameters should be taken into account, since the shrinkage of the house can “press down” the installed windows to the main structure. As a result, window coverings will succumb to the deformation process, it will be difficult to open and close them. Therefore, experts do not recommend installation in a building that has not yet shrunk. But not only new buildings lend themselves to pigtailing, such difficulties can also be found in old houses. A specially designed scheme created by professional builders will help to avoid installation errors.
What steps are important when installing PVC windows in wooden buildings
 First of all, when installing window coverings from a plastic base, it is necessary to carry out preparatory work, which includes several activities:
- complete dismantling of the old window frame;
- debris and dust are carefully removed;
- the size of the window frame is measured, the necessary calculations are carried out;
- with an irregular shape of the hole, which is intended for a new window, its shape is aligned. For manipulation, you can use a special sealant or putty material for woodworking;
- it is determined which design design is most suitable for a wooden house, the color of the PVC window is selected.
The preparatory stage allows you to accurately determine the size, think about how many sashes you would like to see on the new window, and what color is more preferable for a harmonious combination of the window frame with the main structure of the house. After completing the first stage, you can contact the window production company and order the view that will satisfy all the wishes of the customer.
Installing a new window
After the selected window coverings are delivered, and the first preparatory stage is over, you can proceed to the main process - the installation of the window frame. For this stage, you need to prepare the following tools:
- wood drill and screwdriver;
- level used in construction, measuring tape;
- fasteners in the form of anchor bolts and plates;
- mounting foam and a spray bottle with plain water.
During the installation process, additional tools may be needed, for example, pliers, wrenches for tightening bolts, wedges for spacers, so it will not be superfluous to prepare them in advance as well. It is recommended that you find a partner during installation in order to correctly perform some manipulations with the window covering. Next, you should install the pigtails so that the shrinkage process does not adversely affect the original shape of the window frame.
The process of making a pigtail
The final installation of a plastic window in a wooden house can only be done after the pigtail has been made. In order to independently manufacture this structure, which will hold significant weight from the bearing walls of the building, you need to prepare a high-quality wooden beam. The size of the latter is 10 by 15 centimeters. Using a construction chisel, it is necessary to make a cut on the base in order to obtain a connecting groove, while its width should be 5 centimeters.
With the help of a chainsaw, additional cuts are made in the longitudinal version. All manipulations with the beam are carried out using the building level to prevent skew on the structure. The main riser of the window frame is installed in the finished grooves, the desired opening is formed. At the same time, the building level is also used in the process.
The last stage of PVC window installation
Plastic windows are installed in the finished pigtail system using special fasteners. To facilitate installation, all sashes can be removed from the hinges, for this, the retaining pin is simply removed. Thus, the weight of the window covering is significantly reduced, and installation is easier.
The installation of this element must be controlled using the building level to prevent distortion. The installation order is as follows:
- fasteners connect the pigtail system;
- a small distance is left at the bottom, using a wooden wedge for this, which will be removed later;
- the window frame is installed in the pigtail system and securely fixed with fasteners;
- window sashes are installed in their original place;
- cracks and gaps are filled with mounting foam, the wooden wedge is removed.
Of course, the installation of plastic windows in a wooden building - both new and old - cannot be called simple and easy. However, any difficulties can be circumvented if you follow the recommendations of experts and a properly designed scheme for this process. If during the installation of window coverings, you still have difficulties, you can watch the training video.