The lining of door frames at the entrance to the house or apartment performs 2 functions - decorative and protective. It not only closes the unsightly joint between the frame and the wall, but also prevents the penetration of cold from the outside through the opening. There are several ways to trim the slopes of the front door using various building materials available on the market. You will be able to choose a suitable design and do this simple work yourself, if you familiarize yourself with the common options and finishing technology described later in the text.
How to finish the slopes - materials to choose from
To beautifully sheathe the aperture after installing the door or in the process of repairing the hallway, you can use the following materials:
- traditional plaster painted in the desired color;
- wood and its derivatives - laminated particleboard, MDF or laminate;
- drywall sheets;
- pVC lining and various plastic panels;
- decorative stone and tile.
It looks more beautiful when the colors of skirting boards and slopes with platbands match
Tip. Whatever building material you choose, it is important to choose the right color for it. From the inside, the jambs must be designed in such a way that they match the color of the baseboards and the framing of the interior doors as shown in the photo. Outside or on the porch side, slopes are easier to do - buy platbands or extensions for the appearance of the door leaf.
If we compare different types of cladding at a price, then the most affordable option is plastic panels, and the most expensive - products from natural or artificial stone. In addition to low cost, PVC lining is characterized by a wide range of colors and patterns and ease of installation, since it does not need to be finished. The weak point of the material is the fear of mechanical damage and deep scratches that can only be removed by replacing damaged lamellas.

Plastic very successfully imitates a cut of a tree

Plastering also refers to inexpensive methods of arranging any slopes, although for its implementation you need to have basic skills in finishing work. It is possible to plaster and paint the doorway from both the inside and the outside. This option is relevant when the door is installed in a narrow niche and there is simply not enough space for the installation of drywall and any panels.

Plastered and painted opening decorated with corners
As for the GKL sheets, their application allows you to even out the curvature of the walls, artificially increase their thickness or make slopes at the right angles. Plasterboard products are good heat and sound insulation, but require finishing fine-tuning - putty, wallpapering or painting. In addition, ceramic tile is successfully laid on drywall.
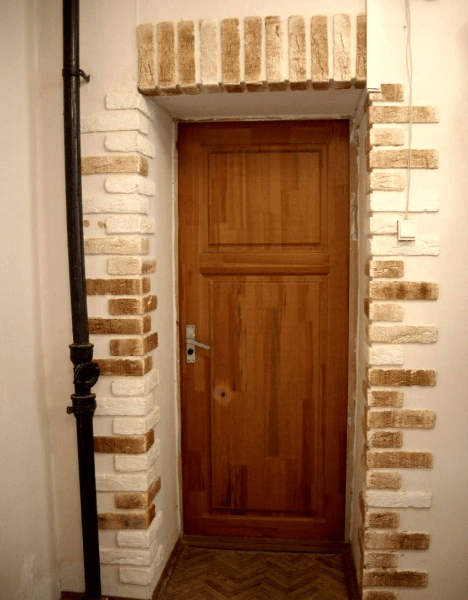
Wood and wood-based materials - a compromise in price and convenient in terms of mounting on the slopes with your own hands. How cute they look in the entrance opening is shown in the photo.

Facing with MDF extensions
This is the most practical and quick way to trim the slopes of the doors in an apartment with thin reinforced concrete partitions. In such cases, the width of the jambs does not exceed 10 cm and ready-made sets consisting of MDF strips and platbands are ideally suited for plating. Of course, they should be matched to the color of the skirting boards or to the pattern of door linings.

To install additional elements, you will need additional materials:
- wooden beam 4 x 4 or 4 x 2 cm
- polyurethane mounting foam;
- self-tapping screws up to 5 cm long;
- dowels (wooden rods for flush mounting);
- metal corners with holes, such are sold in hardware stores.
Before sloping the front door from MDF, it is necessary to cut the mounting foam that peeks out of the cracks after installation and remove any stucco from the ends of the walls. After that, measure the door frame and proceed to work, following the instructions:
- According to the measurement results, trim the facing strips and twist them with screws in the box - portal. She should be closely adjacent to the door and hide the protruding end of the wall.
- On the outside of your box, fix the iron corners - 3 pcs. on the sides and 2 pcs. up and down. Put it in the design position and put marks on the walls opposite the corners.
- At the marked points, install bars of 8-10 cm in length, and then attach a portal from MDF to them on self-tapping screws. Blow out the cracks with foam or lay the insulation inside.
- Insert dowels into the finished holes on the box and platbands (if there are none, drill) and hammer the latter into the slots by hand. Finish slopes ready.

Tip. If the repair has already been completed in the hallway, then the dowels will not hurt to lubricate with liquid nails or other glue mixture. Otherwise, put the platbands without glue so that they can be freely removed.
More visual information about finishing the jambs with MDF extensions is shown in the following video:
Paneling technology
This method is suitable for any panel materials - PVC lining, laminate or chipboard. The main condition: the opening of the front door should be wide enough to install frame elements from steel profiles or wooden beams. The optimal margin of distance between the inner surface of the door frame and the end of the wall is 5 cm on each side.
Note. When buying this or that finishing material, do not forget to purchase elements for the design of junctions - starting strips, outer and inner corners, connectors. You can also be creative: close the slots in the corners with curly skirting boards made of polyurethane.

The procedure for improving the input slopes is as follows:
- Measure the doorway in several places and cut the blanks from profiles or bars for the frame. Here you need to navigate in place: in one case, there are enough external uprights with horizontal jumpers, in the other you need to put internal ones as well.
- Mount the frame by attaching the bars to the wall and the door foot with dowels and self-tapping screws. At this stage, align the curvature of the walls, using the building level and linings of different thicknesses.
- Installation of panels begin with fastening of a starting lath or a corner. If the slats are planned to be dialed horizontally, then it must be placed vertically and vice versa.
- Install the first panel and attach its comb to the crate with self-tapping screws or a stapler, if it is a plastic lining. Insert the next element into the previous one and lock it again. In this way, close the entire perimeter opening.
- Put and fasten platbands or external corners.

Tip. When mounting the crate, take care of the electrical wiring through the front doors. Make special recesses for it or drill holes to hide behind the front skin. It is also recommended to put a heater in the cavity - mineral wool or polystyrene foam.
The door threshold experiencing constant loads from abrasion, it is better not to sew up the laminate or PVC products. Make it simpler and more reliable - install a wide board or pour a small cement screed. How to trim the doors at the entrance to the apartment with a laminate, is described in the next video:
In some cases, when the ends of the partitions are quite even, vinyl panels can be installed without a frame - simply put on glue. Before this, it is important to treat the surface with a deep penetration primer.
Drywall Instructions
If after installing the doors, the reinforced concrete or brick partition was destroyed and needs to be leveled using a plasterboard system, then the technology for lining the opening is similar to installing plastic panels. A frame made of wood or galvanized profiles is mounted on the base, and GKL sheets are screwed to it with screws. Further finishing is done - putty and cleaning of the seams with further painting.

Of particular note is the fastening of gypsum boards without the device of the crate. The method allows to level the curvature of the walls due to the thick layer of adhesive building mixture. Facing technology is as follows:
- Cut from the gypsum board the sheathing elements according to the lateral dimensions of the opening and prepare the walls - clean from the old coating and ground.
- Prepare the adhesive and apply it to the upper drywall part, as shown in the photo.
- Attach the element to the wall and press, substituting a wooden support with a horizontal crossbar. Be sure to align the position of the sheet by level and wait until the glue hardens.
- After hardening of the adhesive, remove the stand and additionally fix the sheet with dowels, drilling it in 3-4 places.
- Repeat the operation on the side slopes of the front door.

Tip. To fasten the ceiling element to the wall, apply a thin layer of mounting foam along the edge before installation.
The subtleties of the process of finishing using drywall will tell you the master in the video:
Conclusion
If you read our material and watched the training videos, then you can surely find the right option for finishing door slopes for yourself. The proposed methods are quite simple, and therefore available to every masterful homeowner. If you wish, you can perform plastering, but in this case, the lining is complicated by wet processes, which cause a lot of inconvenience. The correct application of the stucco mixture is shown in the last video:
Similar entries:

How to trim the slopes of the front door? This question is asked by both those who purchased fresh concrete walls, and those who got an apartment with a "Soviet" repair. We spotted 11 ways. Alas, there are no ideal ones among them - everywhere there are minuses.
1. Drywall
One of the most popular and time-consuming ways to decorate a doorway. GKL needs to be not only installed, but also puttied, and then painted (preferably with water-based acrylic paint) or wallpapered. But in the end, the surface of the slopes will be beautiful and smooth.
The disadvantages of this option are the fragility of the coating (the wallpaper will peel off and tear, the painted surface will quickly get dirty).
Photo from sdelaidver.ru
2. Stucco
Plastering slopes requires a certain skill. As in the case of drywall, the aperture after rough finishing needs to be puttied, painted or pasted over with wallpaper (or choose another finish option).
The disadvantages are the same - the coating will be short-lived, it is difficult to care for it. The disadvantages of plastering are also that working with it is “dirty” and time consuming.
 Photo from svoimirukamivdome.ru
 3. Decorative plaster
A variety of paragraph No. 2. “Decoration” is applied to a previously plastered surface. If the decorative plaster is textured, then the draft layer does not need to be displayed perfectly evenly. You can choose plaster with colored stone chips - it is very durable.
Of the minuses - the high cost of materials, time-consuming and "dirty" work.
 Frame from youtube.com
 The adjacent wall can be pasted over with wallpaper, painted or decorative plaster applied to it.
 Frame from youtube.com
 4. MDF panels
A simpler and faster way to finish slopes. In addition, a lot of materials and tools are not needed for work.
Disadvantage - MDF panels can only be mounted on narrow slopes. Otherwise, there will be seams between the panels.
 Photo from stroy-men.ru
 5. Laminate
A variation of point number 4. But - the laminate is suitable for openings of any depth (the seams between the panels will be neat and almost invisible).
Slopes from the laminate will cost inexpensively, but they will look accordingly.
 Photo from strgid.ru
 6. Tree
Suitable for those who have an interior hallway - in the appropriate style.
Wood is an environmentally friendly, not very expensive material, it is not difficult to fix it. However, the finished surface needs to be treated with special compounds (for example, varnish), which will periodically have to be updated.
 Photo from positroika-doma.ru
 7. Chipboard panels
Inexpensive, but also non-modern way of finishing slopes. Most often used with large wall thickness.
Chipboard panels are easy to maintain, but short-lived (they are afraid of moisture, easily scratched).
 Photo from stroyday.ru
 8. Extras
The option is especially good if the entrance hall has several doors (interior and entrance). In this case, all the boxes and slopes can be finished with the same material.
Mounting is relatively simple. But the material itself is more expensive than particleboard, laminate and other analogues.
 Photo from the site dverivmir.ru
 9. PVC panels
Such slopes look very "simple". But the material is inexpensive, durable, not afraid of moisture, easy to clean. In addition, it is easy to work with him - the installation of panels does not require much skill.
 Photo from the site dvervdome.ru
 10. Artificial or natural stone
This method of finishing slopes is already out of fashion. But it was good for durability and high wear resistance of the material, ease of installation. Of the minuses - the process of "applying" the stone is lengthy. Another drawback is that adjacent walls can only be painted or covered with decorative plaster. Other finishing options (wallpapering, installation of MDF or other panels) will require the involvement of virtuoso repairmen.
 Photo from dveridoma.net
 11. Tile or mosaic
Slopes made of tiles are very durable, easy to clean, not afraid of moisture, not scratched. But sometimes they look a little strange - tiles on vertical surfaces traditionally appear in our bathrooms, bathrooms and kitchens. Another minus is the complexity and duration of the installation of such slopes.
 Photo from dveridoma.net
 Boring door slopes are a thing of the past - now the variety of finishes just rolls over! What just do not come up with interior designers, and what kind of experiments only customers do not agree. A review of the best ideas and how to implement them is ready for viewing.
DIY do-it-yourself slopes
Most companies responsible for the delivery and installation of doors care only about the outside of the issue. It is understandable - you can install doors and decorate the front side with trim in one evening, but with the slopes from the side of the apartment you need to mess around much longer. However, this is the positive side of the issue - you can make and arrange slopes yourself, as your heart desires.
In the modern art of interior design, slopes for doors have long lost the role of a standard space around the opening. Now they can become the hallmark of your home, because it is their guest who meets at the entrance. But first, let’s refresh in our memory that, according to building codes, slopes must be representative, and what functions they must perform.
So, slopes are the end part of the walls surrounding the door frame, if any, or the constituent parts of the opening in the wall when the door is not installed, for example, in the interior passage. The main functions of this architectural element are: protecting door fastenings from burglars, strengthening the door and walls and ennoblement of the entire doorway that was spotted by masters during door installation.
However, modern designers look at things from a different angle - slopes can be, if not the central element of design, then one of the main ones. The design of the entire room may depend on this element, with its help it is possible to visually improve the space, to bring harmony to the imbalances.
How to make slopes on doors - design of slopes
The modern installation of door slopes is similar to a multi-layer cake - the base is hidden behind the decorative layer, under the main one there can be insulation, sound insulation, vapor barrier, vibration protection, lathing and there will only be a brick or foam block under it. The doorway is no exception - do not forget that in addition to external beauty, we must take care of the protective function.
The easiest and fastest finish option is to install slopes on the door made of sheet material, which they sheathe the crate or stick on the rough surface.
However, this option is best used in the arrangement of interior openings, where security issues are not so acute. In case you have to decorate the slopes on metal doors, or increase moisture and heat insulation, the best option would be.
However, this is only one layer of “pie”, except for the mandatory primer.
- Warming is a desirable but not required layer. Most often, it is made of polystyrene foam (in the case of plastering) or mineral wool (crate and plasterboard lining).
- Reinforcement - at a minimum, is the installation of reinforcing corners on top of the external slope angles. Corners have a special perforation, with the help of which they reliably “cling” to the putty layer.
- Putty - a finishing, leveling layer. In some cases, it may be absent if further finishing is followed by durable materials.
- Decorative layer - can be made of a variety of materials. The easiest way is to apply a coat of paint, complex options are not limited by anything but the imagination of the customer and the designer. In each case, the method of attaching decorative elements may vary.
Do-it-yourself slopes on doors - original ideas
How to make original slopes on the doors at little cost? Even the simplest option - painting - can be turned into a boring way of decoration. Alternatively, you can apply two coats of paint: the background coat is applied with a regular roller, and when it dries, the second coat of lighter or darker paint is applied with a textured tool. You can buy or make one yourself - just wrap a standard roller for painting with a piece of suede, so that the material forms waves, bends, indentations, in a word, texture.
- Another effect - color - allows slopes and walls to look more airy, softer if you want. To begin with, the main background is also applied, on top of which a lighter paint, close to the background, is applied with a sponge or cloth. With light washing movements or criss-cross movements, rub the second layer, due to which a picture of air lightness is formed. If there is no time for fuss at all, use stencils that you can either purchase ready-made or cut yourself.

- If you still have wallpaper after repair, the slopes can be pasted over with them. This is quite practical, especially if the wallpaper is washable - after all, the doorway is quite dirty.
- Slopes from a laminate or are mounted very quickly and look original. Just do not forget to buy special corners to hide the junction of the dice on the corners. If you think about it, this method is very practical - only on the floor the laminated coating can last about 25 years, and on the walls even longer. Laminate is easy to wash, it does not fade and is resistant to mechanical damage.
- Another quick and durable option is slopes made of MDF boards. It should be noted that MDF is still not as durable as the same laminate, but its installation is even easier - you just need to cut the strips according to the width of the slopes, fix them to glue and ennoble the corners.
- Slopes made of artificial stone are more complex in execution, but they are very beautiful and durable. Depending on the shape of the stone and its color, you can achieve the effect of antiquity, or vice versa, create modern designs. The stone is mounted mainly on a special adhesive base, for fitting individual elements you need at least a grinder with a diamond wheel. To give a wet effect, be sure to coat the surface of the stone with polymer varnish.

- Ceramic tiles or mosaics look very impressive in the doorway, especially if you choose the right colors and layout. The option is very practical: durable, easy to clean from any dirt, does not attract and does not accumulate dust.
- Mirror tiles or mirror mosaics will give the doorway a greater height and width. Do-it-yourself finish option for modern interior design, the best slopes for interior doors look best from this material.
- The use of cork panels will allow you to create a very harmonious finish on the slopes, especially if the hallway has parquet, parquet or laminate flooring. To increase the wear resistance of the material, it can be coated with a special elastic varnish for cork.
With sloppy slopes, even the most expensive and chic front doors will look unattractive. Why do we need slopes for the front doors? First of all, they are used as a beautiful frame, a means of complementing and highlighting the main element - that is, the door itself. So that you can decide what material to make slopes from, it is necessary, first of all, to pay attention to the design of the door structure itself, its style and color. After all, it is important that the slopes are suitable not only for the design of the door, but also for the overall design of the room.
We also note that the described elements perform not only aesthetic functions - they are also an insulating layer, because they cover the joints between the structure and the walls.
Basic materials for making slopes
To create slopes, you can use a variety of materials, although, as an option, you can bring to the "divine form" already existing slopes.
Option one. Plaster
If the door structure is strong and reliable, but it doesn’t look very presentable, strengthen the corners and even out the slopes using plaster. What is characteristic, this is often done not only from the side of the stairwell, but also in the hallway itself.

Note! The plaster slopes will look quite neat - if you wish, you can additionally paint them in the color of the room or the door trim.
Option Two. Drywall
This material is advisable to use if the slopes you get wide because of the sufficiently large wall thickness. Thanks to the use of drywall, your walls will become warmer, and all existing joints will be securely closed. In addition, the slopes, again, will look very neat.

If you want, you can subsequently paint drywall or, as an option, wallpaper. One of the main advantages of the material is that for its installation does not require laborious work to level the surface.
The third option. Natural wood
If the wood is suitable for door trim, then you can use it for slopes. It is no secret that wood has always enjoyed considerable popularity and, most likely, will never go out of fashion ever. The material fits perfectly into almost any interior design, and if necessary, you can easily change the tint of the material using folk / modern means.

In addition, wood can serve you for many years, while retaining all its decorative and operational properties. Although, in extreme cases, you can always paint it to the color of the hallway.
The fourth option. Laminated Lining
Such a lining, made on the basis of chipboard, can be an excellent alternative to natural wood.

Due to the fact that this material is available in a variety of colors and can mimic the texture of various tree species, you can always choose the most suitable option for the design of the hallway. However, it is extremely undesirable to use the lining when decorating the external slopes, since it will simply quickly become worthless there.
The fifth option. PVC panels
The next material through which they can get off slopes for entrance doorsare pre-made PVC panels. This material is made in a variety of colors, and the panel sizes can also be different. Specialized companies are engaged in the manufacture and sale of this kind of panels, where specialists are working who are involved in their (panels) installation.

It looks like the decoration of the slopes is attractive and respectable. The service life of PVC panels is quite large, but it is still advisable to mount them from the entrance side, and from the back side, options No. 1 or No. 2 (they are described above).
Note! If you are completely confident in yourself, you can finish the slopes with finished elements with your own hands.
Although it is worth noting that there is another application for sloping polymer materials - in this case we are talking about plastic lining. It also comes in various colors, so you can easily choose the most suitable option for decorating the hallway.
Option six. Particleboard Panels
Yes, they are also widely used in the design of slopes. But, as a rule, only for thick walls. Although in fairness, we note that this option has not been very popular in recent years due to the appearance of a huge number of more modern materials that can replace chipboards that are so difficult to install.

In any case, if you have a panel of suitable sizes lying around, you can quite make it through the door slopes from the inside.
Note! There are other materials used in the design of slopes (for example, a laminate, installation instructions for which will be given at the end of the article), but only the most common options were considered above.
What do you need to make slopes yourself?
Before you begin to work directly, you must prepare all the necessary materials and equipment. So, if we are talking about plaster, then you should prepare:
- finishing putty;
- sandpaper (large and medium);
- primer;
- serpentine tape, self-tapping screws and a mounting knife (in case plasterboard sheets will be used for decoration);
- the plaster itself;
- iron perforated corner (it will be required to align the corners);
- level;
- spatulas of different sizes;
- plumb line;
- rule (it is important that it be shortened);
- electric drill with a special nozzle-mixer;
- a suitable container for mixing.

If panel materials are used in the decoration, the list of everything you need will look a little different:
- the panels themselves of the material you have chosen, additional elements required for their installation;
- a hammer;
- platbands, decorative corners;
- timber 2x3 or 1.5x3 centimeters (in case slopes for entrance doors will be trimmed with lining);
- screwdriver;
- dowels;
- electric jigsaw (as an option - you can use a simple hacksaw);
- hammer drill (in case of walls made of concrete);
- measuring instruments;
- self-tapping screws with which the panels will be mounted.
When all the required equipment and materials are ready, you can proceed with the preparatory work and the finishing itself. Let us consider in more detail each of the possible options.
How to trim slopes for entrance doors - detailed step-by-step instructions
First, get acquainted with some features of the finishing process.
- Most of the materials described above are installed using the same technology.
- Separate technologies are quite simple, but because the work may well be done independently.
- The rest, on the contrary, can be applied only if there are certain skills in working with materials and equipment.
In any case, the finishing work itself should begin only after installing the door structure and sealing all the joints between it and the wall. We also add that the previous coating should be removed from the slopes in advance, as well as the peeling areas should be repaired. After carrying out all these events, you can proceed directly to the decoration, using one of the technologies presented below.
Option one. Plastering door slopes
If you decide to use a stucco mixture for decoration, then proceed in accordance with the instructions.
Step one. First prime the previously cleaned surfaces (if you can, then with two layers, but the second layer should be applied only after the first has completely dried).

Second step. After that, determine how smooth the slope angles are. In case of deviations from the norm, be sure to consider this moment when installing reinforcing corners. Using the latter, you can easily align corners that deviate slightly from the vertical.
Step three. Next, using the level and plumb line, set the perforated metal corners in the corners. Ideally, they should immediately be attached to the finishing putty (the latter can be purchased ready-made). Apply it using a spatula to the corners of the slopes - the mixture is necessary not only for fixing the corners, but also for aligning the slopes horizontally / vertically. Remove excess solution that has come through the perforation immediately using the same spatula. When everything is perfectly smooth, you can relax for a while - the putty should dry completely.
Fourth step. In the case of uneven slopes, before setting the leveling corners, it is recommended to set the direction from the door jamb, fixing a plasterboard strip along it with a width of about 0.8-1 cm. Use putty to fix this material to the surface. If the putty you are using is plaster, it will not take very long to completely dry.
Fifth step. The perforated corner and the edge of the drywall strip are in this case the points that you must connect with putty and align with the plaster mixture.
Sixth step. We continue to finish the slopes for the front doors. When the elements that adjust the walls are dry, spread the putty (in this case, strictly follow the manufacturer's instructions) to finally get a pasty mixture.

Seventh step. Using a trowel, throw the resulting mixture on the wall, moving from the floor up. After pouring the desired amount (about 100 centimeters high), smooth the putty using a short rule. As a kind of beacons will serve as a metal corner and previously fixed plasterboard strip.

Step Eight. Throw the mixture into the second section, level it, and then advance in the same way to the very top.
Step Nine. Puttying the upper surface of the opening may cause certain difficulties. So, for putting putty there you will have to use a wide spatula, and for leveling - all the same short rule. After this, plaster the wall over the opening, then cover the upper part of the perforated corner with the mixture.

Step ten. Wait until the putty slopes are completely dry. Drying time depends on the composition, as well as the thickness of the leveling layer.
Step eleven. When the layer dries, check how good the surface is. If minor defects remain, clean or chip them. After that, bring the slopes to the utmost evenness, using the finishing putty for this.
Twelfth step. At the end, when the finish coat dries, coat it with a primer.
The slopes that eventually turned out can be pasted over with wallpaper, painted or, as an option, finished using decorative plaster.
Video - How to plaster slopes correctly
Option Two. We use drywall for decoration
This material is simpler and easier to use than the plaster described above. However, you still have to use the finishing putty - in this case it will serve as glue for the gypsum plaster sheets; although instead it is preferable to give preference to special gypsum adhesives that are designed to work just with this material.
In the case of limited space, drywall sheets are ideal for finishing slopes. The algorithm of actions in this case should be as follows.
Step one. First of all, separately measure each of the slopes.
Second step. Transfer the resulting numbers to the sheets of material, then, working on the markup, cut out the elements for subsequent fastening to the walls.

Step three. Install plasterboard sheets from the bottom of the opening. First, apply several “slides” of glue to the first sheet, as in the image, then firmly press the element to the desired location and additionally fix with pre-prepared supports.

Fourth step. Similarly, trim the side slopes with plasterboard parts, not forgetting to check each of them according to the level. For fixing to the walls, you can use driven dowels, having previously made narrow through holes under them with a puncher.

Fifth step. Just as in the case of using plaster, close the corners with iron corners, using the same putty for fixing.
Sixth step. Coat all joints with putty, smooth thoroughly and, when it dries, thoroughly clean so that the finished slopes for entrance doors looked as attractive as possible.
Seventh step. To get a perfectly flat surface, apply a millimeter layer of the finishing putty mixture. So you finally mask all defects and holes for dowels.
Step Eight. When the mixture has completely hardened, you can sand the surfaces with fine emery cloth (if required) and, finally, proceed to the decorative design. You can use for this, again, paint, decorative plaster or high-quality wallpaper.
Note! There is another way of attaching drywall - it is advisable in cases where when aligning the slopes it is necessary to close a considerable wall thickness.

- Fix metal corners or wooden blocks to the slope, thereby forming a crate in order to give the wall the desired direction. The main advantage of this method is that between the elements of the crate it will be possible to additionally lay the insulating material.
- Close the crate with plasterboard sheets, using for fixing with self-tapping screws. Everything else is not much different from the technology described above.
Video - Finishing slopes with plasterboard sheets
The third option. We use lining or panels
If you intend to use panels made of hard materials in your work (this includes many varieties of lining, MDF, particle boards, etc.), you should know that they are all fastened practically using the same technology. The advantage of this method is that even the most serious irregularities can be hidden with such panels.
As for the specific algorithm of actions, it in this case will look something like this.
Step one. First, ground the slopes, mark the places where the bars or iron profiles will be attached. The step between them should be approximately 30-40 centimeters (if they are mounted across the slopes). In our example, a lining is used, mounted parallel to the box. If a transverse arrangement is required, fasten the crate along the jamb. If the surface is wide enough, you can use not 2, but immediately 3-4 strips.

Second step. The image shows another option - with the installation of the lining parallel to the door leaf.
Step three. You can lay heat-insulating material (polystyrene foam, mineral wool, etc.) between the battens of the battens.
Fourth step. Install panels of the selected material over the finished crate.

Fifth step. Use the metal fasteners shown in the image to mount the laminated / plastic lining.

Sixth step. For fastening large panels, use self-tapping screws, sinking the latter by 0.15-0.2 centimeters. To seal the formed holes, you can use putty.
Seventh step. At the end, install decorative corners. They must match the color of the cladding. Glue the corners on the horizontal as well as the outer vertical corners; finally, at the joints of the finishing material and the door frame itself.
Rules for creating vinyl slopes
One of the most modern materials that can be used for finishing slopes, vinyl panels are rightfully considered. They are sold in almost all specialized firms involved in the production and installation of this material. In the case of a non-standard form of slopes, the panels can be made to order for you, having previously measured the dimensions.

Finishing can imitate various natural materials, so in any case, you will choose the most suitable option for yourself, regardless of the design of the door and the hallway itself.
Note! The main advantage of such panels is that they are quickly installed, and there is little debris after completion of work. Yes, and this kind of finish looks extremely attractive, neat and stylish.

This material is fastened with universal glue, which is able to reliably connect materials of different properties (for example, brick and lining, concrete and wood, plaster and vinyl). In a word, everything that can be used during the finishing and construction works. Also, as an option, slopes for entrance doors can be finished with vinyl using polyurethane foam.
Adhesive should be applied to the inner surface of each panel and then pressed to the slopes. In this case, no holes need to be drilled in the walls or cladding, which can also be attributed to the undeniable advantages of this technology.
Using laminate flooring is a worthy alternative.

Laminate is widely used as a floor covering, it is easy to use and is produced in various color options. Who does not know, a laminate is an MDF panel covered with a special decorative layer. Why is this material so popular? All because he has many important virtues.
- It is inexpensive and can be used for various surfaces, including slopes.
- Some of its varieties are moisture resistant.
- The material looks attractive, and it goes well with other finishing materials.
- Laminate has excellent wear resistance. It does not wear off for a long time, in addition, it does not withstand very strong blows.
- Finally, the material is made of different types, textures and colors. Therefore, you will definitely choose the most suitable option for yourself.


Note! The operational term of slopes can reach 10 and even 15 years, which, you see, is not so small.
Laminating the slopes with laminate can be done in one of several possible ways. Let's get to know each of them in more detail.
- On the glue. In this case, liquid nails or similar formulations may be used. However, the surfaces must first be leveled (using plaster or plasterboard sheets).
- Using a wireframe. The most laborious method, which, nevertheless, allows you to get extremely smooth slopes without resorting to preparatory alignment of the walls. Also, this method makes it possible to lay a layer of insulating material, which will contribute to the conservation of heat in the apartment.
- On mounting foam. The simplest technology that does not need to be pre-aligned. All defects will be eliminated after the mounting foam swells.
Video - Laminate Door Slopes
As for the laying process itself, it - regardless of the particular method chosen - should begin with surface preparation. In our example, the laminate will be attached to glue. The algorithm of necessary actions is given below.


Step one. First, cover all the gaps and apply a layer of plaster. Do it all on a plaster grid. Later, when the plaster is completely dry, prime the slopes to provide additional protection.
Second step. Here the most important stage of work begins, so get to business with utmost responsibility. You need to make markings and cut the laminate. Start from the top, then proceed to the side surfaces. We recommend cutting the material with an electric jigsaw, although in the absence of such a conventional hacksaw may well come up.
Step three. Before gluing, install mounting spacers - a kind of border, thanks to which the material will not move.
Fourth step. Take the first lamella, attach it to the upper slope, and then open the door - the last should not hook it. Then apply foam on the inner surface of the laminate, press it to the slope and fix it with masking tape (you can remove it only after it has completely dried). Too much foam should not be applied, because an excessive amount after swelling can lead to displacement of the element.
Fifth step. Install the sidewalls in the same way, regularly using the building level.
Sixth step. Having laid out all the slopes, wait until the foam completely dries and proceed to the final stage of work. Cut off excess foam, plaster openings with plaster. But this is not the end - to slopes for entrance doors Looked really attractive, cover the openings with a corner of a suitable color.

That's all, now you know about the most popular ways to finish a door slope. We hope the article was really useful for you.
Good luck in your work and, by tradition, warm winters!
After installing a new front door, it remains to update them with brand new slopes. They can be included in the interior design in various ways, for decoration drywall, laminate, MDF, PVC sandwich panels as well as non-standard materials (for example, imitation of natural stone) are suitable. In order not to spend money on the services of a specialist, installation of slopes can be done with your own hands, following the instructions.
Plastering slopes
Slopes plaster most often together with the entire apartment, when the finish is not completed.
Tools required:
- Putty knife.
- Level.
- Master OK.
- The rule.
- The grid is painting.
- Masking tape.
- Corners are painting.
- The mixer is construction.
Materials:
- Stucco (dry mix).
- Putty finishing.
- The primer is liquid.
- Emery paper.
- Water based paint.
The sequence of DIY plastering:
- To clear a surface.

- Primer.
- Install and lock the beacons with a level.
- Close the junction of the wall and the slope at the level with a paint corner.
- Mask over the front door and box

- Fasten the paint net.
- Make a solution.
- Close up potholes.
- Apply the solution to the entire surface, pull along the beacons, then wait for drying and close the cracks.
- Primer.
- Align with finishing putty.
- Wait for drying and process with fine sandpaper.
- To paint with a water emulsion.

Finishing is completed.
If we are talking about a private house, it is advisable to work on the cleaned opening with an antifungal primer and add a little to the solution itself.
Plasterboard slopes
Drywall - a popular material for decorating the slopes of the front door with your own hands. It is inexpensive and reliable, easy to install.
Necessary materials:
- Drywall.
- Dowels.
- Self-tapping screws.
- Profile guides.
- Glue.
Tools required:
- Drill.
- Roulette.
- A simple pencil.
- Rag.
- Level.
- Putty knife.
- The mixer is construction.
- A hammer.
The procedure for installing the slopes with your own hands using drywall:
- To clear an aperture of dust, the remains of polyurethane foam.
- Drill connectors for dowels around the perimeter at a distance of 20 cm - necessary to improve the adhesion of the material to the surface.
- Using a tape measure, measure the width and height of the doorway and cut out the guides: two side and one top.
- Having retreated from the door door about 1.5 cm, attach a guide to the screws so that its narrow edge is in the inner part of the slope.
- Measure the size of the slope strips and cut out of drywall. When cutting, try to ensure that the drywall edge does not crumble and is even.
- Dilute the glue to a uniform, thick sour cream.
- On the cut drywall parts, apply the adhesive mass in heaps.
- Lubricate with dowel glue.
- A sheet of drywall is inserted into the guide and pressed.

- Check the level of the location of the slope, then fix it for 6 hours.
- Protruding glue with a rag.
- Periodically tap through the trimmed surface with a hammer.
The day after installation, the slopes can be further processed: putty, paint.
Laminate slopes
Laminate is a floor covering, often used for slopes of the front door, it does not need to be further processed, it resists mechanical stresses. Do it yourself has a lot of nuances.
There are two ways to install slopes from a laminate:
- Frame installation. With this technology, you can insulate the opening: fill with mineral wool or polyurethane foam. Design flaw - strips are placed only in horizontal position.
- Glue installation. It requires a flat surface of the opening, or it must correspond to the dimensions of the laminate. The laminate is glued onto the foam (at low pressure).

The first method is preferable for apartments, the second is universal.
Slopes from MDF panels
The most common finish: affordable, looks good, easy to install.
Necessary materials:
- MDF panels.
- Bars are wooden, width 3 cm.
- Dowels.
- Self-tapping screws.
- Liquid nails.
- Platbands.
- The corner is decorative.
- Guide strips.
Instruments:
- Hammer drill.
- Drill.
- Scissors, knife.
Installation of door slopes from MDF - do-it-yourself installation algorithm:
- Clear the opening.
- Drill holes for dowels around the perimeter.
- After, attach the rails guides.

- Measure dimensions and make part templates for slopes.
- Cut out the details.
- Install the upper part on the screws. Check that there are no gaps.
- Install the side parts in the guides: inside on the nails, outside on the screws.
- Paste external corners with a flexible decorative corner to hide self-tapping screws, irregularities.
- Inside, paste over the corners with a decorative rail and the finish is ready.
After finishing work you need to install platbands. If there is still wallpapering, they are installed after the repair is completed.
Advantages: finishes look presentable, easy installation.
Slopes from a sandwich of panels
A PVC sandwich panel is two thin sheets of plastic with a layer of insulation (sheet thickness 1 cm).
Materials, tools for installing slopes of sandwich panels PVC on the front door:
- Sandwich panel pvc.
- Profile (starting, cover).
- Liquid plastic.
- Roulette.
- Self-tapping screws.
- Screwdriver.
- Drill.
- Screwdriver.

Installation of slopes from sandwich panels, or how to do it yourself:
- To clear an aperture of dust and the remains of foam.
- Take measurements of parts of sandwich panels (length width): one top, two side. For convenience, you can cut out a cardboard template so that there are no gaps between the parts of the sandwich of the PVC panels after installation.
- Cut the start profile, attach to the screws (10 cm indentation) along the edge. You can not use the profile: make an opening in the foam 1 cm deep, insert the edge of the sandwich panels there.
- Install the top PVC panel.
- After, cut the starting profile to the slope width, install under the ceiling and at the base of the floor. This can not be done if there is liquid plastic - the cracks can be repaired with it. But do not use sealant - it gets dark.
- Installation of strips of sandwich panels.
- Close the sandwich panel sections with the “lid” profile. Slice and set. An overlap is formed in the corners of the structure.
- In the place of overlap, trim the profile at an angle of 45 degrees.
If desired, the space between the PVC sandwich panel, the wall, the opening is filled with polyurethane foam. This is done after installing the sandwich panels.
More about installing slopes with your own hands after installing the front door; watch the video
Custom solutions
In addition to the above standard methods using popular materials, you can use more original options that emphasize the interior, decorate the front door and surprise friends:
- Artificial stone - custom trim slopes. The main advantage is resistance to mechanical stress (if it is not a gypsum model, it is fragile). Not a cheap option, requires the participation of a specialist.
- Tile. Clinker type (imitation of brick or stone) is suitable.
- Plastic panels are an affordable but unreliable finish.
- Decorative plaster - in terms of aesthetics, endurance, it has no equal. But you will need to work hard to find a good specialist in this field, because this work requires a creative approach and professionalism.
Materials can be combined if their properties are similar (details of sandwich panels + stone, laminate + tile and others).