Structural paint is an excellent finishing material, which has recently been actively used in repairs, along with wallpaper and other finishing materials. Its application is quite simple and does not require any professional skills, however, you should still familiarize yourself with some of the nuances of the work.
What is structural paint
First of all, let's figure out what constitutes a structural or, as it is also called, textured paint. So, outwardly, it is a thick and viscous white mass. Despite the fact that the material is called paint, in its structure it is more like plaster.
After applying this composition to the wall, it is given a certain structure using a roller or other tools.

Advantages of coverage
I must say that the growing popularity of this finishing material is fully justified by its many advantages:
- The coating has good vapor permeability, so that the natural moisture exchange is not disturbed in the room.
- The dense structure of the coating allows you to hide minor flaws in, so there is no need to bring the base to perfect condition.
- Since structural plaster is initially white, it can be given any desired shade using special colors.
- The coating has a high moisture resistance, so the material can be used in rooms with a high level of humidity. And if the walls are dirty, they can be cleaned using water, without fear of damaging the surface.
- High wear resistance.
- Resistant to UV rays.
- Elasticity.
- Environmentally friendly and harmless in the process of painting surfaces.
- If necessary, you can change the color of the finish at any time by covering it with acrylic paint.
- Versatility - the coating can be used not only inside, but also outside the room. The paint may be applied to concrete, brick, plasterboard, plastered and putty surfaces.
Advice!
When painting the composition, it is advisable to use the color of the same manufacturer as the textured paint itself.
This will give you the best quality result.

Flaws
Of the shortcomings of the material, it can only be noted that the price for it is quite high. However, given the durability of such a finish and its wear resistance, the result is still savings.
Structural paint on the wall
Surface preparation
Like any other type of finish, the application of textured plaster requires preparation of the base. True, there is no need to align the walls to an ideal state, as we have already mentioned above.
However, if you can't. You can find out how this is done on our construction portal.
After . For these purposes, Betonokontakt is most often used.

The primer should be applied in an even layer using a roller, while avoiding drips of the solution and its accumulation in certain sections of the walls. You can start painting only after the surface has completely dried. Typically, this takes about 24 hours.
Tools
Before you start applying paint to the walls, you need to prepare the following tools:
- Wide spatula.
- Roller for paint. In order for the surface to really turn out to be structural, the paint roller must be patterned. The structure of the roller is selected in accordance with the desired pattern on the wall.

Paint application
Now you can go directly to painting.
The instruction looks like this:
- First of all, you need to get the desired color of the composition. To do this, take a small part of the mass and gradually add color to it until the desired color is obtained. In this case, you should remember the proportions in order to dilute all the paint in the bucket in the same way.
- Then the composition must be mixed well. If the manufacturer allows, a little sand can be added to the paint, which will make the surface rough.
- Then a small amount of the mixture is applied to the spatula and rubbed over the surface of the walls. Thus, this process resembles ordinary puttying.
- Next, you need to moisten the structural roller for painting the walls with water and then roll it over the surface treated with the composition. It is more convenient to do this work together, so that one master applies the composition to the wall, and the second one then gives the surface a structure with a roller.
Of course, drawing on the surface can be done not only with a roller, but also by hand or using a stencil. For example, to obtain the effect of a scratched surface, you can use graters or combs. However, using a roller is the easiest method.
Since the coating will begin to set already 20-30 minutes after application, the work must be done quickly enough.
- To prevent color differences on one wall, finish the surface from corner to corner in one go.
- After 48 hours, when the coating hardens well, it can be treated with decorative wax, varnish or acrylic enamel.
Note!
Paint can only be applied in one layer.
The complete drying period of the paint is from 8 to 12 days. After that, the surface can be subjected to various mechanical loads and washed with water.

In the photo - applying the structure with a roller
Note!
Before proceeding with the application of paint on the walls, it is necessary to eliminate drafts in the room, and also protect the wall from direct sunlight.
In addition, the temperature in the room should be between + 25 - +30 degrees Celsius.

Conclusion
Having familiarized yourself with the technology of applying textured paint, it will not be difficult to perform this procedure on your own. The main thing is to adhere to all of the above recommendations and a certain sequence of actions.
This will eventually allow you to get a beautiful and durable wall covering. Additional information on this topic can be obtained from the video in this article.
Long gone are the days when wall decoration consisted only of wallpapering or covering with oil paints. Now construction companies are ready to provide a wide range of products, which occupies a leading position in the list of exterior and interior decor. Structural wall paint is versatile and suitable for many surfaces.
Features of structural paint
 This paint can even cover wood cladding or brickwork.. Before applying the composition does not require any special preparation. Any novice master is able to cope with the task, creating the perfect interior in his home. You can embody many ideas using textured paint, just look at the Internet photos with ready-made interior solutions.
In textured paint there is a structuring filler. First you need to familiarize yourself with the types of paint in order to know their differences. Construction stores are ready to offer a range of structural mixtures of the following types:
- silicone;
- mineral;
- acrylic;
- silicate.
Depending on the filler, the paint has the following properties:
- The mineral version is dry. The base is lime and cement. The mixture is diluted with plain water to the desired consistency. Suitable for street finishes.
- The silicone mixture is practical due to the presence of silicone resins in the composition.
- Acrylic binder filler is considered the most wear-resistant to any external factors. It is not diluted with anything, it is sold in the form of ready-to-use mixtures. It can be applied to any surface, subject to the basic rules.
- The silicate filler is the most expensive. It is used only on mineral surfaces and silicate primer.
Paint is selected individually. The following varieties of this coloring composition can be distinguished:

Advantages and disadvantages
Although this decorating material is called paint, it looks like a white mass with a rather viscous structure, so it looks more like plaster than the usual liquid coloring compositions. After application, it is given the desired texture. For this, structuring rollers are sold in hardware stores.
Advantages of finishing material:

Do not forget that every building material has its drawbacks - textured paint is no exception. The main disadvantages can only be attributed to its high cost, but it pays off with durability and increased wear resistance of the surface, so its price is fully justified. This option is ideal for those who do not want to re-paste the wallpaper every few years, but want to make repairs for quite a long time.
Surface preparation
If the novice master decided to make an interesting design on his own, then he needs to prepare the walls before painting.
The final decorative coating may be slightly inaccurate, but if the walls are very curved, then you will have to pre-plaster them, and also apply a suitable primer in several layers.
If there are no visible flaws on the wall, then it is enough to simply clean it of dust and dirt with a special brush.
Application technique
To make the walls beautiful and even, you should do the work in stages. Sequencing:
- First, a thin layer of plaster is applied. It is necessary to wait for it to dry completely, then a primer coat is applied on top of a uniform layer. For this, a roller is used. Avoid excessive smudges, accumulation of solution on certain areas of the working surface. After applying the primer, you need to wait a day. After complete drying, you can proceed to the application of decorative mass.
- To prepare the mixture, water is used in compliance with the proportion of 1:100 of the total mass.
- The paint is applied to small areas of less than 2 m². This is easily explained: the paint is quickly fixed, it takes about 15 minutes. But complete drying will come only after a day.
- After applying the mass to a small section of the wall, you need to immediately proceed to the creation of a relief pattern.
Relief Tools
 A structural roller is used to create a relief. You can try to create an interesting and unique design using improvised means. They can be an ordinary roller, brushes, spatulas. Even a piece of crumpled newspaper wrapped in several layers of cling film or a damp rag can be a suitable tool for the master. Using an ordinary newspaper, a pattern resembling a floral ornament is created..
There is a little trick with which you can create an effect that resembles bamboo stems in texture: you need to wind a thick rope around an ordinary roller. It is enough to hold the prepared roller over the surface on which the textured composition is applied.
An ordinary pneumatic sprayer can help decorate the walls. It is required to set a suitable pressure level of 5 atmospheres on it. A nozzle diameter of 3 mm or larger is selected. With a sprayer, you can quickly treat the entire surface. Interesting stains and patterns are formed on the walls, which will look intricate and even mysterious, reminiscent of the sands in the desert or the waves of the sea.
It is very easy to make high-quality and elite repairs in an apartment with the help of textured paint. It is so easy to create fantastic interior options with it. You just need to be patient, prepare everything you need and show imagination. To perform any repair work, the main condition is accuracy.
Structural (embossed) paint is a relatively young type of decorative surface finish. It is a dispersed mixture, which includes inclusions of elements of various structures. This method of decoration has only recently begun to be used, however, it has already gained great popularity due to its relatively simple application technology and excellent results. Many appreciated the originality and effectiveness of the coloring composition, as well as the practicality and environmental friendliness of this material.
Structural paint has the unique ability to pass steam, maintaining an ideal balance of temperature and humidity, making it ideal for interior applications. At the same time, this composition is extremely resistant to the effects of the external environment, so the paint can be safely used for facade and outdoor work. The service life of such a coating is up to four years.
Structural paint gives surfaces a relief shape and creates additional protection against mechanical or atmospheric influences. In addition, the structural composition has excellent adhesion to the surface, so this coating is successfully used for decorating walls, moreover, very different, ranging from concrete to wood.
The advantage of structural paint is a wide range of colors of the coloring composition, choosing the right shade is not difficult. And, of course, the undoubted advantage is the unique individual surface design when working with this material.
Of the disadvantages of using structural paint, one can name the relatively high cost of the coloring composition. Although, the technology of its application allows covering the surface with only one layer of paint, which will undoubtedly significantly reduce the required amount of coloring composition for work.
Using structural paint in decorating a room is quite simple. It is not necessary to have special professional knowledge in the painting business.
To decorate the surface, in addition to the coloring composition, you will need:
- metal brush,
- Master OK,
- maklovitsa,
- putty knife,
- rollers with a fur or foam rubber nozzle.
The decoration process consists of a series of successive steps. First, the surface is prepared for applying the coloring composition, after which it is primed and, if necessary, a layer of acrylic paint of the desired shade is applied. Then the coloring composition is prepared, thoroughly mixed and tinted in the appropriate color. Only after that you can proceed to applying paint to the surface. Consider the nuances of using structural paint in the process of decorating.
 Preparation for painting begins with pre-treatment of the surface. Despite the rather simple use of the coloring composition itself, special attention must be paid to preparing the base for decoration. Otherwise, the service life of the coating will be significantly reduced.
Applying structural paint to a wall
Surface preparation
If the surface was plastered without reinforcement, then it would be nice to remove the plaster layer completely. With a strong adhesion of the plaster layer to the wall, there is no need to remove it completely, it is enough to remove poorly adhering areas of the hardened mortar. In addition, peeling and peeling paint should be removed, for which you can moisten the surface with plenty of water, and after a while dry the area with a building or ordinary hair dryer. Water that has fallen into microcracks in the paint layer will swell the old coating when it dries, which can be easily removed with a spatula or a metal brush.
It is allowed to apply the coloring composition to the old layer of paint, however, in this case, the entire surface must be processed with a grinder or sandpaper, while the old layer should turn out matte.
If there are small defects on the surface, there is no need to eliminate them. Structural paint will cope with this task, since in the process of decorating a relief pattern is created. In case of significant irregularities, the base should be puttied.
Primer application
To ensure high adhesion, the surface should be carefully primed. The primer layer in this case will not only remove small particles of dust and dirt, but also provide a high-quality base. To prime the surface, it is more convenient to use a foam roller, and hard-to-reach places can be treated with a brush.
Acrylic can act as a primer. It is simple and easy to use, unpretentious and affordable.
The primer performs a very important function of protecting the subsequent layer of structural paint from physical, chemical, mechanical stress and, at the same time, increases the service life of the coating and saves material.
Deep penetration mixtures are also well suited as a primer. It is best, according to experts, to use special primers.
Proceed to the direct application of structural paint to the surface only after the complete drying of the primer layer after about 2-3 hours.
Room preparation
Before carrying out painting work in the room, you should take care in advance that there are no drafts there, direct sunlight should not fall on the surface, and the optimum temperature in the room for high-quality drying of the coloring composition should be from 25 to 30 degrees Celsius.
 Before use, the coloring composition must be thoroughly mixed, if the consistency of the paint is too thick, then you can dilute it with plain water or a special solvent. Also at this stage, the coloring composition is tinted, giving it the desired shade.
It is necessary to apply paint on the surface in a thick layer, at least two centimeters, it is thanks to the wide layer of paint that the surface will acquire a refined relief shape in the future. It is preferable to paint the surface with a spatula.
It is important to remember that the structural composition is applied to the wall with no more than one layer.
The coloring composition must be applied evenly to the surface. If a large surface area is being decorated, it is advisable to apply the material along the planes. In this case, the surface of the plane must be painted completely in one go. If you do not use this method, then a discrepancy in the color range on the painted surface is possible.
Surface decoration
The next stage is one of the most enjoyable for the implementation of design ideas. Using a fur roller or brush, you need to give the coating its own unique pattern or pattern. Creative thought is absolutely unlimited here. Creating a unique pattern on a wall using a roller has its own characteristics, for example, the technique of applying a pattern to a wall can be longitudinal, transverse, and even combined.
You can give the surface a "scratched" relief using metal brushes or combs. If you want to create a smaller and more elegant relief, it is enough to moisten the fur roller or brush with a little water beforehand.
In a word, at this stage, you can safely experiment with various techniques for giving the surface patterns and patterns.
The coloring composition thickens very quickly and will begin to dry out in half an hour, so you need to create patterns or drawings on the surface immediately.
By the way, it will take eight to twelve days for the structural paint to dry completely, after which it can be cleaned, washed or subjected to other influences.
When applying the coloring composition with a roller, a number of conditions must be met. Firstly, the number of rollers must be at least three, and two rollers must be the same size, and one slightly smaller. In the process of decorating the surface, two tools of different sizes are involved. Secondly, the tool must be completely immersed in the tray with the coloring composition and cover the surface with vertical lines from top to bottom. And, finally, the material should be applied gradually, first with a large roller, and then, if it is necessary to correct the shortcomings, use a roller with a smaller size.
Final stage
At the end, you need to check the uniformity of the applied layer of the coloring composition, if it is excessively thick, then a clean roller is useful here, with which you can remove excess paint from the surface.
After creating a relief pattern on the surface, the coating can be finalized, namely, the sharp edges of the textured surface can be removed with a brush or spatula.
Naturally, to obtain an ideal result, you should use the coloring composition from the same batch in order to maintain a uniform tone of the entire surface, and it is also important to use the same source or composition when diluting the paint with water.
There is another technology for painting surfaces with a structural coloring composition. It consists in using a spray gun as a tool for applying material to a surface.
The advantage of this technology is the ability to control the particle size of the coloring composition, as well as the intensity of supply and consumption of paint.
 Together with a great textured effect, the use of a spray gun gives an impressive result. Another advantage of using this method is the possibility of its easy application, both for internal and external works.
If the device is properly adjusted, then when painting, a perfect layer of coloring composition without streaks will be obtained. The distance from the spray gun to the surface to be painted should be from 50 to 70 centimeters, in which case the particles of the coloring matter will evenly fall on the surface.
With a shorter distance, the paint layer may not lie evenly, and the material consumption will also increase significantly. If the distance from the surface to the sprayer is too large, some of the colorant will simply settle on the floor. The movements of the sprayer should be smooth without jerks, and besides, you can’t linger in one area for too long, so that streaks do not form.
When painting surfaces outdoors, it should also be remembered that exposure to direct sunlight on structural paint will shorten its service life. A freshly applied coating should be protected from drying out, excessive moisture and low temperatures, for this you can use a foil or mesh cover.
Structural paints give the surface a unique texture, while protecting it from atmospheric and mechanical influences and allowing you to embody the most daring creative ideas for decorating the interior.
Structural paint video
related materials
CPI: Construction of a pilot plant for the production of high quality nano-structured powders
CPI (Center for Innovative Technology) and nine other European partners are jointly developing the construction of a High Energy Ball Mill (HEMB) pilot plant to produce and test advanced nano-structured powders. These advanced powders can be used in a range of high quality manufacturing applications such as cutting tools, medical implants and a range of aerospace and automotive components.
Structural paints and varnishes - capable of giving the treated surface a special structure and texture, due to the presence of a special structuring filler in the composition. Also, such paints can be called structural.
Structural paint is a finishing material that has recently gained popularity in repairs. This happens for the reason that the application of the composition is quite simple and does not require the master to have professional skills. However, before starting work, it is still worth familiarizing yourself with some of the nuances of the technology.
Varieties of structural paint
Structural paint is also called textured. Use it at the final stage of finishing work. Application can be carried out on almost any surface, namely:
- wood;
- brickwork;
- concrete cladding.
There is no need to prepare the surface using special technology. Any novice master will be able to understand the nuances of working with the material. This type of finish can be classified according to the type of filler. Thus, on sale you can find mixtures with the following fillers:
- mineral;
- silicate;
- silicone;
- acrylic.
The first type of mixture is dry, lime and cement act as the basis. Dilution should be carried out with water to the desired consistency. This material is excellent for exterior wall decoration. Silicone formulations are practical compared to the first, because among their ingredients there are silicone resins.
Silicate fillers are the most expensive. They are applied on mineral surfaces and silicate primers. Acrylic binder provides higher wear resistance to external factors. Dilution is not required, the mixture is completely ready for use. The composition can be applied to any surface.

Additional classification
Structural paint is available for sale in several varieties, among them:
- mizuri;
- Marseille wax;
- relief.
The first variety is different in that it contains modified starch. The main advantage is the ability to create a textured smooth surface. Marseille wax is great for imitating cork, bark and stone. It is moisture resistant and easy to care for. In the role of the main condition during application is the need for a protective coating in the form of wax. This type of paint is suitable for decorating the walls of public places and residential areas.
Structural paint is also offered for sale in the form of a relief. This composition is a type of acrylic polymer. Among the ingredients there is a quartz crumb. Sometimes other natural fillers are added to the components during the production process. With the help of relief, you can create interesting textures with different effects. The mixture is easy to apply.

Preparation before applying paint
Structural façade paint must be applied after surface preparation. True, there is no need to level the walls to an ideal state. However, if they are very crooked, then plastering is indispensable. Once this layer is dry, you can start applying the primer.
Concrete contact acts as it. The primer is applied in an even layer using a roller, smudges should not be allowed, as well as accumulation of the composition in certain areas. You can start painting only after the surface has completely dried, usually it takes about 24 hours.

Application methods
As soon as the base is diluted with color, you can begin the process. Application should be carried out using a textured roller with a pattern, which will allow you to get the appropriate effect. Re-staining is unacceptable, which refers to the same area. Otherwise, you will experience a change in shade or pattern.
Structural paint can be applied by roller, sponge, trowel or notched trowel. During the drying period, the paint should not be subjected to mechanical stress and washing. This can lead to smearing of the texture or pattern.
The process can be carried out with a special sprayer, with which you need to move from bottom to top. In this case, the application is carried out in two layers. The texture will be determined by the size of the droplets. In the first layer, they should be different from those in the second. However, this option cannot be called economical, in addition, it requires special skill, which is especially true if you have to paint an extended surface.
Before you buy structural wall paint, you need to pay attention to the fact that it may already have its own pattern. In this case, the application should be carried out, for example, with a spatula, if we are talking about the “bark beetle” pattern. The tool must be coated with Teflon. Application to external surfaces can be carried out in calm, dry weather. For successful painting of internal walls, it is necessary to exclude drafts. For work, the temperature regime should be in the range from +20 to +30 ° C. Painting with structural paint may involve pouring a special varnish into the cavities of the pattern, this will achieve the effect of aging.

During the application of paint, it is important to exclude exposure to direct sunlight on the walls. It is necessary to start work only after the primer has dried. If you have chosen a spatula, then with the help of it you need to give the wall the necessary pattern, additionally using a brush, trowel or roller.
Smearing should be carried out with longitudinal movements, then you can switch to transverse ones. In order to achieve a more spectacular pattern, you need to stock up on special scallops or graters. For a small pattern, brushes or a roller are used, which must first be soaked in water.
When applying structural paint, it is important to remember that it will begin to set in half an hour, so it is important to create a drawing during this time. The period of complete drying can reach 12 days. After this time, the surface can be loaded and washed.

Structural paint work may include the addition of some sand to the composition, if the manufacturer allows it. This may result in a rough surface. However, to begin with, the composition is tinted, it is thoroughly mixed, and the amount of pigment may vary depending on the desired shade.
After preparing the paint, a small amount of the mixture must be applied to the spatula and rubbed over the surface. Some masters compare technology with conventional puttying. Next, the structural roller is wetted with water, and then they should be rolled over the treated surface. It is better to work together, then one master will apply the composition, and the second will give the structure with a roller.
You can use not only a roller, but also a stencil to create an invoice. You can use a comb to get the effect of a scratched surface. The easiest method is still to use a roller. To prevent color differences on one wall, the surface is finished from one corner to another in one pass. After two days, the base can be treated with acrylic enamel, varnish or decorative wax.

Paint for plastic
On sale today there is also a structural paint for plastic. It is necessary for the repair of the car interior, exterior mirror boxes, bumpers and moldings, which may lose their appearance during operation. If products and elements have lost their original structure, then the surface can be roughened again, hiding small defects.
Structural staining does not require certain skills, thanks to this, work can be done even at home. The paint allows you to create a durable coating that is resistant to mechanical and atmospheric influences. The composition adheres well to surfaces of various types, only polyethylene acts as an exception.
Why choose this color
The mixture dries well, so the total staining time is reduced. Between layers, the mixture is left for only 5 minutes to dry. After staining, applying varnish is not required. Modern structural paint for bumpers is so diverse that it allows you to choose the necessary grit and color range. It is sold in bottles or cans. But working with spray paint is very simple. To obtain the desired result, the product must be prepared. The final result will depend on how seriously you approach this stage.
Preparation before applying bumper paint
Before applying paint to create a texture on the bumper, the surface must be prepared. To do this, the product is cleaned with sandpaper, after which putty is applied to its base. After drying, its excess must be cleaned with sandpaper. With the help of a napkin, the master will have to remove the remnants of dirt and dust.
The surface is then degreased with a solvent. The next step is to start priming. If you plan to use a structural composition when painting, then you can refuse priming, because the composition already contains elasticizers and plasticizers. If you still decide to prime the surface, then after this layer has dried, the primer should be washed off, and the surface will have to be matted. As soon as the base has become matte, we can assume that the product is ready for staining.
If you are using an aerosol, shake the can well for two minutes. Only after that, from a distance of 30 cm, can the composition be sprayed in a thin layer onto the surface. After 5 minutes, a second layer can be applied. Structural paint is applied in several thin layers. Their minimum number is three. After completion of work, the product should be left to dry for several hours. It is important to ensure that the temperature is between 18 and 20 °C.
Conclusion
Using paint that allows you to form a structural surface, you can get a durable base. This approach to interior decoration is also good because you can carry out the work yourself, without resorting to the help of specialists.
In addition, this allows additional savings. With this composition, you can create unique effects that are difficult to achieve using other materials. If you do not want repeating patterns, then you can use unique stencils.
Exquisitely and tastefully finished walls are a very important element of decor for any room. Almost all existing finishing materials have some drawbacks that limit their use, especially in interiors, which require not only beauty, but also safety and environmental friendliness. Therefore, the optimal material for interior and exterior wall decoration is textured paint. Only it allows you to create incredibly chic, bewitching surfaces on the walls, allowing any manifestations of your own, even the richest and irrepressible imagination.
The process of working with textured paint is incredibly simple and easy, so it can be used by people with a complete lack of experience in construction and finishing works. A distinctive feature of the ongoing painting work can be considered the ability to create your own textures, as well as sufficient time to correct what you did not like or did not work out. To hone your “mastery”, you can practice on a piece of plywood or a small section of the wall (in this case, before the main painting, the “training” composition of textured paint must be completely removed with a steel spatula, and the wall must be dried and primed).

Textured wall paint has undeniable advantages over other materials, and among the main ones are the following:
- frost resistance;
- resistance to constant exposure to UV rays;
- the plasticity of the resulting coating, which does not allow the wall to become covered with small cracks (with natural shrinkage of buildings);
- insensitivity to dampness, preventing the formation and reproduction of the fungus;
- the finished surface does not absorb odors at all;
- dust and dirt-repellent properties, facilitating subsequent care;
- high environmental friendliness, making it possible to use in children's rooms;
- the ability to use on any grounds - from brickwork to wood;
- huge scope for creativity when it is self-applied.
In addition, it is worth noting its hypoallergenicity and the minimum requirements for the quality of the surface used for applying textured interior paints.
Applying textured paint
Textured wall paint is applied, according to reviews, extremely easily, and the use of any complex special tool is not required. Do-it-yourself textured wall paint can be somewhat modified, which will allow you to create your own, unusual textures. So, to obtain a rough relief surface, pure sawdust can be added to the paint, and quartz sand is added to obtain a structure with sharp edges. The paint is applied in a fairly thick layer, so it perfectly covers all the cracks, chips and small irregularities on the wall.
The choice of application tool is devoid of any standards, and depending on what effect you want to achieve, you can use:
- natural sponge;
- textured (structural) roller of various lengths and diameters;
- comb;
- putty knife.
In general, applying textured paint is possible even with your hands, since it is absolutely safe, and the decor created “by hand” can become quite unexpected, interesting and unique.
A little about applying textured paint with a roller is shown in the video
Variants of possible reliefs
Textured painting of walls with water-based paint allows you to get several basic textures.

Stages of work
Applying textured paint with a roller, of course, is neither particularly difficult nor time-consuming surface preparation - and this is its huge advantage. However, the minimum amount of work to be done is still required:
- it is advisable to tap the wall with a hammer, which will reveal areas where the old plaster is about to fall out (this must be eliminated);
- large cracks need to be repaired;
- the entire surface intended for painting the walls in the apartment with textured paint should be primed with an acrylic primer, preferably marked "deep penetration".
Advice! Best results are achieved when the applied compound and base are at room temperature.
Before working with such paint, it requires very thorough mixing, and it is better if a drill with a mixer nozzle is used for this. Re-mixing is necessary after adding the selected filler and color. There are several mandatory rules, otherwise the effect may differ from what was intended:
- the application of textured paint should be carried out in a thick enough layer to be able to create the intended texture;
- it is desirable to work immediately on the entire surface where the texture will be created, since during breaks in work places of “joints” may be noticeable, which will visually worsen the impression of the whole work;
- the tool that is planned to be used must be prepared in advance;
- after drying, textured compositions for walls with effects can be additionally painted with acrylic compositions.

Choosing the best textured paint
Painting the walls with textured paint allows you to get a unique, sophisticated interior. With this, now no one argues. But in some cases, people complain that instead of unprecedented beauty, it turned out completely different from what they expected. In almost every such fact, the buyers themselves are to blame, who did not have a clear idea of \u200b\u200bwhat they ultimately wanted to receive. If almost everyone understands how to work with textured paint, few know about the intricacies of its choice.
Each coloring composition to give the wall texture and relief has its own graininess. The more pronounced and deep the texture is required, the greater the grain size should be chosen, and since each manufacturer marks this parameter in its own way, do not neglect the seller's advice when buying. Another important parameter of textured coatings is the base.
- Mineral. The most budget option, consisting of cement and lime, and produced in the form of a dry powder. Most often, with the help of a mineral composition, they give texture to the outer walls of buildings.
- Silicone. The most common option that can be used both inside and outside buildings. Creates a vapor-permeable coating that is resistant to moisture, temperature extremes and aggressive environments.
- silicate. The most expensive, but very practical option. such a coating is not afraid of any exposure to the atmosphere, the treated surface does not absorb dirt and dust, and is easy to clean. Use is allowed only in combination with a primer on a similar basis.
- Acrylic. The most convenient, ready-to-use composition that allows tinting and the introduction of the required fillers.

Enthusiastically engaged in the creation of a new, creative interior of your own home, you should not forget that in any business you need, if not experience, then at least skill, so training is necessary before work. In addition, you first need to be very clear about what kind of surface you want to get. To do this, you can not only look at online photo galleries, but also try to draw your future interior.
You can apply textured paint to a separate area, and using various tools or improvised means, see what kind of texture is obtained. It is important to understand that a pattern that looks good in a small area may not be appropriate on the entire wall. In addition, do not forget that all tools used to work with textured paint must be clean. Naturally, elementary safety requirements cannot be neglected - personal protective equipment and sufficient ventilation of the room will not interfere.
- Textured paint for interior work, reviews, photos
- Two-component parquet varnish, acrylic, matt and glossy
- Do-it-yourself heat-resistant paint for metal
- Types of paint for a children's room: magnetic, dulux, tex, pro
 Types of textured paint for walls, application technology
  Decorative wall painting with your own hands, Textured
  Textured paint: DIY creative design
  Textured ceiling paint: video instruction
  Do-it-yourself wall painting with textured paint
  How textured wall plaster is made


Structural paint properties
Structural (embossed) paint is a relatively young type of decorative surface finish. It is a dispersed mixture, which includes inclusions of elements of various structures. This method of decoration has only recently begun to be used, however, it has already gained great popularity due to its relatively simple application technology and excellent results.
Many appreciated the originality and effectiveness of the coloring composition, as well as the practicality and environmental friendliness of this material.
 Structural paint has the unique ability to pass steam, maintaining an ideal balance of temperature and humidity, making it ideal for interior applications.
At the same time, this composition is extremely resistant to the effects of the external environment, so the paint can be safely used for facade and outdoor work. The service life of such a coating is up to four years.
Structural paint gives surfaces a relief shape and creates additional protection against mechanical or atmospheric influences.
In addition, the structural composition has excellent adhesion to the surface, so this coating is successfully used for decorating walls, moreover, very different, ranging from concrete to wood.
The advantage of structural paint is a wide range of colors of the coloring composition, choosing the right shade is not difficult. And, of course, the undoubted advantage is the unique individual surface design when working with this material.
Of the disadvantages of using structural paint, one can name the relatively high cost of the coloring composition.
Although, the technology of its application allows covering the surface with only one layer of paint, which will undoubtedly significantly reduce the required amount of coloring composition for work.
Using structural paint in decorating a room is quite simple. It is not necessary to have special professional knowledge in the painting business.
To decorate the surface, in addition to the coloring composition, you will need:
- metal brush,
- Master OK,
- maklovitsa,
- putty knife,
- rollers with a fur or foam rubber nozzle.
The decoration process consists of a series of successive steps.
Do-it-yourself textured wall painting technology
First, the surface is prepared for applying the coloring composition, after which it is primed and, if necessary, a layer of acrylic paint of the desired shade is applied. Then the coloring composition is prepared, thoroughly mixed and tinted in the appropriate color. Only after that you can proceed to applying paint to the surface.
Consider the nuances of using structural paint in the process of decorating.
Structural paint application
 Preparation for painting begins with pre-treatment of the surface. Despite the rather simple use of the coloring composition itself, special attention must be paid to preparing the base for decoration. Otherwise, the service life of the coating will be significantly reduced.
Applying structural paint to a wall
Surface preparation
If the surface was plastered without reinforcement, then it would be nice to remove the plaster layer completely.
With a strong adhesion of the plaster layer to the wall, there is no need to remove it completely, it is enough to remove poorly adhering areas of the hardened mortar. In addition, peeling and peeling paint should be removed, for which you can moisten the surface with plenty of water, and after a while dry the area with a building or ordinary hair dryer. Water that has fallen into microcracks in the paint layer will swell the old coating when it dries, which can be easily removed with a spatula or a metal brush.
It is allowed to apply the coloring composition to the old layer of paint, however, in this case, the entire surface must be processed with a grinder or sandpaper, while the old layer should turn out matte.
If there are small defects on the surface, there is no need to eliminate them.
Structural paint will cope with this task, since in the process of decorating a relief pattern is created. In case of significant irregularities, the base should be puttied.
Primer application
To ensure high adhesion, the surface should be carefully primed.
The primer layer in this case will not only remove small particles of dust and dirt, but also provide a high-quality base. To prime the surface, it is more convenient to use a foam roller, and hard-to-reach places can be treated with a brush.
Acrylic can act as a primer.
It is simple and easy to use, unpretentious and affordable.
The primer performs a very important function of protecting the subsequent layer of structural paint from physical, chemical, mechanical stress and, at the same time, increases the service life of the coating and saves material.
Deep penetration mixtures are also well suited as a primer.
It is best, according to experts, to use special primers.
Proceed to the direct application of structural paint to the surface only after the complete drying of the primer layer after about 2-3 hours.
Room preparation
Before carrying out painting work in the room, you should take care in advance that there are no drafts there, direct sunlight should not fall on the surface, and the optimum temperature in the room for high-quality drying of the coloring composition should be from 25 to 30 degrees Celsius.
Painting with structural paint
 Before use, the coloring composition must be thoroughly mixed, if the consistency of the paint is too thick, then you can dilute it with plain water or a special solvent.
Also at this stage, the coloring composition is tinted, giving it the desired shade.
It is necessary to apply paint on the surface in a thick layer, at least two centimeters, it is thanks to the wide layer of paint that the surface will acquire a refined relief shape in the future.
It is preferable to paint the surface with a spatula.
It is important to remember that the structural composition is applied to the wall with no more than one layer.
The coloring composition must be applied evenly to the surface.
If a large surface area is being decorated, it is advisable to apply the material along the planes. In this case, the surface of the plane must be painted completely in one go. If you do not use this method, then a discrepancy in the color range on the painted surface is possible.
Surface decoration
The next stage is one of the most enjoyable for the implementation of design ideas.
Using a fur roller or brush, you need to give the coating its own unique pattern or pattern. Creative thought is absolutely unlimited here. Creating a unique pattern on a wall using a roller has its own characteristics, for example, the technique of applying a pattern to a wall can be longitudinal, transverse, and even combined.
You can give the surface a "scratched" relief using metal brushes or combs. If you want to create a smaller and more elegant relief, it is enough to moisten the fur roller or brush with a little water beforehand.
In a word, at this stage, you can safely experiment with various techniques for giving the surface patterns and patterns.
The coloring composition thickens very quickly and will begin to dry out in half an hour, so you need to create patterns or drawings on the surface immediately.
By the way, it will take eight to twelve days for the structural paint to dry completely, after which it can be cleaned, washed or subjected to other influences.
When applying the coloring composition with a roller, a number of conditions must be met.
Firstly, the number of rollers must be at least three, and two rollers must be the same size, and one slightly smaller. In the process of decorating the surface, two tools of different sizes are involved. Secondly, the tool must be completely immersed in the tray with the coloring composition and cover the surface with vertical lines from top to bottom.
And, finally, the material should be applied gradually, first with a large roller, and then, if it is necessary to correct the shortcomings, use a roller with a smaller size.
Final stage
At the end, you need to check the uniformity of the applied layer of the coloring composition, if it is excessively thick, then a clean roller is useful here, with which you can remove excess paint from the surface.
After creating a relief pattern on the surface, the coating can be finalized, namely, the sharp edges of the textured surface can be removed with a brush or spatula.
Naturally, to obtain an ideal result, you should use the coloring composition from the same batch in order to maintain a uniform tone of the entire surface, and it is also important to use the same source or composition when diluting the paint with water.
Atomizer application
There is another technology for painting surfaces with a structural coloring composition.
It consists in using a spray gun as a tool for applying material to a surface.
The advantage of this technology is the ability to control the particle size of the coloring composition, as well as the intensity of supply and consumption of paint.
 Together with a great textured effect, the use of a spray gun gives an impressive result.
Another advantage of using this method is the possibility of its easy application, both for internal and external works.
If the device is properly adjusted, then when painting, a perfect layer of coloring composition without streaks will be obtained. The distance from the spray gun to the surface to be painted should be from 50 to 70 centimeters, in which case the particles of the coloring matter will evenly fall on the surface.
With a shorter distance, the paint layer may not lie evenly, and the material consumption will also increase significantly.
If the distance from the surface to the sprayer is too large, some of the colorant will simply settle on the floor. The movements of the sprayer should be smooth without jerks, and besides, you can’t linger in one area for too long, so that streaks do not form.
When painting surfaces outdoors, it should also be remembered that exposure to direct sunlight on structural paint will shorten its service life.
A freshly applied coating should be protected from drying out, excessive moisture and low temperatures, for this you can use a foil or mesh cover.
Structural paints give the surface a unique texture, while protecting it from atmospheric and mechanical influences and allowing you to embody the most daring creative ideas for decorating the interior.
Structural paint video
Today, there are a huge number of different materials on the construction market and one of the most popular is sand effect paint. In our review, we will talk in detail about everything related to such paint.

The main composition of decorative paint with sand
2. Types of paints with sand effect
3. Application technology
4. Benefits

The main composition of decorative paint with sand
Today, all leading manufacturers produce paint with sand based on a binder - acrylic emulsion.
And of course, the second main component is the sand itself. The third thing that will affect the properties of the material is additional pigments to give the base of the material certain visual properties. Now let's dwell on all these parts in more detail.
Acrylic emulsion - serves to ensure that the grains of sand adhere to each other and the paint itself sticks to the wall. If the acrylic is of low quality, then the grains of sand, if you run your hand over the painted wall, crumble and remain in the palm of your hand.
High-quality raw materials do not allow grains of sand to fall off and, accordingly, you are much more likely that the coating will last a long time. After all, the average service life of decorative paints is today about 20 years.

Now sand.
We again see that there are manufacturers of quality materials and there are those who seek to reduce the cost of the product at the expense of quality. How to determine which sand is of high quality or not? Here, too, there is a simple way - the sand, after application, should be visually uniform and fine. Coarse sand, of course, can sometimes be beautiful, but a thin layer of paint will not hold it, and over time, such a coating will crumble and lose its attractive appearance.
And the homogeneity of the sand indicates that the raw sand was processed by a separator and debris and impurities were removed from it. Fine glass sand can be found in some sand paints. Such materials have a 3D effect and various decorative effects can be created from them - seas, suede, etc.
The last important part is the pigments.
There are matte sands on the market today, with a silver base, gold or chameleon. The 3D sands described above have a transparent matte base.

Types of paints with sand effect
The different types of decorative sand paint coatings will be determined by both the composition of the paint and how it is applied.
Based on the above compositions, we have several types of coatings - these are classic sands (matte, gold, silver), velvet effect paint (this is when there is a lot of sand in the composition and it gives a velvet effect when applied), 3D effect paint (this is an option , when round glass grains of sand are used in the composition), paint with a chameleon effect (this is when, at different angles of incidence of light, the substrate is under the sand, then the paint base).
Using different types of application, you can create completely different coatings from the same paint.
You can make the effect of sand whirlwinds, or you can make the effect of coarse burlap. You can apply vertical lines - the so-called. rain effect, or place them horizontally or at an angle.
Also, recently, the method of applying sand with a trowel is gaining popularity - it turns out a smooth suede coating - like paint with a skin effect or try to apply paint with sand with an airbrush to get a uniform distribution of sand over the wall surface.

Other ways to create coatings include options for separate tinting and application - the so-called multi-color coatings.
Or you can add a large amount of color to the paint - and then you get a matte finish. You can also add various additives to the paint - for example, gold or silver glitter (sparkles) to give the paint an extra shine.
Another popular type of coating is the combined multicomponent coating.
If you apply various translucent materials over the paint with sand, you will get many additional effects of such paint.

Sand effect paint technology
For the most part, all sand paint options are applied in approximately the same way.
The essence of the technology is very simple:
First you need to apply a substrate with a quartz filler (in fact, also with sand). In no case should ordinary paint be used for this, since the main tasks of the substrate are to create good adhesion to the wall, due to the special acrylic emulsion in its composition, as well as the ability to create the desired effect, due to the quartz contained in the substrate.
The substrate is applied to the wall evenly with a roller or brush. If you are going to buy a paint with a sand effect from a quality manufacturer, then the substrate does not need to be tinted, since high-quality materials are applied in one layer and have good hiding power. An exception is when the substrate is used as a color builder for a translucent sand paint.
Then, after the substrate has dried, it is necessary to apply paint with sand with a brush or trowel, depending on the chosen result, and give the coating the desired appearance.
This is where the technology ends.
The subtleties of the process of applying textured paint
One coat of undercoat plus one coat of paint, all the others say to do is just a desire to sell more low-quality material and more expensive application work.

Benefits of sand effect paint
Sand effect paint has a number of advantages over other materials.
Firstly, it is the ability to create a large number of different visual effects. In fact, this is a constructor, where you can create different coatings in different rooms from the same material.
The second clear advantage is its durability. All coatings made from this paint can be easily used even in public areas due to their positive abrasion resistance properties. But once again we will make a reservation - in this review we are talking about high-quality materials.
Additional benefits will be the safety of this paint for health (it is especially important to make sure that you bought material with an A + safety certificate), the content of fungicides in the composition of the paint prevents the formation of mold on the walls, and most importantly, applying such paint is one of the easiest - then there is even you yourself, with a little practice, you can create a stylish and beautiful interior in your home.

Buy sand effect paint can here, in our online store of decorative plasters in Moscow
Hair coloring at home
It is known that a change of image is the best way to improve your mood, start a new life or attract the attention of others.
So, you finally decided to dye your hair. Now your main task is to choose the right dye, and then properly apply it to your hair to get the perfect result.
For the very first coloring, unstable paint is suitable, for example, tinting hair foam, which is washed off after several shampooing procedures. Do not strive for drastic changes, this will greatly harm the hair.
Don't try to do something supernatural. Leave radical changes to the professionals.
Having bought paint in the store, we start with anticipation, having come home, quickly open it, put on gloves, mix the bubbles and apply it to our hair.
This process is automatic for most of us. And in vain, because first of all you need to carefully read the instructions.
There are two gross misconceptions: the longer we hold the paint, the more effectively the color will take, and the more paint we apply, the more intense the color will be. The first definition is incorrect due to the fact that, by overdosing the paint over time, you can dry them out, or even just burn them. The second is a sales ploy to get you to take more packages of the product.
1. How to apply paint correctly
1. Before the first dyeing of hair, the head should not be washed, so as not to remove the protective film from the scalp. The dye is so deeply absorbed into the hair.
2. Apply paint to dry curls.
3. Before coloring, apply a protective cream or petroleum jelly to the skin of the face along the hairline, on the forehead and temples so that the skin does not change color.
4. Be sure to wear gloves.
5. Divide the hair into thin strands and evenly and most importantly quickly - apply the composition to them with a brush: from the back of the head towards the temples, evenly treating them from the roots to the very tips.
6. If there are difficulties in distributing the dye over the entire length of the hair, lightly moisten them with warm water. The paint will become less thick and easier to spread.
7. After all the hair has been processed, carefully comb it again with a comb with rare teeth.
8. Immediately after application, wipe off the remaining paint from the skin, not forgetting the neck and ears.
9. Leave the dye on your hair for 25-30 minutes (according to the instructions), without covering your head. If there is too much gray hair, increase the time by another 10 minutes.
2. Wash off the paint
After staining, foam the coloring emulsion with a little water, then rinse thoroughly with warm water.
Textured wall paint how to apply video
When washing off the dye, make sure that you rinse your hair completely. You can wash your hair with shampoo to remove coloring elements, then rinse with conditioner. The one that was in the kit, and the one you are used to, will do.
Hair after dyeing especially needs protection and care. To preserve the resulting color, its richness and brightness, it is recommended to use a balm for colored hair.
Staining results
If the staining was unsuccessful, it is best to contact a specialist. Even if you wash your hair ten times in a row, the paint will not come off.
The most wrong decision would be a sharp repainting back to the previous color. The hair is already injured, and only a professional can help not only restore the beauty of the hair, but also protect it from damage.
The main thing - do not forget that a radical change in hair color has a very strong effect on the condition of your hair: hair can begin not only to split or require more thorough care, but even fall out.
It would be a good idea to write down the number of the paint you chose for later, and remember to spread a towel over the pillowcase to avoid stains.
This is especially true if you become a brunette.
Tinting overgrown roots
When tinting the hair roots, apply the composition first to the roots, starting from the back of the head.
After 20 minutes, distribute the remaining emulsion along the entire length of the hair to the very ends and comb the hair so that the paint is evenly distributed.
Leave the composition for another 10 minutes and then rinse.
Necessary items for those who decide to dye their hair at home
In order for you to have as few difficulties as possible, you need to have the following necessary items on hand:
Stock up on an extra pair, suddenly, during the staining process, those that were attached to the paint will tear, then you can get dirty not only your hands, but also your clothes. Powder-free gloves that do not irritate the skin are best suited.
Moreover, it will come in handy for you more than once.
A towel will also come in handy.
Precautionary measures
When dyeing hair at home, you cannot: use the purchased emulsion for other purposes, neglect gloves, do a perm before or after dyeing, carry out the procedure if there are wounds, scratches or abrasions on the scalp, use the drug on hair dyed with natural dyes, exceed the indicated on packaging time, store and use the re-emulsion
Read more:
Hair laminationCare for dyed hairChoose hair color by color type - summer, autumn, winter, spring Highlighting is always in fashion!
Textured paint decor: types of wall reliefs, application methods (photo, video, reviews)
Structural paint for walls with a roller: do-it-yourself video-instruction for painting, painting features, price, photo
Structural paint is an excellent finishing material, which has recently been actively used in repairs, along with wallpaper and other finishing materials.
Its application is quite simple and does not require any professional skills, however, you should still familiarize yourself with some of the nuances of the work.

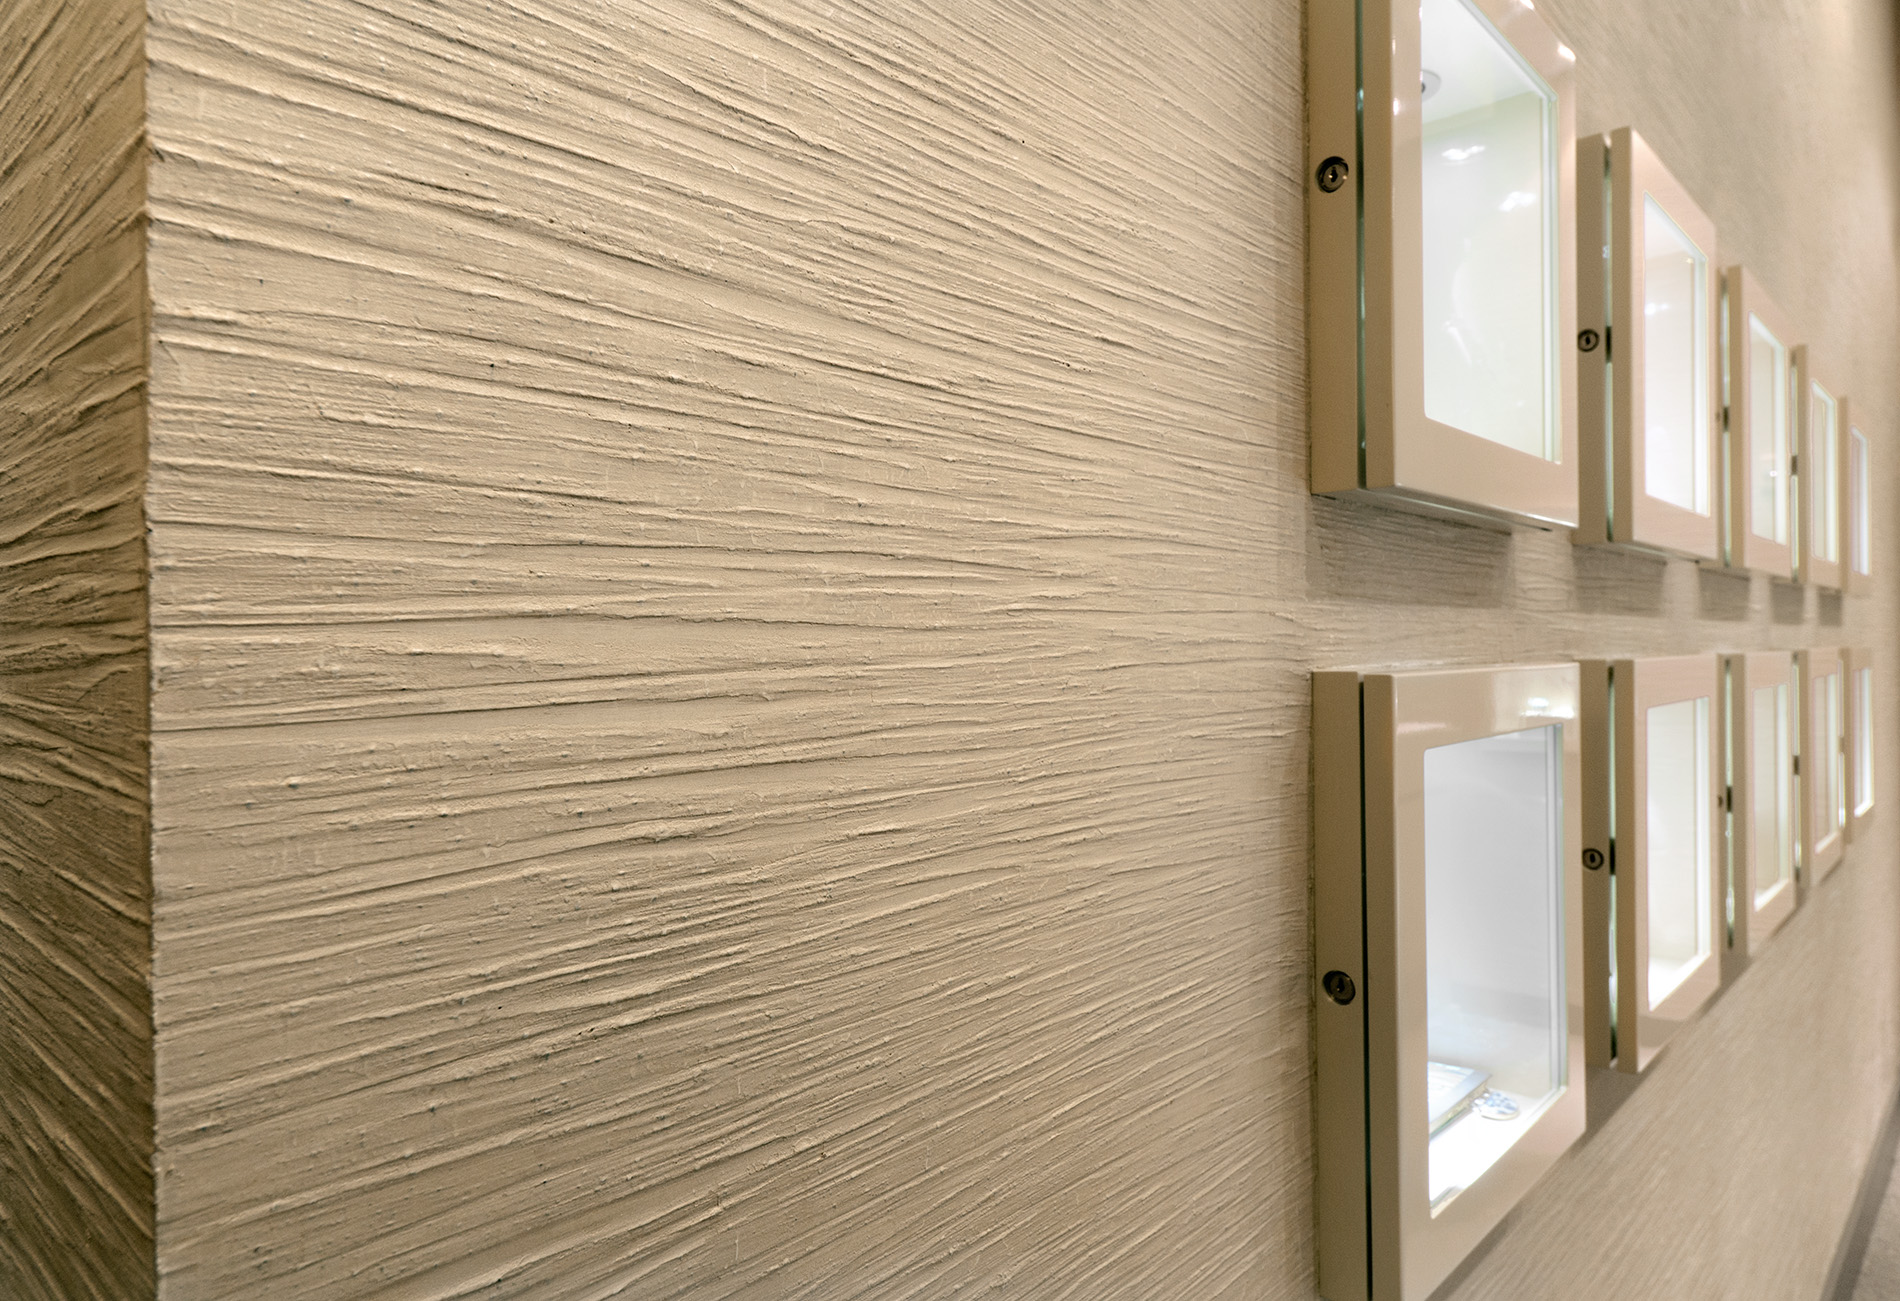
Structural painted surface
What is structural paint
First of all, let's figure out what constitutes a structural or, as it is also called, textured paint. So, outwardly, it is a thick and viscous white mass.
Despite the fact that the material is called paint, in its structure it is more like plaster.
After applying this composition to the wall, it is given a certain structure using a roller or other tools.

Structural paint Ceresit
Advantages of coverage
I must say that the growing popularity of this finishing material is fully justified by its many advantages:
- The coating has good vapor permeability, so that the natural moisture exchange is not disturbed in the room.
- The dense structure of the coating allows you to hide minor flaws in the rough finish of the walls, so there is no need to bring the base to perfect condition.
- Since structural plaster is initially white, it can be given any desired shade using special colors.
- The coating has a high moisture resistance, so the material can be used in rooms with a high level of humidity.
And if the walls are dirty, they can be cleaned using water, without fear of damaging the surface.
- High wear resistance.
- Resistant to UV rays.
- Elasticity.
- Environmentally friendly and harmless in the process of painting surfaces.
- If necessary, you can change the color of the finish at any time by covering it with acrylic paint.
- Versatility - the coating can be used not only inside, but also outside the room.
The paint may be applied to concrete, brick, plasterboard, plastered and putty surfaces.
Advice!
When painting the composition, it is advisable to use the color of the same manufacturer as the textured paint itself.
This will give you the best quality result.

Structural paint color
Flaws
Of the shortcomings of the material, it can only be noted that the price for it is quite high.
However, given the durability of such a finish and its wear resistance, the result is still savings.
Structural paint on the wall
Surface preparation
Like any other type of finish, the application of textured plaster requires preparation of the base.
True, there is no need to align the walls to an ideal state, as we have already mentioned above.
However, if the walls are too curved, then plastering is indispensable. You can find out how this is done on our construction portal.
After the plaster layer dries, the base must be coated with a primer. For these purposes, Betonokontakt is most often used.

Structural paint preparation
The primer should be applied in an even layer using a roller, while avoiding drips of the solution and its accumulation in certain sections of the walls.
You can start painting only after the surface has completely dried. Typically, this takes about 24 hours.
Tools
Before you start applying paint to the walls, you need to prepare the following tools:
- Wide spatula.
- Roller for paint.
In order for the surface to really turn out to be structural, the paint roller must be patterned. The structure of the roller is selected in accordance with the desired pattern on the wall.

Structural paint roller
Paint application
Now you can go directly to painting.
The instruction looks like this:
- First of all, you need to get the desired color of the composition.
To do this, take a small part of the mass and gradually add color to it until the desired color is obtained. In this case, you should remember the proportions in order to dilute all the paint in the bucket in the same way.
- Then the composition must be mixed well. If the manufacturer allows, a little sand can be added to the paint, which will make the surface rough.
- Then a small amount of the mixture is applied to the spatula and rubbed over the surface of the walls.
Thus, this process resembles ordinary puttying.
- Next, you need to moisten the structural roller for painting the walls with water and then roll it over the surface treated with the composition. It is more convenient to do this work together, so that one master applies the composition to the wall, and the second one then gives the surface a structure with a roller.
Of course, drawing on the surface can be done not only with a roller, but also by hand or using a stencil. For example, to obtain the effect of a scratched surface, you can use graters or combs.
However, using a roller is the easiest method.
Since the coating will begin to set already 20-30 minutes after application, the work must be done quickly enough.
- To prevent color differences on one wall, finish the surface from corner to corner in one go.
- After 48 hours, when the coating hardens well, it can be treated with decorative wax, varnish or acrylic enamel.
Note!
Paint can only be applied in one layer.
The complete drying period of the paint is from 8 to 12 days.
After that, the surface can be subjected to various mechanical loads and washed with water.

In the photo - applying the structure with a roller
Note!
Before proceeding with the application of paint on the walls, it is necessary to eliminate drafts in the room, and also protect the wall from direct sunlight.
In addition, the temperature in the room should be between + 25 - +30 degrees Celsius.

Double structural bead
Conclusion
Having familiarized yourself with the technology of applying textured paint, it will not be difficult to perform this procedure on your own.
The main thing is to adhere to all of the above recommendations and a certain sequence of actions.
This will eventually allow you to get a beautiful and durable wall covering. Additional information on this topic can be obtained from the video in this article.
Do-it-yourself textured wall paint
Textured paint for walls and ceilings, video and photo application
We have heard the mention of textured plaster many times, but are you familiar with such a type of decorative coating as textured paint?
Let's get to know each other better, because this is a whole family of special coatings that help create a unique structure and extraordinary surface texture.
Modern construction has become a real art.
Craftsmen use various materials to finish surfaces: these are traditional water-based paints. and decorative plasters, as well as textured paints.
What is texture paint?
It can also be called structural, textural. In fact, this is a special water-dispersed paint containing a thick structuring filler, which makes it possible to obtain various reliefs on the surface.
You can use this paint for both external and internal work, and even on surfaces subject to increased wear.
The acrylic binder, which is included in the decorative coating, makes the paint immune to a number of weather conditions.
Advantages of textured paints
Textured paints based on aqueous acrylic dispersions are produced without the use of solvents, so their harmful effects on human health are minimized.
Textured paints they lay down in a relatively thick layer, but, despite this, they are distinguished by good vapor permeability, and also do not serve as a barrier for hydroregulation, including between decorative layers.
This paint has a higher resistance to mechanical stress than conventional facade paint.
By the way, for textured paints, the consumption per square meter is quite high and amounts to 500-1500 g. This phenomenon can be easily explained by the fact that one layer of paintwork material can have a thickness of up to 1 centimeter (for comparison, #8211 facade paints are applied with a layer of 0, 2 mm, maximum 0.3 mm).
Applying textured paint
To prepare the walls for painting with textured paint, you will need to apply a deep penetration primer to the previously leveled surface of the walls or ceiling.
However, there is no need to make perfectly smooth walls. This feature facilitates the work of the builder and reduces the cost of the preparatory work.
After the primer dries, you can start applying.
The appearance that is obtained at the output largely depends on the composition of the paint, the tool used and the application technique. The possibilities of using different techniques are almost limitless, it all depends on your skills and imagination. You can apply textured paint in various ways: with a roller, brush, spatula, sponge. You can watch the application process in the video.
The range of structural paints surprises.
The compositions differ in the type and size of the filler. When buying, you yourself can choose the paint that suits you best for painting the walls. Each of these types of paint has its own characteristics and advantages.