The putty of the walls is the final stage of the preparation of the base under the sticking of wallpaper, painting or applying other decorative coatings. This event is directed to the maximum leveling of the surface, eliminate explicit defects, small chips, chosen and other shortcomings of the draft finish. Professional work, taking into account materials, can do in a round sum, so many tend to perform the putty of the walls with their own hands. It should be noted that the technology of the walls of the walls does not represent special difficulties, therefore, having studied the main principles and having learned a little on the old walls, you will successfully handle this task.
The feasibility of putting the walls is due to the following reasons:
- Wallpaper pasteing and staining require perfectly smooth surface, otherwise all the problem areas will be well noticeable under the coating. The putty allows you to effectively align the wall and do without costly and sophisticated work on the plaster.
- The putty can be repeatedly redoing, inflicting repeated layers and eliminating even the slightest flaws on the walls. At the same time, it will not affect the quality of the coating.
- Materials for putpocks have an affordable cost, are presented in a wide range and have a small consumption.
- To launch complex relief designs from drywall, you need to seek the help of professional finishes. With a putty, things are different - all work can be done by yourself, saving your funds.
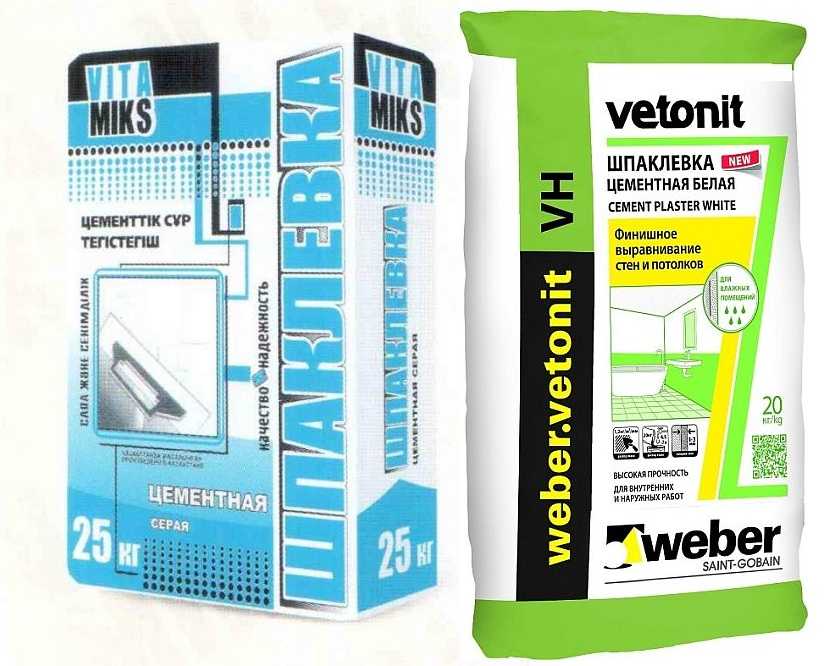
Varieties of putty materials
The spacure of the walls involves several basic principles, from which the quality and appearance of the decorative finish directly depends. First of all, it is necessary to choose the properly to choose a spike mix. The main criteria are the base material, the type of finishing coating, the size and purpose of the room, the temperature conditions and indicators of humidity.

The building materials market offers a wide variety of blends. Consider the most common types of putty.
| Type of spacure | Characteristics | Use of use |
|---|---|---|
| Oil-glue | The cheapest putty. Improves the waterproofing properties of the coating, protects against steam exposure and increases the stability of the structure to destruction. Not used for pasting wallpaper and painting by any paints, except for oil, because it quickly absorbs into the walls and performs stains. | Technical (non-decorative) cladding of walls in basements, sheds and chulans. Finishing wooden posted walls. |
| Cement | It is characterized by high resistance to moisture and durability. Due to the low elasticity after drying, it gives a shrinkage, as a result of which a crack can appear on the finish. | Facing bathrooms, kitchens and bathrooms. Finishing technical and unheated premises. |
| Gypsum | Unstable to high humidity and temperature differences, absorbs moisture, as a result of which the coating begins to swell and fall off from the base. It has a high plasticity, so qualitatively aligns any surface even when applying one layer. | Interior decoration of premises with a normal level of humidity, in particular, residential rooms, corridors, offices, etc. |
| Polymer | Most often used as an finishing putty to eliminate microcracks on the starting layer. It is characterized by high elasticity and ease of use, thereby significantly reduced labor costs and consumption of material. | Decoration of premises with cement, twisted and plasterboard walls. Decorative decoration of residential rooms, where it is assumed to apply fine coatings and delicate artwork. |
Necessary materials and tools
The putty of the walls with their own hands is a responsible and time-consuming event, before which it is necessary to prepare the following materials and tools:

- mixtures for starting and finishing shtlock;
- the composition for the primer of the walls;
- tanks to knead the putty (if the mixture in dry form) and work with the primer;
- malyary roller, narrow and wide brushes for applying a primer solution to hard-to-reach areas, for example, on corners and places behind the batteries;
- spatulas: a narrow tool for the fence of a mixture of a container, wide - for applying putty on the walls, angular - to align the layer of the mixture on external and internal angles;
- construction rule to control the level of foundation;
- the smoothing to smooth the layer of putty on the plot of a large area;
- lamp or lamp to identify poorly aligned sections of the wall;
- electric grinding machine or manual grater for grouting dry surface;
- drill and special nozzle "Mixer" for careful mixing of putty.
Important! Without a drill with a nozzle to get from a dry mixture, the necessary consistency will be almost impossible. Therefore, if you do not have this tool, it is best to purchase ready.
Video: How to put the walls newcomer
Starting shovetling of walls
Standard technology of walls of walls involves starting and finishing processing. The starting coating is used for the primary wall alignment to process the joints and seams in the drywall, close the hats of the screws and fill the volumetric potholes, cracks and other irregularities. At the initial stage, the wall must be cleaned of dirt, dust particles, fat spots and residues of the old finish, and then leave for some time until complete drying. Before applying a putty, the base is ground so that the following layers are tightly connected with the wall and did not be peeled after drying.
Tip! In preparation for the shtlock, specialists recommend using the reinforcing mesh - the material will be better held on the walls, in addition, the risk of cracks is significantly reduced.
 Starting putty close all chips, cracks, differences and significant irregularities
The starting spacing of the walls is performed by a mixture with a coarse-grained structure, which is specifically designed for basic coarse processing and most often sold in a dry form. After applying this composition, the surface becomes smooth, but has a porous texture, so in most cases requires.
With the help of the rule, it is necessary to check the smoothness of the wall - you need to look at how much the tool is adjacent to the base. If the wall is relatively smooth, then the mixture is applied with large smeared smears, while the spatula must always be pressed against the wall under the same angle.

On plots with large depressions, slides or other deviations from the level, the putty is applied with a thick layer, after which it stretches over the entire surface with the help of ironing. So it is necessary to act until the wall becomes smooth. After hardening the starting layer, the surface must be carefully polished to eliminate traces from the tool, splashes and influx.
In what cases use the reinforcing grid
Most often, the spacure of walls with the reinforcing grid is required when there are significant differences on the basis. Sherryanka grid makes the leveling process more efficient and accurate. As a result, a qualitative and durable basis is obtained, suitable for further finishing works, in addition, the risk of cracks on the painted walls is significantly reduced.

The reinforcing grid is fixed on the surface using glue, which must be pre-apply with a roller or brush. The grid is firmly attached to the wall and is labeled with glue from the outside. After complete drying, the adhesive can be started to putty.
Another way to fasten the sickle - to press it to the pre-inflicted raw layer of putty, align and sharpen another layer on top. For beginners, the first method is more preferable because it does not imply special difficulties.
Corner treatment
Wall putter in hard-to-reach places, such as external and internal angles, is performed using an angular spatula. For external corners, special perforated linings are used, which are combined in a pre-applied putty layer. After drying the mixture, the final processing is performed on both sides of the joint. To do this, the mixture is applied on both sides of the angle and vertically recalls with the help of an angular tool, while it is necessary to try not to leave the furrow.
VIDEO:
A solution is also applied to the inner angle, the surplus you want to delete the rule. The mixture is aligned with the corner spatula by longitudinal movements. It is recommended to monitor the plane with the help level. If necessary, the operation can be repeated with a smaller amount of putty mixture, after which it becomes the main finish operations.
Applying finishing spacure
The finish putty of the walls is the final stage of surface preparation before applying a fixed coating. At this stage, the same order of work is applied as for starting processing - primer primer, applying a spacion mixture and grinding. The material is used as a fine grain fraction, which eliminates microcracks after instrument, pores and other minor defects. As a result of the finish treatment, a smooth and smooth surface is obtained, on which even thin wallpaper can be glued and paint bright shades.
 With the help of finishing putty, it seeks the ideal evenness of the walls for further color or pasting with wallpaper
 The finish spatlement of the walls involves the following nuances:
- the mixture is applied to the base from top to bottom with a thin layer of 1-2 mm, while the tool must always be pressed against the wall at an angle of 20 °;
Important! If the layer of putty is thicker than 5 mm, after drying, the coating can crack and crumble. - before each new fence material, it is necessary to carefully wipe the wet sponge tool to eliminate the dried particles;
- for pasting tight wallpaper, one layer will be enough, and under thin wallpaper or painting will have to be applied 2-3 layers;
- the finish mixture dries around 36-48 hours, after which it is necessary to carefully grind the surface before the formation of a smooth plane.
The irregularities and roughness remaining after the tool, as well as the strips from the spatula on the angular joints are easily eliminated at the grinding stage, so they do not require re-applying material. If the thick wallpaper is assumed, the grinding can be skipped.
Anyone who at least once faced with repair work, is familiar with the process of shtcloth. Thus, walls, wooden parts, and many other surfaces are separated. No finishing finish is impossible without a pre-put surface of the surface. It is the putty to help make the wall of the ideal - without roughness, cracks, irregularities and other flares. The varieties of this material is presented a lot - in addition to different purposes, there are also different types of putty, in their own way and the result obtained. What to choose and how to use - let's look together together.
What should we roll?
Sometimes it happens that by removing old wallpapers, it turns out - the walls are not as uneven. It often comes across such a gift from builders, like a stove, on which there are no dents or cracks and it seems that it is simply no need to put it. In fact, this is a delusion! There are two types of putty works, directly as preparatory:
In this case, the preparation of walls is both or needed to align them if they are curves, especially for the corners, arches and the like joints. For such treatment, not the most expensive putty are usually applied, since there is no need to get an ideal appearance - the decoration wall will still be closed with wallpaper. After applying putty and its complete drying, such surfaces are usually cleaned with sandpaper to get a smooth white surface. Its roughness will even be an additional hitch wallpaper with a wall.

This is a more painful and pure type of putty work. First, such a surface should be truly perfect, without scratches, cracks and the like defects. Secondly, even microscopic cracks must be absent, since it is because of them, in the future the destruction of the colorful layer may occur. This will completely spoil the quality of the coating and its appearance.
To perform a high-quality putty under painting, it will correctly be a multilayer coating technology. In this case, various types of putty are used, which are applied consistently by each other, as well as additional reinforcing agents - reinforcement of fiberglass, phlizelin, and the like specifically designed for this, materials.

The same type of putty is advisable to use for surfaces that are in view - window slopes, ceilings and so on.
What are put putty?
Even with a huge abundance of various putty on store shelves, in fact, there are not many species of this material. In its intended purpose, they are divided into two groups:
- Starts
As already understandable from the name - it is necessary for the initial alignment of the walls, subject to their irregularities. They are made of chalk, a gypsum component and filler of a rather large fraction - usually these are crushed perlite or pumice.
Starting putty are used for coarse alignment of wall surfaces, ceilings or slopes and can be applied with a thick layer. Due to its composition, this material quickly solidifies, which allows you to treat the surface layer on the layer, without waiting for a long drying of the previous layer.
These putty are sold in a dry form, packaged in bags - for use they need to be dissolved in the desired amount of clean water. Usually, breeding recommendations are indicated on the packaging and from different manufacturers may differ, therefore, it is necessary to approach this process responsibly.
Ready to use putty, sold in buckets of different volumes, but still, even the largest of them are not sufficient to finish large areas. It is advantageous to take such a putty "on the sample" - to understand whether such a type of material is suitable for this manufacturer, you can buy a putty in the bucket, and then, for the full repair of the entire area, buy the same, in dry form.
Starting putty can also be reinforced with grids or fiber. Especially relevant such strengthening in the presence of strong defects in walls, a weak foundation, or in new buildings, when the building's shrinkage is not yet completed.
- Finish
Designed for finishing surface finishing. Such a putty work on the already dried starting putty. It is always applied with a thin layer - it can make up to three millimeters as possible. The dried finish putty forms a dense solid layer without cracks and chips.
Finishing putty are commercially available in two types: dry and ready-to-use. Dry mix - divorced in water, similar to starting, in accordance with the instructions on the package. It is important to carefully stir the powder to the desired consistency, so that no lumps are left. For high-quality mixing, it is convenient to use a special construction mixer, which is driven by a conventional perforator. The finished putty made of dry powder can not be stored for a long time, as it quickly freezes when open air contact.
Finishing putty, ready for use, sold in buckets of various volumes. It is very convenient, in terms of the fact that, if necessary, you can buy a small amount of product. Also, the finished putty is convenient because it can be used immediately immediately after opening the packaging, however, it is still desirable to mix it - this may be necessary, since in the storage process, it can stratify and become inhomogeneous.
Types of spacure
In addition to the separation of material for the purpose - the starting and finishing, putty also affect their variety by varieties. Here, the type of putty is determined by the initial raw material from which it is manufactured. In fact, modern producers have a wide range of the initial component for putty in their arsenal. What exactly and what are their differences? The main three types of putty used in the construction market can be described as follows:
As already understandable from the name, it is made on the basis of plaster. This product is different, first, dazzling white, secondly, with its plasticity. It is also important and the property of gypsum absorb and give moisture, when interacting with the surrounding air. Walls treated with gypsum putty can create a favorable microclimate in the room, thanks to the correct circulation of moisture.

Naturally, such a type of putty is suitable only for internal works, as the plaster does not show itself in external work. Ideally, it is suitable for work in - as these materials have a common structure.

The plasterboard wall is easier than usual, as it does not need to be aligned - it is enough to simply close the seams and places of fastening of sheets. Gypsum putty produce both starting and finishing.
It is also clear that its main ingredient is cement. Accordingly, it perfectly covers the properties of cement: moisture resistance, immunity to temperature differences from frost to summer heat. Such a putty is convenient to use both indoors and outside - since it is resistant to atmospheric phenomena.

For interior decoration can be used in conditions of high humidity and vaporization, such as kitchen, bathroom, pools, and the like. The disadvantage of putty on a cement basis can be called its gross structure - this is also caused by its main component - cement. It is quite difficult to process and grind after drying. Usually, such a putty is used under the decoration of the tile, and the like materials capable of hide the layer of plaster.
The most modern material is made from chemical raw materials, on modern equipment. It is distinguished by a dense structure and plastic consistency - suitable for alignment of walls and for finishing. Acrylic putty is convenient in applying, easily grinding, is not subject to crack formation. It is a kind of universal, since, firstly, suitable for treating surfaces from various materials, and secondly, because it can be used as a starting putty, and as an finishing - depending on the needs.

But, because of her not a small cost, it is hardly advisable to apply it with a thick layer. Usually, finishing work specialists, prefer to apply an acrylic putty with a thin layer, not more than one millimeter, thus performing the finishing surface finishing.
With a neat and thorough application, acrylic may look perfectly even, beautiful, even glossy. An important advantage of acrylic putty is its ecological safety.
In addition to these species, polymer putty are also presented on sale - they are based on acrylates or vinyl compounds. Such products are more expensive and are universal.
Polymer mixtures are gaining popularity - they are currently used, perhaps even more often than gypsum and cement-containing. They are comfortable in operation and durable in operation. By types, polymer putty are divided into three main groups: acrylic, polymer cement and latex - by the main ingredient as part of each of them.
- Acrylic polymer spacure - characterized by the presence of acrylic in the composition. It can be starting, finishing or universal - depending on the need for use.
- Polymer-cement spacure - mainly used to align cement-concrete, limestone and brick grounds. The main component here is the cement to which special polymer additives are coming. Such a putty has a plastic consistency and can be applied both start, for alignment and finishing, for completing processing.
- Latex spacure - is made on the basis of styrene - this is a certain type of latex on an acrylic basis. This type of polymer putty is ideal in the form of finishes and is well suitable for finishing various surfaces: drywall, brick, wood, concrete and others.
Polymer putty are very comfortable with their special kind - they are plastic and elastic, which makes them perfect for work. Even amateurs can create a perfectly smooth layer using polymer materials.


They are also convenient because they can be applied with the thinnest layer, which is impossible for plaster or cement putty. However, the minimum thickness does not make a layer of putty less durable than those that are applied more precious. It is also important to note the strength characteristics: the polymer putty is not subject to shrinkage and crack formation. In addition, they are vapor permeable, that is, allow the walls to breathe, and resistant to the effects of moisture and have thermal insulation properties.
Polymer putty are sold, as well as other analogues in dry or in ready-to-use form. Dry mixes, as a rule, makes sense to choose if we are talking about the finishing of large volumes, and the finished plastic blends will be perfectly carried out if it is necessary to finish a small area.

This type of putty is represented on store shelves in three types: start-up, finishing and universal. Select the necessary putty will not be difficult. The consumption of the material is indicated on the labels - it is enough just to calculate the necessary area under the finish.
The only drawback of polymer putty is their high cost. Unfortunately, due to the content of polymers, which at its cost simply cannot be cheap. Of course, the many positive characteristics of these materials quite justify their price, so that choosing material for finishing the walls, it is worth paying attention to polymer putty.
Types of applying putty
Deciding with the type of material, it is necessary to choose and the method of applying it. The putty, as a rule, is applied by three traditional methods:
With mechanical application, special installations are used, with which the finished mass is sprayed to the surface of the walls. Such apparent is convenient, quickly and efficiently. But, of course, the acquisition of special equipment for household needs is inappropriate. And, as a rule, in a similar way, the putty is applied by specialists in the field of finishing works, with industrial scales, large volumes, and so on.


The semi-necificial method also requires the presence of a compressor or a discharge tank - thus putty as it were "splashing" on the walls, which is also much faster than apply it manually, although slower than in the first case.


Handmade putty applying
Well, and the most common way - hand-drawn. Since it is most often used by both professional builders and those who decided to make repairs independently for the first time, consider it in more detail. For application, a ready-made spacious mass is used - cooked independently made of dry powder or already purchased in the ready-to-use form.
- using a flat painting spatula and small ironing
A small amount of putty is recruited onto the working surface of a flat spatula and a small smoothness is applied and distributed over the wall. This method is simple and convenient even for those who have never engaged in similar works.


- spakly "Lyapami"
This name speaks for itself: a small spatula is applied to the wall in the form of "flashers" - large stains, and then, with a long ironing, the mass is evenly distributed over the entire surface. This method allows you to complete the finish quickly, but physically heavier than the previous one, as to align the material with a smoother, a length of fifty centimeters, you will need muscles.


- using two spatulas: main and auxiliary
The main spatula must be longer auxiliary about two to two and a half times. For example, it is well combined with spatulas, a length of 45x20 cm or 35x10 cm. The longer the main spatula is the more effort is necessary to work with it.

In the process of applying, the auxiliary spatula, the putty is distributed in the main one and is already transferred to the wall. It is important that when distributing the mass, pressure on the spatula was the same throughout the surface being treated - then the material will be distributed evenly. The basic principle of putting out putty: with dry on wet. That is, it is necessary to work in such a way that each subsequent separated plot connected to the previous one and it could be immediately compared with each other - then the work will be done neatly, without irregularities and influx.

Applying putty - the process is not difficult, however, requires accuracy and certain skill. Starting for the first time, you can practice on not too noticeable places, fill your hand. When muscular memory remembers the movement of hands, work will go faster and better. Manual putty - is available to anyone who wants, there is no particularly critical nuances in it.
Wall putty do it yourself
Many owners seek to perform repair work on their own: it is not always caused by the desire to save on the remuneration of specialists. Many love to make repairs themselves, taking into account every wishes, or simply because this is a lesson to them. As for the process of putty, there is nothing difficult in it, it is only necessary to acquire a high-quality shuttle mixture and comply with the right technology of work - these two facts will allow you to get a flat, beautiful wall, ready for further finish.
Preparation
Before proceeding to the shovels itself, the walls must be properly prepared.
1) Remove the remains of old building materials as much as possible. Traces of varnish, paints, wallpaper - can significantly affect the quality of the finished coating, in the negative case, the remainder of the old varnish can simply disappear after the end of the putty, disturbing the integrity of the finished layer.
2) carefully examine the surface for the presence of cracks, chips, irregularities. If such are available, they must be pre-embedded, flush with a wall, watching, while working so that there are no convexities. After seeling cracks, it is necessary to wait the time necessary for the complete drying of the material and only after that proceed to the next step.

3) thorough cleaning of walls and premises in general. There should be no dust, dirt, fat stains - all of them need to be removed, cleaned, degrease. The walls are desirable to be treated with a vacuum cleaner to maximally remove small particles of dirt and dust.
4) primer surfaces. The primer must be chosen based on the material from which the walls are made, as well as, depending on their state, apply it to one or several layers. Preferred primer with anti-grapple additives - for the prevention of mold or similar trouble. The primer should be brushed with a scrapbook or a special roller capable of carrying fluid to the wall well.

This stage is important, since well-projected walls have a stronger adhesion with a spacion mixture and are protected from damage to fungus. Therefore, you need to try to apply the primer as carefully as possible, not missing a single millimeter. After applying, leave the primer at rest until complete drying, and this is at least six to eight hours, at room temperature indoors. But it will be best to leave the walls to dry out a day.
Preparation of a spike mix
If you plan to put a room, or not even one, then you probably do not fit the finished putty in buckets - this is, although it is convenient, but clearly silent. Just for the processing of large areas, the dry spacing mixture is perfect in bags, from which you can prepare the material ready for use. It is not difficult to do this, but it is important to comply with the correct cooking technique:
1) in pure, preferably plastic, container, pour one third of clean water. Water must be taken cool or even cold, as hot water accelerates solidification of the finished putty.
2) A dry spacion mixture is covered in water. Quantitatively difficult to say exactly, it all depends on the manufacturer and needs. Decide this question will help the recommendations of manufacturers and experience.

First, the packaging always indicates the proportion of water and the dry component, which will allow you to get ready-to-use mass. Secondly, having tried the finished putty, prepared according to the instructions, you may need more thick, or, on the contrary, more liquid consistency. Of course, in the process of mass stirring, the dry product can be added, therefore, initially try not to exceed the quantity specified on the package.
3) For the next stage, you will need a building mixer. By installing it on the perforator, it is necessary to produce the initial mixing of the mixture. Its purpose is to fully moisten the dry powder with water. It is necessary to interfere on low turnover of the tool, slow circular movements, trying not to scatter putty around the tank.


After the initial mixing, you need to leave the mixture for five to ten minutes, it is necessary for the water to completely dug a dry putty, and especially, the lumps that are available in it.
4) Stir again using the same building mixer. This time it is possible to more intensive mixing. After that, leave the mixture again alone for swelling. Thus, it is necessary to do three - four approaches, alternating the processes of mixing and settling the finished mixture. It is necessary to mix three minutes, to defend - about five. Thus, gradually, the consistency will reach the desired - medium thick and high plasticity.

It is important to prepare not too much volume of putty, as it is not stored in the finished form. In this case, it is more convenient to get less, and, if necessary, finish it. The thickening mixture is also not suitable for breeding with water and further use - as the formation of lumps in this case is simply inevitable. Therefore, thickened or completely frozen putty must be thrown away, wash the container in which it was and prepared again.
Spike wall
Proper compliance with the technology of this process requires putting a putty, at least two layers - starting, and then - finish. But in fact, the layers can be more - depending on the state of the walls and their visible defects.
1) To apply putty, you will need two spatula - wide and narrow. A wide spatula must be slightly smaller than the diameter of the container in which the putty is located - it is necessary that it can place there. The second, narrow, the spatula is needed in order to distribute putty along the entire length of wide, as well as to correct the flaws. It is possible to type the product on a wide tool - here each produces a convenient technique for him.
2) The first layer is the starting putty, it is more loose and can be applied to a thicker layer than the finish. With it, you can hide minor wall defects - shells, small cracks. Apply a putty conveniently bottom, with a wide spatula. The spatula is held behind the handle with three fingers, and two - the middle and index, are the stops and it is convenient to correctly adjust the power of pressing the spatula, holds it from above, behind the plastic base.
Gothic putty plastic and easily applied, it must be homogeneous and do not contain lumps or other enclosures. It is necessary to apply the solution as soon as possible, avoiding irregularities or visually noticeable smears - a wide spatula helps in this perfectly. It is advisable to work quickly, since the putty mixture is quickly frozen and after some fifteen - twenty minutes to correct the errors of the application will be already problematic.
3) You can continue to work only after the first layer will dry out. If the layers are supposed to do a lot, then at this stage it will be best to use the reinforcing grid.

After drying the layer of the starting putty, the network must be fixed on the wall by temporary fastener, and then apply a layer of finishing putty. It is necessary to apply it in such a way as to hide the grid as much as possible, but at the same time, not too thick layer - it must make no more than five millimeters. After this layer is applied, it should also wait for its complete drying. If the reinforcing network is not closed in the first layer of putty completely, then it is necessary to apply another, which will hide it completely. This layer must also dry well.
4) The next step is to apply the main layer. This is a finishing putty high quality - it is applied very thin - a pair of millimeters, no more. It is necessary to apply it at the same time, on the whole wall - otherwise, the transitions will be visually noticeable. This layer is not in vain is the main one, it must be as smooth and carefully derived. If all the minor shortcomings are available, then after the end of work and drying the putty, they can be cleaned with a shallow grinder.

The grid graininess should be no more than 3 mm cell, otherwise, it is possible to damage the thin layer of the finish coating and leave visually noticeable traces of grinding. In no case cannot be used by sandpaper on a tissue basis - after such a processing, not always noticeable traces remain almost!
The finished surface trimmed with putty dries, depending on the room temperature - from 8 to 24 hours. After complete drying, further finishing works are possible.
Rating of the best spacure
The modern construction market is not standing in place and every year pleases consumers with new products, including spacure mixtures. To date, the results of customer surveys lead certain goods.
Starting spacure
VOLST STANDARD. This starting putty has greatly proven itself in both Russia and abroad. Well suits both for aligning surfaces and under the finish. It is suitable for gypsum or cement walls. It has best shown yourself when using indoors.

Although this composition is designed for starting application, many experts note that with its help you can get a finished surface, without applying "Finishi", since this putty is easily polished and does not leave after yourself defects. This is a material of high quality, convenient in operation and acceptable by price. Of the disadvantages, you can call a rather long duration of drying.
He basses Ekonsilk. The product of domestic production, which has been firmly proven in the market of finishing materials. The putty of this brand is convenient for its plasticity, an attractive appearance and of course very democratic value.

It can be applied not too thick layer, preferably up to 5 millimeters. Unfortunately, if you do not comply with this condition - then cracks on the trimmed surface can appear after drying.
Bolloss facade. It is recognized as a better putty for facades, because of its excellent performance: frost-resistant, not susceptibility to atmospheric precipitation. Also can also be used in rooms with elevated vaporization. It has high strength to mechanical damage, good vapor permeability, which allows the "breathe" walls and creates the correct circulation of moisture indoors.

The maximum allowable layer is up to 10 millimeters, and this is without cracking. Accordingly, this plus entails and minus - a big consumption. Also, some unpleasant moment is its high cost.
Finish spacure
The first place among finishing products by right is the Sheetrock Superfinish. It has the minimum grain size among putty, it equals 0.03 millimeters.

This fact allows you to get a smooth, perfect surface, almost on any wall -, concrete, and others. Haning, this putty does not have the properties to crack, again because of its finely dispersed structure - it fits tightly to the surfaces and does not peel. All these advantages complements and quite acceptable value of the goods, which makes it an excellent solution for each buyer.
By the way, until 2016, a bucket with a putty had a different appearance. Then the company "kg system system" translates the sheet of finished SHEETROCK® putty under the umbrella brand of Danogips building materials.

KNAUF ROTBAND PASTA is a spacure based on vinyl connections. It is universal in terms of treated surfaces, suitable for concrete, gypsum plates and others, has a good adhesive ability.

Another distinctive feature: rapid drying - about 5 hours. Some minus is that this, ready-to-use putty mixture, gives a large consumption, even when applied with a thickness of about one millimeter. It is also not happy and its high cost of 700 rubles.
Ceresit CT 225 is a spacade made on the basis of cement. Suitable for both the work indoors and the facade finish. It is possible to apply for cement bases. The putty has excellent qualities: adhesion, moisture resistance and frost resistance.

It is popular thanks to the presence of special reinforcing fibers - they prevent cracking and shrinkage of the finished coating. It should also be paid to the environmentally safe composition. Of course, such a putty is not cheap.
Universal spacure
Knauf - Fumen. Perfectly proven itself when using indoors, in room temperature conditions. As part of a gypsum-based putty, polymer compounds are also present that allowed to make the finished composition elastic. Good adhesive properties.

Suitable for cement walls or plaster-covered. Complements the list of advantages not high cost and minimum consumption. Despite the versatility, the use of indoors with high humidity is not recommended, since the composition is hygroscopic.
VGT acrylic, universal. Fully ready for use immediately after opening the package. Suitable for warm interior, without increased vaporization and moisture. It is possible to apply a thick layer - up to seven millimeters. Suitable for wood, concrete, gypsum and cement surfaces. Cons: Quite large consumption, the possibility of shrinkage when the composition is drying and quite large dustiness during subsequent processing.

Unis glare. Putty on plaster basis. It is convenient for what can be applied with various layers - both thin and thick. According to the manufacturer's recommendations, the layer of application may vary from half a million to eight millimeters. It is also convenient and rapid drying of the mixture - even with a thick layer it will be no more than seven hours.

The putty is convenient in operation, elastic and does not forms cracks. However, there are disadvantages: high consumption, the presence of extraneous inclusions - pebbles may come across that interfere with the uniform distribution of the mass along the wall surface.
Spaklyka - a constant attribute of any repair work. Even under the condition of smooth walls or placing with plasterboard, it will still be necessary. Modern manufacturers of building materials are developing daily and launch new products into production, seeking to satisfy the most advisable buyers. However, today, from the wide range of proposals, you can choose high-quality spacing mixtures that satisfy all the necessary needs of each individual consumer. On the shelves of construction hypermarkets there is a putty, suitable for any surface, budget and possibility of applying. It is only important to decide what exactly you need and make the right choice.
Smooth walls are a good repair attribute, but hiring a brigade. The putty of the walls is not so complicated so that it cannot be coping with it. It is important to successively perform all actions. Immediately get the perfect wall under painting it is unlikely, but it is possible to sharpen on the wallpaper without much difficulty. And to help you describe the process, photo and video.
What are and when to use
Spaklyka is the preparation of surfaces to the finishing finishing. With it, it seeks the wall to (or looked) perfectly smooth. It is applied to relatively smooth surfaces. If you need. Putty for this is not intended.
As well as plaster, putty consist of a binder, aggregate and additives that give them special properties. They are distinguished by the use of aggregates - sand - thin fractions. A binding is used by two types - cement or plaster, sometimes they add lime, polymer additives to them. Accordingly, putty has plaster and cement.
There are still polymer putty - acrylic and latex. They are based on synthetic substances whose properties change depending on the additives. They are not natural, but have a longer service life, also withstand more freezing cycles / defrost. For facade work it is better to choose them. In the premises, they are not the best choice, as they have small vapor permeability, which can cause dampness of the walls, the appearance of fungus and mold. They are convenient to be used on wooden and metal surfaces.

By type of application, all putty are divided into two types: starting and finishing. In the starting, the sand grades are used - 0.3-0.8 mm. Because of what the surface is slightly rough. Apply them at the first stage for sealing depressions and cracks. In the finish composition of the sand - almost dust with very small grain 0.1-0.3 mm. This allows you to get a smooth surface.
Cement plaster - scope, dignity and disadvantages
Cement plaster Cheaper plaster, can be applied with a thicker layer - some formulations up to 10 mm. After the selection (stirring with water), it can be used in about 3 hours. The plasticity of the composition affects the temperature and humidity. It is usually indicated for + 20 ° C and humidity 60-65%.
Cement plaster are universal. They are used both for finishing inside the building and outside. Moreover, most of the facade compositions are made on the basis of cement, as they maintain more defrosting / freezing cycles and create a stronger surface. They also feel better in wet premises. If you need to launch a bathroom or kitchen, use better composition based on cement.
Cement plaster can be white, maybe gray
In color, cement plaster can be gray, white and ultra-white. It depends on the type of cement used. White compositions are more expensive, as more expensive brands are used, because the finish formulations make white more often.
The lack of cement plasters is a long grasp period - a few days for complete drying - this is the norm. Before applying the next layer must pass for several hours. From 2-3 hours at a layer of 1 mm, up to 24 with a thickness of 6 mm. Since it is rarely achieved to achieve a flat surface in one layer - there may be three and more, they are stretched by cement plasters for a long time. For this reason, their popularity is quite low.
Gypsum putty, their features
Layer of application of plaster putty - 0.5-10 mm depending on the type. They dry much faster, which has a positive effect on the velocity of finishing works. On the other hand, the mixed composition should be used within 30-60 minutes, so that there are such putty in small portions. This is not very convenient. If you put the walls with your own hands for the first time, start with small knees. Gradually decide how much at a time you can work out. Also note that the starting plaster consumption is greater than the finish - the thickness of the layer is different and not mistaken in volume.
Gypsum plaster without modifying additives are designed for dry rooms. There are compositions and wet, but it is necessarily indicated on the package, as they contain hydrophobic additives.

Despite the higher price and the small shelf life of the gated portion, plaster based on gypsum are now more popular. They are more plastic, with their use it is easier to achieve the required smoothness of the surface, with them it is easier to work with beginners and professionals. If the spacure of the walls you are unfamiliar to you, use gypsum compositions.
Technology
The method of applying plasters is the same for any composition. It matters only adherence to the formulation specified on the package (the ratio of water and dry mass) and the time for which it must be used. The rest of the technique of plaster is the same.
Preparation of the foundation
Works start on a dry and pure base. If there is an old coating, everything that may fall, cracks are expanded, remove screws and nails, remnants of wallpaper and other coatings.
How sad it is necessary to delete and paint, and whiten. Paint for the reason that the putty sticks is badly sticking, and if it sticks out, it can later fall off. The blots are removed because it is loose. With her after the primer, the clutch is normal, but after some time the finish begins to crack and peel. If you do not want to remake the ceiling or the wall in a year and a half again, the lime should be considered.

After the old coating is removed, the dust is cleaned. If there is an industrial vacuum cleaner, you can use it (household it is impossible - breaks). If there is no such equipment, you can walk at a dry broom, then a brush and finally - slightly damp cloth to collect residues.
Primer
Protecting walls under the plaster is used to ensure that the materials are better enclosed. The second task is to reduce the amount of moisture absorbable. It is very important on porous surfaces such as brick, dry plastered wall, etc. On the loose and pending walls, special compositions of deep penetration are used. They bind particles of copper material by increasing the overall strength of the base.

To obtain a guaranteed good result, this stage is better not to skip. Even despite the fact that the primers are a lot.
Primers are sold or in the form of a mixture ready for use or in the form of liquid concentrates. The second type requires additional water dilution. In any case, before use, carefully read the instructions and follow her strictly.
Typically, the technology is: in the container the composition is pouted, it is distributed over the surface with a brush or roller. In difficult places - corners and bends, thoroughly pass through the brush. If two or more layers are needed, they are applied after complete drying of the previous one.
Instruments
Directly for putting the walls, only two spatula will be needed. One big, with a long blade (300-600 mm) and one small. The small composition is getting out of the tank and distribute the large blade. They also remove the remnants from the blade and again distribute them along the edge. The large spatula is needed directly to distribute the composition along the wall.

The blade of a large spatula should be stainless steel. It should be flexible, without jar and scratches. If you look at it "in the profile" you can see that its ends slightly bent into one direction. It is done specifically that when putty the walls or ceiling on the surface, the strips from the edges of the blade did not appear. You can work with a direct spatula, but at the same time you cannot get rid of the bands, as a result - after drying, you will have to compare them, and this is a long and dusty work.
We still need a container in which the putty and a building mixer or a drill with a nozzle for stirring are. Capacity is better to take a plastic - a bucket or a basin with high sides. Pay attention to the bottom form. The transition from the bottom to the walls should be smooth. Then it manages to mix the whole composition without a residue and lumps.
Technique putty wall
In general, everything is already said, but we concentrate on the process and sequence of work. First, the putty is kneaded. Water poured into the bucket, dry composition adds to it, following the lumps. For some time you have to wait until the whole lot is wetted, then you can stir. Came can be mechanical or manual. It is indicated on the packaging with putty. When they achieved a homogeneous composition without lumps, you can start work.

Apply putty on the wall need from a large spatula. The composition is imposed on it small, forming a roller width in two or three centimeters on the edge of the blade and around a centimeter height. If the composition is thick, you can take the solution more, if liquid, it can flow, because the roller makes a small size.
Step 1. Starting Spike. If there are large irregularities - more than 3 mm, they first shut off the starting putty. If irregularities are only in some places, only them put out, with one level with the surface. If there are many of them, you will have to put the entire surface. When working it is advisable to not exceed the maximum allowable layer thickness, otherwise cracks may appear or the finish will fall off. If there are no significant irregularities, you can do without this layer. But in this case, the flow rate will be greater, and it costs more than the starting.
The thickness of the putty layer, which remains on the wall, is regulated by the angle of inclination of the spatula. If it is strongly tilted to the wall, the layer remains thicker if the angle is closer to direct (60-70 °) - may be 1 mm.
There is another putty apparent technique. It is called "on the Sadir". In this case, the spatula is put perpendicular to the wall. As a result, only pores, stripes and other defects are embarrassed, consumption is minimal. But this technique works only on smooth walls, without deviations in geometry. The putty of uneven walls with differentials is more than 1-2 mm for such a technique.
Step 2. Alignment of the first layer. After drying the starting layer (time is indicated on the package) take sandpaper for grinding and the most protruding irregularities level. Most often it is the bands, but bugs can appear in inexperience. After completing the grinding, dust from the walls are emitted by a broom, then pass a dry brush.

Step 3. Finish putty wall. The purified walls are applied with a layer of finishing putty, a thickness of no more than a few millimeters. At this stage, it is already necessary to try to get a flat surface, thoroughly throwing the composition. Leave to dry.
Step 4. Alignment of the final layers. For this stage take a grid with a smaller cell. Try to get an even surface. For a normal result, good lighting is necessary. Also, the absence of defects is checked by palm.
That's all. Next step 3 and 4 are repeated until the result is satisfied. A little about what the walls need to be aligned. It all depends on the type of finishing, which you have chosen. If the spacure of the walls is made under the wallpaper, it is not necessary to achieve ideal smoothness. Even the finest wallpaper hide small differences. Less demanding of the surface of multilayer paper wallpaper - duplex or triplex. A more even base is necessary under the phlizelin base, as well as under all vinyl obsides foamed and textured.
Requirements for putty under painting above. The paint does not even hide the most minor flaws, because it accounts for even the paint. It may be needed to six very thin layers.
How to make spacure smooth corners
Several ways you saw in the video - just good to remove the mass from the corner itself. It seems that everything is simple, but in practice it turns out with difficulty and not very smooth. There are special angular spatulas for novice plasters for exterior and inner corner.
Applying a certain amount of putty, they are carried out, removing excess and forming an ideal line. It is easier to work with them.

You started repair and decided to sharpen the walls. But absolutely do not know where to start, what to choose the material, and in general the whole process is covered with a mystery and darkness. To begin with, we will understand what a putty is, and why it is needed.
Difference of plaster from putty
Starting plaster - a coarse powder mixture, which builders are used to align the walls. Before plastering, measurement is performed using the level and detects the degree of variation of the wall from the perfect vertical. In other words, this is done so that the wall is smooth. The maximum thickness of the superimposed layer of about 5 cm. After drying, this mixture has roughness.
Putty - powder used after plaster. Hence the name - the finish putty. It plastic, makes the wall smooth. It can be applied to a maximum layer of 1-2 mm (and no longer succeed). The finish putty fills the minor irregularities of the plaster, preparing it to paint or to the wallpaper.
What putty is better for walls
The putty is produced in both paper bags in the form of powder and in the form of a finished mixture in plastic buckets. It is hardly possible to say which one is better because it can be understood only on your experience. The only difference is that the finished putty is ready, and you cannot regulate her delicate.
Therefore, to begin with, it is better to use the powder composition, at the same time on your experience learn to breed the mixture.
Depending on the composition, several types of putty are distinguished: gypsum, cement and polymer.
- Cement putty consists of sand and cement. This composition perfectly tolerate moisture, but does not possess plasticity. This means that cracks may occur over time. The surface after drying will be rough, so it is necessary to grind. But it is great for outdoor work. She is not afraid of rain and snow.
- Gypsum putty. If you are going to use a gypsum putty, be prepared for the fact that it dries very quickly, so you should not knead a lot. As you dry in the bucket, a stone will be instead of putty.
- The polymer putty has high elasticity and reaches well. You can use it for both exterior and internal works. With this composition, you can achieve perfectly smooth surface, but it is not suiced.
Choosing a putty, it is important to take into account what will be on the walls. The putty on a plaster basis consists of a plurality of small grains, which are visible after drying the surface. Also, you can see the characteristic divorces due to certain properties of the gypsum. Gypsum spacing is beige, gray and even pink. If you try to paint it, for example, in white, you have to apply several layers. Such a putty is poorly staining in brighter colors. But it is ideal for wallpaper.

The glue applied to the wall contributes to the discharge of the composition. Because of this, the wallpaper can be badly kept on the wall and glued with pieces. Wet wallpaper is problematic to cut down from below. Gypsum putty soaked in moisture is not as strong as polymer. And for painting it is better to use a polymer putty. As a rule, it is white, soft consistency and on the wall looks perfectly smoothly.
Is it possible to sharpen the walls yourself
Wall putty with their own hands is possible, but requires a certain practice. The first knowledge can be obtained by looking at the video or watching experts do it. Of course, it will be not very good at first. But there is a consolation moment: you can always count on grinding. Therefore, if it does not immediately work perfectly smoothly, bands and divorces are formed, these defects will hide sandpaper.

What tools will need
So that in the midst of work does not run in search of the necessary thing, it is better to prepare everything right away.
- drill with a mixer;
- plastic container;
- latex gloves;
- roller with a long handle;
- narrow spatula (5-7 cm);
- wide spatula (25-35 cm);
- serpenta;
- respirator;
- stepladder (or table);
- work clothes;
- newspapers, rags, polyethylene.
If plaster is applied on the walls, then it is better to use a brush for priming. Since the roller will not be able to effectively process the surface. Spatula width choose yourself. Standard width 35 cm, but the newcomer is better to use narrower, as it is easier for them. Mixer for drill is a special nozzle for stirring. There is a different form, no value does not have. As a container, ideally, you can use a large bucket from under the water-level paint. It does not split under the influence of a drill.

Preparation of walls to the finish putty
First you need to free the room from furniture. What can be reached - take out. Dust from this process can not be avoided. The floor must be covered with polyethylene or newspapers. The biggest surface you will close, the better.
Why rejust the walls
If the room was too dusty, clean the walls with a wet broom. So that the shplanke joins the walls well, it is necessary to pre-prim. Primer - this special fluid. After it drying on the walls, micropoline is formed from the adhesive composition. The walls are completely degreased, cleaned and deprived of dust, so that the putty will not fall off in the future. We pour primer into plastic container and wept with water. The bottle indicates the degree of concentration. Next, with a roller with a long handle with a stuffing wall. This process is similar to an ordinary painting, the main thing is to ensure that the walls are primarily primed. This is easy to guess on wet divorce on the wall.
Some moments
The putty of the walls under the wallpaper with their own hands is easier than in painting. Wallpaper will hide small defects and shortcomings. But it is necessary to make sure that there are no previous wallpaper on the wall (if they were). Because under the influence of primer, they will be splashing and stick to putty.
The easiest way to put and primed GLC (drywall sheets). For this there are no special recommendations, just drive the roller from top to bottom. Whatever the surface, separately primed a narrow brush is better near the ceiling, floor and sides, since the roller in these places does not reach the end.
The putty of the walls after plaster is the process more time-consuming. Therefore, it is necessary to progress very well. To do this, it is better to use a brush to fill all microcracks and depressions.

What kind of primer to choose
The primer is used to create on the surface of the adhesive layer, which contributes to a favorable compression of the composition with the wall. When choosing a primer, you need to pay attention to the room. If it is wet, it is better to choose a primer with an antibacterial effect, opposing the occurrence of mold.
- Alkyd primer has powerful properties, but does not penetrate the material. It should not be used for plaster, putty and GLK. It is suitable for wood and iron, because it has an anti-corrosion effect. In addition, such a primer creates a film on the surface being processed, which is why the material does not breathe.
- Latex primer fits practically for any surfaces. This is the perfect option in the case of plaster and a shrinking surface. It is very moisture resistant, has waterproof and elasticity. But it has such properties by adding synthetic substances to it, so it does not suit connoisseurs of environmentally friendly products.
- Acrylic primer is best suited for home. It does not have a sharp smell, quickly dries and easy to use. The thick composition is divorced by water to the desired consistency and applied to the wall. This primer can handle any surfaces. And its price will pleasantly surprise.
- The primer of deep penetration is used in cases where the surface is buzzing, loose and not solid enough. It may be old plaster, wood or just a GLC with crushed corners. Such primer penetrates deep inside the material, gives it the strength and waterproofability, which is especially important in wet premises.

Additional preparation of GLC to the primer
The joints between the plasterboard sheets contain slots and recesses. To eliminate irregularities in these places, it is better to use plaster. Due to the coarsest composition, it lines the surface faster. But it is not enough to simply hold the spatula. At the place of the joint after drying the plaster, a crack is formed, because in the area of \u200b\u200bthe slit, there is nothing to hold on. To this not happen, we use the sickle. Sherryanka is a mesh ribbon in a roll, like a gauze. It happens different widths and on the one hand has a sticky surface, so that it can be easily glued to the joints. After gluing the sickle, we apply the layer of plaster from the bottom up. Watch that it does not move and, if necessary, correct. Drying time 2-3 hours. After that, we remove small stony particles with sandpaper. Now the surface is prepared for priming.

Finish spacure walls. Technology
After the primer dried, the surface is ready to apply the finish putty. For the preparation of the composition, we take a plastic bucket and pour a small amount of water there, less than half. To begin with, it is better to make a little composition to fill the hand. Then we fumble there a little putty, simultaneously stirring the mixer. The consistency should turn out to be slightly less liquid than the thick sour cream. We achieve homogeneity of the composition, the complete absence of lumps, otherwise the balls with a dry powder will be formed on the wall. The mixture should not roll from the spatula. If this happens, it means that it is too watery. This composition is very difficult to work.
We proceed directly to the shtlock. In our hands we have two spatulas: big and small. Please note: the spatula does not have absolute evenness. In one direction it will be arched more than another. It is necessary to determine the "rounded" side. If you put another, the stripes will remain on the surface.
Speaking about spatulas, it is worth noting that you need to choose stainless materials. Otherwise, with a subsequent putty on the wall there will be rusty divorces. We recruit a little composition to a small spatula and transfer it to a large, distributing evenly over the entire surface. Starting from the window, we begin to put the wall, creating an irresistible layer 1-2 mm. If you make a layer too thick, it will be more difficult to smooth out, and cracks may form during drying. When working with the GLC direction of movement of the spatula does not matter because the surface is smooth. On the plastered wall, dried major particles have their own direction. Therefore, just repeat it when putty. In the process of work, it will become clear.

Important: The uniformity and smoothness of the putty is very dependent on the lighting. Disadvantages that are not visible in daylight may become noticeable when lighting with electric light.
The spacure of the walls under painting implies a uniform layer of composition without cleansing. If in some place the layer is thinner, the paint will have another shade. The difference of putty under the wallpaper is that the wallpaper will hide small errors.
During the work on the wall, various bands and divorces will appear. Align the situation as much as possible. But do not forget that there is still saving grinding.
Grinding of walls
Grinding of walls is used to eliminate small irregularities, strips and tubercles. This process can be both manual and mechanized.
For grinding walls used ordinary sandpaper. It is characterized by particle sizes. The smaller the skin number, the very coarse surface of him. For the finish putty, the skin of larger numbers will fit. If large scratches remain on the wall, it means that the skirt must be taken more small.

In addition to sandpaper, another diamond grid is used. It is characterized by the size of the cells, and, unlike the skin, is not clogged with putty. It can be used both manually and using a special holder.
The grinding itself is necessary to eliminate the remaining defects, even a beginner will cope with it. This process is very dusty, so it is necessary to wear a respirator. Grinding is made by circular motions. If grinding in one direction, noticeable scratches are formed.
After the end of grinding, the surface must be primed again, as it will remain a large amount of white dust. Wait to dry and start further work. Wall putty with their own hands for beginners may seem like a time consuming and complex process. In fact, this is not the case, it is worth just start.
Today there are many different finishing materials, but the use of wallpaper does not lose popularity. It makes sense to take on the wallpaper immediately, for the beginning it is necessary to prepare the surface, for better quality, be sure to align the walls. It is very important to initially prepare the surface, our result will depend on it.
Liquid wallpaper can be applied on walls with protrusions and flaws, they will hide these shortcomings well due to their structure. Now we will tell you how to align the walls with putty. Thin wallpaper and paint will emphasize all the minutes of the unprepared wall.
No need to close the eyes this is this stage of work. The irregularity of the walls and roughness occurs not only in a private house, but also in the new apartment. Even in new buildings, the walls require preparation before applying wallpaper or paint.
Why put the walls?
The putty of the walls under the wallpaper is needed to fill not only large flaws, but also very small. Because of its structure, it penetrates where the plaster will not fall. This material makes a smooth surface, and the wallpaper will stay much better.
If the wallpaper had to be glittered on the plasterboard wall, it is also necessary to use a putty. And the point is not that the plasterboard wall curve. In the future, when you decide to change the wallpaper, the old layer will have to dug together with the cardboard and you will need to repair more serious.
All work can be divided into 2 stages.
- The first layer of putty, fill all the small cracks, thickness up to 5 mm.
- The second layer will make the surface smooth, thickness up to 2 mm.
Instruments
For applying putty, you will need proper instruments:
Tools for putting walls
- The rule is a wooden flat rail up to 2 m long. It will be necessary when applying the first layer of putty, since the thickness of the layer in different parts can be different due to irregularities.
- Mixer - nozzle on a drill. We quickly dismiss the composition.
- Accordingly, drill itself.
- Direct spatula without dents and chips. Angular spatula - by the name of the instrument it is clear where to apply it.

Work by an angular spatula
- Grater. It can be sandpaper.
- Level, they will follow the quality of their work.
- Apply primer with a roller. Sometimes they can apply the first layer of putty, and after align it with a spatula.
- A bucket or other container in which we will knead the solution and after the end of the work, you will key the necessary tools.
- Brush for applying primer in places of inaccessible roller.
Materials

- Spike two species. For the first and second layer.
- Primer. We recommend using with an antiseptic.
- Sherryanka grid If you apply putty on a plasterboard wall. Strengthen the joints between the sheets.
- If there are large chips and flaws on the surface, the cement-sand solution for initial alignment is needed.
Spike mix
Putty can be bought in different views. In the ready state, either it will be a dry mix that requires kneading before it is applied.
Ready mixes are sold in plastic buckets. Very convenient in that it does not need an additional container for kneading and do not need a drill with a mixer nozzle. In the moment you need you can close the bucket with a lid and stop working. It will not dry and save their condition. The mixture we knew yourself better use at once, otherwise it will dry, it will become solid and unsuitable.

Previous mix
Finished putty make on a polymer and latex basis. Because of their advantages, it has a high price and therefore many prefer to use dry mixes.
We apply a putty with two layers, accordingly, you need to buy two types. The graininess of the first coaster layer and thanks to this, the second layer will be securely held.
The second layer is made of small gypsum powder. After it is applied the wall to become very smooth, which is suitable for applying wallpaper or paint.
Note! There are versatile compounds of putty, suitable for the first and second layer.
I buy putty pay attention to the information printed on the packaging. If the shelf life passed, this mixture will have a bad clutch with the wall and the putty will fall off.
If we buy a dry mix, pay attention to the package. According to the appearance of a paper bag, you can understand how to stored putty. If it can be seen that the material was stored in the raw room, then you should not buy such a composition, it will be unsuitable.

I buy the putty of the first and second layer immediately, it is recommended to take a mixture of one manufacturer, they will be as best approached to each other.
Cooking the surface for putty
Do you need to prick the walls before putty? Of course, yes, but before that it is necessary to prepare the surface. It is necessary to remove old coatings, such as:

paint, water disposal, plaster, etc.
Prepare the surface in different ways:
- Wallpaper should be wetted by water, for example, using a roller
- Paints are removed by a construction hairdryer or grinding machine
- The plaster can be removed as roller and spatula if it is a thin layer. If the layer of plaster is thick, then you need a hammer with a chisel or perforator.
If, after cleaning from old coatings on the set you noticed cracks, they must be elated. If this is not done, the putty will repeat all the cracks after drying.
Seeling cracks on the wall
- With the help of a hammer and chisel, the crack should be expanded and deepened to fill it with cement composition and it became part of the wall.

- Sponge or brush, we step down the crack from the dust and the residues of the plaster.

Remove dust and fine garbage
- Next, carefully apply the soil composition on the entire surface of the crack and well asked her.
- Next, the repair compounds with force fill the crack.

- After drying, the composition needs to be treated with large emery paper or other grater.
- On plasterboard joints, we apply a grid-sulfyan and on top of it we apply the first layer of putty. It is important to hide the hats of self-tapping screws under it, if this is not done, the rust will be noticeable on the wallpaper.

Sealing seams of drywall amphan

The primer will not give to appear mold and apply it to cost it with a roller and brush. Roller quickly handle the walls, and the brush will pass in hard-to-reach places.
After applying the primer, the wall should dry and sometimes it is recommended to apply primer 2-3 times. And after each application, it is necessary to dry the surface until complete drying.
Wall putty under wallpaper with your own hands
To correctly knead the composition for aligning walls with a putty, pay attention to the packaging, there must be an instruction, as in which proportions to knead the putty.
Stages of kneading:
- We pour into the container of water average temperature (9-10 liters of water by 25 kg. Putchals).

- We start to pour a mixture with small portions in the water and immediately interfere with the drill with a nozzle mixer. The mixture should be homogeneous and without lumps.

Prevent the composition to homogeneous mass
- After the putty ended in the bucket and you decided to knead the second portion, it is necessary to rinse the container and the tools from the residues of the mixture. If this is not done, in the second portion there will be small frozen lumps from the first kneading and it greatly prevents the quality work.
We apply the first layer of putty
 Initial recommendations for work.
- The putty is applied to the wall with a wide spatula, and the average we scratch the composition and put on a wide spatula.
- From the corner of the room, we begin to put shit, smoothly apply a solution of 1.5-3 mm pushed. The maximum thickness is possible in places where it is necessary to fill the wall.
A wide spatula hold at an angle of 45 degrees, so it will not be markedly traces from the edge of the spatula.

aligning walls with putty. We apply a solution with a wide spatula
- Apply to the putty Vangest to 80 mm on each other.
- After we have covered the wall area you need to spend the rule (smooth wooden rail) and excess the mixture will remain on the rail, and in what places there are not enough
- The angles are considered complex areas and we will use the corner spatula to simplify the work.

- The first layer of putty, we try to align the wall as much as possible - it is very hard. Possible small irregularities that we liquidate the second layer.
- After we finish apply the starting layer of the shplankee, you need to lose it without waiting for complete drying
Pull the wall with a circular motion counterclockwise.

Manual grout
- If we have detected in the wall to 3 mm, then such sections can be superimposed with a layer of starting putty.
Second layer of putty walls with their own hands
How to apply the finish putty on the wall? Application of composition differs only layer thick (up to 2 mm)
As in the first layers, we divide all work to the steps:
- This solution is prepared as the first, it must be up to 2 mm thick, so we apply it to the pressure on the wall.
- The second layer requires a more accurate approach, especially if we decided to glue thin wallpaper. To be confident in the quality of your work, we put 1 or 2 light sources in such a way that all the errors would be visible.

In different parts of the room, light sources are installed, which would cross the ray on the wall

- The finishing layer is recommended to apply in 2 layers.
- After complete drying, we drag the finishing layer of shallow sandpaper.
- The last step is applied to the primer in 1-2 layers and after drying, we do the wall decor.
Wallowing the walls under the wallpaper with your own hands the complex process, on this we highlight the recommendations for beginners.
- The first layer should not be thick (up to 5 mm), otherwise, the putty after drying can crack.
- Any other layer should be applied to the dry surface, it is necessary to wait to the previous layer of drying.
- It is strictly forbidden to dry the putty opening the window for a draft or heater. In controversial, the putty will begin to crack or peel.
- Constantly check the wall by rule and level.
- What putty is better for walls under the wallpaper? There is no definite answer, it may depend even on what room is it.
If you are a novice and you have no experience in such a job as aligning walls with putty, do not think that it is easy. Try to put the wall of the wall where your errors will not be visible. For example, on the place of the poorer closet. If the work goes well and everything turns out, continue to put the wall with your own hands. If you do not work, it is better to trust the walls of the walls under the wallpaper professionals.
Video
On the video, it is clearly shown as the putty of the walls under the wallpaper is applied with your own hands.