The dacha is a pleasant place not only for work, but also for relaxation. In stores, you can find many offers for summer cottages, but a more economical option is to make country tables and chairs yourself.
Country table with your own hands
Making furniture requires a serious approach, certain tools and skill. But you can make a simple and very economical option from wooden pallets.

Necessary materials:
- Sandpaper
- Self-tapping screws
- Pallets
- Wood primer
- Varnishes and paints for wood


The pallets must be sanded (coarse sandpaper can be used for this). Then process with fine-grained sandpaper, in order to facilitate the work, the paper can be fixed on the block. Next, you need to cover the pallets with a primer, paint and varnish if necessary.

If the finished furniture will be outdoors, the workpieces must be varnished. So it will last longer and will last for several seasons. Before you start connecting pallets, you need to decide on the type and size, we select a photo of a table for a summer residence on the Internet and make it according to it.


Two or three pallets can be stacked on top of each other and fastened with self-tapping screws. If the table will be used at home, you can attach wheels to it for easy movement.

You can also attach ready-made metal legs to the pallets and thus make a full-fledged dining table. You can also make budget chairs, benches and veranda sofas from pallets. This material is the most affordable, you can buy new pallets, or get previously used ones for free.

Folding country table
Required materials and tools:
- Hacksaw
- Screwdriver
- Roulette
- Hammer
- Drill
- Pencil
- Wooden lath 5 m long
- Wood plate for countertop (board, plywood or OSB)
- Screws and nuts

When using plywood, it turns out to be a completely inexpensive option. If you have tools for woodworking at hand, it is better to use them, so the process will go faster.


To begin with, we cut the blanks according to the following dimensions:
- 4 pieces 70 cm each
- 4 pieces of 45 cm
- The table top measures 45 cm by 65 cm.

In order to properly assemble the folding mechanism, you need to find on the Internet drawings of country folding tables, or step by step photos.


On 70 cm parts, measure 40 cm from the edge and mark with a pencil, then drill the holes. We connect the two legs with each other with a screw, on the other side we tighten the nut, we also do the second pair.

We divide the tabletop into two equal parts of 32.5 cm and cut it. On parts of 45 cm (for a folding mechanism), we retreat 1 cm from the end of the rail and drill holes. Parts for the folding mechanism must be rounded off so that they do not cling to each other.


According to the diagram in the photographs, we collect all the details together and get a folding table. Next, the table must be primed, painted and varnished. When using these sizes, a very compact table is obtained, it will be convenient to take it with you to nature and carry it in a car.

Additional Information
The design of the folding table can be adapted to your size and you can make drawings yourself. To make the table look better, the table top can be smoothly rounded.

Wood primer helps protect wood from insects, so don't neglect using it.

When painting tables and chairs, new brushes must be used, during the process, care must be taken that the paint does not bubble. Usually they are painted in two stages, you can proceed to the finishing stage after the first layer of paint has dried.


Outdoor tables must be varnished so that dampness and mechanical stress do not affect the wood. This should be done in a well-ventilated area; it is better not to take the product outside until it is completely dry.


If the structure is large and it is not possible to bring it into the room, you can varnish it on a covered veranda, where moisture cannot harm.

Varnishes differ in the degree of protection, some protect only from moisture, others will help to avoid minor scratches, they can also be with the addition of paint.

When making tables from wood, it is necessary to observe safety precautions, use cotton gloves for work, be careful when working with tools. If the work takes place on the street, you need to make sure that moisture does not get on extension cords and sockets.


Diy photo of a country table


It is such a building on a personal plot or in a garden, where you can relax with the whole family and invite friends.
But the arrangement is not only about giving an aesthetic appearance to the building itself.
It is also important to organize the interior space.
The role of the gazebo in the design of the cottage
The gazebo has a special role in the design of the cottage. In addition to its functional purpose, it should be in harmony not only with the surrounding buildings, but also with the landscape of the site.
It is good if all the facades of the buildings on the personal plot, including the gazebo, are finished with the same material. Gazebos look interesting, the roof of which is an exact copy of the roof of the house.
But even such a room is unthinkable without internal filling, the main element of which is the table.
You can make a good table with your own hands
You do not need to buy a ready-made table for the gazebo, because you can do it yourself.
This option is preferred. As a result, you will get such a piece of furniture that you not only need, but also ideally fits in size and shape.
This does not require extensive experience in construction work and special tools. Simple skills and a small set of tools are enough.
For making a table, wood is the best suited. Its main advantage is its long service life, visual appeal and naturalness.
Such a table will become a worthy element of the overall design of the cottage.
Project and drawing creation
At this stage, you need to create a detailed drawing of the future table.
Self-tapping screws and fasteners made of stainless steel can be used as fasteners. Be sure to use a wood impregnation that will protect the table from rot and mildew.
Development of a 3d drawing of a garden table in AutoCad.
Step by step instructions
You can make a garden table with your own hands by following this master class.
It is necessary to prepare all tools and materials for work in advance. At the preparatory stage, a wooden surface is processed and boards are selected by thickness.
Then four boards measuring 15x70 cm are laid in a row and connected with thin wooden planks. And the end parts are closed on both sides with boards measuring 15x60 cm, which are fixed with special metal plates.
Thus, a flat wooden surface is obtained.

Rectangular top strapping box
To prepare the upper harness, make a box. To do this, you can use boards measuring 10x91 and 10x46 cm. First, you need to make a rectangular base from long boards.
After that, stiffeners are installed on its surface, fixing them with self-tapping screws. It is important to install them at an equal distance.

Supporting structure box
Cooking the lower frame
It consists of 2 parts, made in the form of the letter "P". They are attached to each other using a long wooden plank. U-shaped elements are represented by two legs connected to each other by a bar.
Each support leg is made of four 4x4 cm bars.After both parts are made, they are fastened to each other with a strip, the length of which is 10x99 cm.

To make it more comfortable, turn the countertop over and lay it on the ground. Do the same with the frame.
As fasteners, metal corners and self-tapping screws are suitable, which ensure a reliable connection of structural elements.

We connect the tabletop with the frame
We process surfaces
All wooden surfaces must be carefully treated with a special protective compound.
It will provide reliable protection against moisture and insects.

Impregnation with varnish
Wood table
Wood is the most environmentally friendly and pliable material.
A wooden garden table can be round, square, or rectangular. Irregularly shaped models are also popular.
If you plan to do it yourself, the tabletop can consist of narrow boards or slats.
A table made of wooden cuts also looks good, which can be done in several ways:
- connect the cuts to each other with tongue-and-groove connections or staples, forming a flat surface;
- fix the cuts on some kind of base.
The finished surface is sanded and varnished. The gaps between the boards can be coated with epoxy.
Sand the finished product and cover it with a protective compound.
To give the surface the desired shade, you can use a stain or special impregnation with pigment. Such a piece of furniture can be placed not only in the gazebo, but also in an open space in the garden.
For more information on how to make a table for a gazebo made of wood, see the video:
As a basis - pallets
Designers actively use wooden pallets to create furniture. This technique allows you to create an original stylistic solution.
Existing ideas can be used to implement the following solutions:
- models on a stand;
- on casters;
- with a lid;
- with glass top.
You don't have to buy a ready-made table. You can make it yourself using pallets.

Such tables in themselves are not difficult to manufacture. To do this, you first need to find or buy a pallet. You can find it in one of the major home improvement stores. Then you need to saw off a part that is suitable in size and screw the wheels to it.
You can put an MDF panel or glass on top. They can also be bought at one of the hardware stores. The finished table must be treated with impregnation.
If you want to change its color, use a stain of the appropriate shade. This completes the manufacture of a table from a pallet.
Such a piece of furniture will organically look not only in a gazebo, but also in the open air on a personal plot. And the design, complemented by wheels, is mobile and inexpensive.
From scrap materials
Many designers use any materials at hand to make a table. Such a piece of furniture allows not only to decorate the interior space of a house or apartment, but will also look organically on a personal plot, in a gazebo or garden.

Ordinary stumps decorated with mosaics look original. Larger stumps can be used in a qualitatively original table. Smaller stumps are suitable for use as unusual stools.
Any tile left over after repair is suitable for decoration. It is split into small pieces, which are attached to the surface with cement mortar or tile glue.
Originality lies in your creativity. Such designs often turn into a real work of art.

Mosaic table top
An old table that has fallen into disrepair can also be decorated with mosaics. This will refresh the countertop. To do this, first remove the old paint from the legs, grind them and cover them with one or two layers of new paint.
Then the countertop is sanded and the mosaic is glued to it. From above, you can apply grout, which will protect the surface from the adverse effects of the external environment.
A wooden bobbin for winding a cable can also be used as a table. To do this, it is enough to process and paint it in a suitable shade. But it can be additionally decorated.
The resulting piece of furniture will become more convenient if you attach wheels to its lower part. In this case, you can easily move it around the site.
Also, many have inherited tables. They are usually not used because they require serious work. With the right approach, they can be used as garden furniture or placed in a gazebo.
If you inherited a forged table, you can simply restore or replace the old tabletop.

Forged furniture for a gazebo
For those who have weaving skills and sufficient perseverance, garden wicker furniture from a vine is suitable. Such furniture can be done independently.
But if you like wickerwork and don't want to make them, go to a large store. Here you can buy tables made of wicker or rattan, as well as artificial fibers.
If there is a lot of metal left in your area, and you know how to work with a welding machine, you can make a beautiful table for a garden or a gazebo.
If you have the necessary skills, you will get an openwork and original product that will be one of a kind.
But before starting to use it, do not forget to treat all metal surfaces with a corrosion agent.
If you plan to paint the table, you can cover its surfaces with a special primer and apply a finishing coat of paint. Materials such as wood or glass are most successful as a countertop.
A more interesting approach could be used. Decorate a simple countertop with mosaics or pebbles of the same height. Then cover the surface with glass to match the size of the resulting countertop.

Whatever table you choose for the gazebo or your garden, the main thing is that it is in harmony with the surrounding landscape and the interior of the gazebo. A hand-made thing will delight you for a long time with its uniqueness and originality.
After a hard week of work or on vacation, there is nothing better to spend time in the country. Sit comfortably by the fire, drink tea brewed with herbs, gather at the table for the summer cottage, which is assembled with your own hands.
The modern market offers a large assortment of affordable plastic furniture. But, unfortunately, plastic tables for a summer residence are not reliable. Therefore, many owners of a garden plot dream of making it on their own from natural materials.
The process is quite simple, as it might seem at first glance, you just need to properly prepare for work.
Country furniture set: which material to choose?
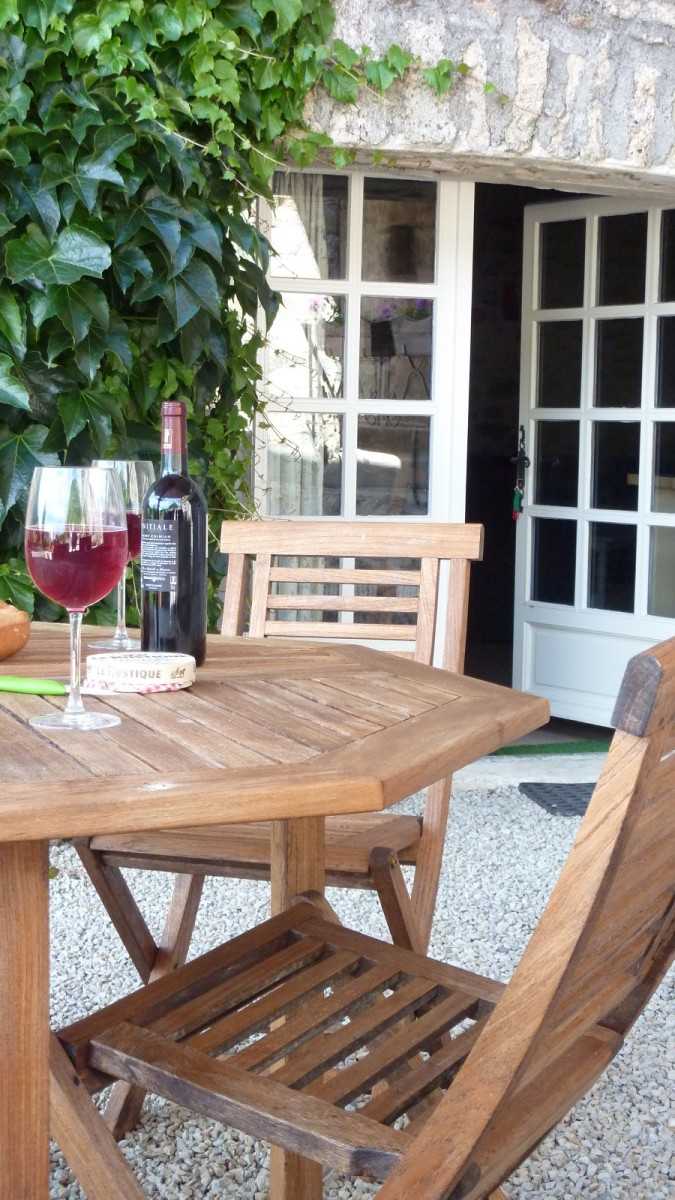
The outdoor table and benches, being constantly under the open sky, are exposed to natural precipitation, therefore, they should be made only from durable materials: natural wood, stone, metal raw materials.

Natural wood
Please note that not every type of tree is suitable for the job. Coniferous species have a loose, light structure, moreover, they are prone to inflammation, constantly emitted drops of resin can ruin the tablecloth and dishes. Therefore, it is recommended to impregnate them with special moisture-resistant compounds.

For a wooden table in the country, it is better to take hardwoods, and each board should be at least 50 millimeters. The design of the legs can be performed both in a straight and in an X-shaped version.

Make sure that all surfaces of the constituent products were carefully processed to avoid getting a splinter in future use. And do not forget to apply a special impregnation to the finished product.
To extend the durability and strength of a wooden table in the country, experienced experts recommend varnishing it in at least three layers.

Stone
Stone furniture will undoubtedly amaze everyone with its grandeur and beauty. Ready-made furniture can be purchased, but the price is too high. You can reduce costs by independently performing the basis for the table and benches. For which you can use the available materials: slabs, bricks, building blocks, ordinary natural stone.

Such a base will perfectly fit into the general style of the garden plot and other buildings. For the countertops and backs of the bench, it is reasonable to take an artificial stone.

Metal
Tables and chairs for a summer cottage made of metal are not at all difficult to do on their own, but for the work process you will need a welding machine. Such furniture looks very attractive, and decoration with openwork inserts will give aesthetics. But metal furniture is also subject to gradual destruction, therefore, it also needs special treatment against corrosion.

If funds allow, you can order forged products from a specialist in a professional workshop. Forging is perfect as a base, which can be supplemented with glass, stone and wood.

Therefore, there is an option to buy only the basis for the furniture and in the future to complete it yourself.

Options for making country furniture
To create real unique masterpieces of furniture, you can use improvised unnecessary things by rummaging in a barn or garage, where it is undoubtedly possible to find suitable consumables:
- metal barrels;
- used plastic parts;
- glass surfaces;
- other.
The old lid from the barrel can be cleaned of rust and processed, then covered with paint - you get an interesting tabletop. Or, for the base (leg) of the table, you can use the iron part of the flower stand. It must be primed, covered with acrylic paints. Next, you need to glue a window seal onto the support, and glass to it - a tabletop, to improve fixing.

The non-wasteful owner, of course, stores pallets from sets of bricks, which can also be used as countertops. At such a table it is not at all a shame to invite friends to a tea party or a dinner party.

Pallet table constructions
Self-construction from old pallets does not require any special costs. It can be done in several simple ways, for which a simple set of tools will come in handy:

- construction screwdriver;
- sandpaper;
- brush;
- colored stain;
- wheels;
- screws and screws.

First you need to properly grind the pallet, this is first done with coarse sandpaper. At the completion stage, finer sandpaper is already taken. Work will go much faster if you have a grinding wheel in everyday life for processing parts.

Next, turn the finished processed pallet over and screw the small swivel wheels from below using a screwdriver. In order to better and more securely fix the product to the tree, it is recommended to use washers for lining under the wheels.

The finished base must be carefully treated with an antiseptic. The transparent composition will preserve the interesting unique structure of the wood, and the stain will give the object a colorful look.

A small neat table for a summer residence, as shown in the photo, can be placed on the terrace, veranda, or directly in the room.

The summer recreation area will look the most comfortable and cozy if a large set of furniture is made from pallets. Such a furniture set can be made in a portable version, that is, with its possible transfer to different parts of the area.


The scope of imagination: table option
A heavy cable reel is a relatively heavy construction that can be lightened and transformed into a street table in the country. You will have to make a little effort to decorate, and so - the structure itself is almost ready.

The easiest way is to wrap the barrel of the product with a twine twine, and carefully grind the top and cover it with transparent varnish. And you can take only the center itself from the coil, adding a tabletop to it, or vice versa - a base made of metal, and the surface of the upper disc.

An excellent designer garden set will come out of old tires: a table and ottomans with a back. They can be painted in your favorite color, fastened together with silicone sealant, or a similar adhesive. It is reasonable to make a tabletop made of durable plastic or solid wood. On the seat of the pouf, you can cut foam rubber for convenience, covering it with a cloth.

A powerful brutal set will turn out from ordinary thick logs, which must first be carefully processed and soaked with high-quality stain. Then, for stability, the lower part of the log should be leveled.

A slightly smaller pouf is made in a similar way. But an interesting table will come out of a long log, lined on top for a table top.


The creation of a furniture set for a personal plot is quite an exciting activity, and it is absolutely not an expensive business. Any old things prepared for disposal will come in handy for work. Do your best and the results will surely surprise both you and your guests!

Photo of tables for a summer residence


(1
estimates, average: 5,00
out of 5)
There is a table in every home. In summer cottages and in private houses, it is customary to install street models that can be moved around the territory and placed in gazebos and on verandas. A wooden outdoor table for a summer residence is made by hand according to a developed drawing or a ready-made model is purchased. The product is made of quality material, adhering to the basic rules of manufacturing.

Model types
Tables can be of any shape and size. Different materials are used for their manufacture: wood, plastic, metal. Types of models depending on materials:


- Plastic. Products made of plastic are a budget option: lightweight, compact, and, if used correctly, have a long service life. This is an ideal country furniture option for 6-8 people. The shape of the table is round or oval. Direct sunlight destroys the material, which is one of the disadvantages of plastic furniture. The table is installed in a closed area or securely fixed, since due to its light weight, strong gusts of wind can turn it over.
- Wood. In country design, wooden tables for summer cottages are very popular. These are expensive models that are in perfect harmony with garden plantings. Products must be periodically treated with an antiseptic, since wood is destroyed under the influence of humidity and temperature extremes. Table legs dug into the ground are susceptible to rotting.
- Metal. Metal products are highly durable, durable in use and tolerate any climatic changes well. This is a heavyweight furniture that perfectly matches wrought iron railing and other decorative elements. Metal is often combined with glass and wood, making a tabletop out of them. To give stability, the legs of the table are buried in the ground.
Before purchasing a finished model, consider the following:
- product dimensions;
- place of furniture installation: in the house or on the street;
- number of seats;
- the cost of the product.
From what to make a table on the street with your own hands, everyone chooses for himself according to the availability of available material.
Step-by-step table making
Outdoor tables for summer cottages made of wood are made independently with minimal cash costs. First you need to prepare a drawing. To build an original product with optimal dimensions, they come up with the shape of the tabletop and frame on their own. Standard tables have a size of 178x95x77.5 cm. When preparing a drawing, you must adhere to these numbers. To work, you will need the following tools and materials:

- boards - 2 pcs. (0.85 × 0.1 × 0.025 m) and 2 pcs. (1.53 x 0.1 x 0.025 m);
- boards - 4 pcs. (1.68 × 0.1 × 0.025 m) and 4 pcs. (0.75 x 0.1 x 0.05 m);
- boards - 17 pcs. (0.95 x 0.1 x 0.025 m);
- drill, saw;
- building level, tape measure;
- fasteners;
- pencil;
- glue;
- varnish on wood, brushes.
Of the means of protection, gloves and goggles are used.
Preparation of parts

All table elements are made of solid wood. The parts must be even, so each of them is carefully leveled and sanded. Then they are treated with antiseptic agents. Oil-based waterproof compounds cannot be used. Despite its protective qualities, the substance is highly flammable and emits an unpleasant odor that does not disappear for a long time. For additional protection, the material is covered with a glazing antiseptic. In addition to protective properties, the product gives the product special decorative qualities.
Assembling the frame
All prepared boards for the table top and furniture legs are attached to the frame base, so they begin to assemble the table for giving with their own hands from it. The assembly is done on a flat surface:

- For the frame, end boards are used with a size of 0.85 × 0.1 × 0.025 m and 4 longitudinal - with a size of 1.68 × 0.1 × 0.025 m.
- The end parts are fixed with self-tapping screws on the longitudinal boards. The frame must be flat, without distortion.
- To give the frame additional rigidity, a second pair of boards is fixed - measuring 1.53 × 0.1 × 0.025 m.With these elements, the attachment points of the legs will outwardly be invisible. Before fixing the boards, the base is checked diagonally for skew.
- Boards measuring 0.95 × 0.1 × 0.025 m in the amount of 17 pieces are intended for tabletops. They are fastened with self-tapping screws or galvanized nails, leaving a gap of 5 mm between them.
- To make the product conveniently stored and transported, the legs are bolted to the tabletop. It turns out a removable model.
Mounting amplifiers will make the structure more durable and massive. The table is turned upside down, transverse reinforcements are nailed to the center of the tabletop. To save free space, their corners are cut down. Several curved amplifiers are nailed to the sidewalls. They must match the shape of the countertops cross members.
Protective covering
Any wooden structure that is used outdoors is prone to rotting. Sun, rain and other adverse conditions are bad for her. You can protect wood furniture and extend its lifespan by:
- special film casings;
- impregnations;
- polyurethane film.

The film based on polyurethane is the most popular, but over time it wears out, loses its properties and spoils the appearance of the product. If oil mixtures and repellent solutions are used for protection, they must be renewed regularly.
The arrangement of a summer residence is a constant process. You build something, then you improve it. Moreover, furniture is constantly required and tables are most in demand in the country. And put in the garden, and near the house, and also in. We will tell you how to make a table for a summer residence with your own hands in this article using the example of ready-made projects.
Homemade table from pallet boards
Disassembled pallets served as the material for this table. Naturally, new boards can be used. There is only one condition - they must be dry. You can buy dry ones (this is more expensive) or buy ordinary ones, put them somewhere in ventilated piles and keep it that way for at least 4 months, or better - six months. In general, any furniture, including, is made of dry wood.
We assemble the table for the street - put it in the gazebo, therefore we will not glue the boards of the countertop, but we will fasten them from below, using slats. This is a very simple country table and very cheap.
Having disassembled the pallets, we get boards with an individual color and pattern. Having conjured a little, shifting them several dozen times in different manners, we achieve the required result. It turns out quite a nice tabletop.
We take the side parts of the pallet. We use them for the table frame. We grind them first with coarse sandpaper, then we bring them to the required smoothness with fine sandpaper (grain 120 and 220).

We take the strips that remained unused, with their help we fasten the tabletop. We place them in the place where the joints of the boards are. We use two self-tapping screws to fasten each board with a joint, one to a solid one.
From the processed sidewalls and two boards (also sanded) we assemble the table frame. We fasten its parts with self-tapping screws to the end (two for each joint). The frame can be glued or also "put" on self-tapping screws. Only their length is large. For each, we pre-drill holes with a drill, the diameter of which is slightly less than the diameter of the screws.

Turn the assembled tabletop over and grind it. The procedure is the same - first with coarse sandpaper, then with fine one.
Next is the installation of the legs. We select four boards of the same size, check their length, and adjust if necessary. Then - sanding again. This is easier than sanding the already screwed legs. We fasten the sanded boards to the frame. These will be the legs. For each one there are two self-tapping screws fixed in a diagonal (look at the photo). For greater stability, we install jumpers at the bottom. From the floor to the jumpers, you can leave about 10 cm. We connect everything with self-tapping screws so that the boards do not crack, we pre-drill the holes.


After removing the dust, we again varnish. In theory, the varnish should lie flat, but it depends on the wood, so another sanding / painting cycle may be needed. As a result, we get such a homemade country table.

If you don't like motley planks and old nail marks, you can make them the same design. This table can be rectangular or square. All sizes are arbitrary - see available space.
Country table from the remains of boards
This table for giving with your own hands is assembled from the remains of boards of different breeds and sizes. Pine boards with a thickness of 25 mm and a width of 50 mm were used for the frame of the tabletop, the remains of 15 * 50 mm were used for the legs. We make the frame according to the dimensions you need. This table will stand on the veranda, and it has a small width. So we will make it not wide - 60 cm, and the length 140 cm. The height of the legs is 80 cm (everyone in the family is tall).

Immediately cut off two long boards of 140 cm each.To make the width of the table top 60 cm, we subtract twice the thickness of the board used - this is 5 cm. Short bars should be 60 cm - 5 cm = 55 cm.Fold the frame, keeping an eye on the right angles, and twist it with self-tapping screws. We check if the bars were folded correctly - we measure the diagonals, they must be the same.
We cut off four boards of 80 cm each, fasten them from the inside to the assembled frame. You can have 4 self-tapping screws for each leg.

We attach the crossbars approximately in the middle of the height of the legs. This is the frame for the shelf. The shelf can be used for its intended purpose, and it also increases the rigidity of the structure. We fix it strictly at right angles, checking with a large square.

We put the frame on the floor, check if it staggers or not. If everything is done correctly, it should be rigid. Next, we take sandpaper or a sander and grind.
Let's start assembling the countertop. Planks of various types of wood were left from the finishing work, some of them were stained. We alternate boards of different colors.

We fasten the boards of the tabletop with finishing nails, carefully finishing them off with a finishing tool. It can be fixed on the shelf with ordinary nails or self-tapping screws. Then we level with a grinder. The last stage is painting. Very unlucky with the choice of varnish. We bought it too dark, didn't like the look. We'll have to sand it again and paint it in a different color.

Wooden table with glued top
This design features L-shaped legs. They are assembled from boards of the same thickness. In this case, 20 mm. In order for them to hold well, 5 self-tapping screws are needed. Pre-drill holes with a drill with a diameter of 1-2 mm less than the diameter of the screws. Then, with a larger diameter drill, we drill recesses for the caps. The diameter can be matched to furniture plugs of a suitable color or made from a wooden rod. Another option is to use wood putty, to which add wood dust that remains after sanding. After drying and sanding, the marks will be difficult to find.

When assembling the legs, make sure that the angle is exactly 90 °. You can choose a bar as a pattern. First, we coat the joint of the two parts of the leg with wood glue, then we install the screws in the following sequence: first the two extreme ones, then the middle one, and only then the other two. After the glue has dried, the legs are sanded, varnished and dried.

It's time to make the countertop. We collect it from boards of the same thickness. We dial as much as necessary. Fragments of different widths can be used. It is only important that everything looks organic, and the sidewalls of the boards are even and docked without gaps.
We coat the sides of the boards selected for the tabletop with glue, lay them on a flat surface (some kind of table) and tighten them with clamps. In this case, they cost one, but preferably at least three. We tighten it so that there are no cracks in the resulting shield. We leave for a day. Having removed the clamps, we get an almost finished tabletop. It still needs to be ripped off - to align the edges, and then sanded. You can trim with a jigsaw or a conventional hand saw. Using a grinder is difficult to get a straight line, but you can try. After sanding, we get a beautiful tabletop.

Using the same technique, you can make an oval or round tabletop. It will only be necessary to draw the appropriate line and end the glued boards along it.
To make the table look more attractive, let's make a frame. We take a thin strip, process it with sandpaper and fasten it around the perimeter of the tabletop. You can also use finishing nails. Only the planks are also pre-coated with wood glue, and then with nails.

After the glue dries, we process the joint again with sandpaper.

Now you can attach the table legs. We collect the table frame from four boards (there is no photo, but you can do it as in the previous paragraph). We attach it to the back of the tabletop with glue, then install furniture confirmations through the tabletop. A preliminary hole is drilled for confirms with an expansion under the head. The holes for the fasteners are masked in the same way as on the legs.
We attach the legs to the fixed frame. We put them inside the frame. You can attach it with ordinary self-tapping screws. That's it, we made a table for a summer residence with our own hands.

How to make a garden table from wood with benches
For this table, boards of 38 * 89 mm were used (dismantled themselves), but you can take standard sizes. The difference in millimeters will not greatly affect the results. In the photo below you can see what should turn out.

To connect the parts, studs 16 cm long with washers and nuts (24 pieces) were used. All other connections are made with nails 80 mm long.

The parts are installed in place, a through hole is drilled with a drill. A hairpin is installed in it, washers are put on on both sides and nuts are tightened. Everything is tightened with a wrench. Why is this option convenient? For the winter, it can be disassembled and taken to a shed or garage.
Making seats

According to the drawing, we cut the boards of the required size. Everything is needed in double quantity - for two seats. We grind the boards, pay special attention to the ends.
The short sections, which we use to fasten the three seat boards along the edges, are cut off at an angle of 45 °. First, we assemble the structure that is attached to the bottom of the seat. We take a board with a length of about 160 cm, at the end to it we attach two short boards sawn at an angle. You need to attach it so that this board is in the middle.

Then we attach the legs to the resulting structure (you can use nails). Then we add the boards cut at an angle and pull everything together with studs and bolts.
We attach the seat boards to the resulting structure. Since this is a table for the street, you do not need to knock them close. Leave a gap of at least 5 mm between two adjacent ones. We nail it to the supports (which are cut down), two for each board.

We fix the finished seats with four boards 160 cm long. We fasten each leg with studs (if you walk, you can put two studs by placing them in a diagonal or one above the other).

Putting together a table
The table is assembled in a different way. Please note that for the countertop, the transverse boards are sawn at the edges at 52 °. We attach them at such a distance that the legs enter. Each board has 2 nails. You can finish, with small caps, or you can hammer in deep, and then mask the holes with putty.

Now we need to assemble the cross-legs. We take two boards, cross them so that the distance between their ends is 64.5 cm. We outline the place of intersection with a pencil. At this point, you will need to take out the wood half the thickness of the board.

We make the same notch on the second board. If you add them, they turn out to be in the same plane. We connect with four nails.

We make the second leg for the table in the same way. We are not assembling the table yet.
Installing the table
Now you need to fix the legs to the structure on which the benches are installed. We put them at an equal distance from the benches, fasten them with hairpins.


Now we install the tabletop. We also fasten it with pins. The last stage is painting. Here everyone does as he pleases.
Variations on a theme
According to this drawing, you can make separate benches and a table for a summer residence, a garden. The design is reliable and simple to perform.


Diy table for giving: drawings

