Today in supermarkets there is a great variety of all kinds of juices and other products, but they are, to put it mildly, soaked through with chemistry and this is very putting it mildly. With the development of mankind, chemistry is increasingly coming into our lives. Chemistry is everywhere now and everywhere, but undoubtedly it is certainly convenient when, for example, the juice can be stored for a couple of years and will not deteriorate. I wonder who benefits from such storage, naturally not to the consumer.
The manufacturer hides all the secrets under beautiful cover looking for his own benefit, and people's health is their own business. To drink or not to drink is the question))). Many people will naturally agree that the juice squeezed from their apples, pears or berries is very beneficial for the body. Self-squeezed juice does not contain a drop of chemistry, only vitamins and fructose useful for life.
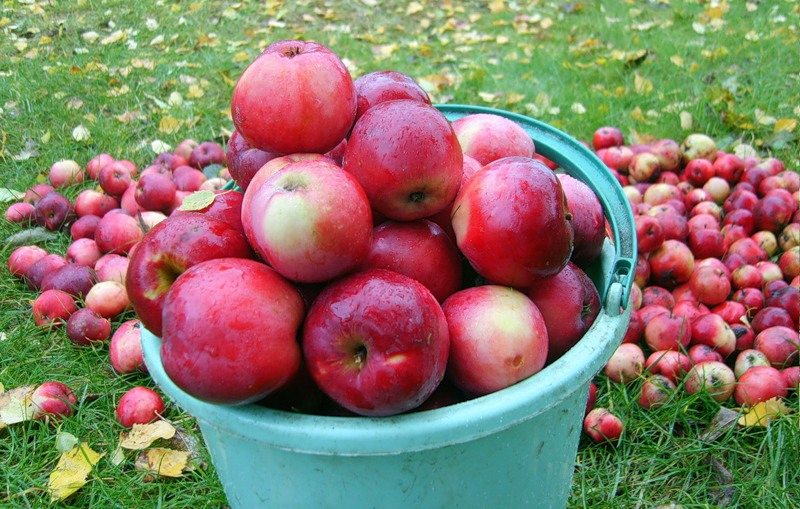
People who have household plots In summer cottages, the question always arises of what to do with a large number of apples or pears, which often disappear just idle. Of course, there is a solution you need to squeeze tasty and healthy juice from summer cottage fruits. You can drink it fresh or preserve and store for good. But how wonderful it will be afterwards winter evening open a jar of delicious and healthy homemade juice.
For the extraction of juice, people have been using all kinds of devices for a long time. In our time, a huge variety of different juicers, different brands and brands. This is all good, of course, but it all costs money, and sometimes not small ones.
So how to be common man? Of course, do it yourself. So our author decided to make a juicer with his own hands, from what he had in the garage. What will our designer need to bring his idea to life?
Materials: stainless steel sheet, channel, 16 mm pipe, threaded rod, nut, 30 mm board.
Instruments: welding machine, drill, grinder, hammer, hacksaw, jigsaw.


Pay attention after drilling the holes, the author makes them countersink, that is, he drills the surface of the hole with a drill of a larger diameter, but not to the end so that the hole turns out to be a taper.


Through these holes, the juice will come out and drain onto the tray and then along the chute into the vessel. Then he proceeds to the manufacture of the bed, for this he takes the channel and saws it according to the specified dimensions.

When the bed is ready, it starts making the squeezing chamber, where the process will take place. To do this, the resulting mesh is bent into a cylinder and seam welded.


The bed is ready.

Next, the author proceeds to the manufacture of a protective casing, this part serves so that the juice does not splash, but flows evenly onto the receiving tray and then flows down the groove into the container.


The author, as can be seen in the photo, also bent a cylinder of a larger diameter from a sheet of stainless steel than the squeezing chamber and welded the seam. Then a screw press was made.
The idea of using a washing machine as a juicer is not new. Another design is proposed below, a feature of which is minimal intervention in the machine components. This makes it possible to use it both for its intended purpose and as a juicer.
Amateur gardeners know how difficult it is to process fruit at home, especially in good years. Household juicers have a relatively low performance, require constant presence during their operation, preprocessing fruit and occasional drum cleaning. For mass processing of fruits, you can adapt a worn-out washing machine such as "Kiev" or "Volga-60". Other models may be suitable, the main thing is that there is a centrifuge, and the activator is located at the bottom of the washing tank. The washing machine converted into a juicer has been used by the author of this article for many years.
The alteration consists in the fact that the activator present in the machine is removed together with the shaft, and another shaft of the corresponding diameter is installed instead. The part of it, which is in the washing tub, has a thread on which 3 knives rotated by 60 ° are fastened with nuts. Shaft, knives and fasteners are made of stainless steel. The drain hole of the washing tub is blocked. A stainless steel mesh with a mesh size of 1.5 mm (made of wire 0.2-0.25 mm) is laid in the centrifuge so that the mesh covers the entire lateral surface centrifuge drum with an overlap of 40-50 mm. At the bottom of the centrifuge is placed the rubber cover included in the kit washing machine, the hole in which is closed with a stopper. It remains only to rinse thoroughly baking soda washing tank, centrifuge, pump, hoses - and the machine as a juicer is ready to go.
It must also be borne in mind that the juicer must operate in a longer mode than is provided by the time relay available on it, so the relay must be turned off or after turning on the toggle switch must be jammed.
The juicer works as follows. Unripe and juicy fruits, for example, apples in the amount of 15-20 kg are washed and whole in small portions are loaded into the washing tub with rotating knives. After 20-30 minutes (depending on the maturity of the apples), grinding ends. The crushed mass in the form of liquid puree is transferred to the centrifuge in small portions (3 liters each), otherwise the mass will be thrown out of the drum during extraction and clog the pump. Then they turn on the centrifuge and squeeze out the juice.
After 2-3 minutes, the centrifuge is turned off, the mesh, together with the stuck cake, is carefully removed and shaken out.
What does such a juicer give? When processing apples, its productivity is 10-12 liters of juice per hour, there is no need to cut and peel fruits, and most importantly, the grinding process does not require constant presence. And this means that at this time you can start preparing the next portion of fruit, pasteurizing juice, etc. Other fruits can be processed on the juicer, as well as berries containing a lot of juice, such as grapes, plums, cherries, etc. Naturally, the juice will contain a certain amount of pulp, depending on the duration of grinding, the type and type of fruit. The same happens in all household juicers. If desired, it is easy to get rid of the sediment by letting the juice stand or filtering it. Finally, it should be noted that waste from processing (cake) can serve as feed for poultry or an excellent fertilizer.
If a decision is made to use the washing machine only as a juicer, you can make it more reliable and easier to use. To this end, it is necessary, first of all, to replace the bearing assembly and the seal of the activator, as well as to make other minor improvements not related to the manufacture of parts.
Installing the knives in the washing machine:
1 - knife, 2 - shaft, 3 - nut М10, 4 - adjusting washer, 5 - bottom of the washing tank,
6 - bearing assembly with a seal, 7 - activator drive pulley, 8 - M6 screw

Chopping knife design
I. ZABASHTA (Kiev)
One of the most simple ways crop processing - juice preparation. hand-made can become a great solution because most of these devices are either expensive or have low performance and short-lived.
There are several manufacturing methods. For one of them, you will need a drum, its mount and a casing from.
The design of a homemade juice extractor from a washing machine: 1 - washing machine tank; 2 - centrifuge; 3 - mesh liner; 4 - fruit bin; 5 - grater; 6 - axle sleeve; 7 - guide pipe; 8 - engine; 9 - car tire.
First, they are cleaned of traces of powder and scale, and then they are polished with fine emery paper to a shine. All holes in the drum casing, except for one lower one, are closed with a thin rubber gasket and stainless steel plates using nuts and bolts.
A circle with a radius of 110-115 mm is cut out of a stainless steel sheet, 2-3 mm thick, for a grater. For the lining, we make another circle of the same diameter and from the same material, but already 0.5-0.6 mm thick. Lining provides rigidity... It is fastened with three brass posts exactly in the middle of the drum bottom. The grater is installed on the backing using five M5 screws.
Through two circles, many holes are drilled, with a radius of 2.5 mm, a centimeter marking is drawn along the diameter, dividing it into 14-20 sections. Cutting teeth are stuffed along it with a punch.
Loading tube for apples corresponding to the diameter big hole, attaches to the drum from four sides aluminum corners bolted. You can use a pipe with a corrugated hose or a polyethylene pipe with walls 5 - 6 mm thick. The MB bolts are inserted from the inside of the casing at the beginning of the process and are clamped from the outside with nuts. The distance between the pipe and the grater determines grinding degree apples. From above, the corners are fixed with lambs.
From a stainless steel mesh with a cell of 1 × 1 mm, workpieces are made with dimensions of the drum section (with a margin of one centimeter for bending) according to the number of stiffening ribs. We fold the mesh so that the edges are smooth and safe. Using a rivet gun and an awl, we firmly attach the mesh to the drum.

For the pusher, a plywood circle with a diameter of 0.8-0.9 cm is attached to the end of a thick handle from a shovel. A limiter is installed to prevent the pusher from contacting the float.
The pulley is converted to the required dimensions and V-belt. The base frame is welded from the corner. A 1.1 kW 3000 rpm motor is ideal.
A polyethylene or rubber circle is cut out with a diameter like that of the casing and a hole corresponding to the diameter of the pipe for loading apples. This cover protects against splashes and covers the moving drum. A hose for outgoing juice is pulled to the bottom hole of the drum, under which a pan is placed.
All elements are firmly clamped, the motor and wires are insulated, the mains voltage is taken into account. The details of the container are thoroughly washed.
During the test run, the empty drum of a properly assembled homemade apple juicer should not bounce or make any foreign noise.
Apples are laid in 2-3 pieces. With a pusher, they are brought close to the grater. Centrifugal force distributes the cake over the grid. If the device starts to vibrate, then, without adding apples, we wait until the juice stops flowing. If you lay the product systematically and constantly, a bucket of apples will be processed until vibration (in 7-10 minutes).
After turning off the engine with a plastic spatula, remove the cake from the grid. Then we wash and dry all the parts. The device is stored exploded view.
From an activator type machine
Can also be crafted from. The activator and the shaft are removed from the bottom of the tank, the shaft is installed required diameter... Three knives are installed on the shaft thread with nuts at an angle of 60 degrees. The drain hole is closed. A stainless steel mesh with a mesh of approximately 1.5 mm is laid on the centrifuge wall with an overlap of 40-50 mm. A complete rubber cover, plugged with a cork, is placed on the bottom. Everything is washed with baking soda. Timer relays turn off or jam its toggle switch.
Apples in several pieces are lowered into the tank on moving knives. The fruits are crushed for 20-30 minutes. At a time, the centrifuge is moved no more than 3 liters the resulting puree so that it does not spill out. After 2-3 minutes, the waste mesh is removed.
The assembled apparatus prepares 10-12 liters of juice with pulp per hour, works with juicy fruits... To remove the sediment, the juice is defended and then passed through cheesecloth.
If there is no electricity, it is better to make a homemade juicer. Apples for her are cut in half, the core and rotten areas are removed. A long, straight trough made of pine or spruce boards is filled with prepared apples, which are then pushed with a rectangular spatula with a sharp blade corresponding to the trough width.

A hole is cut in a rectangular tank, saucepan, barrel or wooden compartment lined with polyethylene to drain the juice. Gauze with apple pulp is placed inside, arranged with boards. A piston cover is placed on top, and a press of one of two designs rests on it:
- worm gear;
- jack.
The screw is tightened smoothly, observing the drainage of the juice. At the end of the process, the screw is unscrewed up, the cake is removed from the gauze.
Apples for the described manual juicer can also be chopped with a mixer installed on a drill, this will speed up the process. And as a tank, you can use a large plastic bottle.
After watching a video on how to make a juicer, do not forget about preparing raw materials for pressing. Apples are washed and cut off rotten spots. The product for juicers from washing machines does not need to be cut or cleaned, but it should remove bones... The resulting dry cake is added to animal feed in winter and used as fertilizer.
Having mastered the independent production of a juicer, you can easily manage a factory model.
For lovers apple juice from apples and berries, I can offer a home-made juicer that is easy to manufacture and does not require significant investments. It is made from the old washing machine.
Factory juicers are characterized by low productivity and low reliability, since they contain a lot of plastic assemblies and parts. On my homemade one, a bucket of apples is processed in 7 - 10 minutes.
To make it, we will need from the washing machine basically a drum and its casing, an apple press. They can be taken from any used horizontal loading washing machine. It is not a problem to get such a car nowadays, since the models change every 2-3 years.
Washing machine juicer progress of work
We produce complete disassembly old car... We leave the drum, drum casing, drum mounting bracket with bearings. We unscrew the balance weights, temperature sensors, heating elements and other unnecessary parts and remove them from the casing.We thoroughly clean all parts from powder and scale. We will polish all surfaces to a shine with fine sandpaper. Let's inspect the available holes. We need to leave only one hole in the drum casing, at the bottom - for the juice to drain. All other holes are sealed with a thin rubber band, clamping it with bolted stainless steel plates. If possible, it is better to take all bolts and nuts made of brass or stainless steel. In my case, a tube with a corrugated hose from a siphon for a kitchen sink approached the large hole in diameter.
We make a grater and a grater pad. We cut out a circle with a diameter of 220 mm from a "stainless steel" 2 mm thick with a grinder or on a machine - for a grater. From the same steel with a thickness of 0.5 mm, cut out a second circle with a diameter of 220 mm for metal with scissors: this will be a gasket. It is needed to ensure rigidity so that the grater does not bend. The gasket is attached through three brass posts to the bottom of the drum, and the grater is attached to it with five M5 screws. We cut the thread directly in the gasket.
The grater is made as follows. Having drilled holes with a diameter of 5 mm, we mark out with a step of 10 mm along the entire diameter. We divide the circle into 14-20 sectors. We fix the workpiece with screws to plywood with a thickness of 10 - 16 mm in holes with a diameter of 5 mm. We fill the cutting teeth according to the marking with a punch with a round or square working profile. The screws and spacer prevent the grater from bending and shifting. All parts should be marked and drilled as accurately as possible so that the grater is exactly in the center of the drum.
DIY apple juicer drawings


The drum has holes with a diameter of 3-4 mm, so we are finalizing it. As a rule, the inside of the drum has three stiffening ribs. We take a fine mesh made of "stainless steel" with a cell of 1x1 mm, make three blanks according to the size of the drum sections (if there are no stiffeners, then we make the mesh in one piece). At the top of the mesh, add 10 mm each for the bend, performed under the ruler, tapping with a hammer - the edges are smooth and injury-safe. Using an awl and a pistol with blind rivets, we fix the mesh inside the drum. The number of rivets is arbitrary so that the mesh fits snugly against the drum surface and does not come off during rotation.
From the segment polyethylene pipe with an inner diameter of 100 mm and a wall thickness of 5 - 6 mm we make a hopper for loading apples. To secure the pipe, we need four corners made of aluminum alloy. We fix the pipe with an offset from the center so that its edge is on the edge of the grater.
The pipe with corners is attached to the drum casing with 4 MB bolts, and the bolts must be inserted from the inside of the casing before assembly and tightened with nuts from the outside. Using washers under the corners, we adjust the gap between the pipe and the grater: it depends on what the degree of apple crushing will be. From above, the corners are attached with lambs for quick disassembly and assembly.
We make a pusher for apples from a birch shank for a shovel. On its end we attach a circle of plywood with a diameter of 90 mm, in the upper part we put a limiter so that the pusher cannot go down to the grater.
After we have prepared all the parts, we assemble the drum with the casing and bracket. We check the bearings and the oil seal and replace if necessary. The pulley will have to be altered to fit your size and V-belt.
I took the engine with a power of 1.1 kW at 3000 rpm. The drum is driven by a belt drive at 1500 rpm. More dangerous due to vibration, and less - it will be bad for the juice to come off during squeezing.

We will weld the base frame from the corner or adapt some ready-made one. We attach to it a bracket with a drum casing through rubber vibration damping washers. Cut out a lid from thick polyethylene or rubber - a circle along the diameter of the drum casing with a hole for the apple loading pipe. The lid is necessary not only to protect against splashing juice: it will also protect against the rotating drum.
All fasteners must be securely clamped, and the electrical part is assembled with good insulation to prevent injury. electric shock... Before assembling, the parts of the container are thoroughly washed with dish soap and rinsed. All components must be made of environmentally friendly materials, not corroded and not emit harmful substances into the juice.
DIY juicer video
After assembly and adjustment, we make a trial run. The empty drum should rotate without beating and abnormal noise. We cook apples, wash them thoroughly, select rotten and wormy ones. Good apples don't need to be cut. The core and bones are not a hindrance to our juicer. We put a bucket under the drain tube. Throw in apples 1 - 2 pcs. into the bunker and press the pusher against the grater. With a uniform cast, approximately a bucket of apples is crushed until the vibration starts. The centrifugal force presses the cake evenly around the circumference of the net. If a slight vibration starts, we stop the injection and let it work for spinning until the moment when the juice from the tube stops flowing.
We turn off the engine and wait for a complete stop. We clean the cake from the drum mesh with a plastic plate or a children's sandbox spatula.
After finishing work, thoroughly rinse the mesh and all parts with a strong jet of water.
For long-term storage we separate the drum casing from the bracket, remove the mesh for more thorough cleaning and rinsing.
Dried cake is a good vitamin supplement for chickens and goats in winter.
E. YABLONSKY, Bobruisk, Belarus
A juicer from a washing machine that has served its life is not so new idea... Back in the late 1980s, artisanal craftsmen published in popular technical magazines their drawings of productive juicers, which were made from Soviet machines "Riga", "Oka" or "Vyatka". We decided to continue the good tradition and propose our ideas regarding the use of a modern washing machine, namely, making a juicer out of its parts with minimal alterations.
Why make a juice squeezer?
The question is really good, why spend a lot of time altering a used washing machine in order to turn it into a juicer, when you can buy a powerful machine in a store for relatively little money? The answer to this question lies in human nature.
Some people make such things for the fan, so that they stand in their garage or in the country and can boast to friends of their ingenuity and "golden hands". And some people make such things with their own hands simply because they like the process of working with hardware and electrics. So the light is born, emery and God knows what else. Whatever your motivation, the goal is worthy, and we will try to help you realize it.
For your information! Make a washing machine juicer with front loading no more difficult than any other.
What materials will be required and how to prepare them?
To make a juicer from a typewriter, a front-loading machine with our own hands, we 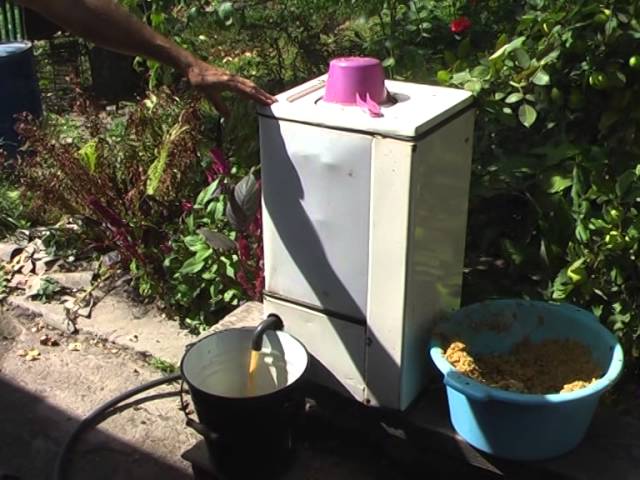 you will need an old washing machine and a few more spare parts on top. We remove the excess from the body of the washing machine immediately. The pump, pressure switch, filler valve, drain filter, block and control panel are all superfluous parts, we do not need them. It will also be possible to remove the bottom and back of the washing machine. In addition to all this, we need two additional damping springs to compensate for the centrifugal force horizontally.
We also need to get two thin strips of metal mesh 30 cm long and 6 cm wide, big amount bolts and nuts 3 mm, a container for juice, a new drain pipe and plugs made of tin and rubber. From the tools we need:
- drill;
- Bulgarian;
- welding;
- screwdrivers;
- different wrenches;
- thin awl or drills;
- pliers;
- hammer;
- scissors for metal.
Important! This design involves using the parts of the old washing machine to the maximum, so in the end the juicer will cost you very cheap.
The idea is as follows, we put the washing machine on its back, put bars in the corners and fix them so that the juicer does not come off them during operation. We leave the hatch, collar, drum, engine and drive mechanism in place, and remove the rest. The engine will have to be connected separately, since we also removed the control unit. Next, we need to prepare the details for the future juicer, we do the following.
- Remove the drive belt from the pulley.
- We unscrew the shock absorbers and all other elements that interfere with the removal of the tank.
- We remove the hatch cuff (for this you need to loosen the clamp).
- We take out the tank together with the drum.
- If the tank is collapsible, we untwist it, if it is not collapsible, we cut it along the seam with a grinder.
- The drive mechanism does not need to be disassembled and the drum does not need to be pulled out, our task is to clean the bottom of the tank from debris and dirt, as well as to clean the outer walls of the drum from the same dirt. After mechanical cleaning, it is better to additionally process the bottom and walls of the tank, as well as the drum with vinegar.
- The tank is cleaned, no debris or unnecessary parts such as a heating element, thermistor and other sensors should remain in it. All unnecessary holes must be repaired with tin and rubber patches. We will only leave the drain hole, to which you will need to screw a new drain pipe.
For your information! It is preferable to take old washing machines with a front-loading machine, in which the tank is made of stainless steel, for do-it-yourself alteration. Cars with plastic tanks worse, but they can be used too.
- We weld all the holes of the drum by welding, they are not suitable - they are too large. We remove the ribs, and leave the fasteners for them, they will help chop vegetables and fruits.
- We make hundreds of small holes with a diameter of 1 mm in the walls of the drum around the entire perimeter.
- Putting the tank back. If it was non-separable, then you will have to drill 15-20 holes across the seam in a circle, coat the seam with sealant, and then tighten the two parts of the tank with bolts.
- We install the tank together with the shock absorbers and the hatch cuff in place - the preparation is complete.
Assembling the structure
After the high-quality preparation of the parts, which was carried out by hand, it costs nothing to assemble the finished device. To begin with, we will finalize the drum of the washing machine so that it turns into a full-fledged fruit receiver for the juicer.
- We take pre-prepared strips of metal mesh and insert them around the drum between the ribs mountings and onto the back wall.
- We tighten them with screws to the drum wall for strength. The mesh will act as a vegetable grater.
- In addition, the fastening of the rib punch will help to break the vegetables in the drum, it must be unbent and the edges sharpened. So the fruit receiver is ready.
Now we need to improve the design so that the device will last as long as possible. We fasten additional springs to the tank and the wall of the washing machine in order to dampen the vibration of the tank from the horizontal centrifugal force. This is necessary, since we will operate the juicer with the hatch to the top. Now you need to "give life" to the drive mechanism rotating the drum, namely to connect the motor to the mains. How to do this, see the video below.
We put our hand-made juicer with the hatch upwards and carry out a test run. The drum should rotate freely at full speed without knocking or other extraneous sounds. It is also important that the juicer rests securely on wooden supports and does not collapse during operation with a full fruit receptacle. We put a container for juice under the drain pipe, open the hatch, pour the fruits into the fruit receptacle and start the juicer.
Be careful! In no case do not put a full fruit receptacle of vegetables or fruits, not only that they will not be crushed and will not give juice. If overloaded, there is a risk of damage to the juicer drive mechanism, especially the bearings.
 What will happen to the fruit? Rotating at a speed of 800-1000 rpm, the fruit receiver, aka drum, breaks the fruit into porridge. The porridge is kneaded in the fruit receptacle, and the juice, together with a part of the pulp, is squeezed out through the holes in the side and back wall drum and settles in the tank. Further, the juice flows down the walls of the tank and goes into the drain and through the branch pipe enters the container. This is how a DIY juicer works.
How many vegetables and fruits can you best put in the drum so that they are efficiently processed? The answer is simple - the denser the fruits, the less they need to be poured into the fruit receptacle. For example, hard apples are poured into half a drum, that is, until they fill the fruit receptacle up to half. Carrots are very hard, so you need to fall asleep in a quarter of the fruit receiver, but berries such as currants or cherries can be filled in ¾ of the fruit receiver - in general, the principle is clear.
In conclusion, we note, as you can see, making a juicer from an automatic front-loading machine with your own hands is not too difficult. The washing machine undergoes minimal alteration, you just have to make some adjustments to the design and you can start processing tens of kilograms of fruit from the garden.