Igor asks the question:
Good day! Can you please tell me how to glue textile wallpaper? They say they are very whimsical in gluing. Is it necessary to smear both the wall and wallpaper with glue? Thanks for the answer.
The expert answers:
The question is very relevant. Many do not know what to glue textile wallpaper on the walls of their homes and how to achieve best result... After all, there are a number of problems, and first of all they appear in the gluing process itself. To understand how to properly paste over a room with this type of material, you need to figure out what it is.
Pasting walls with textile wallpaper requires strict adherence to the rules. This is necessary so that in the process of pasting the walls, the wallpaper was not damaged, and was also securely mounted on the wall.
Today manufacturers offer a huge range of wallpapers, but not all of them can be called truly unique and original. Textile should be considered the material that gives the room individuality and sophistication.
The basis of textile wallpaper is a cloth of woven thread with a pattern applied with dyes. This fabric is attached to a paper, vinyl or non-woven base. The complexity of gluing the material depends on the type of base.
The main thing here is not to overdo it with the application of glue. If the glue accidentally comes out of the joints onto the surface, the wallpaper can be considered damaged. Given this feature of woven fabrics, it is better to purchase and glue non-woven material.
In this case, only the walls can be coated with adhesive, due to which the likelihood of staining the front side of the textiles is reduced by 2 times. For another type of base, the usual gluing method is used, in which both walls and canvases are smeared.
But an excessive thickness of the glue layer is not all that can ruin the gluing result. Great attention must be paid to smoothing the canvases on the walls. So, it is undesirable to use plastic spatulas offered by manufacturers today: they are designed to be applied from the center to the edges of the strips of material. In this case, the threads that create the pattern are damaged, and a large amount of glue is squeezed out, due to which the possibility of damage to the wallpaper increases several times.
Smoothing textiles must be strictly from top to bottom. With this method, all excess glue will come out from under the canvases in the area of the baseboard, which will not affect the gluing quality. A hard rubber roller must be used for smoothing.
If you use these tips and tricks, gluing textiles will not be difficult for you and will be completed successfully.
Fabric or textile wallpaper is an elite finishing material. Working with it requires a different approach than with paper wallpaper. But the finish is too expensive, since professionals are usually invited to glue wallpaper on a fabric basis, who take a lot of money for this, although you can cope with the technology yourself.
Choice of materials
Already buying wallpaper on a fabric basis, you should take into account several nuances. They can be made up of panels, and they can also be seamless and in rolls. The first type of wallpaper is the most expensive. It is easier to work with seamless ones, and rolls are made on different bases: NON-WOVEN, non-woven, paper.
It is best to stick fabric wallpaper for walls on SEM-MURALE - a special glue for working with textile wallpaper. There are other compositions for textiles, ideally, buy wallpaper and glue from the same manufacturer. This guarantees the greatest strength of the connection.
Surface preparation
Usually professionals are attracted to work with this type of wallpaper. There are two reasons for this. Firstly, the material is very demanding, so you need to handle it as carefully as possible. Secondly, it is required to cut wallpaper with accurate calculation, and if there was no previous experience in cutting, it can be quite difficult to guess.

You need to glue wallpaper on walls on a fabric basis in the following sequence:
- Training.
- Cut the canvases.
- Wall markings.
- Bonding walls.
- Impregnation of wallpaper with glue.
- Direct bonding.
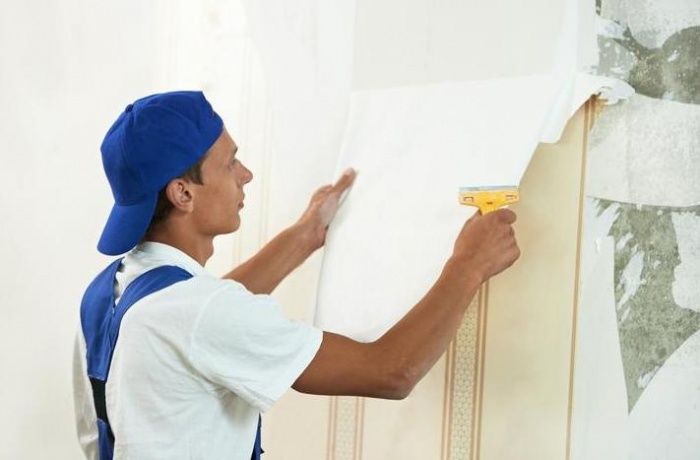
Preparation begins with the removal of the old finish. It is important to remove absolutely all of the finish, even if other areas are still holding well enough. The goal of wall preparation is to achieve a perfectly flat surface as much as possible. Even small particles of cement or plaster caught under the glued layer can damage and tear the wallpaper.
When all old finish removed, the wall is thoroughly washed, debris and dust are removed, and then plastered. For plastering use a wide trowel to minimize unevenness. The dried surface is carefully sanded and primed with a deep penetration solution.
After that, they start cutting the canvas. The most convenient way to stick vertical stripes 1-1.5 m wide. Therefore, leave marks on the wall every one and a half meters in order to navigate along them in the future.
For example, a wall 5 m long. We measure out two segments of 1.5 m and one for 2 m, put marks. Calibrate and measure carefully several times. The fewer seams and pieces, the better, but it should also be comfortable to work. Try to touch the front surface of the wallpaper with your hands as little as possible.
Now we measure the same segments on the canvas, but strictly adhering to two rules:
- the seams must be straight and vertical;
- the drawing should be adjusted so that the finished coating the seam could not be discerned.
The gluing process

If the adhesive is thin, it is necessary to saturate the wallpaper. Usually, the manufacturer immediately notifies this on the packaging and gives instructions on how to do it correctly.
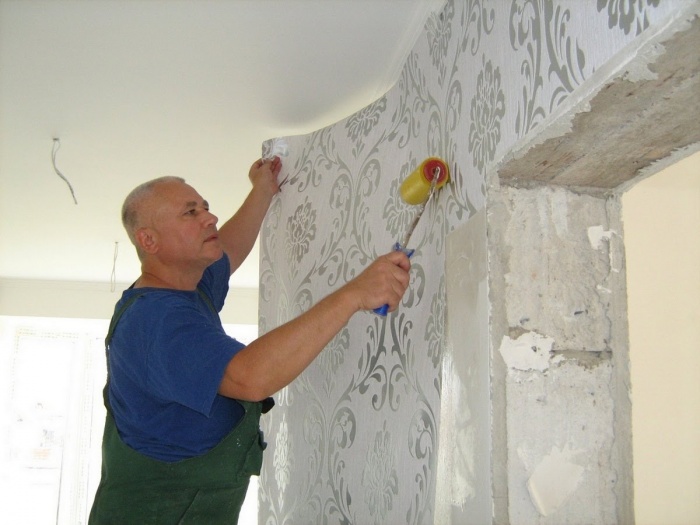
Apply a layer of glue to the wall from the corner, necessary to glue one piece. A segment is neatly attached from the upper corner so as to maintain the horizontal and verticality of its texture. All further work depends on the first canvas. Then, along the plumb line, the canvas is smoothly smoothed and pressed against the wall with a medium plastic trowel. Rollers cannot be used for this. Make sure that the edge of the segment coincides with the previously marked markings on the wall.
Canvases can only be glued from top to bottom, without overlap, butt-to-joint. Smoothing the wallpaper with rags, rollers and hands is prohibited. Try to prevent glue from getting on the front side of the canvas - the surface will instantly deteriorate and cannot be restored.
Glueing fabric wallpaper on the walls is very careful. Wrinkles and creases should be avoided in directions other than top to bottom. If folds are formed, sticking the canvas just simply will not work.
Care
After cutting, you may be left with scraps of wallpaper that have not been used. In no case should you throw them away. Since the material is quite delicate and collects dust, sooner or later you will see that the walls lose their attractive appearance and need to be washed. It is impossible to do this with a wet rag with soapy water.
It is also impossible to brush off the dust with a brush and even more so to rub - the coating will become unusable. Therefore, use only dry cleaning products - there are plenty of these in any hardware store. Before you start cleaning the walls directly, try the product on the remaining shreds.
Varieties of wallpaper

The material of the front side can be quite diverse, since textile wallpapers in the interior have been successful since the days when only the royal estates could afford them:
- Silk. The base is paper, and the front side is viscose with the addition of silk. This composition significantly reduces the cost of the material than if it were made entirely of silk.
- Linen. This type of web consists of a paper base laminated with natural or fibrous blended yarn. As a result, a continuous linen fabric emerges on the surface.
- Felt. Material on a paper basis, the front side of which can be either felt or polymer. The latter does not differ to the touch from felt, resembling velor, but it is more wear-resistant - you can clean it with a washing vacuum cleaner.
- Jute. Represent natural fabric with the addition of flax on a paper basis. Can be cleaned by dry vacuuming, do not fade. They have good thermal insulation.
- Velor. Interesting view wallpaper, which is made from paper base covered special paints... While they are still not dry, a special apparatus fills them with velor pile, and at the output canvases are obtained that imitate velvet, tapestries and other noble surfaces. The most capricious view, requiring constant cleaning, absorbing dust and odors.
- "Japanese grass". Paper base with fiberglass and sage ropes. It looks quite fragile, which can change color even in the same roll, which is normal for this species. When glued, they are durable and strong.
- Jacquard. The most user-friendly wallpaper that can be glued completely without joints thanks to different sizes standard rolls. Acrylic base allows you to straighten the blade during operation without damaging it. Jacquard wallpaper resembles short-cut wool to the touch.
Conclusion
Textile fabric is capricious and demanding both in working with it and in further care... But aristocratic beauty similar finish deserves to be pasted over with textiles in a hall, bedroom or living room.
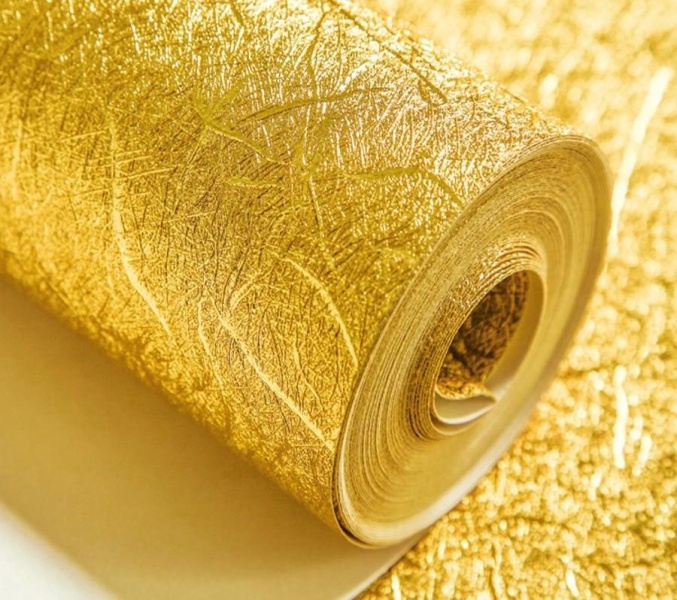
Textile wallpaper- This is an exclusive finishing material, not cheap, but very original. From the name itself it becomes clear that their basis is fabric, and the substrate can be different: paper, non-woven or new material called "NON-WOVEN". Manufacturers today offer standard sizes rolls are 10 m long, or custom-made - rolls up to 50 m long. There are so-called seamless wallpapers up to 3.1 m wide and up to 100 m long. They are usually glued wide, unrolling the roll along the wall.
The gluing of textile wallpaper is practically no different from the technology of gluing any other types. The walls need to be leveled and repaired, trimmed to the required wall size with an allowance of 5 cm, glue should be applied to the wallpaper and applied to the surface to be trimmed. But this technology has its own nuances, which will affect the quality of the final result. To understand them, you first need to deal with the textile wallpaper itself.

Features of textile wallpaper
To begin with, during the production of textile wallpaper, the material shrinks, because it is glued to the substrate using a liquid adhesive. Therefore, they have a certain error in the horizontal displacement of the pattern. This offset may be different for each manufacturer, but there is a certain standard equal to 1-1.5 cm per 1 m of roll width. Therefore, manufacturers must make a mark on the packaging in the form of the term "Cirka", which says that there is an error. True, it is small, so this offset is practically invisible on the wall.
There is one more point that concerns product defects. Since the production process of textile wallpaper is related to the fabric, the manufacturers do not guarantee high quality the material itself. That is, they allow small defects that look like knots, loose threads, and so on. But there are certain requirements - there should be no more than three such defects per roll 50 m long.
Gluing technology
As mentioned above, before gluing textile wallpaper, the surface of the walls to be trimmed must be repaired and leveled.
Attention! Textile wallpaper is glued only end-to-end.
Next, the step-by-step instruction of the sticker technology will be described. First of all, it is necessary to apply markings on the wall. This vertical lines applied with a simple pencil. The markings can be applied along a plumb line or level. You need to start from the corner of the room.

Next, the roll of wallpaper is unfolded and cut into strips equal to the height of the wall, plus an allowance of 5 cm. It is very important to trim with the combination of patterns, which is why textile wallpaper has a lot of waste. Now each strip must be greased with glue. After that, the wallpaper must be left for 5-10 minutes so that the glue is well saturated into the substrate. To apply adhesive composition it is necessary in one layer, a large amount of glue is, firstly, an overrun, and secondly, unabsorbed residues, which, when glued, will come out from under the material, leaving irreducible stains on the front surface.
If the backing of textile wallpaper is non-woven, then the glue is applied to the surface of the wall, the wallpaper itself does not need to be processed. Everything is ready, you can proceed to gluing.
The wallpaper strip is precisely laid along the marked lines and smoothed with a rubber roller from the center to the edges (see video). This must be done carefully without pressure on the plane of the wall. Do not smooth the wallpaper with your hands or a cloth, only with a roller. At the same time, air and excess will be squeezed out from under the finish adhesive solution... They must be immediately removed with a clean sponge dipped in water so that the glue does not get on the front side of the textile wallpaper.
Attention! It is only necessary to peel off the glue in the vertical direction.
After sticking the first strip, the rest are applied in exactly the same sequence. When the whole room is finished with textile wallpaper, you must adhere to the following rules.
- Maintain the same temperature in the room.
- Close all windows and doors, avoid drafts.
- The drying time of the wallpaper is indicated on its packaging, for almost all manufacturers this time period is 1-2 days.

Experts recommend not to rush to apply all wallpaper strips. You must first stick on two strips, let them dry, and then see how the process went. Namely, you can see if the joints have parted, if there are glue spots, and so on. If everyone is satisfied with the quality, then the process can be continued further.
Some manufacturers produce textile wallpaper with a repeating pattern along the edges of the strip. Such a pattern is called doubled. If during transportation or for other reasons the edge of the roll is wrinkled or damaged, then you can cut it to its full length, leaving one of the patterns. This will reduce the width of the wallpaper, but the quality will be at the proper level. If such wallpapers have reached their place of installation in their normal form, that is, they do not need to be cut, then the sticker is overlapped. And after drying, the doubled edge will need to be cut off sharp knife exactly on the ruler.

How to identify textile wallpaper with a doubled pattern. The instructions, which are attached to the finishing material, must be written in English: “Warning! Untrimmed ". You can find a hint purely visually. The backing paper should be smaller on one edge than the fabric backing. It will be necessary to cut it off after the end of the gluing work.
If such a sign was found in the instructions - "↓", then it means that strips of textile wallpaper should be glued in opposite directions. This is done like this.
- Strips are cut along the height of the wall.
- On each upper part of it, an arrow is drawn in one direction for all stripes with a simple pencil.
- If the first strip is laid on the wall with an up arrow, then the second with a down arrow, the third with an up arrow, and so on.
It should turn out so that each strip joins the adjacent one with the same edge. That is, the right edge of the first strip with the right edge is the second or the left edge with the left. The thing is that such textile wallpaper has edges different shades, and they are not visible on the roll. But on the walls after drying it will be visible. Therefore, it is worth combining the edges with the same shades. This sticker technology is called reverse. By the way, such wallpapers do not have a pattern, which simplifies the finishing process itself.

Be sure to check out the video that is posted on this page of the site. It shows how to properly stick textile wallpaper and what you need to pay special attention to.
Before there were fabric wallpaper, many hundreds of years have passed. Then people decorated the walls of their living and living rooms with pieces of fabric. When paper wallpapers appeared, which had a cheaper cost, everyone forgot about textile ones.
Now textile wallpapers are back in vogue, despite their relatively high price. With these wallpapers, you can create a rich and exquisite interior... Indeed, unlike paper wallpaper, this kind decorative coating walls are characterized by smooth texture and velvety texture.
What do they represent
Textile wallpaper is a wallpaper consisting of two parts: front fabric, and back - paper or non-woven.
Textile wallpaper for walls is made from the following materials:
- silk;
- viscose;
- velours;
- bamboo;
- natural veneer;
- straws (Japanese herb).
Nowadays, most buyers prefer velor wallpaper. They are especially popular due to their velvety surface.
Textile wallpapers have different widths: from half a meter to almost three meters. Depending on which room needs to be pasted over with wallpaper, the width is selected. If you plan to do decorative panel, stick one fragment or highlight the composition of the room, for this, narrow stripes are chosen. Wide stripes up to three meters are designed to create volume and perception of the endless fabric surface in the room.
Textile wallpaper is considered an environmentally friendly finishing material. They have the following properties:
- keep warm;
- absorb noise;
- resistant to fading.
Despite the mass positive qualities, fabric wallpaper has the following disadvantages:
- do not like dust and moisture;
- can not be washed;
- difficult to glue;
- it is impossible to replace the damaged area;
- high price.
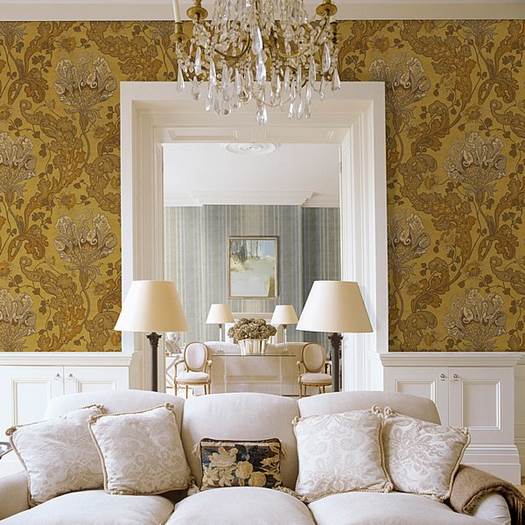
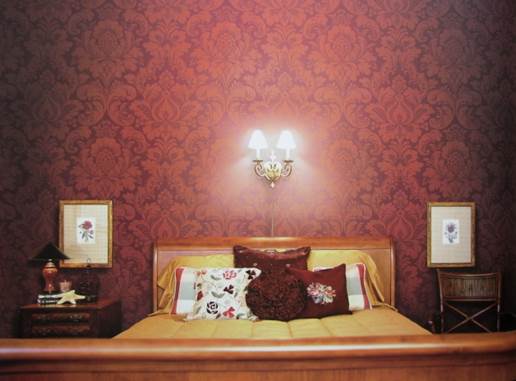
How textile wallpaper looks in the interior, you can see in the photo:


How to prepare the surface before pasting
Before proceeding with pasting the surface, it must first be prepared. Preparation steps include the following:
- collection necessary tools and materials for work;
- preparation of walls;
- preparation of wallpaper for gluing.
Unlike gluing paper wallpapers, textile wallpapers require more thorough surface preparation. The walls must be clean and dry. If wallpaper is glued to walls that have an uneven surface, bumps, depressions, spots, remnants of old wallpaper or glue, then subsequently air bubbles, stains and stains may appear on the surface. Unfortunately, nothing can remove them, but you will have to remove and re-glue expensive wallpaper.

Before applying the wallpaper, it is necessary to remove the remnants of the paper wallpaper from the wall, old paint and glue. Make sure there are no fiberglass splashes anywhere on the wall. If the walls were previously painted with paint, then such a surface must be thoroughly cleaned so that it becomes rough. This can be done with special smoothing agents or with trisodium phosphate.
If there are depressions, bumps and irregularities on the wall, then they must be eliminated. Before applying the wallpaper, the surface is plastered and primed. In addition, the primer must have deep penetration properties.
After preparation, a layer of special enamel coating(oil based). This will avoid phenomena such as sagging after the wallpaper has dried.
If the instructions “how to glue textile wallpaper” attached to the wallpaper say that the wall needs to be additionally processed special means or glue, then this item should not be skipped.
When working with textile wallpaper, you must strictly observe temperature regime. Allowable temperature indoors from 18 to 25 degrees with a plus sign, while the humidity should be no higher than 40 percent. But on the surface of the wall, the humidity should be only 8 percent.
And one more important aspect: if it is planned to paste over the room in light tone wallpaper, then the color of the wall should also be light. If purchased dark wallpaper, then the wall must first be primed in the same tone. If the difference in the shades of the wall and wallpaper is significant, then a dark color will shine through the fabric.
Wallpaper gluing
In order to perform work on gluing textile wallpaper, you need to purchase:
- Special glue designed for pasting walls with fabric wallpaper.
- Rubber roller.
- Short hair glue roller.
- Scissors.
- Roulette (meter).
- Pencil.
- A brush or plastic spatula.
- Glue tray.
- Construction knife.
- Waxed paper strips (2 mm).
- Foam sponge or soft cloth.
The layout of the wallpaper is preliminarily done. It is better to cut the wallpaper on a hard surface than on the floor:

Step-by-step description of work:
- You need to start pasting the wallpaper from the corner of the room, adhering to a vertical or horizontal pattern. In order to work more conveniently, with the help of a pencil it is necessary to draw a line on the wall - to outline the place where the first strip of wallpaper will be pasted.

This diagram will help you apply the wallpaper correctly.
A special glue is used that is suitable for vinyl and textile wallpapers. It must be diluted with water, in the proportions indicated in the instructions. The glue should be colorless so that it does not stain the surface and wallpaper. It must be diluted so that it is uniform and without lumps.

This glue is widely used for pasting textile wallpaper.
- Using a roller of rokotkovorsovy, you need to smear the seamy side of the fabric strip. This must be done very carefully, because if even a drop of glue falls on the front side of the wallpaper, it will be difficult to get rid of it.
After the glue has been applied, leave it on for three minutes to allow the paper to stretch. It is undesirable to coat many pieces of wallpaper at once. DO NOT fold the fabric wallpaper after applying the glue, or fold it, as it will leave folds on it. If “dry gluing” is indicated in the wallpaper attached to the instructions, then the surface of the fabric wallpaper is not smeared with glue. And it is applied directly to the wall itself.
- The prepared wallpaper sheet must be carefully applied to the wall, smoothed vertically with a spatula or brush (not with your hands!) To remove air bubbles and creases.
- Two canvases of wallpaper are glued joint to joint, from bottom to top. The joints are pressed tightly, it is imperative to ensure that the glue does not protrude onto the surface of the fabric. Carefully remove the glue at the joints with a spatula. If a few drops of glue get on the fabric, wipe it off very quickly with a clean, moistened sponge with vertical movements. To insure against emerging glue, strips of waxed paper are glued to the wall at the joints. After the wallpaper is glued, the joints are carefully folded back and removed flat.
- If the strips of wallpaper were prepared in advance and cut off with a margin, then directly on the wall, when the wallpaper is fixed and smoothed, with the help of a construction knife, you need to cut off the excess at the bottom.
How to care
After the whole room has been pasted over with textile wallpaper, it is necessary to close the room until it dries completely in order to prevent drafts.
After the wallpaper is completely dry, it must be handled as carefully as possible. Dry dirt and other dirt can only be removed with a vacuum cleaner or a soft bristled brush.

If the wallpaper has a water-repellent backing, then it can be wiped clean with a soft, damp cloth.
How to stick fabric wallpaper yourself, you can watch the video:
Textile wallpapers really have a luxurious look and add status and high cost. But unlike its competitors, this material requires special gluing skills. After all, their upper layer consists of fabric. Naturally, this fact affects the price of the material, since both silk and cotton can be used in its creation.
Attention! This wallpaper can be glued in virtually any room. The only exceptions will be bathrooms, kitchens, bath rooms etc.
In case of correct gluing and comfortable for the material external conditions microclimate, they can remain in excellent condition for about 10 years.
Aspects of
It's time to discuss the technical side of the matter. The following tools are useful for gluing:

Important! It is required to use a specialized type of glue.
Surface work
Having prepared all the necessary working tools, it's time to start preparing the surface. Unlike other types of wallpaper, textile wallpapers require special conditions, more thorough and painstaking work both during preparation and during gluing. The walls should be perfectly flat. Even small cracks that are typical for "new buildings" will bring big trouble. In addition, the wall must be absolutely dry and clean. If you do not follow the above tips, the final appearance will be damaged, the repair will have to be redone, and the wallpaper, in turn, will have to buy new ones. This instruction will not only help you to make repairs correctly and beautifully, but also save a lot of time and money.

First of all, you need to get rid of old paint, old coatings or other finishing material... If the wall was painted with enamel, it is roughened, and then washed off with water.
Based on the above information, the walls must be brought into a perfectly level state. Further, the surface must be putty and primed. After the work done, in order to avoid sagging of the textile wallpaper, it is necessary to cover the wall with one layer of emulsion paint.
Attention! It is necessary to monitor the color of the wall on which the wallpaper will be glued. They shouldn't be different. Otherwise, it is advisable to use a substrate. You need to glue it horizontally so as not to leave traces, otherwise this material will be conspicuous.
Correct gluing
We offer step-by-step instructions on how to properly glue textile wallpaper:
Attention! If the textile wallpapers selected for gluing do not have a seam, it is advisable to refuse them. Even the best specialists their business does not always take up such work.
Working with glue
The work begins with the wallpaper being laid face down.

After the work done, you need to give time for drying, you should not measure it yourself. All detailed information will be indicated on back side packaging with glue. In general, it will take about two days. The temperature in the room should correspond to that which was during gluing, namely 18-25 degrees. Naturally, drafts are unacceptable.
How to glue non-standard canvases can be seen in the following video:
Wallpaper care


Textile wallpapers are designed to create a status interior. They are not only an integral part of aesthetic beauty, but also an indicator of the owner's wealth. Therefore, they should be glued in living rooms or office areas. They quickly deteriorate under mechanical stress, so pets or small children can quickly render them unusable. But with proper care, they will delight for many years.
Also, we present to your attention a video with step by step instructions how to properly glue textile wallpaper: