important role in the creation cozy environment play decorative gizmos and compositions. But not always and not everyone may have enough money to adequately decorate their home with expensive decorations. Creating such interior items with your own hands often becomes the best way out of the situation, moreover, such needlework brings a lot of pleasure - both in the process and in the end result. To date, moths and butterflies have become a popular type of home decoration. These creatures fluttering along the walls are able to cause a mass positive emotions reminiscent of beautiful sunny days. We will devote our article to an overview of the various possibilities self-decoration walls with butterflies, and also consider how to make them.
Butterfly wall compositions
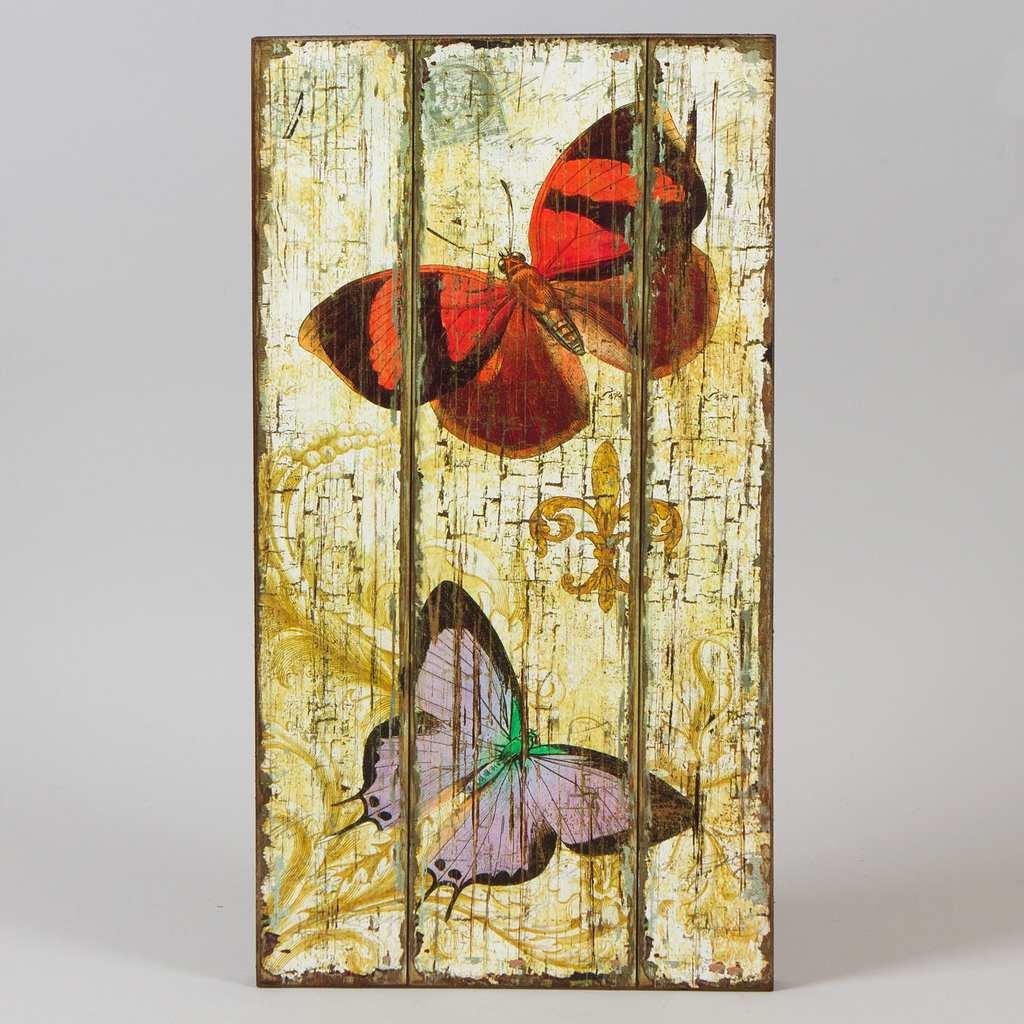
Butterflies in the interior of a particular room can be presented in different ways: they are placed in the form of panels, scattered in chaotic or ordered compositions, they decorate certain areas with them (for example, around lamps, artificial trees, etc.) or they are painted on the walls, often with the use of luminous paints. One has only to look at the photo of a beautiful panel in the form of a scarlet heart made of butterflies, and you will immediately want to place this romantic composition in your bedroom.
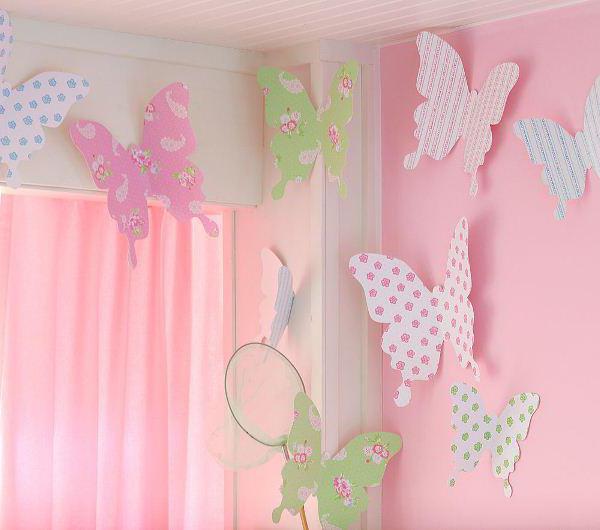
The advantage of moth decor is their ability to complement the interior of any room, regardless of its functional purpose and the style present. It is important to choose the right color solution to match overall design. For example, red or green moths will look great on a beige wall, black ones on a white one. In the children's room, you can create multi-colored paintings from butterflies fluttering cheerfully over the crib, and in the living room, decorate an empty wall with a whirlwind of plain butterflies.
Luminous moths created with the help of special paints. In the evening, they become an original decoration of the room, enlivening it and filling it with mystery.


Butterflies on the wall with your own hands: manufacturing methods
If you decide to decorate the apartment yourself with such decorations, we suggest that you familiarize yourself with different ways making butterflies. Although the work will require some costs, time and perseverance, but the result, believe me, will undoubtedly please. To make the composition look more natural, it is better to make moths for it. different forms and sizes, using templates that you can draw yourself or take ready-made ones from the Internet.
How to make butterflies out of paper and cardboard
The easiest way to make paper butterflies. To do this, you can take white sheets and decorate the winged beauties at your discretion, or get a set of colored paper. The advantage of this material lies in the ease of working with it, so it is quite possible to involve a child in the manufacture, for example, by decorating a panel of butterflies in a nursery. In addition to paper, you will need accessories such as scissors, templates, pencils, PVA glue (for bulk products).
There are two ways to make a butterfly out of paper. The first is to take ready template and with its help transfer the outlines of the moth to a sheet of paper, cut it out with scissors. The second way is more simple. First, we cut out a square (rectangle) from paper, fold it in half, apply a half butterfly template to the fold line, circle it with a pencil and cut it out. Then we unfold and get a beautiful moth. The advantage of butterflies cut out of paper is their airiness - if a light draft blows, their wings will move like real ones.
You can give the butterfly wings more elegance by cutting out pre-drawn internal details with nail scissors or a clerical knife. To make a magnificent butterfly, cut out two identical blanks from paper. different colors or the same, and then glued. In this case, the lower plane - the base - can be simple, and the upper one is decorated with patterns or clippings. For fastening use double-sided tape.
A cardboard butterfly is also cut out in two ways - using a full or half template. As a basis, you can use not only ordinary colored cardboard - multi-colored moths cut out of old postcards and magazines look beautiful.


Corrugated Paper Butterflies
One of good ways making a voluminous moth - the use of corrugated paper. To do this, you additionally need to prepare a needle and thread. On sale you can find material of various variegated colors and create a real colored moth cloud.
First you need to cut out a strip of paper measuring 7x10 cm (you can use other sizes, depending on the desired size of the butterfly). Using a needle and thread, we form an accordion in the central part and tighten it, as shown in the photo. We fold the resulting side canvases, connect them and, slightly stretching them to the sides, get rid of the folds - we got a blank of two wings, which now need to be given a beautiful wavy shape. You need to cut out two wings at the same time, not forgetting to also select areas for the antennae. In this case, templates are not needed - the shape can be given at your discretion.
On the final stage unfold and straighten the workpiece, and twist the antennae with your fingers. Butterfly is ready!


paper origami butterfly
A beautiful, voluminous butterfly can be made using the origami technique. It is a little more difficult to make it than in previous cases, however, when you make a couple of such beauties, things will go much faster. Beginners need to use the schemes of such work, which are quite a lot on the World Wide Web, be patient and perseverant. The art of origami does not stand still, constantly evolving, so there are a variety of ways to fold butterflies - from simple to modular, capable of moving wings, etc. Since we are learning how to make an origami moth for wall decor, you can use a simplified technique.
First you need to cut out a paper square, bend it along the possible diagonals and twice through the center. We fold the opposite sides, and bend the lower corner tops, turn over - we get a double triangle. We bend its tip so that the tip is located above the entire part, after which we wrap it and fold it in half along the central guide. At the final stage, fold the part twice. Making a voluminous butterfly in this way, you do not need to intensively smooth out the folds.


Making fabric butterflies
Knowing the origami technique, you can make a magnificent butterfly out of matter. To do this, you need two rectangular pieces of different fabrics of the same size. We sew them together along the perimeter - we get a canvas-base, from which, following step by step diagram, presented below, we form the product. To fix all the necessary folds and the final design, an iron is used. Butterflies made of fabric will be an excellent decoration for the room. Materials can be used different colors and structures including tulle and lace.


Butterflies from tin cans
If you still have empty cans of drinks, do not rush to throw them in the trash - they can become excellent material for the manufacture of brilliant winged beauties. Cut with scissors upper part and the bottom of the jar, cut it in half, getting the base canvas. Next, we will use the template and apply the image of a moth to the surface, cut it out, giving the edges a waviness. To prevent the wings from curling, you can give them a corrugated finish by making longitudinal recesses with the blunt side of a knife or scissors. The resulting blank is decorated with multi-colored markers.

Luminous butterflies do it yourself
Luminous moths look amazing and excellent in the interior, capable of captivating with their mystery in the dark. In this case, their images will be applied to the wall using phosphor paints. To get the glow effect, you need to make sure that there is some kind of light source next to the decor.
So, for work you will need paints of different colors, a sponge, a brush, glue spray and stencils. First, we prepare stencils of future moths from cardboard and glue them on the wall. We attach a piece of sponge to the brush and use this simple tool to decorate the butterflies. To better understand which paints will look more profitable, it is better to work in the twilight. After applying, you need to wait a quarter of an hour and remove the stencils. The paints will dry completely in two hours, after which you need to outline the contours with a pencil. To "revive" the composition, you can apply additional strokes of paint near the wings. The decor is ready. We turn off the light and admire the beauty of our luminous fluttering moths.


Butterflies on the wall - decor photo
In conclusion, we invite you to visit our photo gallery. Here we have tried to collect best examples decorating the apartment with compositions of butterflies. We hope these creative works will bring you a lot of pleasure and inspire you to create your own wall decorations. Enjoy watching!
Jewelry for various premises made with my own hands, can emphasize the individuality of the owners of the house. At the same time, you can give style and showiness to the interior. Various motives are used for this. Various decorative butterflies harmoniously fit into the interior of the bedroom or children's room. Showing imagination and creativity, you can create various wall decorations for such a motif.
To make decor in the form of butterflies yourself, you do not need special knowledge or skills. Therefore, almost everyone can bring gentle beauty to the design of the room.
General principles
There are many ways to transform an existing interior. Butterflies are associated with summer and youth. They carelessly flutter from flower to flower. They are light and beautiful creatures. It is not surprising that they can decorate a variety of interiors, adding style and grace to the design.
Decorative butterfly stickers sold in specialized stores. However, it is much more interesting to create compositions with such motifs on your own. In this case, you can show imagination. Butterflies are applied to walls, ceilings and other interior elements with paint or their three-dimensional figures are created.
You don't have to be good at drawing. Templates can be found in various sources and printed on a printer. Create decorative panel can be on one or all walls, ceiling in the room. There are many approaches to creating butterflies from different materials.
Where to begin?
IN general style interior should fit any decorative ornaments. Butterflies can be made from various materials. The overall impression of the panel depends on their choice. Moth figurines can be made of hard, durable materials, such as cardboard. They will keep their shape well, allowing you to create clear pictures. Such types of jewelry are considered the most durable.
If you use light paper or even film, corrugated paper, butterfly figures will be light and delicate. If you fasten them only in the center, this will allow the wings of the moths to flutter from the slightest breath of wind. Such a composition will be incredibly light and airy.
The color scheme of the room must be taken into account when choosing the colors of the decor material. It will depend on this whether the butterflies will harmoniously fit into the existing interior. Each moth must be clearly visible. Therefore, it is better to give preference to contrasting shades.
Decor configuration
making decorative butterflies on the wall some tips to keep in mind professional designers. First of all, they recommend making figures of moths of different sizes. This will bring some dynamism to the created panel.
It is better if the wings are not mirror identical. In the manufacture of figures, one should be guided only by the reception of horizontal symmetry. Top and bottom wings are best done different sizes.

When choosing a blank for a butterfly from various sources, you should not give preference to intricate figures that have a large number of details. Cutting ruffles will be extremely inconvenient, and the decorative effect may not meet expectations. One composition will require many butterflies. Therefore, it is better to give preference to a simple configuration.
Composition formation
Before you make a decorative butterfly or a whole group of them, you need to consider their location in the room. First you need to evaluate the pattern of wallpaper or other wall decoration. In places where the composition harmoniously fits into the interior, you can place several moths.
The composition may look like a flock of butterflies, which smoothly moves from one corner of the room to another. Their concentration may be stronger in the center or on one side. The chaotic distribution of the figurines creates a stylistic effect of unique beauty. It is initially recommended to draw it on a piece of paper.

Also, a group of butterflies can form a certain shape. For example, it can be a flower or a heart. There are no limits for imagination in this direction. The intended pattern should be marked on the surface wall light lines. They should be barely visible. It is best to use a thin simple pencil. It can then be wiped off the surface.
Paper and cardboard
Decorative butterflies, as mentioned above, can be created from various materials. Cardboard and paper are very popular. It will be very easy to cut moth figures from the latter. Coloring the wings of such butterflies will also be easy. This is one of the most inexpensive ways interior decorations.

You can purchase white or colored paper. It is also possible to use the pages of glossy magazines or newspapers. It all depends on the style of the interior. They are grouped by color. Paper butterflies are easy to attach to the wall.
Butterflies made of cardboard are known for greater reliability. These are strong, dense figures. They are quite difficult to cut. However, it will be much easier to form different bends of the wings from them. At the same time, the workpiece is dipped in water, and then it is fixed in the desired position. After drying, the material takes on the desired shape. These moths need a secure mount.
Film and fabric
Can be created from film or fabric. In the first case, a special vinyl material or a wide range of "self-adhesive" is used. Moths will have a glossy texture. If create proper lighting indoors, their wings will reflect the glare. The room will be elegant and bright.
The production of figurines from film is fully consistent with the technology in which cardboard is used. If the material has a special adhesive layer on the reverse side, the butterfly can be fixed on the wall simply. To make the moth flutter, the wings are not glued to the base. Only in the center of the workpiece is the protective layer removed.
Fabric butterflies look original. The blanks are completely glued to the base of the wall. If you want to make the fabric dense, able to keep its shape, it is impregnated with a mixture of water and PVA glue. For very thin materials, a soapy solution is used. The composition is applied to the fabric, the workpiece is fixed in the desired position. After drying, the butterfly will take the desired shape.
Making paper butterflies
By creating decorative butterflies for the interior certain instructions must be followed. Before starting work, it is necessary to prepare the required materials and tools. First of all, you will need colored, white paper or wallpaper trimmings. The template is printed on the printer. You will also need cardboard, a pencil, scissors and glue.

First, several butterfly patterns of different sizes are printed on the printer. They are cut out and applied to the sheet thick cardboard. The contour must be circled with a simple pencil. Next, you need to create a stencil. Inner material butterflies are cut out. It turns out a blank for figurines of moths.
On the reverse side of colored paper or wallpaper, you need to draw a lot of butterflies using a stencil. They are cut out and slightly bent in the center. This will create a fluttering effect.
Mount type
DIY decorative butterflies on the wall can be fixed different ways. You can use glue for this. Paper and cardboard are firmly attached to the base with PVA. To do this, glue is applied to the center of the butterfly or over its entire surface. Next, the workpiece is pressed against the surface. It is necessary to ensure that the glue does not protrude beyond the edges of the wings. When applying PVA on the reverse side of the butterfly, you need to control its amount. Surplus is immediately removed. If the glue is applied only in the center, in this place the butterfly is pressed tightly against the wall with a finger. This allows you to clearly fix it on the surface.
Pins can also qualitatively and quickly fix the moths in the places provided for them. This option is not suitable for painted or plastered walls. But for other species decorative finishes pins will become best solution. If desired, the butterfly can be moved. At the same time, there are practically no traces left on the wallpaper.
Butterflies can be hung with threads from a cornice or ceiling. You can also use thin fishing line for this. Butterflies that will be hung in this way must be made of cardboard. Moths folded according to the origami method will also look spectacular with this method of fastening.
Moths from a vinyl record
Original decorative butterflies are obtained from vinyl records. Making them is easy enough. In addition to the plates, you will need to prepare white and black chalk or pencils, moth patterns and scissors.

Using a template and crayons, you need to apply the form to the center of the plate. White chalk is used on the black field, and black on the label. Next, you need to put a plate with a drawn butterfly on the foil. She is sent to a preheated oven (upper compartment) for 45 seconds. During this time, the material will become soft.
With sharp scissors you need to cut out the moth. In this case, the material will quickly cool and harden. It will need to be sent to the oven several times. After the butterfly is ready, its wings need to be bent a little.
Other decor options
They can decorate not only the wall. Having shown imagination, they can decorate the ceiling, chandelier, cornice, etc. There is a technology for creating butterflies using origami. They will also look original in the interior.
From paper, cardboard blanks you can create beautiful chandelier. Moths seem to envelop the ceiling. In this case, you can choose any color for staining. It is correlated with the chosen colors in the interior.
White paper butterflies can be painted acrylic paints. On the fabric, you can make an additional finish with beads and rhinestones. It all depends on the imagination of the master, as well as the availability of a large amount of free time.
Having considered the basic approaches to creating decorative moths, everyone will be able to decorate the interior of their home with the help of these motifs.
To make the interior comfortable, you need to pay more attention to details. One of these details may be the presence of wall butterflies. They are a symbol of lightness and are associated with summer season when it is warm and sunny outside, so if a person wants to provide real comfort in his home, then butterflies created by his own hands or purchased in a store will be an ideal option.
In the interior
Butterflies in the interior are presented in the form of a panel, which is made from a variety of sheet material, and then fastened in an elegant application on one wall or several at once. There are many options for materials for creating butterflies, as well as many variations on how to hang them, it is the combination of these factors that affects how the presented decor element will look in the interior.
Butterflies can be mounted on the wall, as in arbitrary form, and create a single three-dimensional picture.
Attention! If you make this decorative element with your own hands, then it is recommended to select more light material, then when the wind blows, the butterflies will rustle their wings, creating the effect of being ready to fly up.
What style are they suitable for?
The presented decor element is suitable for decorating almost any style, but they look especially bright in the presence of the following styles of room decoration:
- provence;
- high tech;
- modern;
- minimalism;
- classic.
The main thing is to ensure that the color of the butterflies is combined with the general colors interior design, because otherwise, the decoration will be ridiculous and tasteless. But it is desirable that the butterflies differ in color by at least 1-2 tones, because otherwise they will simply merge with the walls.
The following combination will be organic:
- red and green on a beige wall;
- Yellow, brown and black on a gray or white wall;
- rich blues or reds on a pink wall.
Preparation for work
To create a picture of paper moths, you need to carefully consider the future composition, and then proceed to prepare the stencils. If your own imagination does not suggest any ideas, then you can get acquainted with photographs of compositions with wall butterflies on the Internet. The image of a whirlwind or simply a scattering of moths in suitable places is popular.
Having decided on the future composition, you need to choose the material from which they will be made decorative elements, and create a stencil. In the absence of a home necessary materials, you will have to visit any stationery store or arts and crafts store.
Moths are created on plain paper or vinyl using stencils. It is advisable to purchase several stencils, then when mounted on the wall, the butterflies will differ not only in size, but also in appearance, which will look more original.
What material to use?
You can cut moths from almost all materials:
- paper;
- cardboard;
- vinyl film;
- the cloth.
All presented materials are characterized by a number of advantages and disadvantages.
Paper
The presented material is suitable for people who first encountered interior decoration with the help of moths, since paper is the easiest way to create beautiful butterflies. Due to the low cost of the material, you don’t have to worry about how much paper it will take to cut butterflies. You can opt for colored paper, which can be purchased at any stationery store.
If a person prefers variety, then you can go beyond just one color and cut out moths from long-read glossy magazines. As a result, the owners of the house will become the owners of the scenery, consisting of butterflies of different colors.
You can attach butterflies from such material in any way. The big plus is that when the moths are fully glued, they will not stand out much above the wall surface, but if only the central part of each individual butterfly is glued, then they can be made to sway in the wind.
Cardboard
Moths made of cardboard will be several times stronger and more reliable than paper ones. When cutting out these butterflies, you will have to make a little more effort, but you can shape them as you want, since the cardboard easily takes shape and retains it forever.
You can bend the wings of insects or make them rounded. To carry out these actions, you need to wet the cardboard a little and, using a load, bend it in the desired way. When completely dry, the cardboard will forever remain in the desired form.
Difficulties may arise during the fixing of cardboard decorative elements, since they will have to be fixed more reliably.
Vinyl film
Vinyl film, which belongs to self-adhesive materials, is just perfect for creating decorative moths. The film is glossy and colorful, as a result of which the moths are not only characterized by rather bright colors, but also shimmer in the light.
It is quite easy to cut out butterflies from such material, and attaching the resulting moth to the wall is even easier, since you only need to remove the protective layer from the film and then stick it in the desired place. If the owners of the apartment want the moth to move its wings, then the protective layer must be removed only in the center, in the form of a thin vertical strip.
Textile
The fabric is ideal material to create butterflies in the event that liquid plain wallpaper, drape, or any fabric that is soft to the touch. Moths cut from the specified material will only complement the interior, adding comfort to the room.
How to fix?
In order for the created moths to hold firmly on the wall and not fall off the next day, it is important to carefully select the method of attachment, there are several of them.
Glue
Using glue to attach butterflies to the wall, the owner of the apartment can be sure that the described decorative elements will hold tight. Glue can be used either in the form of a pencil or PVA. The main thing is to ensure that a very large amount of glue is not used, as it will protrude beyond the edges of the moths and ruin them. appearance leaving traces on the wallpaper.
Glue considered in a simple way fixing the presented decor elements to the wall.
pins
To attach your own butterflies, you can use pins of different sizes and shapes. At the same time, in order to add a picture of butterflies fastened with pins, the pins should be selected with some beautiful head or decorated with different pearls. Pins are suitable in cases where the walls are finished plastic panels, ordinary or cork wood, as well as drywall.
If wallpaper was used as wall decoration, then you can perform a slightly different action. Using pliers or pliers, bend the end of the pin 1-2 centimeters at an angle of 90 degrees. By doing these steps, bent end the pins are led under the wallpaper, thus, the moth is fixed.
Attention! To connect the pin and the butterfly, you should use Moment glue.
Styrofoam
A small piece of polystyrene is taken and, with the help of glue, it is connected to the butterfly on one side and to the wall on the other. This mounting option is rather unreliable, since the foam is not a strong enough material and if it breaks, it will be very difficult to separate the remaining part from the wall.
Threads
With the help of thin threads or fishing line, moths are hung by the eaves from the ceiling or chandelier. This method of fastening makes it possible to create a three-dimensional picture.
Wall decoration with luminous butterflies
To create this type of decoration, the butterfly should be attached to a white wall, and a table lamp should be located nearby.
For this decoration option, you will need the following components:
- stencils;
- phosphor paint (preferably several colors at once);
- pencil;
- several sponges;
- palette and brushes;
- glue (recommended in the form of a spray).
After preparing all the described things, you need to perform the following actions:
- Initially, you need to make several stencils that are attached to the wall with glue.
- Sponges are cut into several parts, each of which is attached to the brush handle.
- If it was decided to use paint of several colors, then each color is prepared separately on the palette, and then alternately applied to the stencils already attached to the wall.
- Once the paint is completely dry, you need to remove the stencils, turn off the lights, and then enjoy unusual view glowing butterflies.
Attention! To analyze whether the paint is lying down correctly, it is recommended to carry out the described actions in subdued light.
Master class step by step
Those people who have decided to make butterflies for decorating walls on their own should familiarize themselves with several master classes on how to create them.
Colored paper moths
To create butterflies from colored paper, you will need the following materials:
- thick colored paper;
- a printer;
- sheets of white paper (templates will be created from them);
- cardboard (the density is chosen such that it can be bent);
- simple pencil;
- scissors;
- glue.
Having prepared the presented components, you can proceed to the creation:
- You need to print several templates and then cut them out of paper. If you use pictures of different sizes, then the final result will be more interesting.
- Cut out templates are applied to cardboard, circled with a simple pencil, and then cut out. If possible, then the templates can be immediately printed on cardboard.
- The templates are traced on the back of colored paper and then cut out. It is recommended to create more instances. Each of the specimens is bent in half, this is necessary to provide the moths with the effect of fluttering wings.
- A small amount of glue is applied to the fold of each butterfly, and then the blanks are attached to the wall. The central part of the moth should be lightly pressed with a finger against the wall, this is required so that the moths do not lag behind.
Attention! To give the butterflies more realism, they should be placed on the wall in such a way that they fly in one direction.
Origami
Enough original solution will decorate the wall using origami moths.
To make such a moth, you will need the following components:
- paper (sheet from a book or newspaper);
- paint - used to darken the edges of the wings;
- thin wire;
- pliers;
- simple pencil, ruler and scissors.
Having prepared all these things, you can proceed to the creation of butterflies:
- A 4 * 4 square is cut out of a book or newspaper sheet (it is allowed to use a 5 * 5 square).
- The paper is folded in half twice.
- After that, the square is folded diagonally in two directions.
- The paper folds inward, folds inward, as a result, a triangle should form.
- The two tips of the upper layer of the triangle are bent to the top.
- The triangle is turned over to the side, while the lower corner must be bent up so that it goes beyond the moth.
- The formed triangle is bent to the other side and glued to the base.
- The edges of the wings are darkened.
- A bird with bent mustache wings is created from wire.
- The butterfly unfolds in a small triangle upwards, its wings are bent and they are given a realistic shape.
- The wire is dipped in glue and attached in the form of antennae.
The made butterfly can be attached to the wall in any of the ways.
From vinyl records
Making butterflies out of vinyl records is easy if you follow a plan. You need to prepare a number of components:
- unwanted vinyl records;
- black and white chalk (can be replaced with colored pencils - you need any two colors);
- moth patterns;
- scissors.
Having prepared the auxiliary elements, you can directly proceed to the manufacture of butterflies:
- The middle of the template is marked on the vinyl record. The outline is outlined in white chalk on a vinyl record, and in black on a sticker located in the center of the record.
- You need to take a baking sheet, lay foil on it, and then place a vinyl record on the foil. The oven is heated to 400 degrees, and a baking sheet is placed in its upper part. The plate must be removed as soon as it begins to deform - after about 45 seconds.
- Cut out the butterfly using sharp scissors. If during this action, the plate begins to harden again, it must be placed back in the oven to soften. Vinyl cools quickly, so you need to cut the moth not only carefully, but also at a fast pace. It is possible that the plate will have to be warmed up several times.
The manufacture of moths from polymer clay is popular.
You will need the following components:
- moth-shaped baking dish;
- polymer clay (2.5 butterflies take 60 grams of material);
- white thread - a moth will be hung on it.
Having picked up all the components, you need to follow this plan for creating a butterfly:
- Using a polymer clay baking mold, workpieces are cut out, while using a needle in the center of the workpiece, you need to make 4 holes. The wings of moths are bent at different angles, and they are located in glass form for baking. The clay is baked in the oven for 15 minutes, the temperature is selected as indicated on the packaging of the clay.
- If after baking the moths you need to increase the holes in the center, then you can take sharp knife and carefully enlarge the holes. You can also use sandpaper and gently sand the edges of the products. If there is a desire, then the finished figures can be opened.
From the pages of a book
From the pages of an old book, you can make not just individual moths, but a whole wreath of them.
To do this, prepare the following items:
- an old book (in its absence, you can use unnecessary magazines or newspapers);
- thin branches (a willow branch will do);
- three wire hangers;
- hot adhesive;
- decorative elements in the form of beads, beads, shells and pearls;
- several strings;
- scissors;
- simple pencil.
Having prepared these elements, you can directly proceed to the creation of a wreath:
- You can use a ready-made stencil and simply circle it on the page of the book, or you can draw moths yourself. In the second case, you need to fold the page of the book in half, draw half a butterfly on it, and then cut it out.
- You need to collect willow branches and soak them in water, this will make the branches softer and protect them from breaking during bending.
- At the same time, you need to bend a wire hanger into a ring and wrap it with twigs, which should be pressed tightly one to one. The wreath is left to dry. After the wreath dries, the twigs are fixed with hot glue.
- To create antennae and a calf from butterflies, you need to take a few beads and two pieces of twine. With the help of hot glue, the beads are fastened together, while the glue has not yet cooled down, you need to insert two pieces of twine into the hole. After that, the body is glued to the paper blank. It is necessary to check that the wings are slightly bent - this will provide a fluttering effect.
- You need to beautifully place the moths on the wreath and attach them with hot glue.
The wreath can be placed not only on the wall, but also on the chest of drawers.
If the presented method of creating moths from the pages of a book seems too complicated, then you can use another method. This will require the following items:
- Old book;
- adhesive;
- scissors;
- frames for photos of different sizes;
- white paint.
Having prepared these elements, you can start creating moths:
- Frames are painted White color(if desired, the color of the paint can be changed).
- Butterflies of different sizes are cut out of an old book.
- Butterflies are glued, the middle one is glued to the center of the largest moth, and the small one is glued to the center of the middle one.
- Butterflies are placed in photo frames and then on the wall.
It is not difficult to create a decoration for a room consisting of butterflies on your own, the main thing is to calculate your strength and start making simple decorating elements, for example, butterflies from colored paper. And those people who are fond of origami should definitely decorate their apartment with moths made using this technique.
Nature is one of the best places to find inspiration. Butterflies made of paper are one of the most popular shapes for interior decor because they are beautiful, delicate, bright and graceful, and are also perfect for any interior decorations. There are many creative ways to make butterflies. Listed below are some of them that you can do yourself to decorate your home in a unique author's style.
Whether you are planning to decorate your workplace, decorating a nursery or just creating cute details for the living room in the family circle, we invite you to consider unique design ideas. Be inspired by how colorful, airy and light a kitchen-dining room, living room or hallway space can become when complemented by such a creation. We will show you detailed illustrated instructions in a few steps, describing the process of creating many different and easy-to-make paper butterflies.
Butterfly chandeliers
 This nice chandelier handmade perfect for any room, you can make it in the right color and size. For work you will need:
- hoop;
- fishing line;
- paper;
- scissors;
- inspiration.
It will be much easier if you take a ready-made butterfly stencil for paper cutting in templates: 
Or use the origami technique: 
Instead of paper, you can use plastic bottles: Using the template, cut out the shape and paint it with nail polish. You will get a realistic butterfly from a magical forest.

Wall decoration with butterflies
 Why spend money on expensive wall decor when it's so incredibly easy to make these beautiful handmade butterflies? With a minimum of materials and plain paper, you can come up with exciting results.
To make these beautiful butterflies, you will need lots of paper sheets, a butterfly stencil, a pencil to trace the outline, and scissors to cut out the shape. Pay attention to special soft tape options for walls, so as not to spoil the repair in case the decor needs to be removed later. Do this project with your children - you can let them put up the finished figures themselves to develop their creativity.
Depending on what resources you have, you can use both ready-made cardboard (or thick paper) and a regular white sheet with its further painting. Always use gouache or acrylic as paints - it is these two dyes that, after drying, give an intense bright shade that will look especially attractive.
To get a matte shade, use gouache. For a glossy look, you'll need acrylic.
So here is the step by step guide:
- Prepare paper cut butterfly templates that you can print on this page or use your favorite butterfly shape.
- Cut out the outline and fold the figure in half, leaving the central part for fastening.
- Use soft tape or double-sided tape to secure the art to the wall in a free form.
Butterflies will give a special atmosphere to any part of the house, although this option will look most magical in the bedroom to let your imagination soar after them. 
In just a couple of hours, you can create several dozen ready-made figures - provided that the whole family participates in the project. You can choose from a monochrome pattern, using one color and making some thoughtful pattern with the help of butterflies, or choose an unstructured collage - one way or another, you will be amazed at the results!
 The heart design pictured here is one of my favorites for a butterfly stencil, but you can also choose stars, flowers, or your favorite name.
Magic flying lantern
 Your kids will love this magical butterfly lantern idea. A lantern is a great way to create a cozy atmosphere and give the space depth and expressiveness - both indoors and outdoors. In addition to providing lighting, it also helps delineate spaces for a special mood. You can do this project with your kids to game form experiment with shadows!
You will need:
- small glass jar with a capacity of about a liter;
- a piece of thin wire;
- scissors;
- paper;
- pencil;
- ruler;
- glue;
- a thread;
- candle-tablet;
- butterfly stencil.
Walkthrough:
- Draw the silhouettes of butterflies on a piece of paper and cut them out.
- Wrap paper around the jar and cut out suitable size with a margin of about 1 cm.
- Make a cylinder shape out of a sheet of paper by gluing the edges, then glue the butterflies to it.
- Make a curved shape out of the wire and attach it on one side to the neck of the jar, and hang butterflies on the other side with a thread.
- Glue the cylinder with butterflies to the jar.
- Put a candle on the bottom and your lantern is ready.
If you do everything according to the instructions, your butterflies will dance!
When choosing a crafting jar and the length of the wire, keep in mind that hanging butterflies too close to the candle flame can cause them to ignite. If the sides of the paper are protected by glass, then there will be no such protection on top, so make sure that they are at a safe distance from the fire.
Crepe paper cake decoration
 What could be more beautiful than colorful butterflies fluttering around your cake? The trick with these easy-to-make paper-shaped butterflies is that its texture is perfect for making these butterflies.
 Necessary materials:
- crepe paper;
- bamboo skewers;
- multi-colored wire;
- scissors;
- acrylic paints;
- brushes;
- permanent markers;
- hot glue gun.
 Step 1: Cut out butterflies from crepe paper by folding the sheet in half. Be careful to cut the crepe paper on the side, not on the top or bottom. The butterflies shown in the picture are about 8 cm in size on each side, and the diameter of the circle is approximately 5 cm.
Step 2: Crumple the crepe paper in the center of the circle by moving your fingers back and forth.
Step 3: Secure the center of the butterfly with wire. Cut off the ends.
Step 4: Spread, fluff and smooth out the top and bottom wings.
Step 5: Decorate the wings using acrylic paint and markers. Let dry.
Step 6: Hot glue butterflies onto skewers.
Step 7: Insert into cake and serve!

 This version of crafts can be used as a decoration for a gift and in interior design. Here are ideas for inspiration with ruffled butterflies in your home:

How to make a butterfly out of paper is easy. Take a look at this option for a child's room: butterflies on clothespins. This decor can be done even with the youngest children: just cut with the child from crepe paper a simplified butterfly shape, and then fasten it in the middle with a regular wooden clothespin. The clothespin can be painted with gouache as in the photo or in another way. These butterflies are attached to the wall or furniture with ordinary double-sided tape.
Paper butterfly garland
 This cute paper accordion butterfly is the easiest to make and chances are you have all the materials you need to make it. So if you need to brighten up a space or throw a party, just make these butterflies.
 For each butterfly you will need:
- 2 sheets of 15cm x 15cm double-sided colored paper. While double-sided is best, use whatever you have or cut out squares from pretty gift wrapping.
- Thread a thin wire 15 cm long into yarn, thin ribbon or rope.
How to do:

The garland is ready!
 Aren't they wonderful? They are very easy to make. you can use different colors paper to make colorful butterflies. In addition, you can combine two colors to create one butterfly, which will make it unique. You can hang each paper butterfly individually to create a flying effect.
  Or connect them to make a beautiful and colorful garland. They are great for decorating a room, garden, and are also indispensable for parties.
Paper butterflies for wall decor from cupcake baskets
 Here is a super cute idea how to make beautiful butterfly from cupcake baskets and clothespins. It is very easy and perfect for kids craft. You can use these butterflies as a home decoration on their own or as an addition to other decorative elements - for example, for hanging on curtains.
You will need:
- plain white cupcake baskets;
- wooden clothespins;
- dye;
- shine;
- ink;
- rhinestones.
To get started, create some colorful butterfly clips.
For large butterflies, use 4 baskets, for small ones - two. 
Fold them in half. 
And fold in half again to get a quarter. 
Then glue them together at the corners and in pairs, on top of each other, as shown in the picture. 
You can add shape to the wings by trimming the edges. 
Add expression and relief with colored ink on the outer edges. 
Decorate the clothespins with soft acrylics and sprinkle them with glitter. 
A piece of natural twine is perfect for the antennae. 
Add a few drops of glue to the ends and dip them in glitter. 
Take dried clothespins, antennae and some rhinestones to make the body of a butterfly. 
Be sure to glue the tendrils to the top of the clothespin, as if you glue them on the back, they won't be visible under the clip. 
Glue the clothespin in the center between the wings. 
Instead of rhinestones, you can use a tiny ribbon flower in this place. 
Various materials can be used for decoration. 

Make some baby butterflies using miniature clothespins and 2 mini baskets. 
You don't have to cut out the baskets, that looks funny too. 

Butterfly stencils
The availability of printable templates of any type is a big advantage for DIY enthusiasts. Home designers can save a good amount of time by having templates at arm's length. Just print them out and use as you wish.
Create your own collection of dainty butterflies made from cardboard, fleece or plain paper, even in complex forms repeating patterns using our butterfly stencils to cut different sizes. Here we have a collection of amazing butterfly patterns that you can use in your projects.
Simple butterfly pattern

Beautiful butterfly pattern

The sketch of this dark butterfly template is nice and pleasing even if it's not colored at all. It seems that the wings also have eyes that look directly at you.

Print the butterfly template on a printer, color and cut it out - and the idea for decorating the interior is ready.
DIY origami butterflies - video
The beauty of the apartment is the most important, as it is the small details that make it more attractive and comfortable. Not bad option for finishing living quarters will become a panel of butterflies with your own hands. It is butterflies that are considered the most fashion trend last season, and regardless of the time of year, the butterfly panel will look perfect.
Butterflies are called winged flowers and therefore they will be a great addition to any interior. A panel of butterflies on the wall adds airiness and lightness to the room, and also fills it with charm. And according to popular beliefs, moths, whether alive or artificial, can become a symbol of good luck, joy, love and luck. That is why it is far from surprising that on the walls of many houses one can observe panels with butterflies made of paper and not only.

Making a panel of butterflies with your own hands is far from being so difficult, you just have to start and it will immediately become clear that this is a simple and entertaining process.
For such work, you will not need professional skills or attending such a meeting as a master class, but just scissors, glue and the desire to create.
It is important to note that the manufacture of such a panel will help not only create a beautiful picture with your own hands, but also have a pleasant rest emotionally, as psychologists recommend just such a pastime to relieve stress.
The composition of butterflies is mainly made on plain walls. For example, you can place a family of butterflies on a plain decorated wall.
Flocks of butterflies can be located in different directions and groupings, and such butterfly paintings are considered especially chic, such as:
- Vortex;
- A heart;
- Spirals;
- Chaotic order.

If the background for placing butterflies is colored, then the butterflies themselves should be bright, but not in the same tone as the wallpaper, otherwise they will merge and will not be visible. Before work, you should definitely sketch out a sketch according to which it will be carried out, and to be more precise, on the wall itself, using chalk, you should make notes on the location of the butterflies so that after they are made you do not spend extra time on marking.
What material to choose for a panel with butterflies
A butterfly stencil on the wall can be made from cardboard or plain paper, and these can be the remains of boxes or simply unnecessary materials left over from previous works. Also not a bad option would be compacted stationery film and fabric.
Ideas for making paper butterflies are the most optimal and simple, as it is easy to handle, so there will be no problems with such a process as cutting templates, regardless of their shape and dimensions.

Also, paper stencils can be very simply symmetrical. Paper has one more great advantage and this is the availability of this material, as it is sold in many stores and at the same time at a fairly optimal price.
It is important to remember that making stencils from cardboard will allow you to use them much longer than from paper, as it is denser and stronger:
- The cardboard perfectly retains the shape given to it, but it will take a lot of effort to cut out the butterfly.
- The result of a long and laborious process will be a strong, durable stencil, on which you can cut a huge number of butterflies for room decor.
Quilling is the way to decorate a room that does not require stencils, because it is prepared immediately on the panel without preliminary preparations.
Thicker film can be stronger and more attractive than cardboard, which is simple and easy to work with. A variety of butterflies are cut out of the film, regardless of their type, and they are attached using ordinary glue, and even a glue stick can be used for this.
In order to create a beautiful original picture or, in other words, a panel of butterflies, you should use a combination of glossy and matte films, and if you place them under a certain slope, then a 3D effect is quite possible.
If you purchase already prepared stencils from the film, then small squares of adhesive web are attached to them at the factory, and to decorate the wall with them, you just need to remove the protective layer.

The system of moths is sometimes created as one fluttering wing, but it all depends on how the wings are bent, how the light falls on them, and even what shade they are. It would seem that such trifles, but they can become important point when decorating a room with your own hands. Some budding designers set up butterflies to catch the draft in the room and bring them to life, which delights anyone who watches.
How to make a panel with paper butterflies (video)
How to attach butterfly panel ideas to walls
You can install ready-made stencils on the wall in various ways, as it all depends on the personal preferences of the decorator. In particular, the pannoquiling butterfly is attached with glue, and for other types of decor, pins and polystyrene can be used. Glue considered the perfect way to create a panel on the wall, but it is important not to overdo it with the dosage, so as not to spoil the look with the remnants of the material peeking out from under the base of the butterflies.
Pins can be used in cases where the canvas on which the panel is attached is made of soft material, since the mace will need to be stuck into the wall so deep that the wind currents do not tear them out and scatter them around the room, which can be far from safe.

Not many people know that you can decorate a wall with butterflies through the use of foam.
Fixation occurs by gluing pieces of foam on the moth, after which it is smeared back side and attached to the wall. Thus, it is possible to make the panel more voluminous than to fix it simply on the wallpaper. It is important to know that only lightweight structures can be fixed with foam.
How to make a panel of butterflies in stages
Before you start cutting out butterflies, you should choose a specific pattern, which will be an important component of the application. To select, you need to carefully examine the wall on which the panel will be located, as well as assess the scale of its location. Naturally, if the wall is wide, then you can make the most voluminous drawing, but in small rooms you should not overdo it with such decor, as it will put pressure on the psyche and is unlikely to help you relax.

After that, it is worth moving on to the development of butterfly decor, to the choice of color and material.
It is worth remembering that this panel should become the brightest and most memorable spot on the wall, but it should not violate the overall harmony and atmosphere.
It all depends on the space, on the adjacent interior items, and also on how large the composition will be.
Creating a panel of butterflies (video)
The very creation of templates or, in other words, cutting out moths, must be done with the help of a clerical knife. The shapes of the moths must be kept symmetrical for the picture to be truly chic. The last step is to attach the moths to the wall using the previously described methods.
Examples of panels from butterflies (photo)