All the time we move, hurrying to work, to the garage and home, and we always have to carry a whole bunch of keys with us, open different castles. But few of us think about it, because we use all of them daily. This burden brings a person inconvenience at least from gravity.
It is more convenient to place a significant part of the bunch from your arsenal of keys on a clothes hanger (by the way, you can also make it yourself. Read the details), but this is from the point of view modern design most worst decision. It is more reasonable to put the keys in the drawer of the nightstand in the hallway every time you come home.
The best option key storage is a key holder that will complement your exclusive interior corridor, will give positive emotions from the fact that you do not have to look for them throughout the apartment. It will save you once again wasting time and nerves looking for very important things.
The material for the key holder can be the most unusual materials for furniture, but, most importantly, this homemade accessory talking about creativity the owner of the dwelling and his soul.
A variety of shapes and ideas for decorating key holders
 Since the old Soviet times, many of you probably remember that a wall-mounted key holder is the main working attribute of public dressing rooms and duty rooms.
The wall in this case is most suitable for storing keys, since it is visually easier to determine on it whether each of them belongs to a specific door by a tag. But, unfortunately, such key holders look like nail boxes.
furniture manufacturers in recent times already used this consumer demand and provided stationary hooks under the mirrors in the furniture for the hallway. 
Creative people want a variety of shapes, colors, and not the use of a ready-made template. Plain wooden plank maybe as one of the key holder options. Just think about what your housekeeper will turn into if you apply such a decoration technique as decoupage to it. This is the whole work.


What to make a beautiful key holder from, so that it is functional, and at the same time looks interesting in the interior of the hallway? The first decision that comes to mind is to make a panel from processed wood panel threaded.

However, the tree is not the only available material. The use of other improvised materials is not excluded, and even encouraged. They will truly make your key holder original and allow you to decorate it in the most outlandish way.


Everything that, it would seem, is suitable only for a landfill, for example, newspaper tubes, will be used. 

The easiest option is to make a key holder from a photo frame. Instead of a photo, you can put a drawing made by your son or daughter in it, or you can use an embroidered with my own hands picture. 
By the way, the photo frame is also convenient because the background changes perfectly in it, which can be changed according to your mood like on a computer desktop. 
However, look at what things can really be made from ordinary plywood, spending only on hooks and paint with tools. 
It is interesting: constantly experimenting with external lighting, you can achieve gorgeous results. If you bring to the key holder, it will turn out not only the original key storage, but also a convenient night light. Even if there is no main lighting, for example, in the morning when getting ready for work, you will always see exactly where your keys hang.
For those who like to combine useful small things with convenience, we can recommend a closet housekeeper. This locker will serve as a clothes hanger for one person at the same time. 
Key holder finish
You can finish the key holder by painting it with flowers. Original or shabby chic will appeal to most lovers of antiquity. 
By lining the key holder, for example, with salt dough figures or river shells, you will give it a unique look. In addition, it will remind you of your vacation at sea. 
Take note: the effect of an aged thing looks very good against the background of a plainly painted wall. By applying decoupage to the key holder in combination with other materials, you give the product a unique antique look.
An example of making a key holder based on a wooden panel
 A small master class on making a wooden key holder based on a former photo frame will acquaint you with all the stages of work:
- The first step is to choose the base (polished for varnish or just painted).
- For better visibility of the key holder against the background of the wall, the ends of the board are painted over with dark paint or stain.
- The main plane of the key holder (background) is supposed to be decorated with a fabric or pattern for lacquer.
- After the background is ready, carefully drill holes for key hooks in its base.
- An iron loop (keyhole) is screwed on the back of the key holder or two small nails are nailed, between which a rope is pulled.
Note: at the fourth stage, if you decide to make a fabric background, then pre-glue the fabric.
Let us explain in more detail some stages, since different options are possible on them. The design stage of the plane makes it possible to show imagination. For example, as an option for decorating a key holder with velvet fabric. 
For a change, on top of it, applique with figures from a different material. It can be household items, a portrait, animal figurines, still life or landscape.

Tired of constantly looking for keys all over the house? I bring to your attention six ideas for making a key holder with your own hands from improvised materials. Thanks to this accessory, they will always be in one place known to all household members.
Ideas that can be brought to life in your own workshop
Of course, you can just buy a housekeeper in the hallway. But when you start choosing a suitable model for yourself, it turns out that:
- Price such a simple product has a very considerable one;
- They do not have any complex structural units which could not be made by yourself.
So, one wonders, why overpay for a factory sample, which, moreover, can be found in the apartment of acquaintances, if you can make the original key holder literally from improvised cheap materials?
Idea number 1: a plank with a slot
It is enough to take a polished board, which could have remained with you after any home repair, and make a slot in it with a milling cutter. Everything, the elementary key holder is ready. In this case, depending on the position of the slot, the following options are possible:
| A photo | Description |
 |
Horizontal slot. The keys are easy to insert, but can hit each other when you take them out. |
 |
Vertical slots. In this case, the keys do not interfere with each other, but they need large key chains, which are not very convenient to carry in pockets. |

You can fix such a wooden product even with a simple double sided tape, because the load will be small.
Idea number 2: plank with hooks
If you have several coat hooks, then you can make a key holder using them:
| A photo | Description |
 |
|
 |
|
 |
We screw hooks for keys in front, having previously drilled holes for them. |
 |
Testing. |
Idea #3: Frame
Beautiful housekeepers for the house are obtained from the frames. There are also several different approaches to the manufacturing process:
| A photo | Description |
 |
frame decoration. In this case, the key storage structure is made in the same way as in the previous paragraph, but in the end it is also decorated with baguettes. |
 |
Hooks in a frame. Here, the wall key holder is made from a frame by screwing hooks into it. |
For the manufacture of a key holder from one frame, only wood or MDF is suitable. Cast or overhead baguettes will crack from drilling.
Idea #4: Locker
Wall key holder in the form of a locker has two main distinguishing features:
- positive: bottom or top wall construction - ready-made shelf for various small accessories;
- negative: combined only with classical and old Russian styles.
It is noteworthy that the locker itself does not have to be assembled from scratch, it is quite possible to use ready-made frames:
| A photo | Description |
 |
Case from an old watch. If you have a finished frame, the housekeeper with your own hands is very simple:
|
 |
old casket. Here, in addition to hooks, you will also need to consider a system for attaching the product to the wall. |
 |
Drawer from old furniture. Here also:
|
If you plan to assemble the locker yourself, then the following diagram will come in handy:

Idea number 5: plywood figure

Most original designs for storing keys can be made of pliable plywood. The principle of mounting hooks here is the same as in the case of a regular plank. Only now the background will not be in the form of a simple rectangle, but will take the form of any shape you wish.
How to make a key holder from a wood-laminated board? We highlight five main steps:
- Create the desired drawing with a pencil on a sheet of paper or in any graphic editor, after which we print it;
- We transfer image on a sheet of plywood using carbon paper;
- We direct circuits with an electric burner;
- Cut out manual jigsaw;
- sanding m and decorate.

Idea number 6: knots from trees

Another way to achieve originality is to use branches and knots from trees. Cut them to the desired size, connect with screws and paint.
decoration
The decor also allows you to bring original solutions to the look of the housekeeper, make it as suitable as possible for the surrounding interior, or even turn it into a real landmark of your hallway.
Consider the most popular decoration options:
Polymer clay

This material allows you to create a three-dimensional design for your design. It is done like this:
- Thoroughly knead a block of polymer clay to a soft pliable state;
- We fashion from it a plate with the desired ornament or even figures with hooks. It all depends on your creative idea;
If the bar is very difficult to fingertip, put a few drops on it vegetable oil. This will make the process easier and faster.
- The finished product is baked in the oven at a temperature of + 120-139 degrees Celsius until a brownish crust appears;
- Turn off oven and let the craft cool without removing it;
- Applyacrylic lacquer or paint;
- After drying, install on the key.

Decoupage
In the decoupage technique, there are two options for applying an image to a decorated surface:
- Straight. The base is primed with a special compound, after which PVA glue and the paper picture itself are applied to it;

- Back. This is, in fact, just a decal, which can be purchased at a specialized store.
Conclusion
You got acquainted with several ideas for making key holders and methods for their subsequent decoration. The video in this article contains additional material. In the comments, you can ask any questions on the topic.

The key holder in the house contributes not only to order, but also to the safety of property and the safety of the home. Lost Keys a threat to both, and a long empty hook clearly says: look, or do something at all. Similarly, in especially critical industries, say, aviation, hand tool kept suspended from green or gray planks, with the outline of each item filled in with red. A red spot blazes at the end of the shift - we are looking for it until we find it, up to the complete overhaul of the car.
Exactly because of this reason the most practical wall key holder. Desktop (old saucers, ashtrays, figurines / twigs with hooks), by a comic definition, are designed so that the keys are lost just where they should not be. Pocket housekeepers-cases are certainly useful, but they already belong to haberdashery, and not to pieces of furniture, so in this publication we will limit ourselves to mentioning them.
It makes complete sense to make a key holder with your own hands. It is enough just to look at the prices for ready-made ones: 400-600 rubles. for something that can be created literally in an hour or two at home on the table and hung on the wall. It is also good that a mini-key hanger is not a responsible item, not material-intensive, but for high-quality performance it requires quite fine skills. It didn’t work right away - it’s okay, the keys will hang for now anyway. I got the hang of it - you can take on more serious things, the savings on which will no longer be in the hundreds. And the satisfaction from a job well done - of course, one could not mention it.
Species and varieties
Evolution in a simplified form and standard designs wall key holders are shown in the photo. In the days of spring and lever locks, the keys were large and often were works of decorative art. Therefore, the house key holder was most often just an overlay on the wall, so long as the metal did not spoil the finish, pos. 1. The housekeeper-plank has survived to this day, because aesthetically well corresponds to the trends of modern interior design, pos. 2.

In city apartments, where there has never been an extra usable area, a key holder-shelf is convenient, pos. 3. You can make it out of wood in half a day in the kitchen or on the balcony, there is a place for gloves-glasses. With the key holder-shelf is combined with the most naturally. She also has hidden possibilities; we will remember about them, so take a closer look at the pos. 3 more carefully.
The key holder for a house with services and outbuildings is, as a rule, a fairly large board of the traditional type, because. only there will be several bunches of keys from the utility rooms, plus a gate, 1-2 gates and, possibly, a locked passage to the backyards. The hooks are marked (pos. 4), and the “auxiliary” housekeeper is placed at the back door or in the kitchen. For key chains of family members from the front door, garage and car, a smaller key holder is usually hung in the hallway.
In the case when access to the keys has a limited circle of people, use key cabinets, pos. 5. And not only in offices or in production: it is highly desirable to place a key holder-locker in the hallway; especially in private households: psychologists and criminologists consider keys hanging in plain sight to be a strong factor that can provoke a visitor with an unstable psyche to illegal actions. Simply - away from sin.
But then what - to hang somewhere a housekeeper with a key from a housekeeper, where are the keys? And somewhere else - a housekeeper for the key of the housekeeper, in which the key to the housekeeper, where are the keys, and so on ad infinitum (to infinity), as in Swift's satire? No, you just need to make a key holder with a secret lock. This does not require special knowledge, subscriptions, permits and mastery of metalworking techniques. It is enough to know that the most reliable secret is in the absence of any secrets. Remember how in the movie "Ivan Vasilyevich Changes His Profession" an experienced thief and burglar Zhora Miloslavsky went on the rampage trying to open the dentist's safe. What follows from this for home master Let's see at the end.An unreliable guest, the absence of the master's keys in sight, will certainly not give a reason to break loose and do something that neither the hosts nor himself needs in any way. Also, hiding the keys will certainly not stop a professional thief; they have an iron principle: go to work - do it. But in this case, the thief will linger in place longer, inherit more, and there will be much more chances to figure him out and take him until he “shaken off the junk”.
Boards

Key holders-boards are the most common, because. it is convenient to make them from improvised materials, incl. smallest waste. But here there are some subtleties, like any quality work. For example, a cut of a board with a milled groove - it seems to be a ready-made key holder-shelf (item 1 in the figure), it remains only to attach the hangers at the back and drive the screws under them into the wall. However, if there are at least two bundles in such a key holder, then, taking out one, it is easy to pull out the other. And according to the law of meanness, she will definitely fly into the most inaccessible nook just when the time counts down to seconds.
In a plank key holder with oblique grooves (pos. 2), the ligaments with their neighbors no longer conflict. But, first, try in your home workshop to select several inclined transverse grooves evenly and accurately with a hand mill. Secondly, by pulling the bundle straight at you in a hurry, you can break its chain or even tear the key holder off the wall.
The most reliable key holder is a bar with straight transverse vertical grooves, pos. 3. However, then for bundles you need large key chains, with which it is not always comfortable in your pocket. But key chains can be replaced / supplemented with haberdashery carbines on an elongated chain, pos. 4. The carabiner is fastened on the belt loop for the belt, on the steel loop on the belt itself or on the mobile phone case. And there is nothing superfluous in the pocket, and you can not be afraid for the keys, even if these very pockets are at least completely full of holes.
Framework
A kind of housekeeper-board - a housekeeper from a frame; due to it and looks generally prettier. If a solid base is inserted into the frame instead of a picture, then the point is simple: we attach hooks to the board, and that’s all here, on the left in fig. It is not necessary to insert a backdrop with a picture into the key frame, it will soon be scratched and rubbed. If the wall finish is durable (e.g. tiles, porcelain stoneware or fake diamond), then the role of the image is played by the keys themselves. Then the hooks with threaded shanks are screwed into the upper bar of the frame from the inside, in the center in fig. Finally, you can simply screw the same hooks into the picture frame in the hallway, right there. Of course, if it is wooden or MDF. A cast or overhead baguette will crumble and crack from the face already during drilling.

Organizers
Abroad, especially in English-speaking countries, key organizers are widespread, see fig. below. The reason is primarily that in countries with seemingly the most developed Internet, correspondence on paper is still intensively going on and mail is actively working. No one can really explain why they cut down trees and keep environmentally harmful production there, but half a dozen or a dozen outgoing / incoming envelopes for the average American is the norm. Then, here is a saying translated into Russian from the same place: "If the average American does not cut his throat while shaving, he will break his neck, slipping in the bathroom." That kind of explains the slate reminder board.

However, the average American is not at all such a klutz as he is portrayed in Hollywood and he is himself in folklore. The statistics for the whole world testify: the “reminder” board in the hallway better teaches children to order and makes family relations more benevolent. And as for the shelves, so they will fit for gloves-glasses.
Cabinets
Key cabinets, in addition to stealth storage, are more suitable for installing secret locks, see at the end. The ceiling of the locker is a ready-made shelf, and if there is a clock (which is by no means superfluous in the hallway), then the rookery for small items remains. But, due to the straightforwardness of the forms, the design of key cabinets is appropriate only in the styles of classical and rustic clones, see fig.

houses
The key holder-house was originally a kind of key holder-wardrobe. She appeared in the world, it seems, from Russia, more precisely - from the USSR. They say that in one of the first issues of the “Model Designer” there was a description of a key holder made from the case of an unusable cuckoo clock. However, the upper corner of the contour in terms of aesthetics gave it a number of new qualities. That craftsman hardly thought of something like that, but the widespread use of "key houses" is not at all surprising.

Firstly, a housekeeper in the form of a house can be literally any design and type of furniture for a given class of furniture, the top row in Fig. If the key holder-cabinet is necessarily voluminous, then the key holder-house can be flat. Secondly, the key holder-house also accepts absolutely any design and finish, the bottom row. It does not lose its appearance even from the typical, somewhat crookedly screwed fittings. The only drawback is that if there is a clock in the attic, then the shelf disappears. How to make a housekeeper, see the master class:
Video: do-it-yourself housekeeper (master class)
If there is a box...

Perhaps in junk there is a wooden box from cigars, elite drinks, from an expensive gift, etc. In Norway, for example, sets of delicious smoked fish are produced in wooden boxes more elegant than those from French or Swiss chocolate sets. In a middle-income family, it is more likely that by the time a child can be trusted with his keys, he will outgrow the old toys and the box for them.
In all these cases, the wood of the box is of sufficient quality, and it is quite appropriate to make a key holder-cabinet out of the box. However, simply screwing the hooks into the back wall (or sticking pushpins with long necks) and putting the hangers on is not enough. On fig. you can see where the weak point is: the door hinge. In gift boxes that are not designed for long-term use, it is paper or cloth and will not last long in a key holder. Therefore, the door must be hung on a piano or a pair of small card hinges. In addition, it is not possible to classify the constipation of such a locker in all ways.
... or box
Comfortable, roomy key holders or, for example, toilet cabinets, are also obtained from drawers from old furniture. If the bottom of the box is made of fiberboard, it must be impregnated with a water-polymer emulsion or PVA diluted 3-5 times with water for strength and moisture resistance. The surface of the part treated in this way holds glue well, accepts varnishing and painting.
A word about plywood
You have probably already noticed that key holders are made with extensive use of plywood. Fans of it sometimes create truly masterpieces, at the top in fig. Impressive results with little labor and skill are obtained by a two-layer technique, at the top right: a carved shaped overlay is glued onto the base and, possibly, reinforced from the inside with small self-tapping screws. It is enough to pre-sand the overlay with sandpaper No. 240-260, and lacquer the entire product.

This, it must be said, is the rarest case in history when the development of industrial technologies contributed to the revival of a withered handicraft: artistic sawing on plywood. On the furniture factories from sawing waste, they began to cut blank figures with a laser under computer control, with a laser, if necessary, apply strokes / contours to them, and put them on sale. The success was phenomenal, prices skyrocketed. It was then that lovers remembered how to make elegant little things from plywood at home:
- You can sketch to perfection and print an outline drawing on a computer and at home.
- In addition to carpentry electric jigsaws, manual ones for fine work have not disappeared.
- For artistic sawing, it is quite possible at home, with your own hands, to make a vibrating desktop electric jigsaw for a thin string file.
- A manual cut will go more accurately and its small irregularities will completely disappear if the contour drawn on the workpiece is drawn in advance with an electric burner on wood.
- With the same electric burner, you can apply strokes on plywood and draw contours no worse than with an industrial laser.
- To make an electric burner with your own hands, you need a 3-12 V or 0-30 V power supply for a current of up to 3 A and an old burnt soldering iron.
key key
For an example in fig. a drawing of a universal hanger for a hallway in the form of a key made of 15 mm plywood is shown. To make it, you do not need to be able to draw, and you do not need a computer: the entire contour is made of straight lines and arcs of circles. For use only as a key holder, all dimensions are proportionally reduced by 2-3 times, and the thickness of plywood is up to 6-8 mm. It is possible without calculations: we remove the comma everywhere in the numbers, we get the dimensions suitable for the key holder in mm.

Key holder-key - not without intent. Able children are often capricious and freedom-loving. Valuable instructions and moralizing on the board of the housekeeper-organizer will only annoy them. And it’s cool to hang keys on a key, so they get used to order without coercion.
Own, unique
Naturally, I want to see the creation of my own hands as unique. Original key holders are obtained simpler than other items due to the above reasons: fundamental simplicity, low material and labor consumption. But to give recipes for originality is nonsense. The original is original because it is a unique fruit of the master's invention. For outstanding designers, it costs a lot of training, solid experience, hard thinking, painstaking work on complex equipment and expensive materials. But is it possible to be original with the housekeeper in a hurry, without all this and without really racking your brains? Well, let's try to give a few "tips" for fantasy.
First, the original wooden key holder-hanger is obtained from branches with knots. Here the material itself works for originality: there are no two identical plants in nature. Small branches will gain strength only when they are completely woody. Then their thickness at the butt will reach at least 4-6 mm, so the hanger will turn out to be universal, pos. 1 and 2 in fig. The technology is simple: we saw off, dry in a heated room for 3-4 weeks, cut to size, impregnate twice with a water-polymer emulsion or once diluted twice with acrylic varnish on water based; this will prevent the product from rotting and hold the bark if needed. Then we varnish or paint and hang where necessary.

The next variant of natural originality is tinder mushrooms. Especially good are those that grow on birch (pos. 3) and oak deadwood. The strength of the dried ones is stone, and the durability after the treatment described above is many decades.
You can also be original with purchased plywood blanks, which were discussed above. For example, for family housekeepers, pos. 4. On sale there are sets for families of various composition, with key chains in the form of a car, a gate, even an outdoor toilet. All this can be decorated in your own way (see below) or at least just pasted over with your own photographs. From the finished "blind" parts, you can also glue the key holder using a two-layer technique, and print out the inscriptions and strokes on the fragments with a burner, pos. 5. Only first you need to point them with a pencil! The range of plywood blanks for home creativity on sale is the widest; here originality is achieved by a huge number of possible combinations.
Fertile blanks for originality with hangers of any kind - old tableware. Especially the forks. It would seem that here - to bend, but in how many ways and how expressively this can be done, pos. 6-8, and the bent handle will withstand, in addition to the keys, quite heavy things. The aesthetic potential of this material is so great that there are hooks for hangers on sale, stylized as bent old forks, pos. 9.
Decor and decoration
On authentic original design housekeepers of labor and skill will need more. But there are no restrictions on the imagination of the source material. Let's see first what it is better to make the base from, and then how to finish it clean.
Plastic
For voluminous furniture decor small size best material- polymer clay, or just plastic. It can be of 2 types: immediately plastic and square, like plasticine. Immediately plastic is sold in all colors in plastic bags and squeezed out by a sausage through a notched corner. After drying, it becomes hard and moisture resistant, but crumbles during mechanical processing and is not very strong, therefore it is mainly used for decoration additional elements utilitarian details, eg. hooks. Painted suitable acrylic paint(see below), the finished modules look like solid ones, on the left in fig.

Bar plastic before sculpting must be kneaded for a long time with effort; you may have to put 2-4 drops of vegetable oil on the bar. The finished part is baked in the oven at 120-130 degrees; when a brown crust appears, the gas is turned off and, without opening the oven door, the stove is allowed to cool completely, only then the part can be removed.
Baked bar plastic is durable; in the form of a figurine on a wire frame, it can also serve as a crochet, in the center in fig. It can be machined approximately like PVC or solid polycarbonate. It perfectly holds painting and varnishing with water-based paints and varnishes, it is firmly glued to PVA wood, on the right in fig.
Decoupage
The most common decor for small pieces of furniture is decoupage: applying a finished pattern to a prepared surface and then removing it from it. protective film and fixing the image with varnish. Decoupage is direct and reverse. With a straight surface, the surface is primed with a special primer, decoupage glue is applied to it and a picture is applied. Reverse decoupage - well-known decals. In general, decoupage is a vast area of applied art with many varieties; video tutorials on decoupage for beginners, see below:
Video: decoupage master class for beginners
For decorating furniture, mainly direct decoupage is used, because. when reversed on an area of more than about the palm of your hand, it is very difficult to avoid wrinkles. Decoupage 3D is sometimes also called stucco bas-reliefs made of foamed plastic; in this technique it is possible to achieve greater subtlety of outline and shades than with polymer clay, see video:
Video: voluminous decoupage, decorating the housekeeper
Finishing
The finished housekeeper needs to be painted, varnished and, possibly, aged. For painting, water-based art acrylic paints are now most used; total drying time approx. 5 o'clock They are sold in tubes in art and skillful hands stores. Often in the construction industry: the demand for ready-to-use paints in small packaging is also considerable among finishers.
The color range of acrylic paints is such that mineral paints never dreamed of: in addition to all the colors of the spectrum, multi-colored metallics, with simple gloss and sparkles, antique gold, pure gold, polished and blackened silver, nickel, chrome, etc. Mix acrylic paints, unlike oil on mineral pigments, as you like.
The layer of acrylic paints is thin, durable, elastic. This makes it possible to age the surface by two- or multi-layer painting or, for example, to decorate in the Provence style, wiping upper layer(layers). Rubbing is done either on incompletely dried paint with a dry hard brush, or on a dried abrasive. The first method gives a smoother texture and smoother color transitions, but requires more experience and skill. Almost equivalent results can be achieved by wiping dry with an abrasive sponge instead of sandpaper (sold in hardware and art stores).
Of the coatings painted with acrylic surfaces, it should be noted:

On the technique of crackle (crack, crackle) should linger. Crackle is an old, highly developed technology and there are many types of crackle varnishes. At pos. 1-3 fig. only some types of cracked surface are presented for example. The type of crackle retinization created by this varnish is indicated on its label, in the package, pos. 4, or, for expensive high-quality varnishes, on a separate insert coated with varnish from this vial.

Second - craquelure varnishes are one- and two-step. Two-step are opaque and are designed for aging plain surfaces. One-step varnishes, except for the type of crackle, must first be selected according to the generalized parameters indicated in their specifications. For decoupage on objects the size of a housekeeper, the following are preferred:
- Medium - the size of the cells of the craquelure mesh is medium.
- Thin or Hairline - thin cracks (hairline).
- Sharp - the edges of the cracks are sharp, and the corners of the grid are sharp.
What a book-sized picture looks like, cracked with varnish with such properties, is shown in pos. 6. And on pos. 5 and 7 for comparison - images of a similar nature, treated with varnishes with different characteristics.
Secret keys
So we got to the key holders with a secret. The first, the mechanism of which is shown in pos. 1 fig., is well known to intruders, but will not tempt an unbalanced guest. She disguises herself as a picture on the wall, pos. 2. The door is hung on the left on hidden spring-loaded hinges. When you click on the secret bar in the place indicated by the red arrow, the crossbar tongue will come out of the holder and the door will swing open. Just like a dentist's safe in front of the completely exhausted Zhorik Miloslavsky.

Bevels on the secret bar of 1.5-2 mm are necessary so that it does not jam when pressed. The crossbar is made either from sheet steel 1.5-2 mm thick, pos. 5a, or bent from a strong elastic wire of the same thickness, for example. bicycle spokes, pos. 5 B. Clip - steel of the same thickness. The clamps holding the spring are installed with a play of approx. 0.3-0.5 mm.
Skillful craftsmen achieve the exact balance of the secret bar with only one spring, but without experience, there will be a lot of fiddling with setting up the mechanism. It is better for a beginner to put between the bar and back wall drawer a weak ball lock so that the spring snaps it back into place.
Hidden lock, the scheme of which is shown in pos. 4 is already trickier. Look again at the key holder-shelf, fig. at the beginning. Imagine that the keys are covered there by a door in the form of an organizer shelf, pos. 3, quite necessary and useful. On the left, it is hung, as in the previous one. case, but the mechanism is hidden in the right side. And a strong magnet, ferrite or niobium, is built into the bottom of the tray. They moved the tray to the right - the magnet lifted the load, the tongues released the clips, the door swung open. To close it, you need to push the tray back, otherwise the constipation will not click into place.
In this device there is still invisible in fig. secret: the load in cross section is not round, but oblong, as is the slot for it in top bar box. This will prevent rotation of the rod with the crossbars. It is also possible, if the crossbars are wire, to lengthen their fingers emerging from the thrust and select a groove from the inside in the outer wall of the mechanism in which they will walk.
With the help of the correct implementation of the corresponding project, it is possible to ensure convenient storage important things and A high-quality wall key holder with your own hands will be made quickly and without extra costs after reading this article. There are general thematic data and photos in particular good decisions. Some production technologies are described in detail. Therefore, any person will reproduce them exactly even without previous experience in performing similar work operations.
To formulate a list of requirements for this design, it is necessary to make several clarifications for the intended purpose:
- The decorative wall key holder is installed in the entrance area, in a visible place. Its aesthetic characteristics should.
- The direct loads from the keys themselves are not great. However, with intensive use it is difficult to count on very gentle handling. Possible mechanical influences should be taken into account.
- The resistance of decorative coatings to changes in humidity and temperature will come in handy. The differences in these parameters are especially great in the hallways of private houses.
- Ensure good visibility of all objects. If necessary, install.
- In some cases, it is necessary to equip the structure with closing doors.
Taking into account the features noted above, various traditional solutions can be considered.

One glance is enough to check if the items are in their places. An additional "plus" of this design is simplicity. decorative design choose individually. But a base with several hooks can be created in just a few tens of minutes. Of course, you will have to provide a suitable fixing system on the wall. But this task is not difficult to solve using ordinary screws with dowels, other standard ones.

They provide some protection against theft during employee visits. courier services and other strangers. For a good view, a glass insert is installed in the door. If necessary, inside


In this modification, the free space inside the door is rationally used. A mechanism was installed there that performs decorative and practical functions at the same time.
Note! Such a project is not too difficult to implement on your own. You just need to purchase a watch that matches the product in size. It is better to choose an electromechanical or electronic model in order to reduce the operational burden on users.

It must be remembered that such accessories should not interfere with free movement. To store a large number of keys, you can use the internal volume, or open shelves.


It is not difficult to make a wooden wall key holder at home
One of the main advantages of this material is the ease of processing. A beautiful and functional housekeeper made of wood with your own hands can be made using the simplest carpentry. To give the desired size and shape, chisels are also used. An ideal flat surface is created using a planer, sandpaper. Interesting natural cut lines are preserved using clear varnish. If necessary, decoupage or other decorative coating techniques will be used.

In the example in the photo, you will need to find a birch log that is suitable in size. After cutting and stripping the ends, hooks are screwed in from below. This completes the manufacturing process of the device.
This product is a suitable illustration of the shortcomings simple solutions and the material itself:
- The primitive appearance imposes significant restrictions on matching the interiors.
- Without treatment, the log will become a source of pollution.
- If the product is not treated with a deep primer, the structure will be quickly disturbed by changes in humidity and temperature.

Buying a wooden wall key holder in a store is not difficult. But it is much more pleasant to create the desired product yourself. With the correct implementation of plans, it will become a source of pride, which will be shown to guests.

This example shows that the key holder, with the appropriate equipment, can be used to store jars and smartphones, gloves and other small items.
Reliability and durability of metal wall key holders


Metal products are highly durable. They keep their functional characteristics for many years of operation in excellent condition. When using special technologies, these materials create parts of complex shape. The only drawback can be called the destruction of corrosive chemical reactions. To exclude such negative manifestations, various types of decorative and protective coatings are used.

Metal is more difficult to process than wood. For the manufacture of some products, you will have to master welding, casting, and other complex technologies. You will have to equip your home workshop accordingly. Even without careful analysis, it is clear that the total investment will be significant.
What is good about do-it-yourself plywood housekeeper
This material is better than the options discussed above for the following reasons:
- Plywood is created in the factory, so the thickness and other characteristics are known exactly.
- If you purchase a moisture-resistant variety, you can prevent damage by appropriate external influences.
- The outer surfaces, even without processing, are quite even. They are well suited for applying images using different techniques.
- Unlike metal, plywood is not difficult to process.
- Even large products from it weigh a little.

These original key fobs are a convenient means of identifying whether keys belong to different users.

With an ordinary jigsaw, you can cut such a wall key holder with your own hands from plywood. It is easier and faster to create similar products using power tools

Persistent drawings and inscriptions on plywood are created using pyrography (burning)

You will need to purchase a special tool kit

After mastering the technology, it will be possible to create independently similar and more complex images. For better preservation, the drawings are covered with a transparent varnish.
Important! When using plywood, the relatively low hardness of the material is taken into account. Attachment points for hooks and other additional parts may loosen over time. Also, one must not forget about the limited resistance of wood to moisture and microorganisms. To protect against them, special impregnations are used.
Quick creation of do-it-yourself key holders from cardboard


These pictures explain the algorithm for creating a functional . It will take a preliminary compilation of a list of necessary components. In order not to be mistaken, you should prepare the project in advance. It is enough to make a freehand sketch with dimensions and other design parameters. You should also choose and master the application of beautiful persistent images in advance.
This material itself is inexpensive, but you will have to take into account the additional costs of production technologies. We must not forget about the limited resistance of cardboard to mechanical stress, high humidity

In this photo of a do-it-yourself wall-mounted key holder, only a container for small things is made from the box. A solid base and decorative overlays are made of plywood. Metal hooks with the desired aesthetic characteristics are purchased from the store.
Examples from other materials
The parameters of the pocket accessory are selected taking into account the size of the keys
Photo of a do-it-yourself wall key holder made of leather
This complex three-dimensional composition is made of wood and papier-mâché. Having fixed the hooks at the bottom, it is not difficult to transform it into a full-fledged key holder.
Factory made plastic
Stained glass window
Fabric key holder
These examples clearly demonstrate wide opportunities using different materials. Quite often, masters use combined designs. When preparing the corresponding project, the following general recommendations should be taken into account:
- The power frame is calculated taking into account real future loads.
- Dimensions are selected so as to exclude obstacles to the free movement of people.
- All parts of the product must be designed for the respective operating conditions. If necessary, they are protected from adverse external influences.
- In any case, it is necessary to consider the whole complex of works. Some complex components (hooks, locks) can be purchased from the distribution network, or ordered from a specialized workshop.


Do-it-yourself key holder: a master class and useful recommendations
Before making a pocket key holder with your own hands, you need to decide on the method of fixing objects inside it.


In this example, you can consider some of the components:
- button for locking in the closed state;
- a carabiner can be attached to this useful accessory to the belt;
- rivet;
- device with rotary elements for keys;
- edges to prevent wear.
For manufacturing, you will need not only leather and the special metal fittings listed above. The drawing of the workpiece and cutting will not cause significant difficulties. However, a quality seam.


To make a do-it-yourself wall key holder made of wood, you do not need to purchase expensive specialized equipment. A suitable blank can be a completely free snag of a special shape, found during a walk in the forest. When buying in hardware store small boards, plywood - significant costs will not be needed. You can also buy standard fasteners, hooks, varnishes and paints.

The following description will help you create such a housekeeper in the hallway with your own hands without errors:
- After clarifying the dimensions, you need to buy plywood (up to 10 mm), rings with key chains.
- Make drawings of individual parts in life size. With its help, patterns of the lower and upper parts, key rings are cut out of thick paper.
- They are applied to a sheet of plywood and outlined with a pencil.
- Cutouts are made along the marked lines with a jigsaw.
- Surfaces are sanded with sandpaper. Drill holes in the key rings for the subsequent installation of rings.
- The "house" and the base are fastened using PVA carpentry glue.
- "Hearts" and other decorations can be applied using burning devices.
- Products are varnished. After drying - fix on the wall.
When creating a wall key holder with your own hands, it will help to improve the decorative parameters of the product without extra costs and personal artistic talents. Therefore, this technology is worth studying in detail:
- Surface preparation removes chips, bumps.
- Apply 2-3 layers of white paint, which forms a neutral color background and eliminates minor defects.
- The pattern you like is cut out of the napkin, the edges are made uneven.
- Having attached such a blank in the right place, it is applied (transparent PVA). Movements from the center to the sides remove air bubbles.
- After drying - varnished.
Article
The best way to keep your keys in order is with a wall-mounted key holder in the hallway! In my apartment, all the keys were lying in bags and pockets exactly until such a wonderful thing was done. She made life a lot easier and even freed up some free time. Moreover, it is practically perfect option handmade gift for a housewarming or wedding. I give 100% that the gift will look spectacular, impress everyone and be remembered for a long time. In general, today a master class on how to make a housekeeper with your own hands, choose for her beautiful decoration and securely fasten the fittings.
Work materials
1. Wooden frame 13x18 cm or larger. The key holder in the photo is 17x22 cm. The width of the baguette profile itself should be at least 2.5-3 cm.). If we take a plastic frame, then the width of the baguette should be at least 3 cm and it will not be too overloaded with keys. It is best if the frame has its own suspension on the d-rings, and not the usual photo back. 
If they are not available, then you can buy them in a framing workshop or some hobby stores.
2. A beautiful napkin or a picture with the desired image, or a ready-made decoupage krata.
3. A standard set of materials for decoupage - glue, white primer, acrylic varnish, brush.
4. Hooks for keys (we look at the photo for an option - half-ring screws, buttons or classic hooks) - they can be purchased at hardware stores
5. Knife, ruler, simple pencil, screwdriver, awl or drill, several self-tapping screws 3.5x16 cm.
Subsequence
 The master class consists of two stages - decoupage and assembly of the housekeeper. I start with decoupage.
1. I disassemble the frame, remove the backdrop from it and go through the white ground in 2 layers. Waiting for it to dry or dry it with a hair dryer.
2. I glue the selected fragment of the decoupage card onto the glue.
3. After drying, I varnish in 2 layers. Again I wait for it to dry, then I insert it into the frame. In general, nothing complicated. Now the master class is coming to the most interesting stage with different options- attaching hooks.
4. If the frame is wooden, then choose right on it where the hooks will be screwed and outline  holes for self-tapping screws with an awl or pencil, drill and fasten the hooks. That's all. Worse, if the frame is plastic. Then either at our own peril and risk we fasten the hooks on the sides of the baguette itself, or we do more robust design, as in the example in the photo. To do this, we collect a wooden stretcher inside. You can either order it ready-made in a framing workshop, or assemble it yourself from a beam 2-3 cm wide. and attach to the frame with mounting tape.
To show how all this can be done, I completed my master class just from a plastic frame. How to do this is shown in detail in the photo of the back side.  If you are reluctant to mess with the stretcher, then you can go the other way - at the very beginning of work, remove the backdrop from the frame, measure the ruler and cut out exactly the same piece of plywood or chipboard on which to decoupage, and then insert it into the frame. And attach the hooks directly to the plywood.
5. I hang it on the wall with 2 self-tapping screws, on which I put on the d-rings of the frame. We do not hang it on a rope or cable, it will hang out and the keys will start to fall off.
The master class is over. The keychain is ready!
This master class shows, perhaps, the easiest and most budgetary way to make a housekeeper with your own hands. It is simple in terms of materials, manufacturing techniques and does not require much time.
Other ideas for making a key holder
There are plenty more different ways and ideas for making such a wonderful interior gift - from embroidery, with a photo, comic and others. I will share with you my ideas.
With embroidery
One of the coziest and warmest options is to make a key holder with embroidery. The photo shows three examples of such solutions, moreover, in each embroidery is framed not just in a frame, but in the form of an opening box with hooks attached inside. The box inside can be painted over with acrylic paint or sheathed with a velvet mat. It will take a lot of time to make a gift, but the result is worth it! An easier way is to frame the embroidery and attach the hooks directly to the baguette, as in the next photo.
Another idea with embroidery for a wedding or a housewarming party is to make a metric for the newlyweds or housewarming parties on the embroidery with their names and indicating the date of an important event. Such a gift immediately becomes personal and even more expensive for its addressee. 
With photo
If there is no time for embroidery, then why not insert a finished photo into the frame? Then the hooks can simply be screwed onto the baguette as our master class tells. The idea is simple to implement, but it will be possible to preserve the personality of the gift, especially if instead of a simple photo, make a small photo collage and decorate it using digital scraping technique.
With humor
Wall key holder can be decorated in a comic style. Here is a short tutorial: remove the backdrop from the finished frame, sew on it a few items - a banknote, vintage keys, or any other suitable items.  From below, attach a sign printed on the printer “in case of urgent need to break the glass!”, Then collect it all back into the frame under the glass.
From a branch
A rather extravagant option for eco-style fans can be made from a thick branch. The tree will have to be thoroughly dried and soaked through with furniture varnishes, then attach the hooks and get this pretty custom solution for the interior.
From the finished base
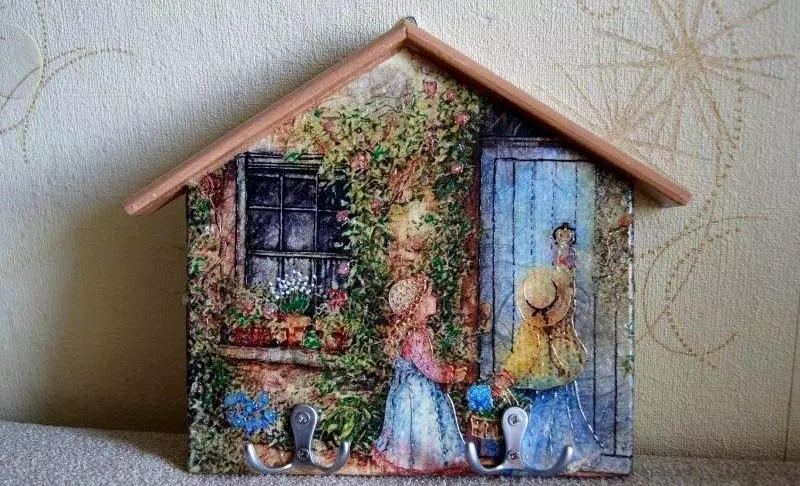
The easiest option is to make a key holder from a ready-made base for decoupage, which are sold in hobby stores. A plywood blank can be made in any shape, for example, in the form of a house. It will have to be decorated using decoupage technique.
From old furniture
Another mega-creative option is to make a key holder out of an old locker door. How to bring it to life, the following video master class tells in detail: