European building technologies have always been thoughtful and comparative simplicity. Now they are already well known and accessible to domestic customers. One of these technologies today at the center of our attention, namely, a series of suspended ceilings of the Tigi-Knauf system P112 and P113. Although there are some differences in general, the constructive similarity between them is quite obvious. This technology was developed by the German specialists of Tigi-Knauf and today with their installation, even ordinary homemade craftsmen, who have no big construction experience cope with their installation. Suspended ceiling Knauf is widely used not only in the arrangement of residential premises, but also when the buildings of industrial, public or office destination are erected.
On a note: Available cost and simplicity of installation make them more and more popular.
We will understand more about the reasons such as the popularity of the Knauf mounted coating and look at the main points of them.
The advantages of the coating Knauf.

Let us turn to the list of the most significant advantages of the CNAUF ceilings:
- change in the height of the installation of the suspended ceiling system depending on the preferences of the customer;
- masking of all communication systems and technological protrusions, for example, the angular parts of the slab slabs of the old sample;
- creature various shapes in several tiers according to designer developments;
- the ability to install embedded lighting elements;
- combination with other types of materials for finishing;
- admissibility of installing an additional layer of heat and sound insulation.
Some conditions for starting installation work
Pay attention to them:

- The complex of work on the installation of suspended ceilings "Knauf" is better to start at the stage of finishing the premises. However, there is one condition, to ignore which is contraindicated: the installation of the plasterboard design is not worth starting until all works are completed with wet processes. The walls before installation of the coating is also desirable, but optionally, to align, especially if it concerns cement-sand plaster.
- Work should be carried out only in conditions normal humidity In accordance with SNiP 23-02-2003. The temperature indicator when installing the ceiling from the GCL should not be descended below 10.
- The start of installation is preceded by calculations and applying marking lines. The profile system must be calculated for a certain degree of loads.
Accessories for assembling ceiling Knauf

The necessary elements for the construction of the suspended ceiling construction Include:
- guide profiles Mon 27 × 28 mm -UD. Of these, a perimeter outline is formed by supporting profile support and creating general level plane of the installed web;
- bearing profiles of PP60 × 27 mm - CD. They are used for direct attachment of plasterboard plates. They connect opposite walls and are located in parallel to each other on a clearly indicated distance;
- connecting elements P60 × 27 mm. The elements called "crabs" are used to connect the carriers of CD profiles in straight or perpendicular directions;
- metal suspensions: anchor and straight. Their role is to hold the supporting profiles displayed in the same plane. They are attached to one side to the ceiling base, the other to CD profiles;
- extension cords (connectors). Very convenient when building guide profiles;
- plasterboard sheet (GLC) "Knauf". Several modifications of the GLC are possible with the same sizes: GLC (normal), GKLO (fire resistant), GKLV (moisture resistant);
- fasteners: Piercing self-clocking screws with ln used to connect profiles without climbing; TN 25-30 screws for fixing plates to profile carcass; Anchors used when installing suspensions for the ceiling.
Technical description
In the finished condition of 1 square. m. Suspended ceiling "Knauf" weighs about 13.5 kg. Some mass change is possible when using plasterboard sheets of different typesSince they can change density and thickness.
For the construction of 1 square. m. The mounted construction will be needed:
- UD profile (guide) - the metra is equal to the perimeter of the room + a small margin of 1-2 m;
- CD profile (carrier) - 2.9 m.
- connector "Crab" ~ 2 pcs.;
- direct or anchor suspension ~ 1 pc.;
- the profile connector - applies only when it takes to increase the missing part of the UD profile;
- plasterboard sheet - 1 square. m.;
- fasteners - their number may vary depending on the structure of the structure, the nature of the walls and the ceiling;
- self-tapping screw LN 9 - 2 pcs., But it is better to always have a small margin at hand;
- tN 25 screws - 25-30 pcs. They fix, and then hold drywall on the frame;
- anchor mount ~ 1 pcs.;
- dowels K 6/40 - 2-3 pcs / 1 p. m ud-profile;
- reinforcing sulfur grid width of about 10 cm - 1.2 m;
- gypsum mixture "Knauf-fogenfuller" - 0.3-0.5 kg. It is applied only for careful sealing of interputric seams, hats of self-tapping and damage, for example, broken corners, samples in a sheet, etc.;
- the primer composition "Knauf-Tiengrund" - 100 ml.
Preparatory work
Tool
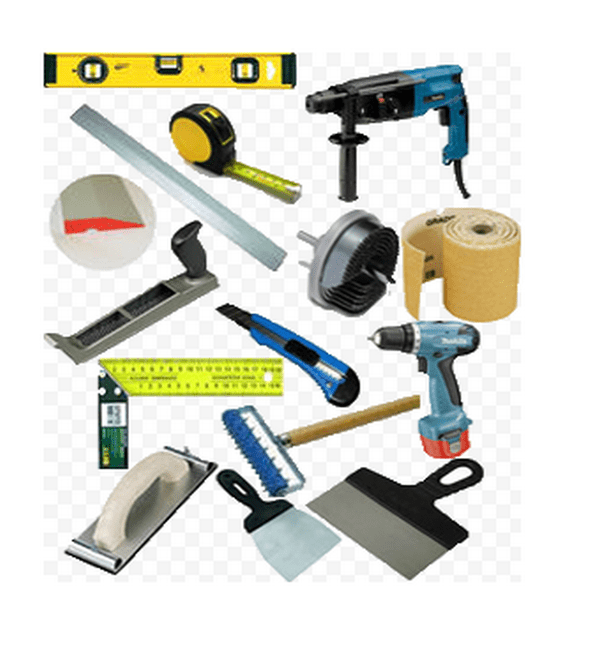
When conducting mounting work It will take the next instrumental set:
- ladder-stepping;
- perforator with a brown ∅ 6 mm;
- scissors for metal;
- electric screwdriver;
- long rule;
- chokline (color marking cord);
- roulette, square, pencil;
- normal or laser level, which is even preferable;
- acute and hard construction knife;
- plates for the removal of chamfer on the ends;
- set of spatulas.
Marking

For high-quality markup, it is better to use not one, but several tools. The markup is performed as follows:
- after determining the lowest point of the ceiling and, taking into account the height of the embedded luminaires, the base mark is put on the wall, which is later transferred to all angles. Using laser level Marks can be put immediately in all corners;
- all marks are connected by a solid line of the applied marking cord;
- on the base ceiling, the geometrically correct mesh with a cell size of 60 × 60 cm.
Arrangement of carcass
Due to the fact that all the marking lines are already applied, you can proceed to the main part of the installation work:

- we produce fastening UD guide profiles throughout the perimeter. Normal mounting step 40-50 cm;
- drilling perforator holes for plumbing along lines marked on the ceiling, and secrets each suspension with two fasteners;
- install according to ceiling markup carrier profiles CD and fix them to suspended elements;
- check the correct installation of the carrier part by applying long rule And if necessary, eliminate inaccuracies. You can use a transversely strained thread for these purposes.
Fastening of drywall sheets Knauf

It is desirable that in order to avoid the appearance of cracks, the fixation of the sheets was performed by a rotator with a longitudinal displacement at least by 30-40 cm. Each separate self-tapping screw should be screwed up, having to sleep in GCL at least than 1 mm. And a few more subtleties:
- the end of each sheet must be placed in the middle of the CD profile;
- all the ends of the sheets are not having factory chamdes, it is necessary to pre-treat with an edge planer at an angle of 22-4 45 °;
- first you need to mount all the whole sheets, and then you can move on to the installation of fragments;
- gLC fixation is made in increments of 10-15 cm;
- after the fastening of the plasterboard with the help of a sturdy putty "Knauf-fugenfuller", all interputric junctions are carefully close. On top of the layer of putty in the raw state, the sulfur mesh is stacked, the edges of which should block the joint with a margin of several centimeters. Usually, for these purposes, standard rolls are used. 10 cm wide. The protrusions of the mesh and the layer of suture putty below the level of the ceiling plane are not allowed.
Now it remains to fulfill the last part of the ceiling finishes, applying two layers with a break for drying finish putty "Knauf".
Video on the topic
We have such a technique to be widely used when conducting finishing works in offices, and residential premises. Due to the low cost of materials and high speed of work, construction organizations everywhere use innovative technology "KNAUF".
Suspended designs from drywall are excellent characteristics and are able to quickly change appearance premises. Plates from plaster are easy, have a perfectly smooth surface, ecologically neutral and quickly mounted by a small group of trained specialists. Having a little snarling and a regular tool, installation and replacement of plasterboard sheets can conduct even a smallly prepared worker. In our country, plasterboard has become one of the most sought-after and widely used materials.

Using modern materials And technology makes it possible to more rationally maintain repair work. Plastic material allows you to create multi-level structures of different shapeswhat helps visually expand inner space Apartments.

Suspended ceiling from Knauf-sheets on a single-level frame
Today, many builders prefer instead of wet plaster use comfortable, durable cast carcarton. They guarantee that work will be held in as soon as possible, and the surface of the ceiling will become perfect smooth and smooth.  If necessary, the prepared plasterboard ceiling can be quickly painted or caught with wallpaper. Conducting repair, and without having enough funds can be easily exit from the position using new technology. A single-level ceiling can be mounted independently without attracting qualified specialists.
Enough observe simple rulesHaving marked and install a metal frame. The main thing will be determined in advance with what type of lighting you will use subsequently and pave the inner wiring. When installing embedded point lamps The height of the gap between the base and plate of plasterboard should be approximately fifteen centimeters. This will help to build lamps, drowned them in the ceiling. If you are going to illuminate the room by external lighting devicesThe gap should be no more than five centimeters. 
- (2) Knauf-profile PP 60/27 - 2.9 Pog. M.
- (3) Knauf-profile Mon 28/27 - * Pog. M.
- (4) Profiles extension 60/27 - 0.2 pcs.
- (5) Single-level connector 60/27 - 1.7 pcs.
- (6a) Suspension with clamp 60/27 - 0.7 pcs.
- (66) Suspension thrust - 0.7 pcs.
- or instead
- (6B) Suspension straight 60/27 - 0.7 pcs.
- (6g) Screw LN 9 - 1.4 pcs.
- (7) TN 25 screws - 23.0 pcs.
- (8) Anchor element - 0.7 pcs.
- (9) Dowel to 6/35 - ** pcs.
- (10) Reinforcing ribbon - 1.2 pog. M.
- (11) Knaf-fugen putty - 0.4 kg
- (12) The primer of KNAUF-TIFENGRAND is 0.1 liters.
Make sure the location of the lamp has a reliable durable frame and can withstand the weight of an external design. All posting connections must be carefully drawn.
Suspended ceiling from Knauf-sheets on a two-level frame
Complex structures that have several levels better put in a room with a large area. This will help to visually delimit the inner space, allocation of recreation areas and work. A similar ceiling is ideal for disguising the additional volume of communications passing on the basis of communications. The two-level framework is much more complicated so much more difficult. Therefore, it should be attracted to the work well-wearing specialists. Small protrusion working area It will help to place in it a set of lamps that will allocate the site and help to give the room individuality.
For more contrast selection of the zone, you can repeat the ceiling pattern on the floor, which will make the room design more beautiful and original.

Composition of a complete system - quantity on m2
- (1) KNAUF leaf GSP-A (GSP-H 2, GSP- DF) - 1.0 m2
- (2) Knauf-profile PP 60/27 - 3.2 pound. M.
- (3) Profiles extension 60/27 - 0.6 pcs.
- (4) Duplex connector 60/27 - 2.3 pcs.
- (5a) Suspension with clamp 60/27 - 1.3 pcs.
- (56) Suspension thrust - 1.3 pcs.
- or instead
- (5V) Suspension straight 60/27 - 1.3 pcs.
- (5g) Screwing LN 9 - 2.6 pcs.
- (6) screw TN 25 - 17.0 pcs.
- (7) Anchor element - 1.3 pcs.
- (8) Reinforcing tape - 1.2 pound. M.
- (9) Knaf-fugen putty - 0.4 kg
- (10) Primer Knauf-Tifengrund - 0.1 liters.
Collecting, makes multi-level ceilingMake sure the height and volume of the room allow you to conduct similar works. The design looks great only in large rooms, so duplex ceilings Most often put in private homes and cottages where they can fully reveal their capabilities. Attached by contour LED summer will help make the construction more air. In addition, multi-colored LEDs helps to quickly change the mood of the room using lighting.
Necessary elements for assembling ceiling
Before starting work, you need to carefully think about what kind of design you will create. Make up detailed plan And put on the sheet paper the desired number of materials that you need during the work process.  In this case, you will not spend a precious time in search and delivery of missing tools and materials. For cutting sheets of plasterboard, electric jigsaw or ordinary hacksaw is used. If you are going to make a figured, a multi-level ceiling will probably need sheets tight cardboardwhich are used for making patterns.
Storage plasterboard plates should be horizontal. Most the best way Save them in perfect condition, It is put on a sheet of thick plywood on the floor. When cracking fails, do not be discouraged. After installation, expand the damage place and fill it with putty. After it dries can be seized this section that will completely hide the crack. 
Mon 27x28 and PP 60x27
For mounting the frame, two types of galvanized profile are used, each of which has its own purpose and performs certain functions. 

Suspension and Connectors (crabs)
By making markup, it is necessary to clearly take into account the step between the fastening suspension by the employees for fastening the ceiling profile. The thymus suspension is guaranteed to power the weight attached to the base of the frame and the plasterboard plate.  The profile connection places are made by a special "crab", which has a reinforced housing and special attachments. The suspensions and crabs are installed in strict orders in a predetermined sequence of marking lines.
KNAUF-sheets GLK
For the manufacture of a suspended ceiling of drywall, sheets that have certain characteristics are used. If you are going to mount the design in the kitchen, you must consider that there will be jumps of temperatures and moisture is changing.  When working in the bathroom, there will be plasterboard not afraid of water from entering, but making complex structures The sheet should have a small thickness and high plasticity.
  Today you can meet materials having several useful propertiesTherefore, it is necessary to decide in advance which leaf of plasterboard is ideal for repairing in your home. The cost of repair depends on this.
Materials for fasteners
Choosing fasteners for plasterboard CeilkovIt must be borne in mind that for its durability and strength, screws and self-tapping screws with wide hats are perfect. 

When mounting plasterboard plates, it is necessary to leave the gap of at least two millimeters this will help the design of being more movable. The joints are closed with a special putty with necessarily reinforcement of this space.  After the work performed the entire surface of the ceiling is polished with shallow sandpaper until the perfectly smooth and smooth surface is obtained. After that, you can apply paint or glue wallpaper. The thoroughly each stage of work, the better and durable will be the result of your work.
Plasterboard ceilings have long been the main way to behavior internal finishing works in the premises of any area and configuration. For a short period of time, you can drastically change the appearance of the apartment if you correctly use innovative technology.
There are no similar posts, but there are more interesting.
If you decide to make repairs in the apartment, fixing the irregularities of the walls and the ceiling, insulating the room, create elegant design with various multi-level designs and backlit, then certainly you need to pay attention to such material such as plasterboard. He gives the opportunity to create new look Your apartment, and, which is very important, with your own hands. Working with him is a pleasure, even a newcomer will cope with it, who has no experience in construction. Another important advantage - all this will cost rather cheap compared to other finishes. But when you come to the store, you see many kinds of plasterboard sheets of various manufacturers. Namely, the quality, durability and reliability of repair depends on the choice of GLC. Plasterboard Knauf. - A good option, acceptable by price, which will pay off a long service life. In this article you will find information about the products of this manufacturer and, most importantly, how to build, observing the technology of KNAUF, plasterboard walls and partitions as well hinged ceilings From GLC of this manufacturer.
Requirements KNAUF to frame frame and ceilings
"Knauf" provides a huge part of the construction market. It produces plasterboard of many species, profile, various construction mixes, Materials of thermal insulation. Therefore, it would be good to buy all this in the kit. It will simplify and speed up work, increase the reliability of the structure. If there is no possibility to purchase a set, then you need to take care of the proper quality of materials purchased separately so that they are in their characteristics to be as close as possible to KNAUF products.
PNG "Alt \u003d" (! Lang: Technology knauf plasterboard Walls and partitions "width \u003d" 606 "height \u003d" 311 "srcset \u003d" "data-srcset \u003d" https://remontcap.ru/wp-content/uploads/2017/10/01-3..png 300W "Sizes \u003d "(Max-Width: 606px) 100VW, 606PX"\u003e 
The basic requirements that are needed for the long service of drywall KNAUF, such:
- It is necessary to install using the KNAUF GKVL. This prevents the material damage when freezing the frame profile
- To prevent deformation or saving a frame under the mass of GLCs, long profiles should be installed in a checker order.
- For fastening, special screws Knauf or LN9 screws are used, you can also use a gypsum coaster for drywall
- Over the doorway, the docking of sheets is prohibited, this is done so that the vibration and weight of the door itself do not damage the connection of sheets
- After assembling the frame, it is necessary to protect its surface with thermal insulation ribbon to protect against freezing
Under the guidance of these rules, observing all the instructions and recommendations of the KNAUF on the installation of plasterboard, you will achieve best resultAnd repair does not have to update for many years.
Installation of drywall on technology KNAUF
Installation of plasterboard knauff sheets It is not very different from working with HCL of other manufacturers. The difference is that Knauf releases almost everything that is needed to cover the walls and ceiling by drywall, and all this is a complete system, which will simplify and improve work, because all parts are ideal for each other, you do not need to suffer with non-standard fasteners and other trouble.
Wall Facing Technology and Mounting Gypsum Country Parts Knaf
Under GOL. Knauf Wall prepare the same as for other brands. First, purified from the remnants of last repairs (old wallpapers, framework elements). The surface is ground, processed by special compositions to protect against corrosion. If there are cracks in the wall, they must be elapsed by plaster.
JPG "Alt \u003d" (! Lang: Technology Knauf Plasterboard walls and partitions" width="620" height="627" srcset="" data-srcset="https://remontcap.ru/wp-content/uploads/2017/10/Rigips_povodne_7-1013x1024..jpg 297w, https://remontcap.ru/wp-content/uploads/2017/10/Rigips_povodne_7.jpg 1200w" sizes="(max-width: 620px) 100vw, 620px">!} 
Instructions for mounting drywall Knauf on the walls and when creating partitions:
- A frame plan is thought out, a doom is created on it - first the vertical guides, they are horizontal. The more horizontal, the greater the strength and rigidity of the structure. The frame is mounted from the steel galvanized profile, it is desirable that it also was brand Knauf. But you can also use wooden bars To create a frame;
- The frame is two species: static and mounted. The first is attached directly onto the wall, it is considered more reliable because of this, and the second is attached to the designed suspensions specifically for this. It takes out the square in your apartment, but it happens very convenient to hide communications;
- Empties between the profile fill mineral Vata. or other similar material for best thermal insulation and protection against external noise;
- If you need to cut off the sheet, use the hacksaw to mark all over the surface of the sheet, and then gently shake. Ends are processed by primer;
- Plasterboard is attached to the profile or screws Knauff or self-drawing. The step should not be more than 25 centimeters, by calculation on each sheet accounts for 8 screws;
- On the seams of the sheets of sheets glued a special tape, which, after coated with plaster;
- Of finishing Gypsum Carton requires only primer, then you can lay it on it decorative tiles or stick wallpaper.
Mounting technology of drywall Knauff on the ceiling
Build a frame for plasterboard KNAUF is made in several ways, depending on structural features Ceiling and room itself. Use for this and wooden brushes, and metal profile. Most often apply five types of structures:
- "System 111". Used for wooden bars. Two-axis frame. The material is a tree coniferous rocks, humidity no more than 12%, otherwise after drying the frame is very deformed
- P 112. It is made of metal profile KNAUF, also two-axis
- P 113. The same frame as the previous one, but is executed in the same axis. For these two types, an ordinary galvanized profile for ceilings is applied
- P 131. A significant difference from the rest - the profile fastening is not made to the ceiling, but to the walls. Must provide even greater rigidity, so used reinforced profile Knauffdesigned to create plasterboard partition systems
- P 19. A complex multi-level construction is a bright representative of architectural and decorative ceilings.
Data-Lazy-Type \u003d "image" data-src \u003d "https://remontcap.ru/wp-content/uploads/2017/10/04-77-600x338..jpg 600w, https://remontcap.ru/ WP-CONTENT / UPLOADS / 2017/10 / 04-77-600x338-300x169.jpg 300W "Sizes \u003d" (Max-Width: 600px) 100VW, 600PX "\u003e 
Installation of a wooden frame occurs in several ways:
- With direct suspension or speed. Using the second, you need to change the side of the attachment
- Straight on the ceiling by self-drawing
Metal profile frame mounted with multi-level suspensions. P 113 is used where heavy ceilings will be, so the material for it serves wall profile, and the distance between the dowels should be not more than 30 cm.
You significantly reduce the time spent on repair and save force if you follow some Tips and Recommendations:
- Fastening sheets worth starting from the corner or from the center, in order to protect the sheet from deformation and cracks
- From the edge of the sheet, the plasterboard should be removed the chamfer. But for different species at different angles (45 or 22.5)
Technology KNAUF on the installation of plasterboard provides for seams with a special tape:
- First, the seam is filled with putty;
- Then laying ribbons for seams;
- Putty tape coating with a thin layer.
Also, the special separation tape KNAUF is installed between the GLC leaf and an outer angle.

Selecting the option of finishing the ceiling surface is one of the most important tasks that need to be solved when performing repair work. The modern building market offers quite a lot of materials with which the task can be solved in several ways. As one of the options, the technology "KNAUF" can be considered plasterboard ceilings. About the most important principles conducting such works and will be discussed below.
After performing the ceiling on the "KNAUF" technologies, the result is obtained more reliable and durable.
General description of technology
First of all, it is necessary to determine what is meant by the definition of the "CNAUF technology". So it is customary to call one of the options for the manufacture of suspended ceilings, in which the elements create the plane are used plasterboard sheetsfixed on a special suspended frame. Taking into account the specifics of the materials used, the end result is distinguished by the strength and ease of manufacture.
Characteristics of the ceiling
Before making a decision on the choice of the technology under consideration, it is worth familiar with its most significant operational characteristics. So, among the benefits, you can allocate:
- High speed of work. If everyone required tools The presence of masters are present and the qualifications of masters are sufficient, then you can mount this ceiling in the mid-size room during the day.
- Universality. The ceiling according to the "KNAUF" technology can be mounted in the room almost any dimensions and configurations.
- Practicality. The plasterboard surface is simple with further processing and allows you to use any selected material. In addition, the technology implies the presence of a certain gap between the surface of the surface and the final coating, which can successfully level almost any ceiling defects or close the communications lines.
- Additional features. Making a plasterboard suspended ceiling allows you to pave a layer of noise insulating or insulating material, which may not be superfluous.
- Variability. Here we are talking about that if the CNAUF technology is selected as the ceiling finishes, a variety of diverse structures can be mounted. A single-level ceiling can be transformed with point lamps, and if desired, multi-level structures are installed.
As a lack, it is possible to consider the fact that the ceiling of GLC on the "Knauf" technology significantly reduces the overall level of the ceiling. This factor can become decisive, especially in premises that are not characterized by dimensions.
Materials and tools
Before working, you must prepare all the necessary tools and materials. One of the features of the technology is that the use of accurate measuring instruments is required for work. The fact is that the carrier frame required for the ceiling includes a set composite elementsthat should be located strictly in terms of level, and therefore the presence of a laser level is welcome.
In addition, it is necessary to purchase special metal profilesfrom which will be created basic structure. For these purposes, two types of guides will be required - one for installation around the perimeter of the room (pn 27 × 28) and the second - to install other framework elements (PP 60 × 27).
Also in advance should be purchased required amount Plasterboard, which develops at the venue for work a few days before they are started. The fact is that plasterboard absorbs moisture, so it will take some time to align the moisture content of the material and the room. If you do not comply with this rule, then the fixed sheet may be a story. Among other things, special elements of fasteners "crabs", self-tapping screws and a screwdriver with a special battle.
Conducting work
If everything is ready for work, then it is necessary to produce them consistently, dividing into separate steps.
Marking
One of the most important stages is the markup. As mentioned above, it is extremely important to comply with the maximum accuracy of the frame installation, which is ensured from the definition of the horizontal line, which will pass throughout the perimeter. In the case of the application of the laser level, the task is simplified as much as possible. If the water level is used, then two points are noted on one of the walls, and then they are connected by a special folding cord.
The procedure is repeated on all four walls. If everything is performed correctly, the result is a smooth horizontal level, which will serve as a starting point.
Montage Karcasa

The frame of the ceiling is performed on special suspensions in the form of "P", which must be used to the old ceiling.
Before installing the longitudinal and transverse frameworks of the frame, markup is performed and special P-shaped suspensions are attached. To install them, it will also be necessary to perform drilling. The distance between the fasteners elements should be about 40 - 50 cm.
Then the longitudinal and transverse elements of the crates are installed, for which the guides along the perimeter and the suspension are used. It is important to ensure that all the elements are in the same plane.
At the end of the work, a smooth doomle made of metal profiles and sides of 40 × 40 cm cells should be obtained.
Sheaving
The final stage of the work is the framework of the frame of the plasterboard sheets. Everything is quite simple here, especially if a special bit with a limiter is used, which will not allow the self-tapping screw to disrupt the integrity of the external layer of material. Sheets are sewn close to each other over the entire area of \u200b\u200bthe ceiling, and between the walls and drywall, 2 - 3 mm should be left.
As can be seen from the above, the technology of plasterboard ceilings "KNAUF" does not constitute anything overhaul. When complying with the necessary technological conditions and the presence of basic handling skills to cope with the task can be independently.
IN last years, suspended structures They become more and more popularity. And all because with their help you can create original design, By excluding the dirty finish processes.
In this case, you can quickly mount the ceiling big SquareWhat is also not unavailable to builders.
Many manufacturers, including the German firm "Tigi-Knauf", offer our attention not just separate construction Materials, and complete systems of KNAUF - suspended ceilings. It is very convenient: acquiring such a system, you do not need to worry about the fact that some details may not be suitable in size or drilling.
Each set is attached to the assembly instruction, following which, you can make installation with your own hands. Here we will tell you about these ceilings.
Constructive features
The system of any suspended ceiling is reduced to one: it consists of a hard frame that locks up to the base ceiling and decorative coatingin relation to it in suspended state. Hence the name.
It can be both metal and wooden. But the modules from which are going to decorative surfaceThe type of material used can be the most different.
The most affordable at the price are ceilings from drywall, and the leader in their production is a company with a world name that produces its products under the Knauf trademark. The company specializes in plaster, producing on its basis all sorts of primers, spitels and dry plastering mixes, not to mention well-known all sheets of plasterboard.

The suspension ceiling made by Knauf may have different functional purposes. For the device of moisture-resistant ceilings, modules from G Clac, for - perforated, and so on.
The most popular models of Knauff
P211 (option 1)
- This option has a frame consisting of wooden bars with square 3x3 cm, or a rectangular 5x3 cm section, which are attached to the overlap on direct suspensions. A suspended single-level surface is created from whole plasterboard sheets that are fixed to the bars.
The overall weight of the design is about eleven kilograms.
P211 (option 2)
- There is a framework structure of the frame. Bruks, unlike the first option, are located at different levels.
It is used when creating a multi-level construction. The frame also consists of wooden bars.
The price of P-211 is the lowest, which makes this system attractive for the wide masses of the population.

P212
- Such a design provides for a frame not from a tree, but from metal profile of PP 60 × 27. More ceiling P-212 is no different from P-211.
Here, too, there are two options: in the same level, and at different levels.

P146.
- Acoustic ceiling, which is collected from metal profiles T-shaped T 24x32. The decorative layer uses either square plates, measuring 60x60 cm, or rectangular 60x120 cm.
They can be perforated, or simply decorated, as in the photo.

P19
- This type of construction is called a complex architectural and decorative ceiling. The combination of different section profiles forms a multi-level frame with curvilinear surfaces.
Suspended ceilings KNAUF SYSTEM P-19, are not massively produced, but are carried out strictly by the design project.

Fastening elements of ceilings Knauf
So:
- For the assembly of the ceilings, Knauf uses several types of fasteners. For fixing the P-shaped profile, anchor suspensions that have a clamp-zero are used.

- For T-shaped profile, combined fasteners are used, they are somewhat different in form from anchor suspensions. In both cases, the thrust is fixed on the suspension using a latch.
- Concerning wooden framesTheir mounting elements consist of two parts: the suspension itself with spike and thrust. The thrust can be of different lengths reaching one and a half meters, with a diameter of 0.4 cm.
It is fixed on the suspension with spikes, through the holes in the squeezing plate. - Direct suspensions are delivered, and when installed, their ends are flexing in the form of the letter "P". They are used when the distance between the basic and suspended ceiling must be reduced to the minimum value.
- Adjustment of the suspended surface of the ceiling with metal carcasy It is performed using nonius-suspensions consisting of three parts: suspension and two clamps.
- Its length, from 0.2 to 1 meter allows you to hang the ceiling almost at any distance from the overlap. Use indoors with.
Installation of such a design, as well, and any suspended ceiling, must begin with markup. According to it, carrier profiles: with a step of 50 cm in length, and 40 cm in width. Exactly like this standard size It has a KNAUF list.
Mounted them with a displacement, after removing the crossed the edge at an angle of 22-23 degrees. How it is done, it is better to watch the video.
Thus, there is a folded groove between the sheets, which will then be processed with a putty, with styling on it reinforcing tape. Further finishing work It will be possible to produce after complete drying of the finish coating.