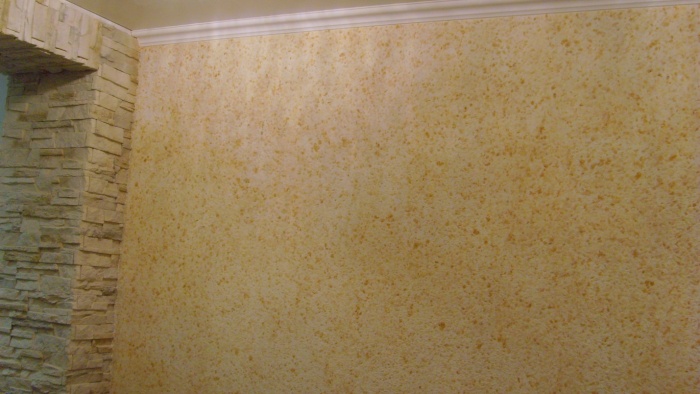
paint, wallpaper, ceramic tile- in a word, any finish fits well only on a perfectly flat surface. That is why any unevenness of the walls in the apartment cannot be ignored.
Moreover, the walls occupy the largest surface of the apartment and are always in sight! If there is even the slightest flaw on the bearing surface, then sooner or later decorative trim may lose its appearance, and you will have to take up repairs again.
Do-it-yourself wall alignment is within the power of even novice home craftsmen. Let's talk about how to level walls with plaster or drywall.
Small cracks or bumps will help hide expensive corrugated wallpaper, but if the walls in your apartment are “wavy”, then only alignment will help.
According to the types of materials used, there are two types of wall alignment - dry (installation various designs from drywall) and raw (using building mixtures). Each of these methods is effective only if a strict sequence of work is observed, but has its own characteristics.
So, leveling the walls with plaster is used when small differences"heights" - from 30 to 60 mm. If necessary, you can level the walls with a greater curvature in a crude way, but this will require more time and money for material and work. In this case, it is better to give preference to the installation of the frame, followed by plasterboard sheathing.
But no matter which method you choose, the main thing is to pay maximum attention to aligning the corners. Curvature, imperceptible to the eye, will manifest itself when gluing borders and installing skirting boards.
Immediately before leveling the wall, it is necessary to carry out a series of preparatory work.
First of all, it is necessary to determine the dimensions of the wall irregularities. When measuring horizontally, you can use the cord by pulling it taut along the wall, or use building level, the length of which should not be less than 1.5 m. Vertical irregularities are measured with a plumb line. If the differences are not more than 3 - 5 cm, then this wall defect is corrected with the help of building mixtures.
Leveling walls with plaster
Before starting work, turn off the power supply in the room. Then carefully clean the surfaces from old wallpaper, paint, peeling plaster, etc. After that, the cleaned walls are treated with a primer.
This must be done so that the building mixture is better fixed on the wall. In addition, the use of a primer prevents delamination of materials and increases their moisture resistance.
For cement mixtures, I use the so-called "cement milk", consisting of a solution of cement, sand and water.
In order for the wall to be even, it is necessary to install beacon lines. The installation of beacon rails begins with the installation of profiles on different sides walls. To check the verticality of the beacons, a plumb line is used.
Then we dilute about 10 liters cement mixture and with a construction spatula we apply it on the wall with large strokes between the beacons. Then we take a rule or an even stick right size and align the superimposed mixture, drawing from the bottom up or vice versa (as it suits you) along the beacon lines.
"rel="lightbox" href="/images/stories/remont-steny/kak-vyrovnyat-krivuyu-stenu-2.jpg">  Add the mixture until the surface of the wall is aligned in accordance with the beacon lines. Trim the corners with a spatula.
When choosing a dry building mix, it is necessary to pay attention to both the thickness of the applied layer and the type of “binding” material (cement or gypsum).
Gypsum-based compositions are used for wall decoration in living rooms ah, because gypsum maintains the microclimate of the room well.
Cement-based mixtures are usually used in wet areas - kitchens and bathrooms.
Alignment of walls with drywall
"rel="lightbox" href="/images/stories/remont-steny/kak-vyrovnyat-krivuyu-stenu-3.jpg">  Another way to correct the curvature of the walls is to level it with drywall. This method is used when the differences in irregularities on the wall are more than 5 cm.
When using drywall for wall cladding, pay attention to the base - it should not have crumbling fragments and be durable.
The wall lined with plasterboard must be protected from exposure to excessive moisture. This wall also cannot be subjected to spatial deformation. Do not allow freezing of the wall and the appearance of condensate.
And in order for drywall sheets to hold better and longer, the wall must be cleaned of residues. mortar, oils, wax and other substances that impair the contact properties of the adhesive. After that, the wall must be primed.
"rel="lightbox" href="/images/stories/remont-steny/kak-vyrovnyat-krivuyu-stenu-4.jpg">  On very porous, loose surfaces, a deep penetration primer should be applied with a brush or sprayer.
On walls that do not absorb moisture - concrete and other dense low-porous surfaces - a special primer marked "concrete active".
Before installation drywall sheets don't forget to mount concealed wiring. Mounting boxes for sockets should not protrude above the wall surface by more than 20 mm.
Pros and cons of leveling walls with plaster and drywall
The use of building mixtures does not reduce the living area of the apartment. But this method is quite laborious, in the production of work there is a lot of dirt - debris and dust.
When facing walls with drywall, no pre-cleaning of the surface is required. In addition, heat can be laid behind the frame - and soundproofing materials, as well as hide various communications. But the walls sheathed with plasterboard “eat up” part of the usable area of the apartment and withstand a much lower load compared to a wall covered with building mixture.
When buying material, pay attention to the color of drywall sheets. His moisture resistant varieties can be distinguished by a green cardboard cover, while ordinary sheets will be gray. For wall cladding in bathrooms, kitchens and other rooms with high humidity choose GKLV sheets.
The concept of "finishing work" includes a list of related operations from painting walls to laying tiles. All of them are carried out only on a carefully leveled surface of the walls.
Modern wall leveling methods are divided into two groups. Depending on the execution technology and materials, dry (using drywall constructions) and raw (correction of the surface with a building mixture) methods, each of which has its own characteristics. In order to choose the most suitable method, it is necessary to measure the irregularities with a laser level, a plumb line or an ordinary level. From potholes and depressions, fluctuating within five millimeters, you can also get rid of with putty. Irregularities about 3-5 centimeters? Then you should buy building mix. Differences of more than 5 centimeters are best leveled using drywall.
How to level the walls with plaster?
Immediately before leveling the walls, it is necessary to carry out a number of preparatory work:
- dismantle obsolete Decoration Materials;
- evaluate the surface to be plastered.
The wall should not crumble or exfoliate. Often in the case of work on old plaster after complete drying of the first layer, defects are detected that were not visible before.
The key to success is the fulfillment of three conditions:
- careful surface preparation;
- right choice building mixture;
- the presence of accurate beacons.
For alignment brickwork it is recommended to use a mixture on cement. The cost of this plaster mixture relatively low. It is allowed to apply a fairly thick layer of material, which is important when finishing brick walls. It should be noted that when applying a layer of more than 2 centimeters, it is necessary to use a plaster mesh to reinforce the composition.
For smooth plastering concrete wall you will need leveling mixes for gypsum-based walls. Quartz microparticles, which are part of the material, make the wall a little rough. But first, be sure to prime the surface. Reinforcement is carried out with a polymer mesh with a mesh size of 5 × 5 mm.

Many are interested in what solution to level the walls of concrete. For plastering concrete with a rough surface, gypsum or cement compositions. A primer is also required, but without the addition of quartz.
When processing foam concrete surfaces, gypsum mixtures are mainly used. A deep penetration primer is required.
Tongue-and-groove slabs, which are used for the construction of partitions, should be plastered gypsum mixture on a normal primer.
The next step after evaluating the surface and preparing it for applying the plaster mix will be the location of the beacons.
Installation of beacons
Beacons in construction are usually called a kind of guide to control the leveling of the surface using liquid mixtures. As beacons for plaster, a perforated profile is used, the width of which depends on the volume of the applied mixture. For beginners, it is better to use purchased beacons, the beauty of which is that they do not need to be removed after work and mask the recesses left after removal.

Beacons are installed on vertical stripes fast-hardening mortar or mixture to be plastered. The distance between the beacons is determined taking into account the size of the rule (it should rest on two beacons with its edges and not slide off).

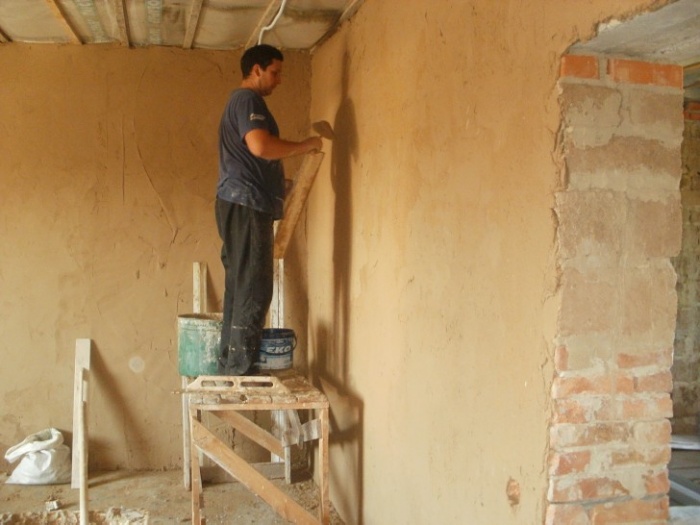
Plastering technology
In the gap between the lighthouses with a trowel and a “falcon”, a “bait” is thrown - excess amount mixtures. A falcon is a tool with a handle, vaguely resembling a trowel, but with a base that is much larger than the base of the trowel. Specialists use a trowel to collect the mixture from the "falcon" and drop it between the beacons. The use of this tool allows you to significantly increase labor productivity, because. there is no need to return to the container with the solution each time. This means that the time spent on alignment is also reduced.
Then, as a rule, the solution is evenly distributed in the direction from the bottom up. In order to immediately apply a thicker layer of plaster, make a rough mark without leveling it. After the rough layer has dried, they begin to apply the finishing mark. The finishing mark is also aligned with the rule.
How to level the walls with putty?
The surface is also primed before leveling with putty. Puttying the surface with your own hands is a simple task. It should be taken into account that this method it is far from always suitable, since it is possible to level the walls for painting with putty only with small differences in “heights”. In other cases, putty will be the final stage of a multi-step process.
To carry out puttying, you will need wide and narrow spatulas, as well as a cuvette with a flat bottom. The consistency of the mixture should be such that the cone formed by stirring with a stick retains its shape. Over time, the putty thickens, so it should be periodically diluted with water or a primer. The mixture of the desired consistency is well kept in an upright position, without slipping off the spatula.
Properly prepared putty is placed in a cuvette and covered so that it does not dry out. A small amount of the mixture is applied to the surface of the wall with a spatula. Next, with measured horizontal and vertical movements, the applied putty is leveled to a thickness of one or two millimeters, holding the spatula at an angle. It should be noted that the greater the angle of the spatula to the surface, the smaller will be the thickness of the mixture layer remaining on the surface. For convenience, the spatula blade is fixed with the other hand.

After the "seizure" of the mixture, it must be lightly washed with a primer. This is done in order to remove the sagging and various irregularities. The first layer after complete drying (at least a day after washing) is treated with a sanding-zero sanding to smooth out the roughness. If necessary, a second layer can be applied, but before that, the previously puttied surface must be primed. Applying a second coat without a primer can lead to cracking as moisture soaks into the previously applied putty. A day later, the surface is again polished with sandpaper wound on a board or a small bar.
How to align the walls with a rotband?
Starting putty "Rotband" is a gypsum mixture made by Knauf - famous brand in the construction industry. Used when carrying out internal works. Sometimes putty Rotband is called plaster. This mixture should not be used for finishing facades, since Rotband contains gypsum, which is subject to the harmful effects of the environment. The characteristics of this material are far superior to those of conventional putty. It is much more plastic and dries more slowly, therefore it is extremely convenient to use. Thanks to these advantages, alignment to the level final finishing Rotband mixture is carried out much faster. The work is carried out in several steps, as with the use of conventional putty, but also starting, and finishing carried out with one mixture.
Putty is best mixed with construction mixer. So it will turn out without dry lumps. When leveling significant irregularities, a special putty mesh is used. The application technique with beacons can also be performed by a rotation band.
Frame method for leveling walls with drywall

How can you level walls with large potholes? For these purposes, drywall is suitable. Correction of irregularities with drywall - the most effective and low-budget of all options. It is carried out by frame or frameless methods.
During installation wireframe method first, a frame is created, on which drywall sheets are attached. The frame is constructed from a bar or a metal profile of two types - a guide and a rack. The timber frame is not so durable (subject to the influence of microorganisms, moisture, prone to deformation). Installing it is also much more difficult. Therefore, builders often use a metal profile as a basis.

First you need to build a frame. To do this, the guide profiles must be screwed to the ceiling parallel to each other. Then, every 40-60 cm, we install guides, taking into account the width of the drywall sheet (120 cm). At this stage, if necessary, the walls are insulated with mineral wool or foam.
After assembling the frame, they begin to fasten drywall sheets to metal profile. This is done using self-tapping screws made of oxidized metal. Installation of drywall sheets is carried out in increments of 40-60 cm (depending on the distance between the guide profiles). The head of the self-tapping screw is slightly “hidden” in the sheet.

Frameless method somewhat different. In this case, the sheets are glued directly onto the surface to be finished. A significant drawback of the frameless method is that it is not possible to align walls with serious defects with this method.
There are other ways to align the walls with your own hands. For example, plywood or plastic panels. The execution technology is similar to plasterboard leveling, but instead of profiles for fastening plywood or plastic panels are used wooden bars. This method is quite economical, therefore it is used in decoration country houses, garages, bathrooms, etc. It also allows you to hide communications.
To make your walls even, carefully assess their condition and determine which method is most appropriate. Smooth walls are the first step to ensure that finishing materials will really decorate your interior.
Exists various ways leveling walls, for which plaster, putty or drywall sheets can be used. The choice of one or another method depends on a number of factors, for example, the operating conditions of the premises, humidity, size, nature of irregularities, etc. So, the plaster of the bases is classic way alignment, and it is suitable for both living rooms and office space.
Walls are usually leveled with drywall sheets if their irregularities are very large, and the usual plastering work result in unreasonable costs. In addition, it will be possible to engage in further cladding of such walls immediately after the installation of drywall, it is not for nothing that this method is called “dry” plastering.
Puttying the walls is already a finish, through which the smallest irregularities of the base are eliminated. It is necessary only before painting the walls or when various surface defects are very noticeable.
Wall plastering
To carry out work on leveling walls with plaster, you will need:
- beacons (guide rails), rule and laser or water level;
- plaster mixture, spatula and trowel;
- a drill with a stirring nozzle and a solution container;
- deep penetration primer, as well as a roller and a primer tray.

Before starting work on plastering the walls, the surface should be thoroughly cleaned of dust and dirt. It is necessary to knock down from the wall all fragile elements that easily crumble even with a slight impact. After that, the surface must be treated with a deep penetration primer.
Priming allows:
- Moisten and dedust the base;
- Limit the absorbency of the wall material;
- Strengthen adhesion to plaster, giving the base some roughness and increasing the area of contact of materials.

The primer is applied to the wall with a roller or sprayer, while the recesses must be carefully smeared with a brush. After the primer dries, proceed to the installation of beacons.
Installation of guide rails - beacons
In order to plaster the base, you must first set the guide beacons strictly according to the level. The latter are special metal guides, with the help of which the level for laying the plaster layer is set, ensuring the perfect evenness of its application.

Of course, as beacons, you can use other, cheaper and available materials – wooden slats, pieces of plywood, etc., which, in fact, until recently, was practiced almost everywhere.

But, of course, this technology will not provide the proper quality of wall alignment, especially if you do not have much experience in this type of work.

Therefore, we recommend that you immediately purchase a special T-shaped beacon profile - light, securely attached to the wall and strong enough so that later, when leveling the plaster layer, it does not bend under the rule.
It is better if it is made of aluminum, since later the profile can not be removed - it is not subject to corrosion.

Beacons are attached to the base in most cases with the same plaster mortar at several points, after which, until the mixture has hardened, they are leveled. However, in some cases, it is required to fix the structure more thoroughly, for which the guide rails are fixed with the help of Ushastik adjusting and holding devices and self-tapping screws, again using a laser or water level. The distance between the guides is usually taken equal to 1-1.5 meters, and from the corner of the room it should not exceed 30 cm.

Option for attaching profiles to mortar
Plaster is usually laid in a layer with a thickness of 15-30 mm, therefore, beacons should be set taking into account these dimensions. If the layer of the poured mixture is thicker than 30 mm, then the plaster will simply slide off the surface or fall off in whole pieces.

In old houses, the walls are not always even, and in new buildings, developers very often miss obvious defects and flaws. They can be bumps, cracks or chips. It happens that the horizontal or vertical planes are not level. Rooms with such defects look unpresentable. Since the finishing materials for the walls should lie on a perfectly flat surface, you have to level the walls yourself or invite specialists. Especially carefully you need to do the alignment of the walls under the wallpaper, because all the errors, even the smallest ones, easily protrude through the paper.
Wallpaper is considered the most popular and best-selling of the finishing products for interior cladding. Now we are offered a fairly huge selection of wallpapers with different textures and colors. Also, the wallpaper differs in the substrate, which requires a certain adhesive composition, but according to the principle of pasting and appearance on the wall, they are all similar to each other.
Before pasting any wallpaper (non-woven, vinyl or paper), all preparations. To make the wallpaper look perfect and keep its appearance for a long time, it is important to properly level the walls.
Before you start work, you need to decide how to align the walls. Factors affecting the right choice building materials for leveling walls:
- size and number of defects;
- economic component;
- deadlines for quality work.
Alignment methods and materials used
There are two main materials for leveling walls:
- dry material;
- liquid mixtures.
Methods by which alignment can be carried out:
- putty;
- plaster;
- use of drywall.

Before deciding on the upcoming choice of material, it is necessary to evaluate the quality characteristics of existing walls. You can consult either with master repairmen, or with a seller in the construction market.
If the plane of the wall has small defects and flaws, then putty can be a leveling compound. It can be found in the form liquid composition, which is already ready for use, as well as in the form of dry mixes that must be properly diluted before starting work. It is usually written on the packaging how and in what quantitative proportions this should be done.
This option for the initial preparation of the wall before fine finish considered classic. It is chosen by the majority of buyers.

The technology of leveling the walls under the wallpaper using putty is a careful application of the composition. Before this, the required steps are:
- Preparation and cleaning of walls from obvious defects.
- Application of antibacterial composition.
- Surface primer.
Then the finished putty mixture is evenly applied to the walls with a long spatula. You will also need a small tool with which it is convenient and quick to draw a liquid solution from the container. For some, it is more convenient to apply the composition on a plane with a small spatula.
Aligning the walls under the wallpaper with your own hands using putty is quite easy to do, even those who do it for the first time can handle it. The main thing is to do everything very carefully, not to be lazy to remove small excess material before it dries.
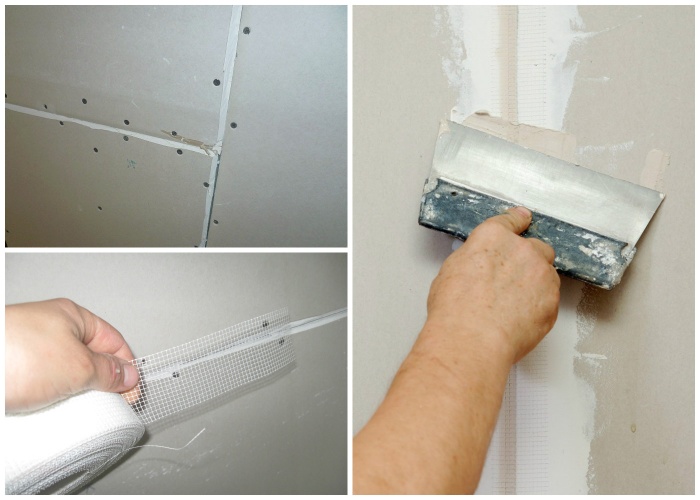
In many cases, you will need several layers, the first of which is called the starter. A special mesh is required between the layers so that small cracks do not go in the future.
The start and finish layers should be perpendicular for the best performance of the plane alignment technology.

The last layer should be thin enough. It is washed out with a primer at the end. After the final completion of the work performed and the complete drying of the product, it is necessary to go through the puttied places with a sandpaper suitable for this activity.
After the putty has completely dried, another layer of primer must be applied to the wall.

Plaster
How to align the walls under the wallpaper using plaster? The question arises for many novice craftsmen and for those who start repairs for the first time. This material in construction and finishing works interior spaces been used for quite some time. This is a universal way to get rid of defects in almost all surfaces of the premises.
It is somewhat more difficult and longer to work with plaster, but the result will be better than if you simply level the walls with putty.

For bricks, it is better to use mixtures based on sand and cement, for concrete - gypsum, for wood - gypsum and lime, cement and clay. The wall preparation technology before application consists of several stages:
- Clear desired surface from dust.
- Prime.
If the wall is uneven and has a number of significant flaws, first apply a plaster mesh to the wall, and then a base layer of plaster, which is approximately five millimeters. After drying, you need to apply the main layer, which is 6-7 mm.
The final layer is applied thinly and only after the previous two have dried. It is needed so that even the slightest defects do not remain on the finished leveled surface.

After completing all the work, you need to sand the walls well to give them an even smoother and even surface. In order not to have to redo everything anew, it is necessary to carry out all the stages with high quality from the very beginning.
How to properly level walls using plaster? Professional craftsmen who have been engaged in all stages of repairing premises for several years will help to figure this out.
Plasterboard sheathing
Before pasting curves and not smooth walls wallpaper is recommended to use drywall. The material consists of separate sheets that are quickly and easily installed.
The cover allows short time improve the quality of the walls, but visually reduces the living area of the room, and if the room is already small, it will be very noticeable.

The method is widely used in buildings or structures of a long time of construction, where it makes no sense to use other materials due to high consumption. This significantly affects financial side ongoing work.
The product is environmentally friendly, suitable for apartments or houses where people with allergies or asthma live. It is allowed to be used in children's rooms. It is used to significantly increase sound insulation and thermal insulation. It is usually used in bedrooms where needed. elevated level comfort and peace.
For bathrooms or rooms with high humidity, it is recommended to choose moisture-resistant drywall, which has a greenish tint.

If the wall does not match by 70 mm in level, then a frame of special profiles should be made before installation. Mount the material already on this system. If the defects are not very large, then you can mount it directly on the wall plane with special glue. It is applied to the sheets every 30 cm, along the perimeter. Mounting on the frame takes place using ordinary self-tapping screws.
When installing prerequisite will mark exactly where the sockets and light switches are located. The material is cut easily, this does not require specialized equipment.
After installing drywall, you need to very carefully putty the seams between the sheets.

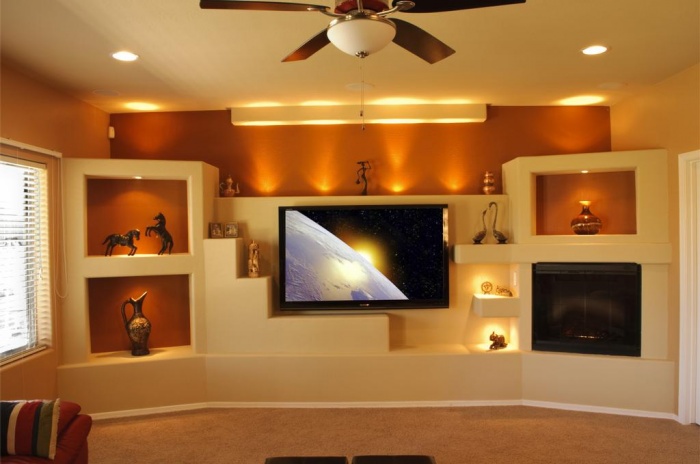
With the help of this product, it is possible to give the room not only the effect of smooth walls, but also to perform different kinds design ideas.
Conclusion
The better to align and how to align the walls in the apartment, everyone decides for himself, but be sure to look at the quality of the original plane, as well as the characteristics of the purchased product.
Do I need to level the walls for wallpaper at all? If this is not done before pasting, then everything will need to be redone later, since implicit defects will become visible. In this case, there is nothing to fix them.
The quality of the material used and the implementation of the leveling technology determine the entire result of the final appearance of the repaired premises. by the most quick option for curved walls there will be drywall, which you can easily install yourself.
Master classes from professionals: how to properly align walls (2 videos)
Surface leveling methods (24 photos)


Aligning walls with your own hands is not an easy process that even a beginner can handle with diligence. First you need to decide on the desired result and method of work. There are several ways to level the walls with your own hands, in each case there is an optimal option.
Types of alignment
According to the technology of work and material, dry and wet alignment are distinguished. Dry leveling is advisable to use in rooms with large surface errors, in wooden houses. Wet alignment is used for both minor deviations and noticeable ones. Let's take a closer look at how to properly align the walls for each technology.
Dry leveling
Dry leveling, also known as frame leveling, significantly saves costs compared to plastering a falling wall - this is an important advantage.

To start work, the necessary material is calculated:
- the guide profile is purchased in double the size of the perimeter;
- rack profile - the quantity is equal to the ratio of the perimeter of the room to the width of the drywall (standard 1 m 20 cm), multiplied by two, plus 4 corner;
- anchor wedges or dowel-nails - divide the perimeter by 50 cm and multiply by 2;
- self-tapping screws for metal - the number of rack-mount profiles is multiplied by 4;
- GCR - divide the perimeter by 1 m 20 cm;
- self-tapping screws on the GKL - divide the perimeter of one sheet by 60 cm and multiply by the total number of sheets;
- sickle - the number of rack profiles is multiplied by their height;
- deep penetration primer - 150 ml per 1 sq. m.;
- putty for joints - depending on the manufacturer, the consumption is different;
- putty on GKL.

Frame alignment allows you to create the perfect geometry of the room, it is suitable for any type of finish.
With the help of a laser level, the frame of the structure is marked, the guide profiles are fastened with anchors or dowels along the lined marks on the ceiling and floor.
Rack profiles are cut at the ends, petals are created through which self-tapping screws are screwed. They are inserted into the guides and fastened at a distance of 60 cm from each other.
Sheets of drywall are screwed to the finished frame, in steps of 0.6 m, the caps of the self-tapping screws are sunk.
The seams are rubbed with a special putty, it is more elastic. In order to avoid the appearance of cracks, a sickle is embedded in the putty.
To finish leveling the surface, putty is used: a mixture is prepared, which is smeared over the entire surface. In order to save time on processing and on the cost of the finishing layer, GKL should be chosen with beveled edges, then the difference in height will be insignificant. You can cut the edges yourself.

In addition to drywall, other materials can be used for frame alignment: fiberboard, chipboard, pvc panels, plywood, lining and a more modern OSB-plate.

Advice! The choice of alignment method depends on personal preferences and financial capabilities. Therefore, before starting repairs, it is worth painting everything possible types finishes, their cost, and then make a decision.
Wet leveling
Leveling the walls with a mixture is a more time-consuming and dirty process. But it allows you to save space, and in some cases finances - with minor deviations, the consumption of the mixture will be less. The method of alignment depends on the requirements for the final result.

There are two ways to do work: by beacons and by rule. Perfect alignment of wall corners is impossible without beacons and corner elements. Such a laborious process is relevant for the bathroom, for the kitchen. Here the geometry of the room is very important, when installing furniture of the correct form, minor errors become noticeable. Leveling tips from the pros:
In practice, two methods are often combined: walls with windows and doors are aligned with beacons, and other walls are aligned according to the rule. Also, careful alignment with beacons requires rooms with external corners.
The choice of mixture for leveling the walls depends on the finish coating. It can be wallpaper, paint, decorative plaster.

Alignment of walls for wallpaper depends on their type:
- under a light thin coating you need a light base without the slightest error;
- glass and vinyl wallpapers dense texture able to hide minor flaws in the base;
- liquid wallpaper, depending on the grain size, requires a perfectly flat plane or allows small flaws.
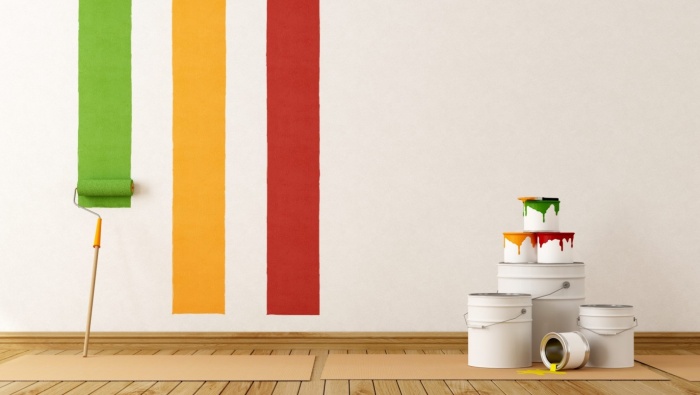
Aligning walls for painting always requires a perfectly flat surface. It involves several stages of puttying and the use of a quality mixture. Choice polymer putty allows you to prepare the surface for painting in one stage of puttying without sanding and re-puttying.
Decorative coarse-grained plaster does not require wall puttying, plastering is enough for an even base, smoothness does not matter.
Important! Regardless of the number of layers and top coat, each stage ends with a primer. It is necessary for better adhesion of layers and material savings.
Difficult cases in alignment
How to line up walls wooden house? For this case, it is acceptable to use both methods of work, but the wireframe version is preferable. The technology of work is the same as described above.

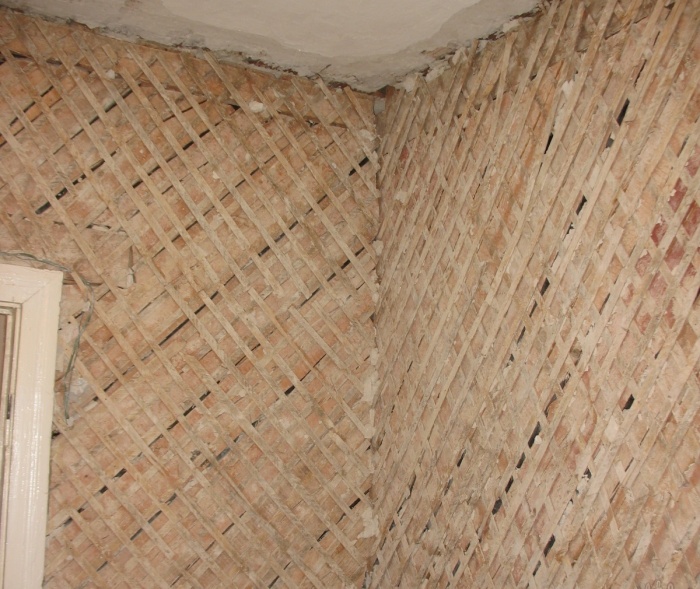
An important point is the height of the sheathing material in a house that has not settled, it should be 5-10 cm less than the walls. Leveling with a mixture is a more laborious process: it requires careful treatment of the walls with an adhesive composition, attaching shingles or mesh to hold the plaster. The preliminary lining for plastering looks like this.
Even in modern new buildings, you can meet clay walls. This material is characterized by low cost, good hygroscopicity - ideal for use in residential areas. How can you level rare clay walls?
In fact, nothing complicated: leveling occurs by plastering and puttying with lighter or balanced mixtures. Gypsum or clay mixtures are suitable for this.
Aligning the outer corner of the wall with your own hands becomes much easier if you use a special perforated corner. It can be narrower and wider, depending on the need. The corner creates perfectly smooth sides, remains in the plaster. For puttying, it is convenient to use a special angular spatula, which will require a minimum of skills and effort.

Aligning the corners in the wrong room geometric shape by hand is a very laborious process. Using drywall will steal more space than plastering, but will pass faster. In any case, the corner elements are installed perpendicular to each other. Then, on the same line with them, beacons are attached to the alabaster along the wall. The laser level simplifies the process of aligning beacons and corner elements. The most crucial moment has been completed, it remains only to fill the space between the beacons with plaster.
Material selection
For high-quality finishing, its speed, convenience of work, material and tools are important. They are not worth saving.
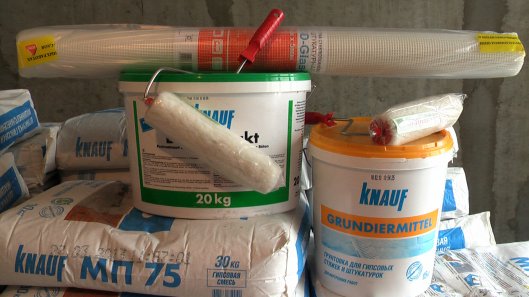
Mixtures for leveling walls are available in different grain sizes and whiteness. The more expensive the mixture, the less trouble it will have. Ready-made compositions of plasters and fillers are especially convenient, which are ready for application without dilution with water. Such mixtures are characterized by a long preservation of properties even in open form, which is very important for beginners - after all, conventional solutions dry quickly and are inconvenient to apply. Ready formulations are sold in buckets, after use, leftovers can be stored in a bucket until the expiration date.
White putty saves painting costs, it is necessary under light wallpaper. Therefore, when choosing, it is worth clarifying the color of the mixture, if it is necessary to align the walls in the apartment under the wallpaper.

High-quality drywall does not crumble, does not have chips - its processing will be much faster. The presence of factory chamfers (image above) on the sheet saves the overall consumption of the finishing mixture and finishing time. The same applies to profiles - rigid profiles create a strong frame and are not subject to deformation during installation.
Advice! When choosing cheap material, you should not rely on quick repair, such savings will require more patience and skill in work.
It's nice to improve your home with your own hands, but the wrong approach can spoil the mood. Before starting repairs, you need to soberly assess your strengths, study necessary information. You can always entrust the work to professionals.